使用 @ng-toolkit/serverless 部署你的 Angular 应用在 Firebase / AWS Lambda / Google Cloud Functions
在这篇文章中,我将告诉您如何使用@ng-toolkit/serverless library轻松快速地将任何 Angular CLI 项目部署到 Serviceless 环境中。
现在你已经有一个完美、强大的Angular 应用了,是时候部署它把它传播给全世界了。现在问题来了。我应该在哪里部署?有很多选择:
- 传统服务器
- 云服务器 (例如 AWS EC2 , VPS)
- Serverless 环境
今天我们将关注第三个选择:Serverless 环境。在我看来,这是初创公司和自由职业者的最佳解决方案。你只为你正在使用的东西支付费用,而当你使用它时。FaaS (Function as a Service)在共享云机器上运行,只有当客户请求到达服务器并运行时,才有必要完成它。大多数 Serverless 提供者会根据执行请求的数量和执行时间收取费用。而且,他们中的大多数都提供免费层,例如 Amazon Web Services 每月提供 1000000 个免费请求!
准备工作
为了利用我们将要部署的库,您需要为您要使用的提供者安装和配置CLI。看看这些指南来实现这一目标:
- AWS CLI
- Google Cloud CLI
- Firebase
我相信NodeJS 和 Angular CLI 你已经安装好了,此处我们就不再赘述,让我们直接来创建一个新项目:
ng new serverlessApp
cd serverlessApp
@ng-toolkit/serverless
我们不会用手动的方式来完成整个设置。我相信每个人都更喜欢自动化的安装,这样他们可以专注于开发。
为了实现这一点,我们使用最新的CLI的新特性: ng add 命令与外部库结合
现在你可以开始选择你喜欢的服务提供商了。
AWS Lambda & Google Cloud Functions:

ng add @ng-toolkit/serverless —-provider aws或者
ng add @ng-toolkit —-provider gcloud在成功更新您的项目后,您可以通过键入来检查它是否在lambda上正常工作:
npm run build:serverless:deploy你的应用程序的URL被附加到命令输出:
Serverless: Packaging service...
Serverless: Excluding development dependencies...
Serverless: Compiling function "helloWorld"...
Serverless: Uploading artifacts...
Serverless: Artifacts successfully uploaded...
Serverless: Updating deployment...
Serverless: Checking deployment update progress...
.................................
Serverless: Done...
Service Information
service: myapp
project: another-project-197513
stage: dev
region: us-central1
Deployed functions
helloWorld
https://us-central1-another-project-197513.cloudfunctions.net/http
Serverless: Removing old artifacts...如果需要,可以使用自定义域名。Check out this step-by-step guide on how to set it up in AWS API Gateway。当您的域名成功配置时,您可以将应用程序部署到生产中:
npm run build:prod:deployFirebase

Firebase的设置有点不同,这就是为什么我决定把它放在单独的部分。
首先,您需要创建一个新项目。导航到Firebase Console 并点击“Add project”。键入项目名称,选择一个区域,并(可选地)更改项目ID。
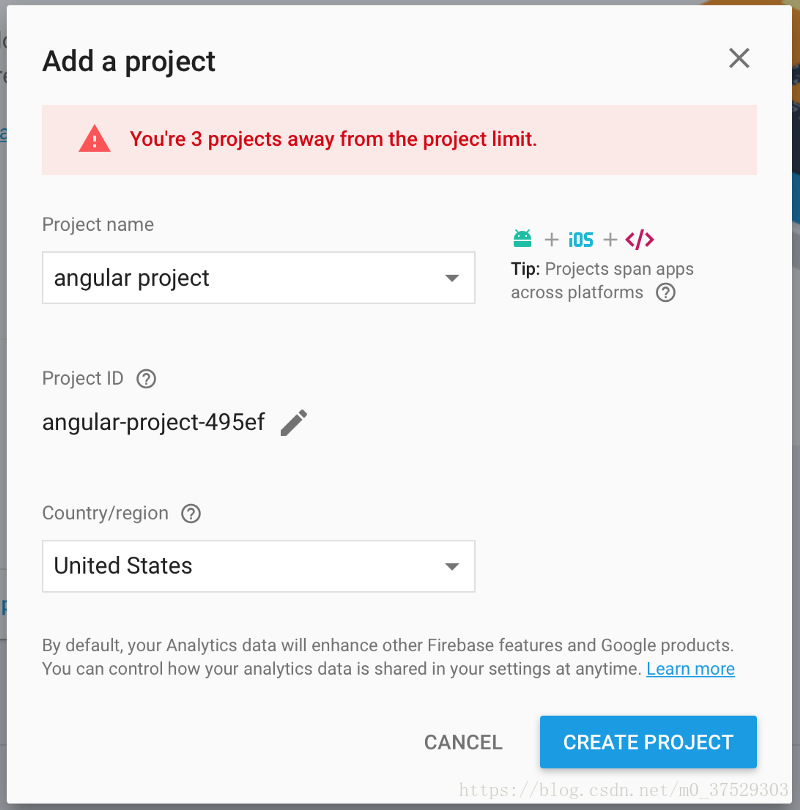
项目ID与 ng add 命令一起使用:
ng add @ng-toolkit/serverless --provider firebase --firebaseProject angular-project-495ef执行此命令后,您应该能够通过键入将应用程序部署到FialBase:
npm run build:prod:deploy
=== Deploying to 'fir-test-7d7eb'...
i  deploying functions, hosting
i  functions: ensuring necessary APIs are enabled...
✔  functions: all necessary APIs are enabled
i  functions: preparing functions directory for uploading...
i  functions: packaged functions (490.22 KB) for uploading
✔  functions: functions folder uploaded successfully
i  hosting: preparing functions/dist directory for upload...
⚠  Warning: Public directory does not contain index.html
✔  hosting: 8 files uploaded successfully
i  functions: updating function http...
✔  functions[http]: Successful update operation.
✔  Deploy complete!
Project Console: https://console.firebase.google.com/project/angular-project-495ef/overview
Hosting URL: https://angular-project-495ef.firebaseapp.com
Thanks for reading!
原文地址(可能需要科学上网)