最近在学习Android的数据存储,便将自己的理解写下来。新手浅显望理解。
在Android中,存储数据主要采用了3种方案,分别为文件存储, SharedPreferences存储以及数据库存储,当然,数据也可以保存在sd卡里,但相比上面这几种,可能就要麻烦点了,而且安全性也会降低。
好了,我们今天就来使用它们当中的 SharedPreferences来实现一下简单的记住密码功能。
不同于文件的存储方式,SharedPreferences是使用键值对的方式来存储数据的。也就是说,当保存一条数据的时候,需要给这条数据提供一个对应的键,这样在读取数据的时候就可以通过这个键把相应的值取出来。而且 SharePreferences还支持多种不同的数据类型存储,如果存储的数据类型是整型,那么取出来的依然是整型。
将数据存储到 SharedPreferences 中
首先需要获取到SharedPreferences 对象,Android中主要提供了3种方法用于得到 SharedPreferences 的对象。
1.Context 类中的 getSharedPreferernces() 方法:
含有两个参数
第一个参数用于指定 SharedPreferences 文件的名称,如果指定的文件不存在,则会创建一个。
第二个参数用于指定操作模式,目前只有 MODE_PRIVATE 这一种模式可选,它是默认目录下的,和直接传入0效果是相同的,表示只有当前的应用程度才可以对这个 SharedPreferences 文件进行读写。其他几种操作模式均已被废弃。
2.Activity类的getPreferences方法
这个方法和Context中的 getSharedPrefereces() 方法很相似,不过它只接受一个操作模式参数,因为使用这个方法会自动将当前活动得类名作为 SharePreferences 的文件名。
3.PreferenceManger类中的getDfaultSharedPrefereces()方法
这是一个静态方法,他接受一个 Context 参数,并自动使用当前应用程序的包名作为前缀来命名 SharedPreferences 文件,得到了 SharedPreferences 对象之后,就可以向 Shared-Preferences 文件存储数据了,具体分为3步:
-1.调用 SharePreferences 对象的 edit() 方法来获取一个 SharedPreferences.Editor 对象。
-2.向 SharePreferences.Editor 对象中添加数据,比如添加一个布尔型数据就使用 putBoolean() 方法,添加一个字符串则使用putString()方法,以此类推。
-3.调用 apply() 方法将添加的数据提交,从而完成数据存储操作。
从 SharedPreferences 中读取数据
SharedPreferences 提供了一系列的get方法来读取数据,每个get方法都对应了SharedPreferences.Editor 中的一种put方法,比如读取一个布尔型数据就使用 getBoolean() 方法,读取一个整型就使用 getInt() 方法,这些get 方法都接收两个参数,第一个参数是键,传入数据时使用的键就可以得到对应的值了,第二个参数是默认值,即表示当传入的键找不到对应的值时会以什么样的默认值返回。
复习完了基础,下面就通过一个 记住密码 的功能来学习一下SharedPreferences
首先,打开as,新建一个项目,修改xml的代码:
<?xml version="1.0" encoding="utf-8"?>
<LinearLayout xmlns:android="http://schemas.android.com/apk/res/android"
android:layout_width="match_parent"
android:orientation="vertical"
android:layout_height="match_parent">
<TextView
android:layout_width="wrap_content"
android:layout_height="wrap_content"
android:textSize="40sp"
android:layout_marginLeft="60dp"
android:text="Login"/>
<LinearLayout
android:orientation="horizontal"
android:layout_width="match_parent"
android:layout_height="wrap_content">
<TextView
android:layout_width="wrap_content"
android:layout_height="wrap_content"
android:text="账号:"
android:textSize="30sp"/>
<EditText
android:id="@+id/admin"
android:layout_width="match_parent"
android:layout_height="wrap_content"
android:hint="admin"/>
</LinearLayout>
<LinearLayout
android:orientation="horizontal"
android:layout_width="match_parent"
android:layout_height="wrap_content">
<TextView
android:layout_width="wrap_content"
android:layout_height="wrap_content"
android:text="密码:"
android:textSize="30sp"/>
<EditText
android:id="@+id/pass_word"
android:layout_width="match_parent"
android:layout_height="wrap_content"
android:hint="password"/>
</LinearLayout>
<LinearLayout
android:orientation="horizontal"
android:layout_width="match_parent"
android:layout_height="wrap_content">
<CheckBox
android:id="@+id/check_box"
android:layout_width="wrap_content"
android:layout_height="wrap_content" />
<TextView
android:layout_width="wrap_content"
android:layout_height="wrap_content"
android:text="记住密码"/>
</LinearLayout>
<Button
android:id="@+id/login"
android:layout_width="wrap_content"
android:layout_height="wrap_content"
android:layout_gravity="right"
android:text="go"/>
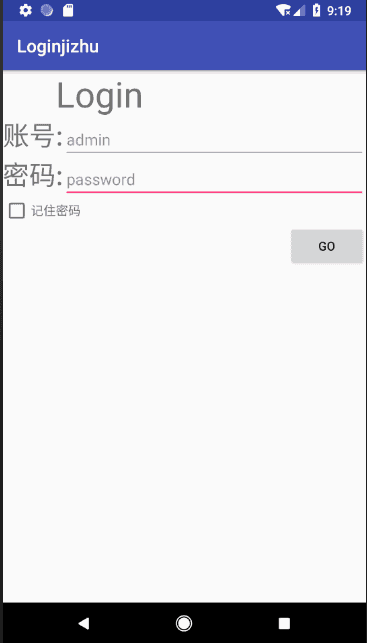
</LinearLayout>不难看出,这里使用3个线性布局做了一个简易的登录界面,如下图

接下来修改MainActivity中的代码:
public class MainActivity extends AppCompatActivity implements View.OnClickListener{
    private Button login;
    private EditText admin,pasd;
    private SharedPreferences pref;
    private CheckBox checkBox;
    private SharedPreferences.Editor editor;
    @Override
    protected void onCreate(Bundle savedInstanceState) {
        super.onCreate(savedInstanceState);
        setContentView(R.layout.activity_main);
        login=(Button) findViewById(R.id.login);
        admin=(EditText)findViewById(R.id.admin);
        pasd=(EditText) findViewById(R.id.pass_word);
        pref= PreferenceManager.getDefaultSharedPreferences(this);
        checkBox=(CheckBox) findViewById(R.id.check_box);
        login.setOnClickListener(this);
        boolean isRemember=pref.getBoolean("remember_password",false);      //默认值
        if(isRemember){
                        //将账号和密码保存到文本框内
            String account=pref.getString("account","");
            String password=pref.getString("password","");
            admin.setText(account);
            pasd.setText(password);
            checkBox.setChecked(true);      //勾选记住密码按钮
            Toast.makeText(this, "信息还原成功", Toast.LENGTH_SHORT).show();
        }
    }

    @Override
    public void onClick(View v) {
        String account=admin.getText().toString();      //获取输入框的数据
        String password=pasd.getText().toString();
        if(account.equals("admin")&&password.equals("password")){
            editor=pref.edit();
            if(checkBox.isChecked()){       //检查框中是否被选中
                editor.putBoolean("remember_password",true);
                editor.putString("account",account);
                editor.putString("password",password);
            }else{
                editor.clear();         //清除保存的信息
            }
            editor.apply();             //提交数据
        }
        Toast.makeText(this, "登陆成功", Toast.LENGTH_SHORT).show();
    }
}
现在简单来说一下里面的功能。
首先在onCreate()方法中获取到了 SharedPreferences 对象,然后调用他的 getBoolean() 方法获取 remember_password 的键值。一开始肯定不存在键值,所以会使用默认的 false,这样就什么都不会发生。这样在登录成功后,调用 ChearBox 的 isChecked() 方法来检查复选框是否被选中,如果被选中了,则表示用户想要记住密码,这时将 remember_password 设置为true,然后把 account和 password对应的值都存到 SharedPreferences文件中并提交。如果没有被选中,就简单调用一下 clear()方法,将 SharedPreferences 文件中的数据全部清除掉。
因为当用户选中了记住密码复选框,并成功登陆了一次后,remember_password 键对应的值就是 true 了,这时候如果重启进入登陆界面,就会从 SharedPreferences 将保存的账号和密码读取出来,并填充到文本框中,然后把记住密码复选框选中,这样就完成了记住密码的功能。这里我们顺便加了两个Toast用来提示密码还原和登录成功的提示,虽然没有登录后的界面,哈哈
下面,我们来看看效果吧-.-
好啦,我会不断更新的,记录学习Android的点点滴滴,欢迎和我一起交流。虽然我很菜-.-