1- 介绍
本教程文章是基于以下编写的:
- Spring Framework 4.0.4 RELEASE
- Eclipse 4.5 MARS (ok for Eclipse 4.4 LUNA)
在本文中使用Maven来声明Spring库,而不是下载Spring库,并以正常的方式来声明。
Maven是一个工具,可以帮你自动,高效地管理您的库,它已成为惯例,所有 Java 程序员必须知道。如果你不知道如何使用Maven,可以花10分钟就学会如何使用它:
如果你想下载Spring和声明库,您可以用传统的方式见附录在文件的结尾。
2- Spring框架
下图显示了Spring框架的结构。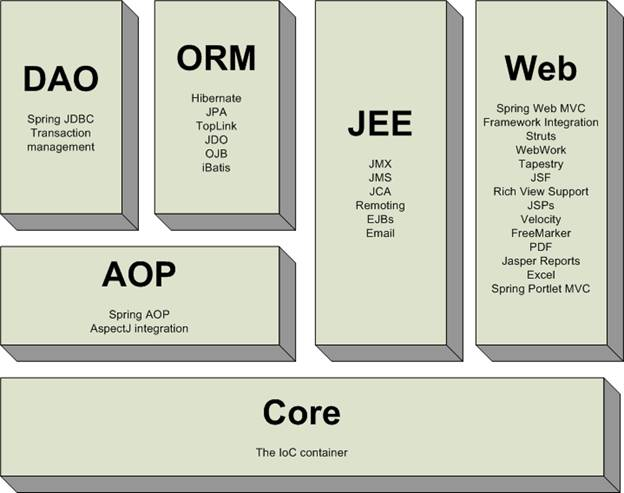
- IoC Container: 这是最重要的,也是最基础的, Spring的基础。它的作用是配置和Java对象的生命周期管理。这篇教程中我们将学习这一部分。
- DAO, ORM, AOP, WEB: 该模块可用于将工具或框架集成到了Spring。
2.1- 反转控制和依赖注入
要了解这个问题,我们使用以下几类:
-
// Interface HelloWorld -
public interface HelloWorld { -
public void sayHello(); -
} -
// Class implements HelloWorld -
public class SpringHelloWorld implements HelloWorld { -
public void sayHello() { -
System.out.println("Spring say Hello!"); -
} -
} -
// Other class implements HelloWorld -
public class StrutsHelloWorld implements HelloWorld { -
public void sayHello() { -
System.out.println("Struts say Hello!"); -
} -
} -
// And Service class -
public class HelloWorldService { -
// Field type HelloWorld -
private HelloWorld helloWorld; -
// Constructor HelloWorldService -
// It initializes the values for the field 'helloWorld' -
public HelloWorldService() { -
this.helloWorld = new StrutsHelloWorld(); -
} -
}
显而易见的是 HelloWorldService 类管理创建 HelloWorld 对象。
- 另外,在上述情况下,当 HelloWorldService 对象从它的构造创建时,HelloWorld对象也被创建了。 它是从StrutsHelloWorld 创建。
现在的问题是,您要创建一个HelloWorldService对象,HelloWorld对象也同时被创建,但它必须是SpringHelloWorld。
所以 HelloWorldService 是控制“对象创建” Hello World 的。我们为什么不创建 Hello World 转让由第三方,
而是使用 HelloWorldService ?因为我们有“反转控制”(IOC)的定义。
并且IoC容器将充当管理者角色,创建了HelloWorldService 和 HelloWorld 。
IoC = Inversion of Control
IoC容器创建 HelloWorldService 对象,是通过 setter 方法传递 HelloWorld 对象到HelloWorldService。IoC容器做的是“依赖注入”到HelloWorldService。这里的相关性是指对象之间的依赖关系: HelloWorldService 和 helloWorld.
在这一点上,我们已经明确了什么是 IoC和DI。让我们举个例子来更好的理解。
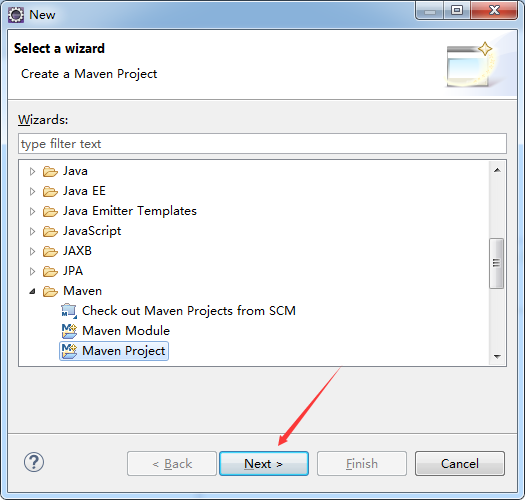
3- 创建项目
- File/New/Other...
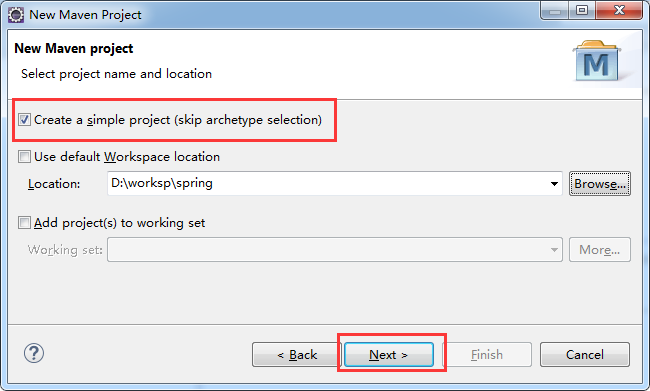
输入:
- Group Id: com.yiibai
- Artifact Id: HelloSpring
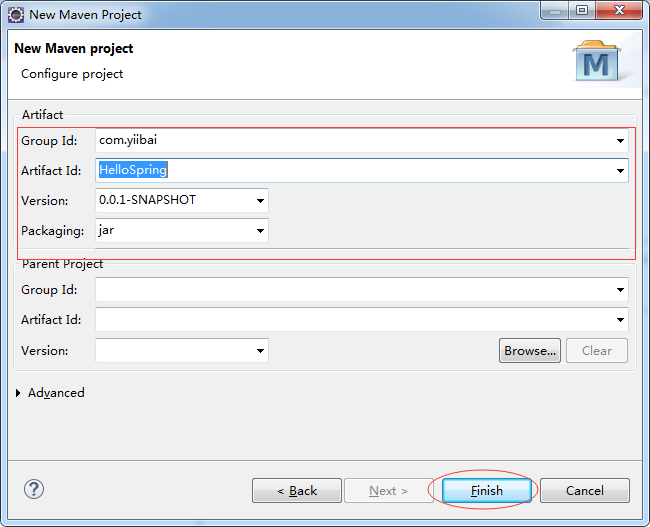
您的项目已创建: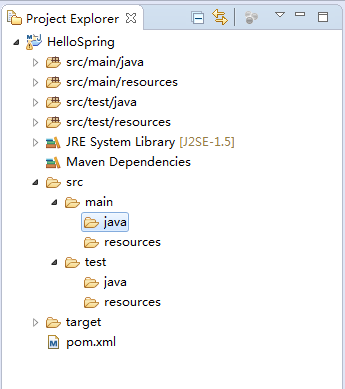
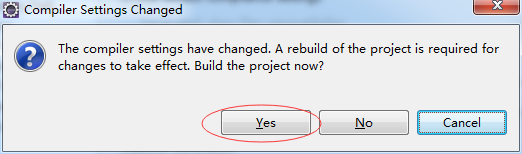
确保您的项目是建立在Java7或更高版本。右键单击该项目并选择属性。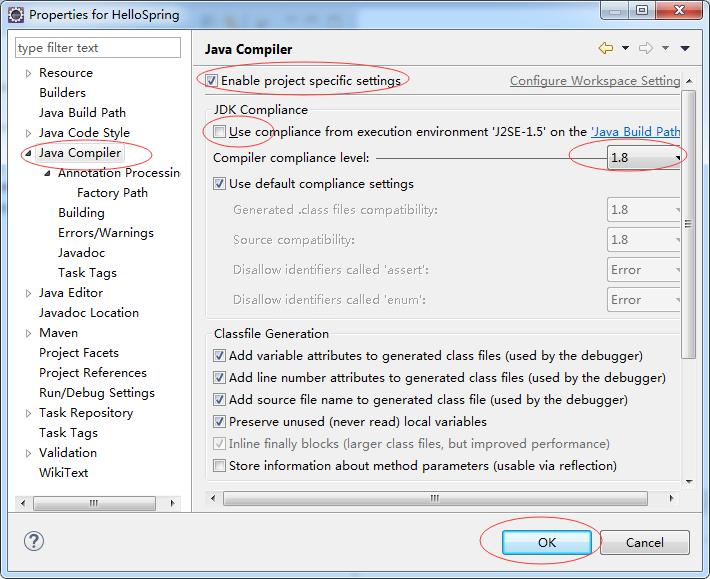
4- 声明Spring的基础库
这是 Spring的 HelloWorld 例子,所以我们只使用基本的Spring库(核心)。打开pom.xml文件来将使用的库声明:
- pom.xml 使用以下内容重新覆盖原上面的内容。
<project xmlns="http://maven.apache.org/POM/4.0.0"
     xmlns:xsi="http://www.w3.org/2001/XMLSchema-instance"
     xsi:schemaLocation="http://maven.apache.org/POM/4.0.0
                         http://maven.apache.org/xsd/maven-4.0.0.xsd">

  <modelVersion>4.0.0</modelVersion>
  <groupId>com.yiibai</groupId>
  <artifactId>HelloSpring</artifactId>
  <version>0.0.1-SNAPSHOT</version>


      <dependencies>

        <!-- Spring Core -->
        <!-- http://mvnrepository.com/artifact/org.springframework/spring-core -->
        <dependency>
            <groupId>org.springframework</groupId>
            <artifactId>spring-core</artifactId>
            <version>4.1.4.RELEASE</version>
        </dependency>

        <!-- Spring Context -->
        <!-- http://mvnrepository.com/artifact/org.springframework/spring-context -->
        <dependency>
            <groupId>org.springframework</groupId>
            <artifactId>spring-context</artifactId>
            <version>4.1.4.RELEASE</version>
        </dependency>

    </dependencies>

</project>
5- 工程代码
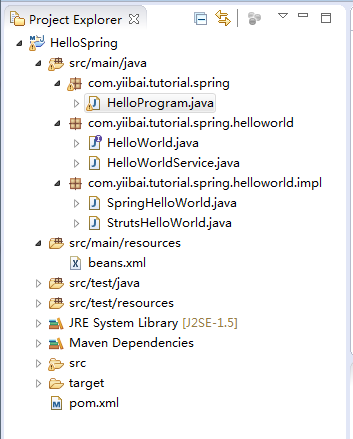
- HelloWorld.java
-
package com.yiibai.tutorial.spring.helloworld; -
public interface HelloWorld { -
public void sayHello(); -
}
- HelloWorldService.java
-
package com.yiibai.tutorial.spring.helloworld; -
public class HelloWorldService { -
private HelloWorld helloWorld; -
public HelloWorldService() { -
} -
public void setHelloWorld(HelloWorld helloWorld) { -
this.helloWorld = helloWorld; -
} -
public HelloWorld getHelloWorld() { -
return this.helloWorld; -
} -
}
- SpringHelloWorld.java
-
package com.yiibai.tutorial.spring.helloworld.impl; -
import com.yiibai.tutorial.spring.helloworld.HelloWorld; -
public class SpringHelloWorld implements HelloWorld { -
@Override -
public void sayHello() { -
System.out.println("Spring Say Hello!!"); -
} -
}
- StrutsHelloWorld.java
-
package com.yiibai.tutorial.spring.helloworld.impl; -
import com.yiibai.tutorial.spring.helloworld.HelloWorld; -
public class StrutsHelloWorld implements HelloWorld { -
@Override -
public void sayHello() { -
System.out.println("Struts Say Hello!!"); -
} -
}
- HelloProgram.java
-
package com.yiibai.tutorial.spring; -
import com.yiibai.tutorial.spring.helloworld.HelloWorld; -
import com.yiibai.tutorial.spring.helloworld.HelloWorldService; -
import org.springframework.context.ApplicationContext; -
import org.springframework.context.support.ClassPathXmlApplicationContext; -
public class HelloProgram { -
public static void main(String[] args) { -
ApplicationContext context = -
new ClassPathXmlApplicationContext("beans.xml"); -
HelloWorldService service = -
(HelloWorldService) context.getBean("helloWorldService"); -
HelloWorld hw= service.getHelloWorld(); -
hw.sayHello(); -
} -
}
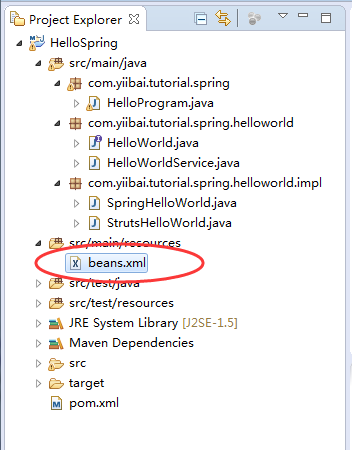
- beans.xml
<beans xmlns="http://www.springframework.org/schema/beans"
    xmlns:xsi="http://www.w3.org/2001/XMLSchema-instance"
    xsi:schemaLocation="http://www.springframework.org/schema/beans
                        http://www.springframework.org/schema/beans/spring-beans.xsd">

    <bean id="springHelloWorld"
        class="com.yiibai.tutorial.spring.helloworld.impl.SpringHelloWorld"></bean>
    <bean id="strutsHelloWorld"
        class="com.yiibai.tutorial.spring.helloworld.impl.StrutsHelloWorld"></bean>


    <bean id="helloWorldService"
        class="com.yiibai.tutorial.spring.helloworld.HelloWorldService">
        <property name="helloWorld" ref="springHelloWorld"/>
    </bean>

</beans>
6- 运行示例
运行 HelloProgram.java

运行 HelloProgram 类的结果如下: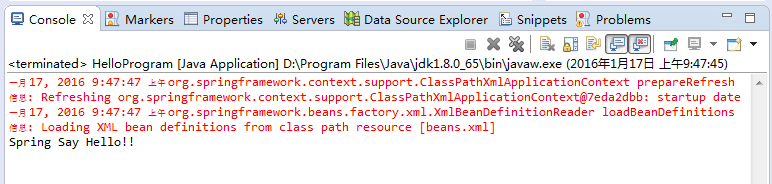
打开 beans.xml 文件并更改配置:
<!-- Original -->
<bean id="helloWorldService"
    class="com.yiibai.tutorial.spring.helloworld.HelloWorldService">
   <property name="helloWorld" ref="springHelloWorld"/>
</bean>

<!-- Change to: -->
<bean id="helloWorldService"
    class="com.yiibai.tutorial.spring.helloworld.HelloWorldService">
   <property name="helloWorld" ref="strutsHelloWorld"/>
</bean>
重新运行 HelloProgram 类并得到以下结果。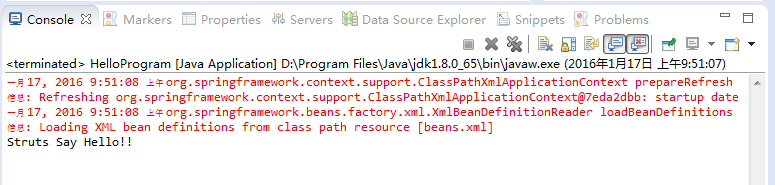
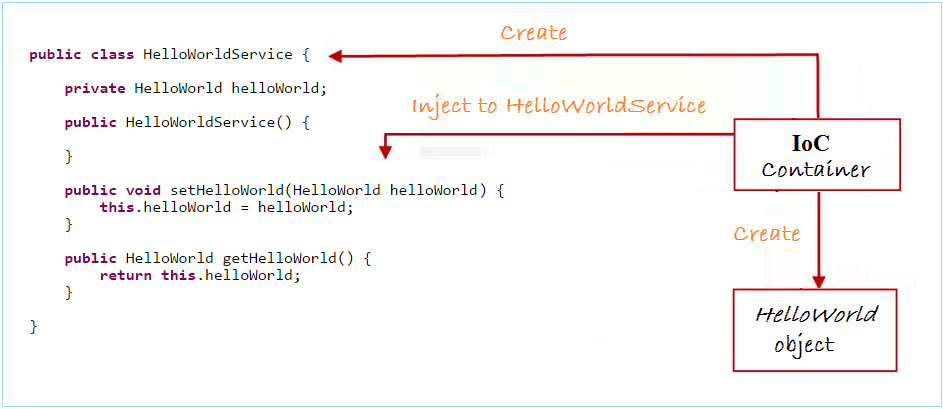
7- Spring的工作原理
Spring在这个例子中,工作原理说明如下图所示: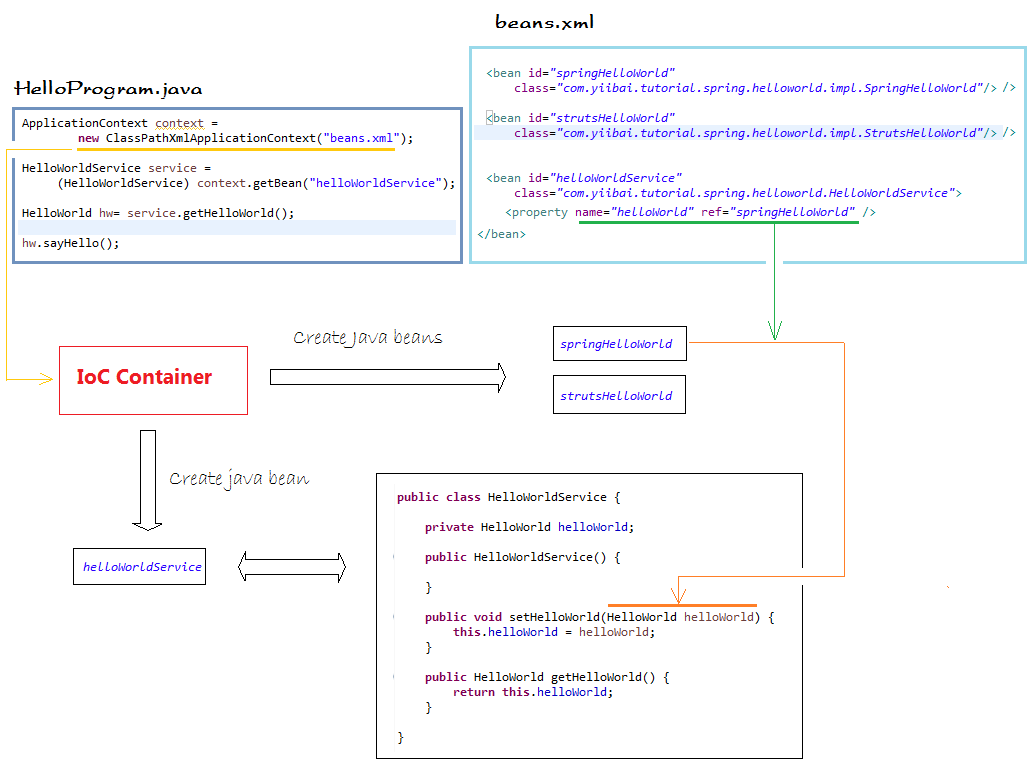
beans.xml
-
这是一个配置文件,您可以在这里声明Java bean。
可以通过读取beans.xml 文件来创建一个应用程序上下文对象
ApplicationContext context =
                newClassPathXmlApplicationContext("beans.xml");
IoC容器中,其作用是作为第三种角色,它的任务是创建 beans.xml 文件中声明的 Java Bean 对象。并通过setter方法注入依赖
在这个例子中,HelloWorldService 是一个 java bean 注入依赖。
<!-- beans.xml -->

<beanid="helloWorldService"
    class="com.yiibai.tutorial.spring.helloworld.HelloWorldService">

    <!-- Call: helloWorldService.setHelloWorld(springHelloWorld) -->
    <propertyname="helloWorld"ref="springHelloWorld"/>

</bean>
8- 使用Spring MVC - 编写Web应用程序
接下来,你可以学习使用Spring MVC编写Web应用程序:
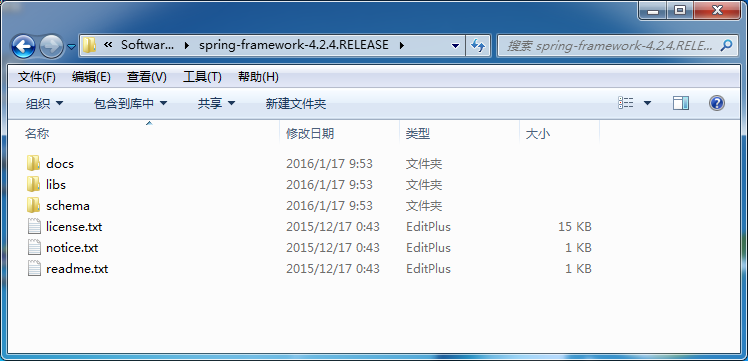
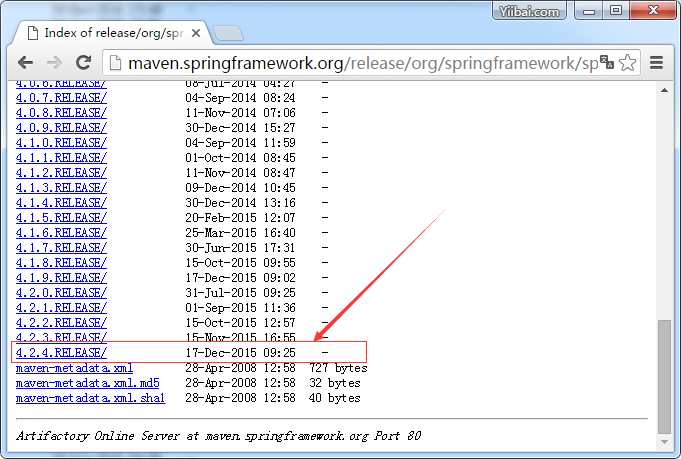
9- 附:下载Spring 库
您可以下载 Spring 从以下网址:
解压下载的zip文件到硬盘驱动器文件夹,如下: