https://www.cnblogs.com/fengli9998/p/7522973.html
1、swagger是什么,这个我觉得凡是一个开发人员就应该知道度娘啊,绝对强大。
简单说下,它的出现就是为了方便进行测试后台的restful形式的接口,实现动态的更新,当我们在后台的接口修改了后,swagger可以实现自动的更新,而不需要认为的维护这个接口进行测试。
2、springboot与swagger的集成:
第一步:jar包的引入:
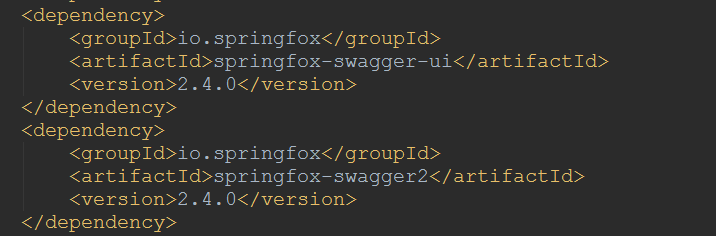
关于jar包的引入出现了一个问题就是版本的问题,可能需要与你的编辑器或者jdk要匹配吧,试了几个才最终成功导入jar。
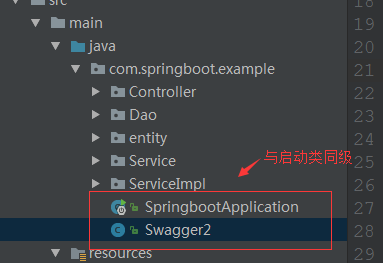
第二步:swagger的配置启动类编写:
要使用swagger要进行一些配置,这个在界面的图上是可以显示的:类似于说明书:在这个类中我们会使用注解来进行启动swagger:
具体配置如下:
| 1 2 3 4 5 6 7 8 9 10 11 12 13 14 15 16 17 18 19 20 21 22 23 24 25 26 27 28 29 30 31 32 33 34 35 36 37 38 39 40 41 42 43 44 45 46 47 48 |
|
这里的坑是:所使用类的引入文件要注意到底是哪个,之前因为这个出错了,
| 1 2 |
|
| 1 2 |
|
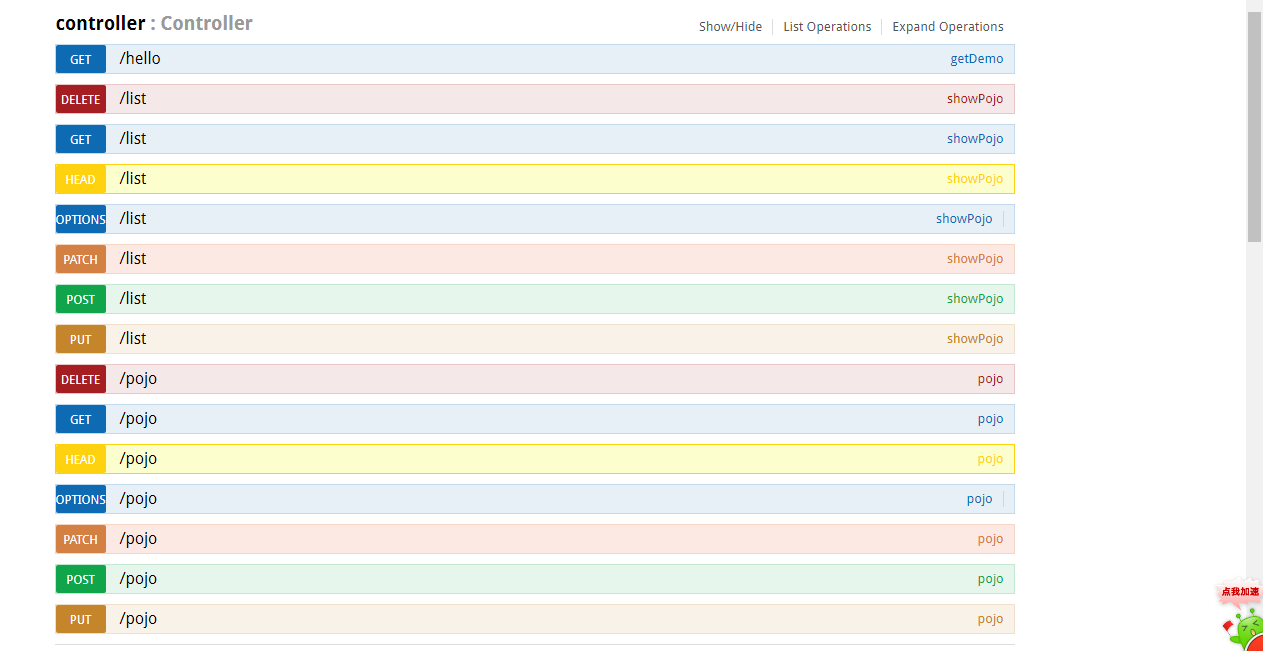
第三步:使用swagger来进行模拟测试:
使用swagger2来进行测试接口主要是在哪些类中使用:这里我们依然选择在controller层:
| 1 2 3 4 5 6 7 8 9 10 11 12 13 14 15 16 17 18 19 20 21 22 23 24 25 26 27 28 29 30 31 32 33 34 35 36 37 38 |
|
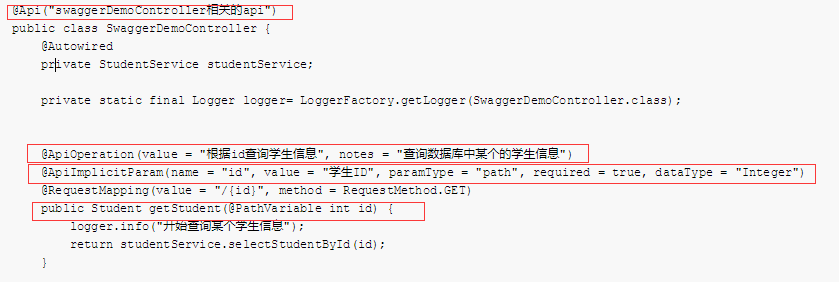
上面这些可以看下具体的注解是什么意思:
这样swagger2与springboot就集成完毕了。
看下最终效果吧:
访问路径:
http://localhost:8080/swagger-ui.html

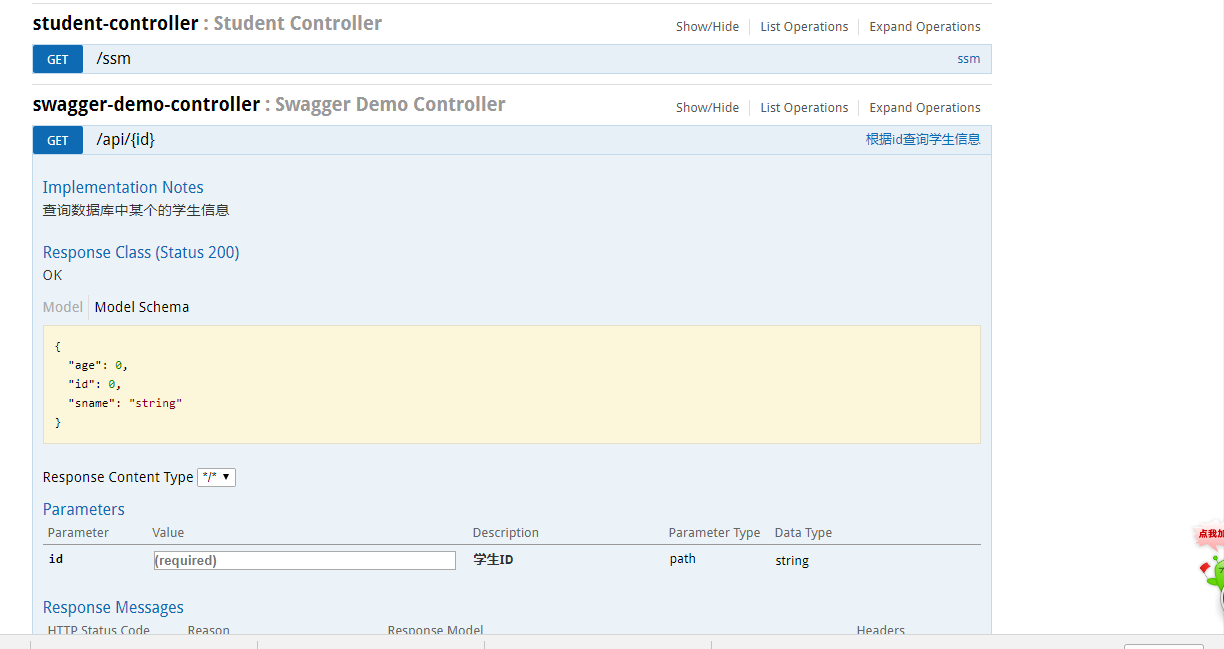
输入id后,我们可以看到查询结果:、
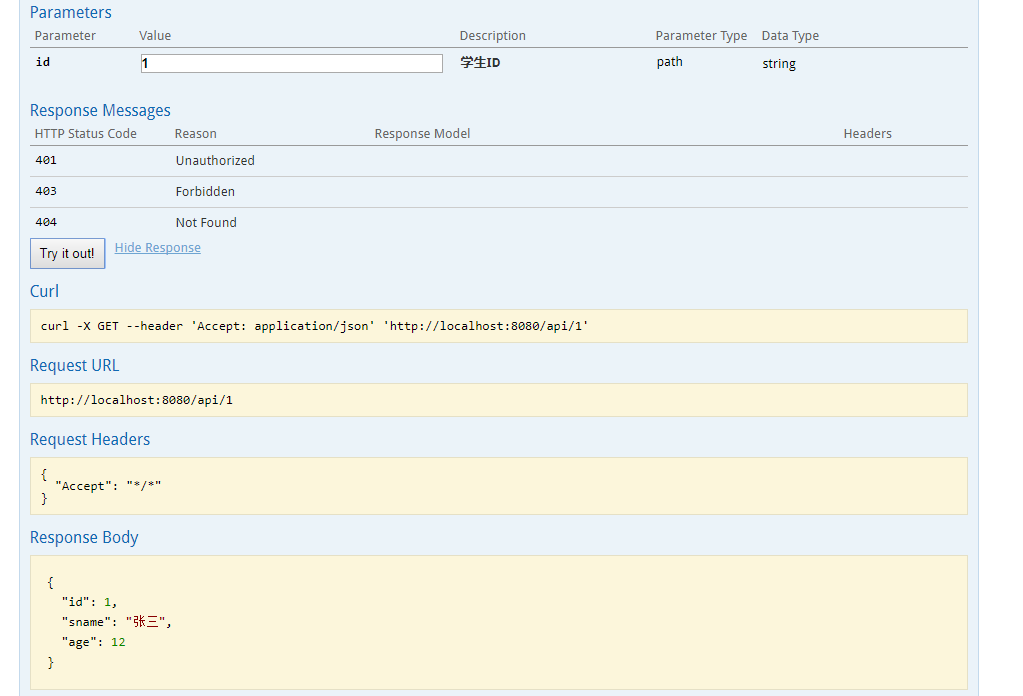
是不是很方便,我们不用像postman一样来编写入口,swagger2自动完成:
而且实时更新:
是不是很方便!
至此swagger2与springboot的集成完毕。