3.2安装ES
3.2.1 下载ES安装包elasticsearch-5.6.3.zip 在usr 目录下创建了es文件夹,将安装包上传到里面,解压 unzip elasticsearch-5.6.3.zip cd 进入 elasticsearch-5.6.3 文件里面
3.2.2 创建ES用户和组(创建elsearch用户组及elsearch用户),因为使用root用户执行ES程序,将会出现错误;所以这里需要创建单独的用户去执行ES 文件;命令如下:
命令一:groupadd elsearch
命令二:useradd elsearch -g elsearch
命令三:chown -R elsearch:elsearch elasticsearch-5.6.3 该命令是更改该文件夹下所属的用户组的权限
3.2.4 创建ES数据文件和日志文件,直接在root用户根目录一下创建就可以了
执行命令:mkdir /data
命令二:chown -R elsearch:elsearch /data/
命令三:su - elsearch 切换用户
命令四:mkdir -p es/data
命令五:mkdir -p es/logs
3.2.5 修改ES配置文件,使用cd命令进入到config 文件下,执行 vi elasticsearch.yml 命令,如图所示,本人没有配置集群,只是简单的配置了一下;详细说明可以参考官网;
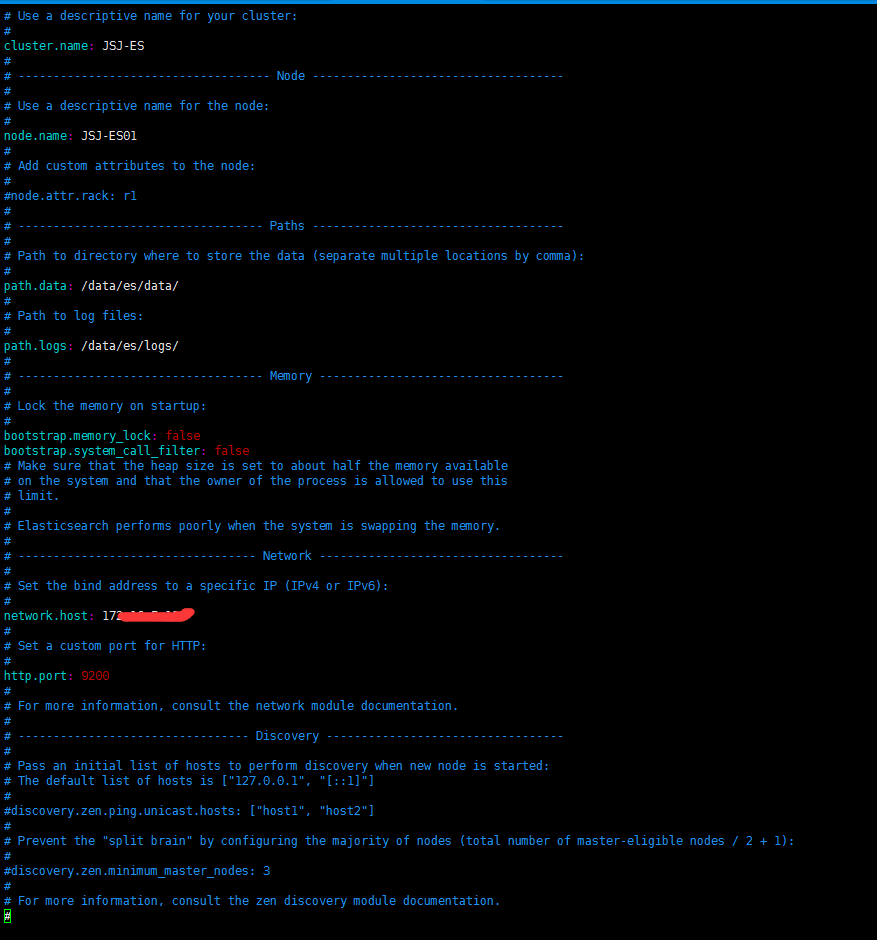
关于上面的警告都忽略了,然后直接就执行命令
3.2.6 执行ES文件,进入到bin 目录下执行 ./elasticsearch 命令就可以了,执行 ./elasticesrarch -d 是后台运行
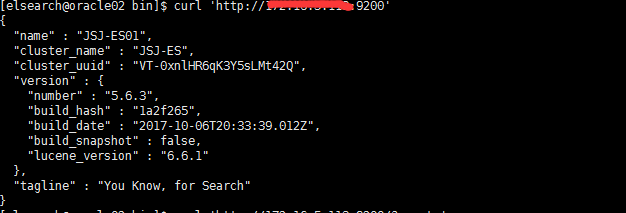
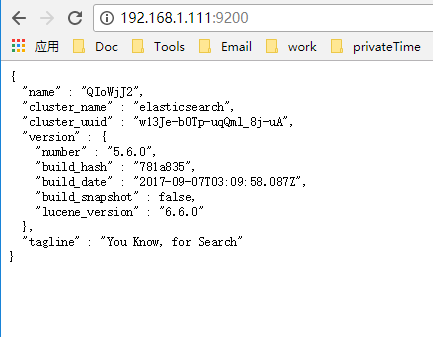
如果没有什么问题话,就可以安全生成了;然后执行curl 'http://自己配置的IP地址:9200/' 命令,就出现下面的结果
第四步:问题
4.1 1.[1]: max file descriptors [4096] for elasticsearch process is too low, increase to at least [65536] 意思是说你的进程不够用了
解决方案: 切到root 用户:进入到security目录下的limits.conf;执行命令 vim /etc/security/limits.conf 在文件的末尾添加下面的参数值:
* soft nofile 65536
* hard nofile 131072
* soft nproc 2048
* hard nproc 4096
前面的*符号必须带上,然后重新启动就可以了。执行完成后可以使用命令 ulimit -n 查看进程数
第五步:安装head 插件
5.1 下载head安装包,下载地址:https://github.com/mobz/elasticsearch-head/archive/master.zip 这是接从git 上下载下来 ,然后上传到虚拟机上的;由于head 插件不能放在elasticsearch-5.6.3 文件夹里,head 插件需要单独放,单独去执行; 所 以在elasticsearch-5.6.3 同级目录下解压了 head 插件;解压出来的文件名字,如图

5.2 执行head 插件,需要node.js 的支持,所以,下面先安装一node.js
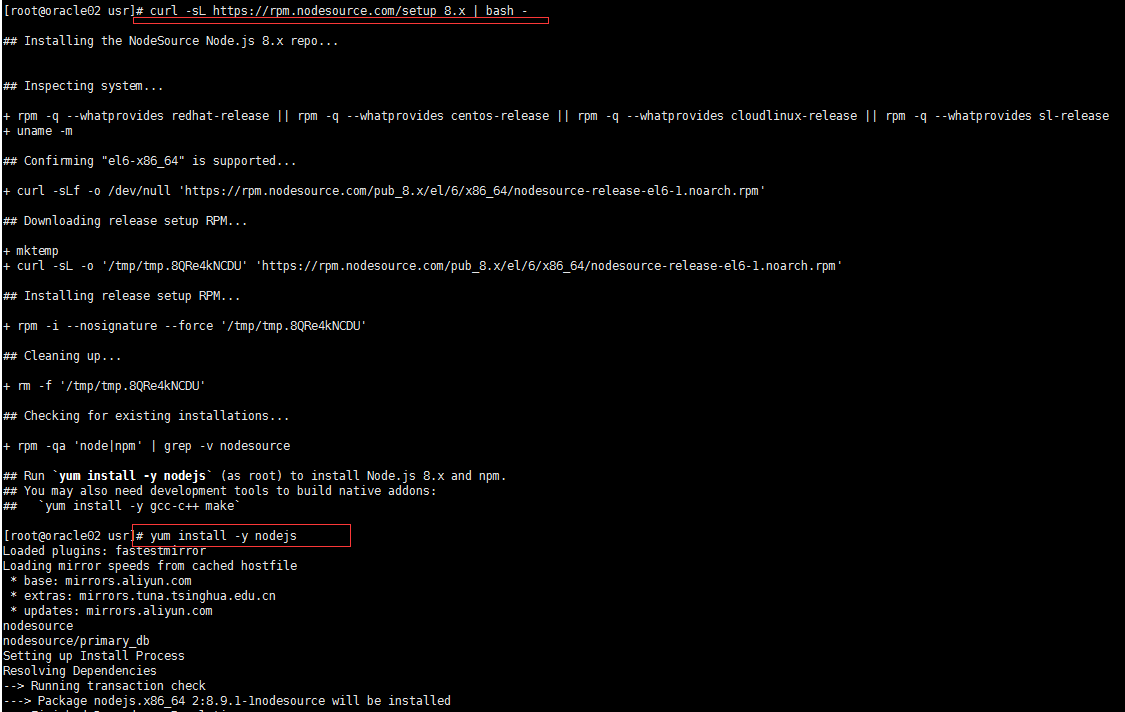
5.2.1 执行命令一:curl -sL https://rpm.nodesource.com/setup_8.x | bash -
命令二:yum install -y nodejs
OK,执行完成后,可以使用命令 node -v 验证是否安装成功,同时npm 也安装成功了;执行命令 npm -v 也是可以验证的。

5.3 安装grunt ,由于head 插件的执行文件是有grunt 命令来执行的,所以这个命令必须安装
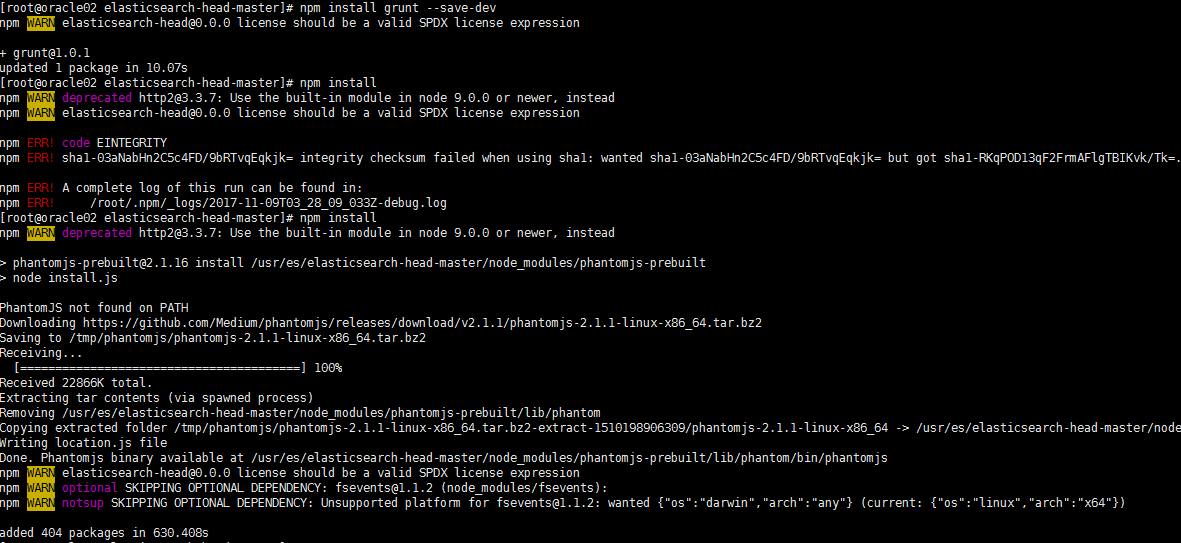
5.3.1 安装命令一:npm install grunt --save-dev
命令二:npm install
5.3.2 修改配置文件,cd 进入elasticsearch-head-master 文件夹下,执行命令vim Gruntfile.js文件:增加hostname属性,设置为*;如图:

5.3.3 修改 vim _site/app.js 文件:修改head的连接地址:,如图所示:

5.3.4 最后一个命令: grunt server & 执行完成后就OK了
5.3.5 涉及到的问题,在网页上无法正常访问;查看防火墙是否关闭
5.3.5.1 执行命令service iptables status 查看状态 ;直接将防火墙关闭就好了 执行命令service iptables stop

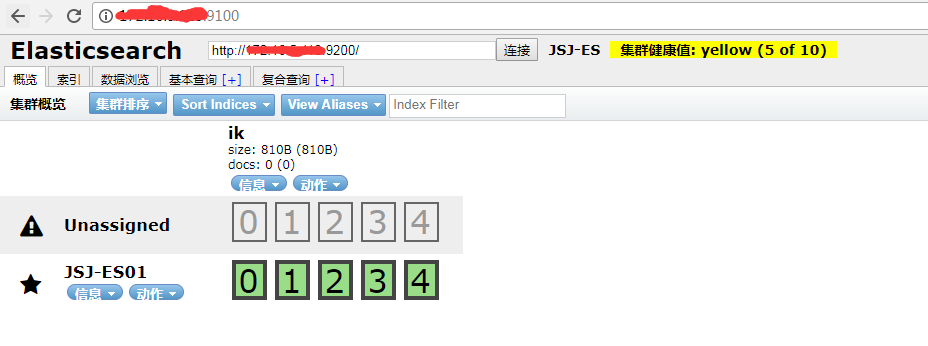
最后执行的结果是这样的,我没有配置集群: 注意下面使用的端口号,不在是9200 了 而是head 插件中的 9100 了

看到上面的出现的健康值了吗,说明的连接还是有问题的,解决方案是修改 cd 命令进入到elasticsearch-5.6.3 /config 文件中 vi elasticsearch.yml
文件下添加 :
http.cors.enabled: true
http.cors.allow-origin: "*"

然后重新执行ES ./elasticsearch 成功起来就可以了,执行结果就是这样的
安装过程中遇到的问题
问题:
max file descriptors [4096] for elasticsearch process is too low, increase to at least [65536]
解决方法:
#切换到root用户修改
vim /etc/security/limits.conf

# 在最后面追加下面内容
es hard nofile 65536
es soft nofile 65536
修改后重新登录 es 用户,使用如下命令查看是否修改成功
ulimit -Hn
65536
问题:
max virtual memory areas vm.max_map_count [65530] is too low, increase to at least [262144]
解决方法 提高vm.max_map_count 的大小
# 切换到root用户
vim /etc/sysctl.conf
# 在最后面追加下面内容
vm.max_map_count=262144
# 使用 sysctl -p 查看修改后的结果
sysctl -p
问题:
Java HotSpot(TM) 64-Bit Server VM warning: INFO: os::commit_memory(0x0000000085330000, 2060255232, 0) failed; error='Cannot allocate memory' (errno=12)
解决方法:
# 由于elasticsearch5.0默认分配jvm空间大小为2g,修改jvm空间分配
# 如果使用虚拟机安装,内存最好不小于2G
# vim config/jvm.options
-Xms512m
-Xmx512m
在阿里云上可能出现的问题:
system call filters failed to install; check the logs and fix your configuration or disable system call filters at your own risk
解决方法:在es配置中加入下面命令即可
bootstrap.system_call_filter: false
在确定服务器端口(9200)开启,elasticsearch启动的情况下(ps -ef | grep elasticsearch)可以在浏览器中访问
max file descriptors [4096] for elasticsearch process likely too low, increase to at least [65536]
解决方法:切换到root用户,进入vi /etc/security/limits.conf ,增加配置(保存后注意切回work用户的时候才能生效,sudo 修改的不能立即生效):
- work soft nofile 819200
- work hard nofile 819200
解决方法:进入limits.d下的配置文件:vi /etc/security/limits.d/90-nproc.conf ,修改配置如下:
- * soft nproc 1024
- 修改为:
- * soft nproc 2048
3、关闭elasticSearch
# 找到elasticsearch的进程号
jps | grep Elasticsearch
3673 Elasticsearch

kill -9 3673