现在使用canvas绘制气泡,虽说很多人都已经实现过了,可能方法都大同小异,但自己写和看别人写完全是两码事,自己会写的才是自己的,话不多说,直接上代码。
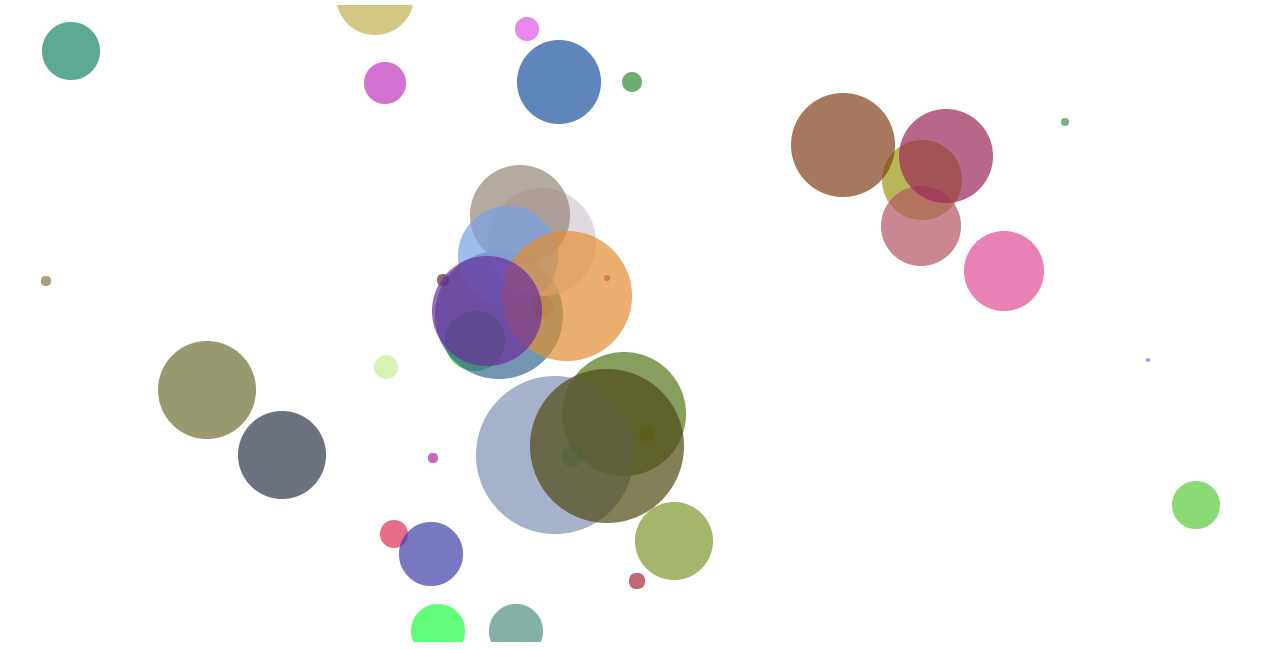
先来一张效果图:
现在上代码,代码有详细的注释,简单易懂:
<!--html只有一个canvas标签-->
<canvas id="canvas"></canvas>
//获取canvas标签
var canvas = document.getElementById("canvas");
//定义画布的高和宽,定义为屏幕的高宽
canvas.width = document.documentElement.clientWidth-20;
canvas.height = document.documentElement.clientHeight-20;
//获取2d画布
var ctx = canvas.getContext("2d");
//定义存放气泡的数组
var bubbleArr = [];

//定义气泡的对象
function Bubble(x,y,r,dx,dy){
 this.x = x;//气泡的x坐标
 this.y = y;//气泡的y坐标
 this.r = r;//气泡的半径
 this.dx = dx;//气泡运动的x偏移量
 this.dy = dy;//气泡运动的y偏移量
 bubbleArr.push(this);//将对象放入气泡数组
}

Bubble.prototype.move = function(){
 this.x += this.dx;//气泡x偏移量
 this.y += this.dy;//气泡y偏移量
 this.r--;//气泡半径减小
}

Bubble.prototype.go = function(){
 //气泡的颜色,随机生成
 ctx.fillStyle = "rgba("+Math.floor(Math.random()*256)+","+Math.floor(Math.random()*256)+","+Math.floor(Math.random()*256)+",0.7)";
 //开始画气泡
 ctx.beginPath();
 //画圆 参数依次为:圆心x坐标、圆心y坐标、半径、弧度开始位置、弧度结束位置、是否顺时针
 ctx.arc(this.x,this.y,this.r,0,2*Math.PI,true);
 //填充
 ctx.fill();
}

//定义鼠标移动事件
document.onmousemove = function(ev){
 //获取当前的dom,兼容ie
 var e = ev || window.event;
 //实例化对象,半径在100以内随机生成,偏移量在-20~20之间随机生成
 new Bubble(e.clientX,e.clientY,Math.floor(Math.random()*100),Math.floor(Math.random()*20)-Math.floor(Math.random()*20),Math.floor(Math.random()*20)-Math.floor(Math.random()*20));
}

//定时器,一秒执行50次,每次都会改变气泡的半径和偏移量
setInterval(function(){
 //现将画布清屏
 ctx.clearRect(0,0,canvas.width,canvas.height);
 //循环气泡数组,存在并且半径大于0,则生成气泡
 for(var i = 0;i < bubbleArr.length;i++){
  bubbleArr[i].move();
  if(bubbleArr[i].r<0){
   //半径小于0,将对象从数组清除
   bubbleArr.splice(i,1);
  }else{
   bubbleArr[i].go();
  }
 }
},20);
相信都能看得懂,代码也可以复制到html里直接运行,很简单的逻辑,代码也简单,如有兴趣可点击下方链接看看效果,鼠标在页面移动即可。
canvas绘制炫彩气泡展示链接:http://yktzs.top/canvas/bubble.html 。
如有错误,欢迎指正QQ:1505771465