目录
获取方式:this.$store.state.全局变量名 - this.$store.state.name
设置方式:mutations: { 方法名:function (state, 参数1) {},}
获取方式:this.$store.commit('方法名',参数)
一、vuex的安装
1-1 npm install vuex
1-2 手动新建store.js
import Vue from 'vue'
import Vuex from 'vuex'

Vue.use(Vuex)

export default new Vuex.Store({
  state: {

  },
  mutations: {

  },
  actions: {

  }
})
1-3 确保mian,js内进行注册


二、状态管理器的使用
2-1 store.js内全局变量的获取
import Vue from 'vue'
import Vuex from 'vuex'
import Cookie from 'vue-cookies'
Vue.use(Vuex)

export default new Vuex.Store({
    //存储全局变量
    state: {
        name:'name',
        token:'token'

    },
    mutations: {

    },
    actions: {}
})
获取方式:this.$store.state.全局变量名 - this.$store.state.name
2-2 store.js内全局方法的使用:
设置方式:mutations: { 方法名:function (state, 参数1) {},}
import Vue from 'vue'
import Vuex from 'vuex'

Vue.use(Vuex)

export default new Vuex.Store({
    // 存储全局变量
    state: {
        name:'' ,
        token:''
    },
    // 存储各种方法,所有方法,第一个参数必须为state
    mutations: {
         // 方法名:function (state, 参数1) {},
        login: function (state, response) {
            // 方法逻辑代码

        },
    },
    actions: {}
})
import Vue from 'vue' import Vuex from 'vuex' import Cookie from 'vue-cookies' Vue.use(Vuex) export default new Vuex.Store({ // 存储全局变量 state: { // 从cookie内获取数据 name: Cookie.get('name'), token: Cookie.get('token') }, // 存储各种方法,所有方法,第一个参数必须为state mutations: { // 登入后将值写入cookie login: function (state, response) { // 修改这两个变量的值 state.name = response.data.name state.token = response.data.token // 往cookie中写数据 Cookie.set('name', response.data.name) Cookie.set('token', response.data.token) }, // 登出后将cookie清空 logout: function (state) { // 修改这两个变量的值 state.name = "" state.token = "" // 往cookie中写数据 Cookie.set('name', "") Cookie.set('token', "") } }, // actions: {} })获取方式:this.$store.commit('方法名',参数)


三、简单登陆页的准备,用于测试数据存储操作
3-1 表结构设计
# ------------用户相关-------------------- # --------模拟用户登陆系统,测试vue状态管理系统-------- class UserInfo(models.Model): ''' 用于模拟简单的登陆实现 - name :用户名 - pwd :密码,明文形式保存 ''' name = models.CharField(max_length=64) pwd = models.CharField(max_length=64) class UserToken(models.Model): ''' Token表,用于存储登陆时候产生的随机字符串 - user:和UserInfo表一对一的关系 - token:随机字符串 ''' user = models.OneToOneField(to='UserInfo') token = models.CharField(max_length=64) # time=models.DateTimeField(auto_now=True)3-2 后台视图函数
from rest_framework.views import APIView from rest_framework.response import Response from LearnOnline import models from LearnOnline.utils.commonUtils import MyResponse import uuid class Login(APIView): ''' 简单登陆页面的实现,测试vuex的数据存储系统 ''' def post(self, request, *args, **kwargs): ''' 接受登陆时候传输的post请求,从request内获取数据处理 ''' response = MyResponse() name = request.data.get('name') pwd = request.data.get('pwd') print(name,pwd) user = models.UserInfo.objects.filter(name=name, pwd=pwd).first() if user: # 若用户名密码正确,对象存在,则用uuid生产随机字符串保存到UserToken表中 token = uuid.uuid4() # 更新或创建对象user的token字段 models.UserToken.objects.update_or_create(user=user, defaults={'token': token}) # 数据库操作成功后,将数据存入response字典中 response.token = token response.name = name response.msg = '登录成功' else: response.msg = '用户名或密码错误' response.status = '101' return Response(response.get_dic)3-3 主页前端代码
<template> <div id="app"> <div id="nav"> <router-link to="/">主页</router-link> | <router-link to="/course">免费课程</router-link> | <router-link to="/DataTest">高级课程</router-link> <span class="pull-right"> <span v-if="!this.$store.state.name"> <router-link to="/login">登录</router-link>| <router-link to="#">注册</router-link> </span> <span v-else> <span>{{this.$store.state.name}}</span>| <a @click="logout">注销</a> </span> </span> </div> <router-view/> </div> </template> <script> export default { methods: { logout: function () { // this.$store.state.name='' // this.$store.state.token='' this.$store.commit('logout') }, }, } </script>
四、数据存储在vuex全局变量中,实现登陆存储操作
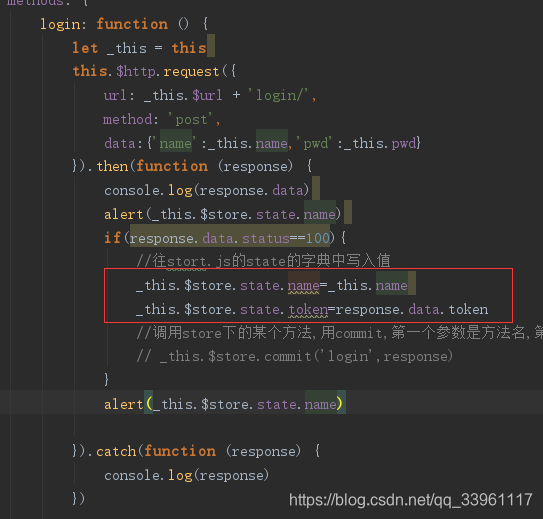
4-1 前端设计
<template> <div class="login"> <h1>登录</h1> <!-- v-model:与script内return数据进行双向绑定 --> <p>用户名:<input type="text" v-model="name"></p> <p>密码:<input type="password" v-model="pwd"></p> <button @click="login" class="btn bg-danger">登录</button> </div> </template> <script> export default { data: function () { return { name:'', pwd:'' } }, methods: { login: function () { let _this = this this.$http.request({ url: _this.$url + 'login/', method: 'post', //携带数据发送post请求 data:{'name':_this.name,'pwd':_this.pwd} }).then(function (response) { console.log(response.data) alert(_this.$store.state.name) //若后台状态码为100,即成功,将数据写入vuex内 if(response.data.status==100){ //往stort.js的state的字典中写入值 _this.$store.state.name=_this.name _this.$store.state.token=response.data.token } alert(_this.$store.state.name) }).catch(function (response) { console.log(response) }) }, }, } </script> <style scoped> </style>4-2 store.js内设计
import Vue from 'vue' import Vuex from 'vuex' Vue.use(Vuex) export default new Vuex.Store({ // 存储全局变量 state: { name: '', token: '' }, // 存储各种方法 mutations: {}, // actions: {} })4-3 实现效果
4-4 存在问题 - 刷新即清空存储信息

五、vue-cookies 将数据保存在网页cookies内
5-1 vue-cookies 安装 - npm install vue-cookies
5-2 vue-cookies的使用
-取值:Cookie.get('根据key值') -赋值:Cookie.set('key值','value值') -删值:Cookie.remove('key值') -是否存在:Cookie.isKey('key值') -获取所有cookie名字:Cookie.keys() ''' 其他页面获取,$使用方式 ''' -取值:this.$cookies.get(keyName) -赋值:this.$cookies.set(keyName, time) -删值:this.$cookies.remove(keyName) -是否存在:this.$cookies.isKey(keyName) -获取所有cookie名字:this.$cookies.keys()5-3 store.js内设计 - 在方法内对cookie进行操作
import Vue from 'vue' import Vuex from 'vuex' import Cookie from 'vue-cookies' Vue.use(Vuex) export default new Vuex.Store({ // 存储全局变量 state: { // 从cookie内获取数据 name: Cookie.get('name'), token: Cookie.get('token') }, // 存储各种方法,所有方法,第一个参数必须为state mutations: { // 登入后将值写入cookie login: function (state, response) { // 修改这两个变量的值 state.name = response.data.name state.token = response.data.token // 往cookie中写数据 Cookie.set('name', response.data.name) Cookie.set('token', response.data.token) }, // 登出后将cookie清空 logout: function (state) { // 修改这两个变量的值 state.name = "" state.token = "" // 往cookie中写数据 Cookie.set('name', "") Cookie.set('token', "") } }, // actions: {} })5-4 前端设计
<template>
    <div class="login">
        <h1>登录</h1>
        <!-- v-model:与script内return数据进行双向绑定 -->
        <p>用户名:<input type="text" v-model="name"></p>
        <p>密码:<input type="password" v-model="pwd"></p>

        <button @click="login" class="btn bg-danger">登录</button>
    </div>
</template>

<script>
     export default {
        data: function () {
            return {
                name:'',
                pwd:''
            }

        },
        methods: {
            login: function () {
                let _this = this
                this.$http.request({
                    url: _this.$url + 'login/',
                    method: 'post',
                    //携带数据发送post请求
                    data:{'name':_this.name,'pwd':_this.pwd}
                }).then(function (response) {
                    console.log(response.data)
                    alert(_this.$store.state.name)
                    //若后台状态码为100,即成功,将数据写入vuex内
                    if(response.data.status==100){
                        // 往stort.js的state的字典中写入值
                        // _this.$store.state.name=_this.name
                        // _this.$store.state.token=response.data.token
                        //调用store下的某个方法,用commit,第一个参数是方法名,第二个参数是参数
                        _this.$store.commit('login',response)
                    }
                    alert(_this.$store.state.name)

                }).catch(function (response) {
                    console.log(response)
                })

            },

        },
    }
</script>

<style scoped>

</style>
5-5 实现效果


