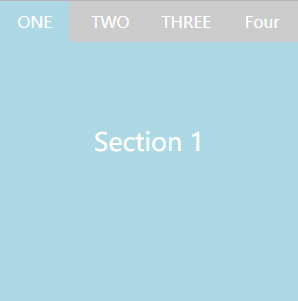
JS实现标签切换栏
页面效果
<!DOCTYPE html>
<html lang="en">
<head>
	<meta charset="UTF-8">
	<title>标签切换栏</title>
	<link rel="stylesheet" type="text/css" href="./style.css">
</head>
<body>
<div class="main">
	<div class="tags" id="tags">
		<ul class="tags-nav">
			<li class="active"><a href="#">ONE</a></li>
			<li><a href="#">TWO</a></li>
			<li><a href="#">THREE</a></li>
			<li><a href="#">Four</a></li>
		</ul>
	</div>
	<div class="tags-container" id="tags-container">
		<section id="toggle-1" style="display: block;">
			<p>Section 1</p>
		</section>
		<section id="toggle-2" style="display: none;">
			<p>Section 2</p>
		</section>
		<section id="toggle-3" style="display: none;">
			<p>Section 3</p>
		</section>
		<section id="toggle-4" style="display: none;">
			<p>Section 4</p>
		</section>
	</div>
</div>
	<script type="text/javascript" src="./script.js"></script>
</body>
</html>
* {
	margin: 0;
	padding: 0;
}

a {
	text-decoration: none;
}

li {
	list-style: none;
}

.active {
	background-color: lightblue;
}

.main {
	width: 300px;
	height: 300px;
	overflow: hidden;
}
.tags-nav {
	background-color: #ccc;
}
.tags-nav li {
	display: inline-block;
	width: 23.7%;
}
.tags-nav li a {
	display: inline-block;
	width: 100%;
	color: #fff;
	padding-top: 10px;
	padding-bottom: 10px;
	text-align: center;
}
.tags-nav li a:hover {
	background-color: lightblue;
	border-bottom: 2px solid red;
	padding-bottom: 8px;
}
.tags-container {
	background-color: lightblue;
	height: 100%;
}
.tags-container p {
	font-size: 25px;
	text-align: center;
	height: 200px;
	line-height: 200px;
	color: #fff;
}
javascript
function $(id){
	return typeof id === 'string' ? document.getElementById(id) : id;
}
window.onload = function() {
	var titles = $("tags").getElementsByTagName('li');
	var sections = $("tags-container").getElementsByTagName('section');
	if(titles.length != sections.length) return ;
	for(var i = 0, len = titles.length; i < len; i++) {
		titles[i].id = i;
		titles[i].onclick = function() {
			for(var j = 0,len = titles.length; j < len; j++) {
				titles[j].className = '';
				sections[j].style.display = 'none';
			}
			this.className = "active";
			sections[this.id].style.display = 'block';
		}
	}
}
实现图片上传功能
页面效果

主要功能:
~页面中初始化有一张图片和一个按钮
~点击按钮弹出文件选择框
~点击选择你需要显示的文件
~若上传文件的后缀名是'.jpg','.png','gif','.bmp','.jpeg',则文件上传成功,在框内展示对应的图片
~若不是,则提示只允许上传特定格式的图片
难点:
FileReader的使用