版本信息
CentOS 6.8
Apache 2.4
获取源码包方法,文章结尾有说明!
预装环境
$ yum -y install gcc gcc-c++ wget expat-devel
安装依赖
安装apache之前,需要先安装几个组件:apr、apr-util、apr-iconv、pcre,这里将安装包上传到/usr/local/software目录下,目前只安装apr、apr-util、pcre就行了。
安装apr
$ cd /usr/local/software
$ tar -zxvf apr-1.6.5.tar.gz
$ cd apr-1.6.5/
$ ./configure --prefix=/usr/local/apr
$ make && make install
安装apr-util
$ cd ..
$ tar -zxvf apr-util-1.6.1.tar.gz
$ cd apr-util-1.6.1
$ ./configure --prefix=/usr/local/apr-util --with-apr=/usr/local/apr
$ make && make install
安装pcre
$ cd ..
$ tar -zxvf pcre-8.42.tar.gz
$ cd pcre-8.42
$ ./configure --prefix=/usr/local/pcre
$ make && make install
安装Apache
$ cd ..
$ tar -zxvf httpd-2.4.37.tar.gz
$ cd httpd-2.4.37
$ ./configure --prefix=/usr/local/apache --with-apr=/usr/local/apr --with-apr-util=/usr/local/apr-util --with-pcre=/usr/local/pcre
$ make && make install
注意:如果make中出现错误,必须执行make clean清除所有缓存文件后继续,如果是在make install过程中出现错误,必须执行make clean并且删除生成了安装目录,然后重新执行make和make install。
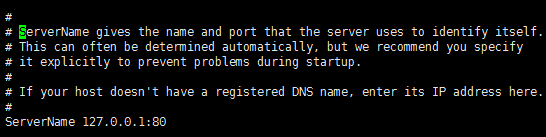
修改配置文件中ServerName字段内容,如以下所示:
$ vi /usr/local/apache/conf/httpd.conf
$ /usr/local/apache/bin/apachectl start		#启动apache
在浏览器中输入CentOS的ip地址,如显示 ==It works!== ,则安装成功!

将apache加入系统服务,并且设置为开机自启。
$ cp /usr/local/apache/bin/apachectl /etc/init.d/httpd
$ chmod +x /etc/init.d/httpd
$ chkconfig --add httpd		#设置开机自启

此步如果出现错误提示:==service httpd does not support chkconfig==
解决办法:编辑/etc/rc.d/init.d/httpd,在#!/bin/sh下面加上如下两行就可以了
	# chkconfig: 2345 10 90
	# description: Activates/Deactivates Apache Web Server
其中:需要带上#,2345是设为要启动的运行级别,10是启动优先级,90是杀死进程的优先级,谁优先谁先挂的意思。
配置虚拟主机
apache 2.4把配置虚拟主机放到了conf/extra/httpd-vhosts.conf文件中,让配置文件看起来更加的简洁、清晰。
打开/usr/local/apache/conf/httpd.conf,找到#Include conf/extra/httpd-vhosts.conf这一行,去掉前面的“#”注释,让apache加载虚拟机配置文件。
$ vi /usr/local/apache/conf/httpd.conf

	Include conf/extra/httpd-vhosts.conf

在httpd-vhostd-vhosts.conf中配置多虚拟主机,创建了两个虚拟主机,两个域名分别指向不同的目录,配置如下:
$ vi /usr/local/apache/conf/extra/httpd-vhostd-vhosts.conf


<VirtualHost *:80>
	DocumentRoot "/var/www/html"
	ServerName www.weige.com
		<Directory "/var/www/html">
		Options -Indexes +FollowSymlinks
		AllowOverride All
		Require all granted
		</Directory>
</VirtualHost>
<VirtualHost *:80>
	DocumentRoot "/var/www/htm"
	ServerName www.weige123.com
		<Directory "/var/www/htm">
		Options -Indexes +FollowSymlinks
		AllowOverride All
		Require all granted
		</Directory>
</VirtualHost>


建立主机目录
$ mkdir -p /var/www/html
$ mkdir -p /var/www/htm
$ echo "i am html" > /var/www/html/index.html
$ echo "i am htm" > /var/www/htm/index.html
$ service httpd restart		#重启apache服务器
验证生效
为了验证配置是否生效,这里就不赘述DNS服务器的配置。我们在Windows的hosts文件中,对C:\Windows\System32\drivers\etc\hosts文件添加域名和IP的映射关系。配置如下,具体内容以实际为主。

访问结果如下,大功告成!


参考链接:
1、Linux下编译安装Apache 2.4
https://www.cnblogs.com/freeweb/p/5177516.html
2、centos编译apr-util-1.6.0出错缺少expat.h
https://blog.csdn.net/hejinyin/article/details/77701702
3、apache不支持chkconfig的解决方法
https://www.cnblogs.com/chenqionghe/p/4302494.html
4、apache2.4配置虚拟主机
https://yq.aliyun.com/ziliao/551017
5、解决问题 “You don’t have permission to access /index.html on this server.”
https://blog.csdn.net/dearbaba_8520/article/details/80390323
6、Apache2.4.6 添加虚拟主机
https://www.cnblogs.com/rwxwsblog/p/5256416.html
apache 2.4源码下载链接:https://download.csdn.net/download/weixin_38642130/10769072
或
关注微信公众号“微圈网络”,回复关键字apache,即可获取源码包!