目录
一 注册企业微信
本文所有内容是基于2018年12月26日时的企业微信版本所做的教程。后面可能由于企业微信界面规则更改导致部分流程不一致。(大家看文章时请注意这一点)
注册企业微信必备条件
- 微信号(实名认证了)
- 手机号
之前我有个误区,就是以为注册企业微信就一定要有营业执照之类的证件才可以注册,实际是不需要也可以的,因为我们直接注册后,即使不绑定企业,我们也是可以正常使用的,未绑定实际企业的,有200人的数的上限(难道你们技术部有200人?不存在的,哈哈!)
注册
注册链接:企业微信
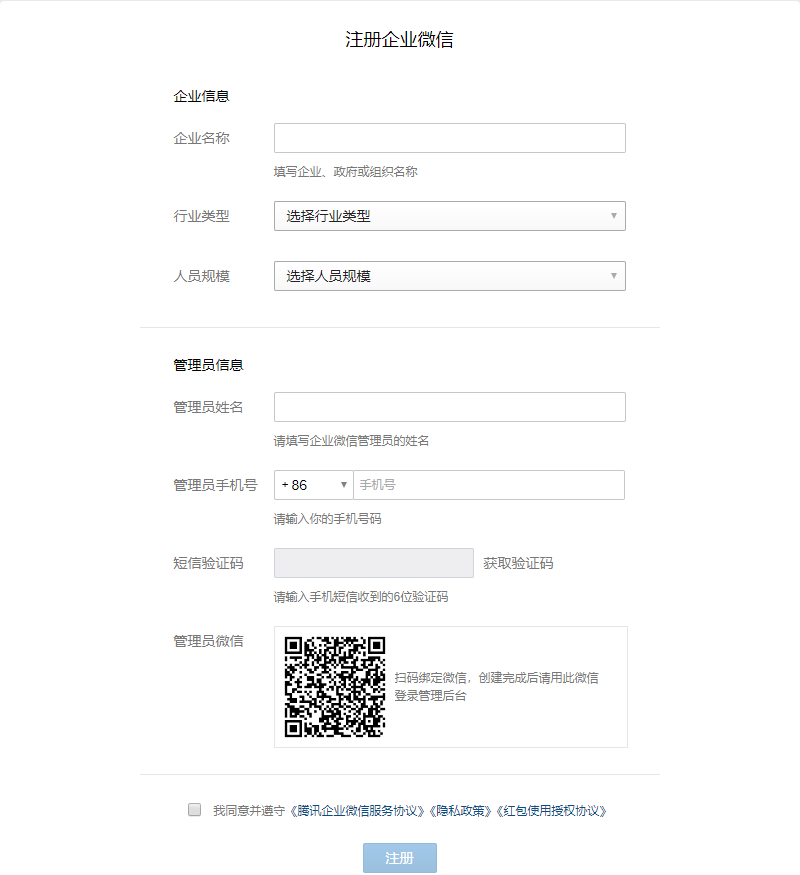
企业名称可以随便填,建议填真实的啊,其他的你就按照实际情况填了。
二 创建消息
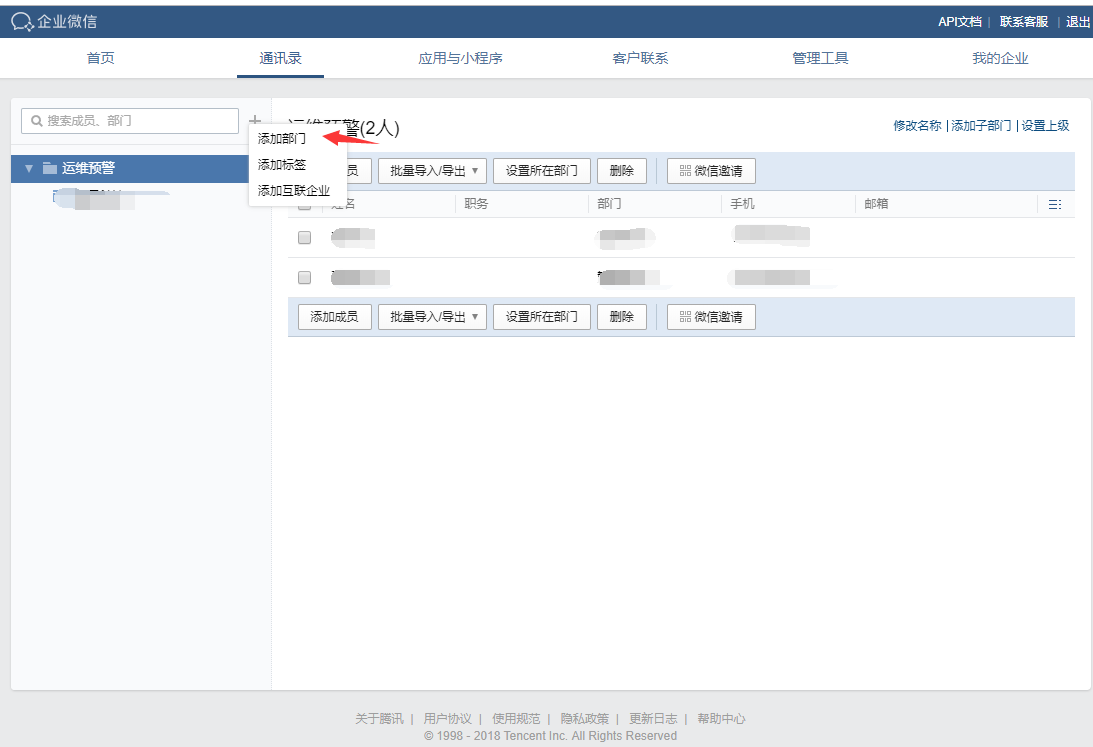
创建部门
首先我们需要创建一个部门,然后将成员添加到一个部门里面
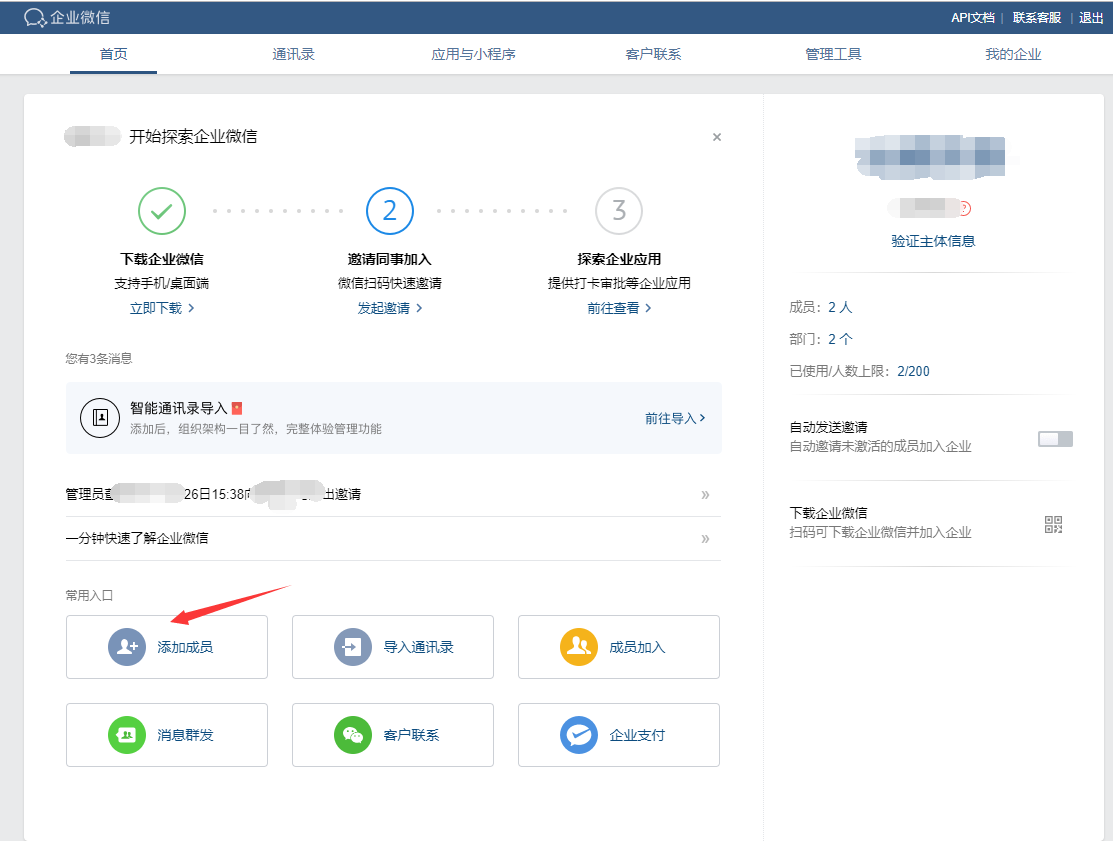
邀请成员加入
我们可以在首页点击进行邀请。
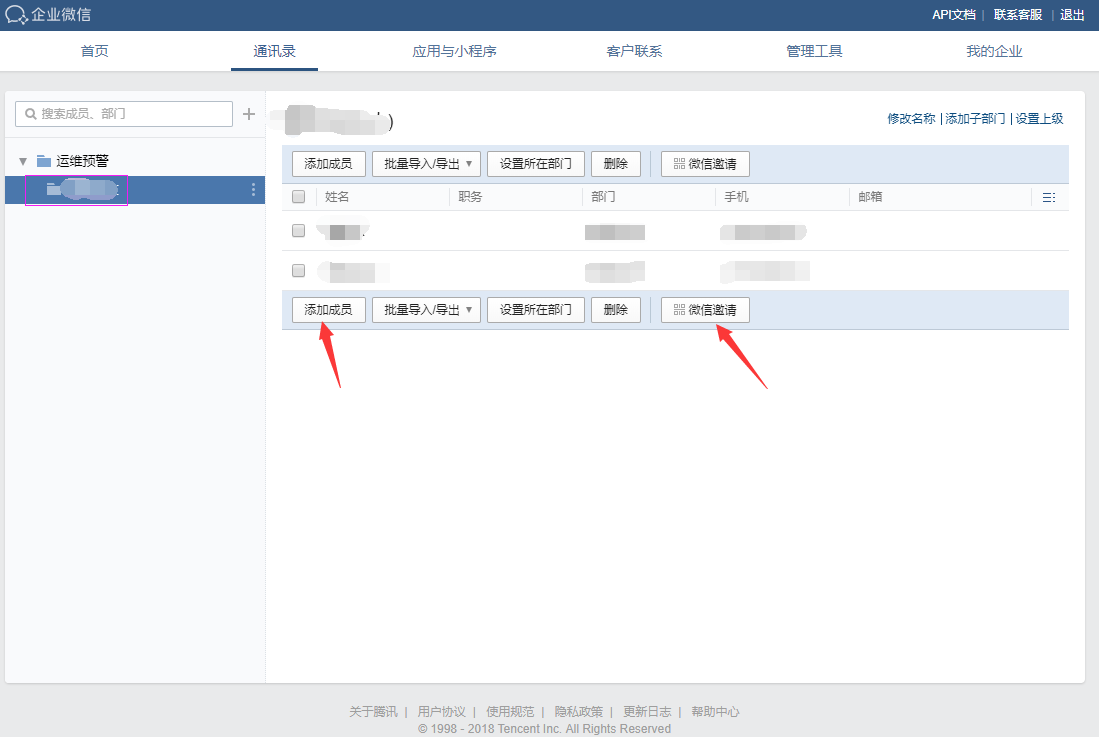
也可以在选中要添加的部门后再选右边的添加成员或者微信邀请。
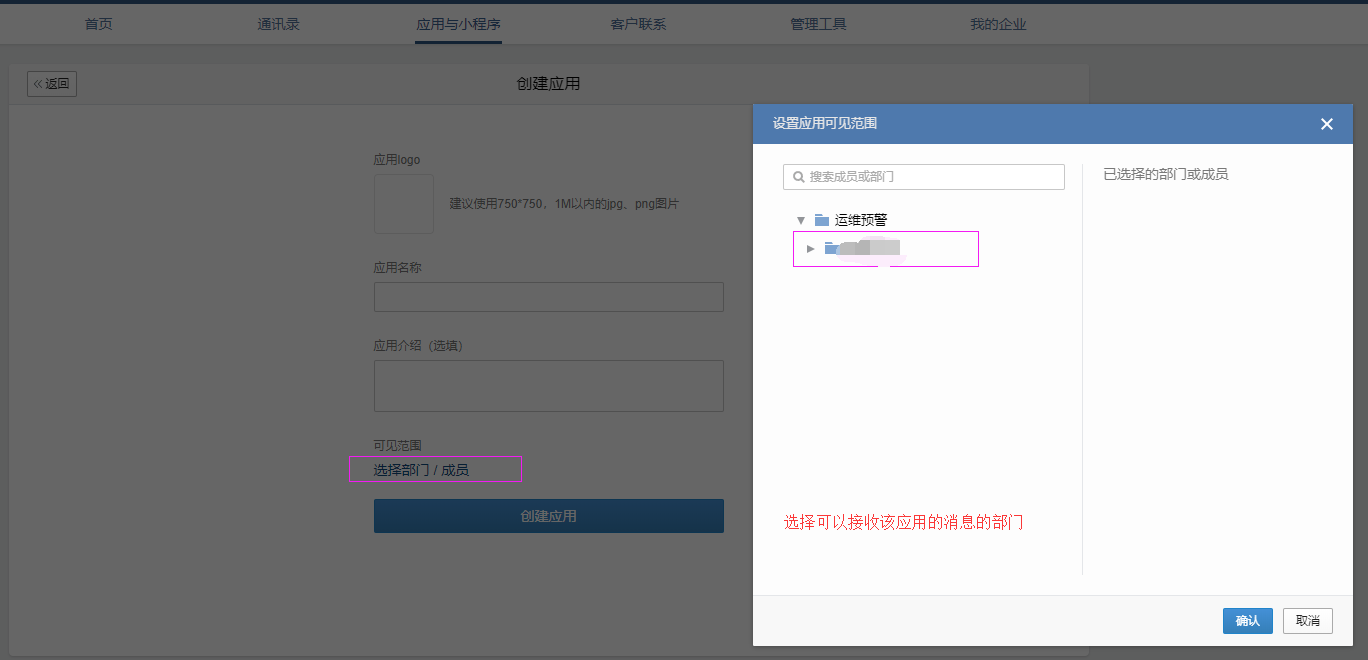
创建应用
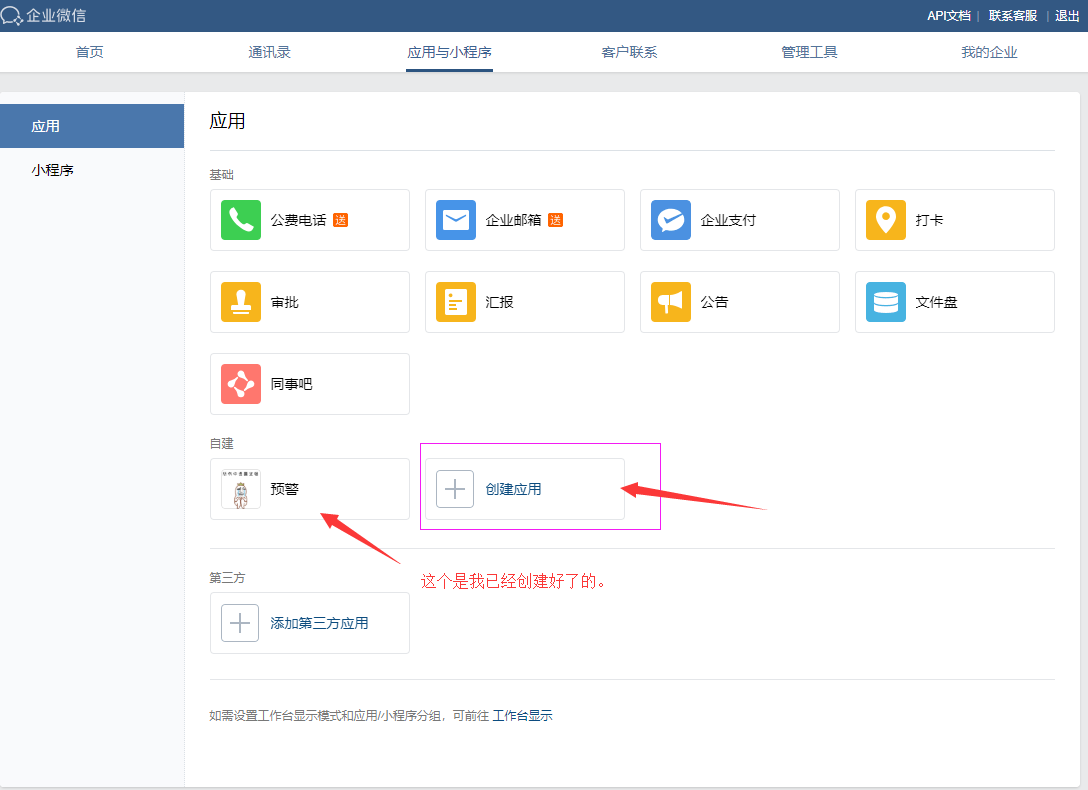
创建的时候指定下可以接收的消息的部门
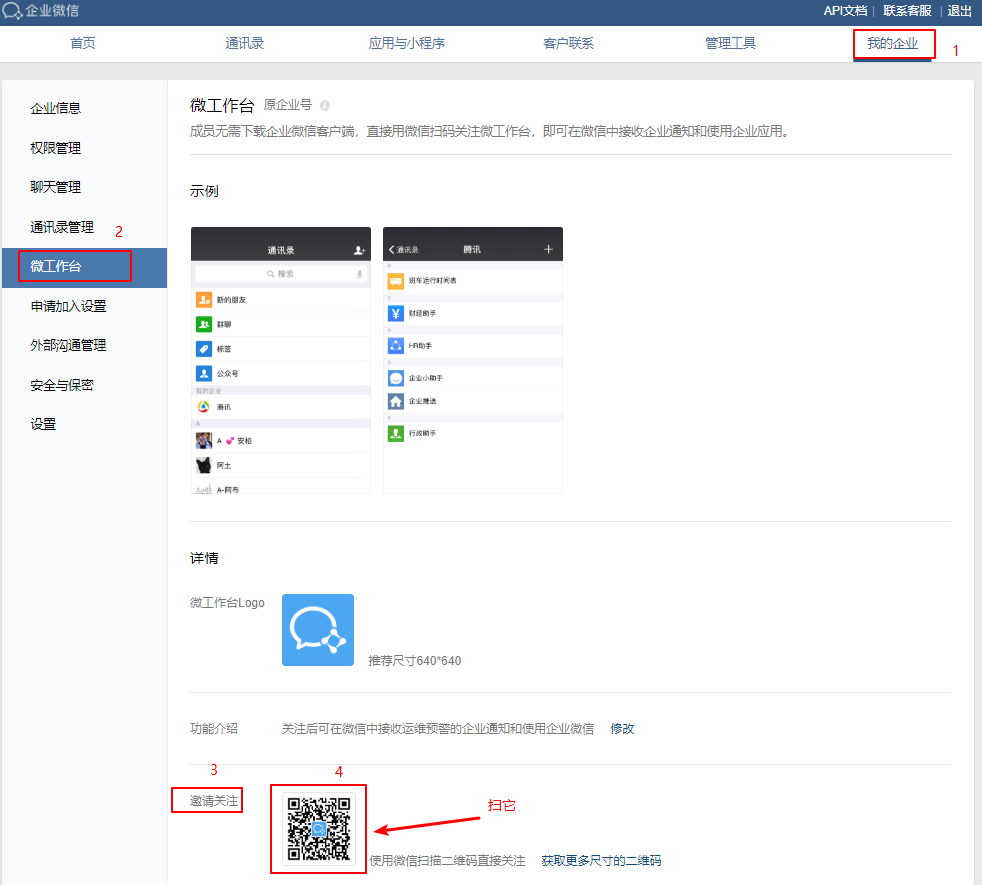
关注微工作平台
在我的企业 ---》 微工作平台 ---》邀请关注
三 实现预警
在完成的上面的所有准备工作后,我们还需要获取三个东西 :
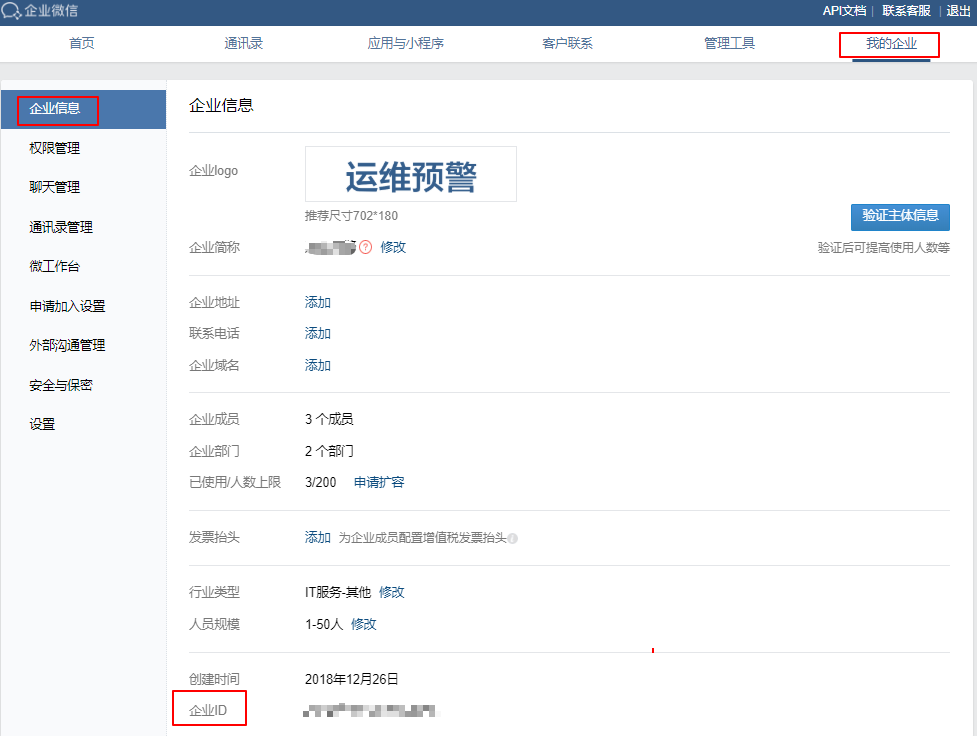
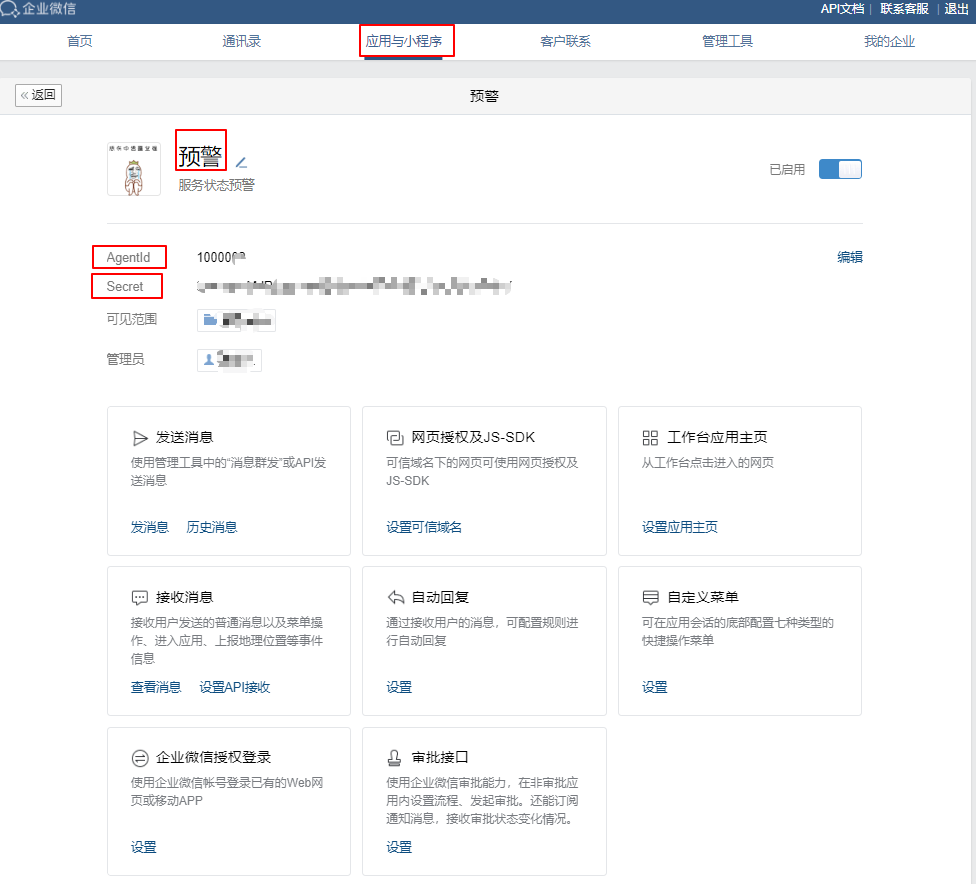
1 企业ID
2 获取应用ID和Secret
获取企业ID
获取应用ID和Secret
通过shell 脚本实现监控预警
该shell 脚本实现的功能: 检测端口是否在监听状态,不在则进行微信预警。
#!/bin/bash
###############
#$Auth= djx
#$Function= monitoring service
#Date= 2018-12-26
###############
# 日志储存文件
log_file='/var/log/ljf_status.log'
# 主机名
hostname=`hostname`
# 监听的端口数组
check_port=("3306" "3329" "4567")
# 数组长度
num=${#check_port[*]}
#  报警消息
msg=""
echo "--------------------------$(date +%F_%T)-----------------" >>$log_file

for i in  `seq 0 $num`
do
    netstat -tnlp|grep "${check_port[${i}]}"  >>/dev/null
    if [ $? -ne 0 ]
    then
        msg="\\n${hostname}:The Port ${check_port[${i}]} is down \\n"${msg}
        echo "$(date +%F_%T)  ${hostname}:The Port ${check_port[${i}]} is down">>$log_file
    fi
done
if [ "${msg}" !=  "" ]
then
    CropID=""   #填入企业ID值
    Secret=""   #填入认证密码
    GURL="https://qyapi.weixin.qq.com/cgi-bin/gettoken?corpid=$CropID&corpsecret=$Secret"
    # 获取token
    Gtoken=$(/usr/bin/curl -s -G $GURL | awk -F\" '{print $10}')
    PURL="https://qyapi.weixin.qq.com/cgi-bin/message/send?access_token=$Gtoken"
    body='{
    "touser": "@all",
    "msgtype": "text",
    "agentid": "1000002", #要更改为我们的应用ID
    "text":{
          "content":"
    故障:'$msg' "
             },
    "safe":0
    }'
    /usr/bin/curl --data-ascii "$body" $PURL >>$log_file 2>&1
fi
通过python 脚本实现监控预警
由于centos7和centos6 默认安装的都是python2版本,所以下面的脚本是基于python2写的,这样我们就可以直接拿到我们的服务器上使用了。
# -*- coding: utf-8 -*-
# @Time    : 2018/12/27 0021 11:58
# @Author  : djx
# @Email   : [email protected]
# @File    : 微信预警脚本.py
# @Software: PyCharm
import os
import time
import urllib2
import json


# 企业号ID
wxid = ""
# 应用ID
depid = ""
# 认证密码
secret = ""
# 获取主机的名称
hostname = os.popen("hostname").read()
# 日志储存文件
log_file = '/var/log/ljf_status.log'
# 监听的端口列表
check_port = (
    "8500",
    "3306")
# 发送的消息
msg = ""
# 获取当前的时间
date_time = time.strftime("%Y-%m-%d %X")
# 检查端口是否在监听
for i in check_port:
    shell = "netstat -nutlp |grep \"" + i + "\""
    recv = os.popen(shell).read()
    if recv == "":
        msg = msg  + hostname + ": The Port " + i + "is down \n"
# 预警判断
if msg != "":
    url = "https://qyapi.weixin.qq.com/cgi-bin/gettoken?corpid=" + \
        wxid + "&corpsecret=" + secret
    request = urllib2.Request(url)
    response = urllib2.urlopen(request)
    recv_info = response.read()
    recv_info = eval(recv_info)
    wx_token = recv_info['access_token']
    msg_url = "https://qyapi.weixin.qq.com/cgi-bin/message/send?access_token=" + wx_token
    send_msg = {
        "touser": "@all",
        "msgtype": "text",
        "agentid": depid,
        "text": {"content": msg},
        "safe": 0
    }
    send_msg_json = json.dumps(send_msg)
    request_post = urllib2.urlopen(msg_url,send_msg_json)
    recv_msg = request_post.read()
    with open(log_file,mode='a') as f:
        f.write(date_time)
        f.write("\n")
        f.write(msg)
        f.write(recv_msg)
        f.write("\n")
上面的脚本也可以应用在zabbix或者是Open-falcon。
最后送上一句觉得不错的话 : 立志要如山,行道要如水,如山能坚定,如水能曲达。