原文出自 https://www.cnblogs.com/penghuwan/p/6941616.html
用最简单的方式搭建一个服务器
npm install webpack-dev-server --save-dev,
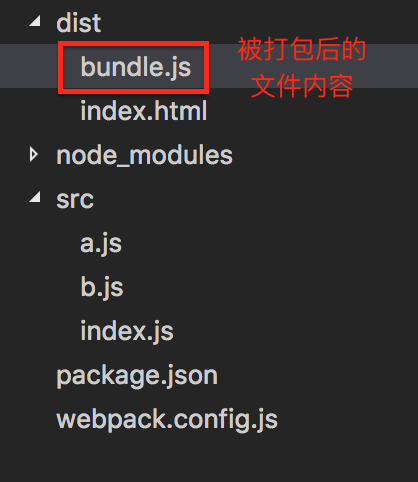
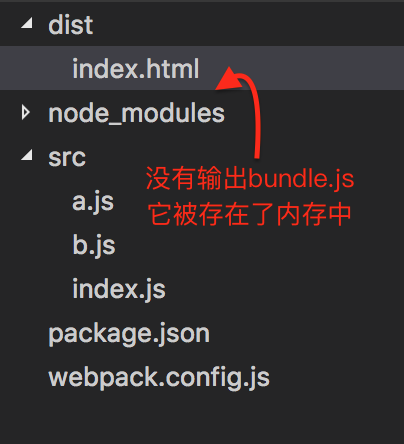
默认是localhost:8080端口,如果bundle.js找不到?
var webpack = require('webpack')
var path =require('path')
module.exports = {
  entry:{
     app:path.join(__dirname,'src','index.js')
  },
  output:{
     filename:'bundle.js',
     path:path.join(__dirname,'dist')
  },

  devServer: {
       contentBase: path.join(__dirname, "dist")

   }
}
详解webpack-dev-server的配置属性
contentBase:它指定了服务器资源的根目录,如果不写入contentBase的值,那么contentBase默认是项目的目录。
当我们在终端运行"node_modules/.bin/webpack-dev-server后
2. port配置属性指定了开启服务的端口号:
devServer: {
   port:7000
}
3.host设置的是服务器的主机号:
devServer: {
   contentBase: path.join(__dirname, "dist"),
   port:7000,
   host:'0.0.0.0'
}
此时访问 0.0.0.0:7000就可以访问项目了
4.historyApiFallback,这个配置属性是用来应对返回404页面时定向到特定页面用的
增加一个访问错误的404页面
historyApiFallback:{
rewrites:[
{from:/./,to:'/404.html'}
]
}
5.overlay 这个配置属性用来在编译出错的时候,在浏览器页面上显示错误,默认是false,可设置为true
6.stats 这个配置属性用来控制编译的时候shell上的输出内容 , stats: "errors-only"表示只打印错误:
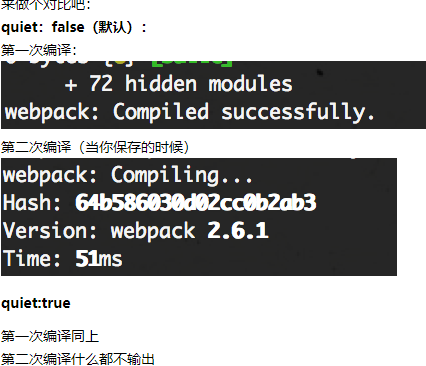
7.quiet 当这个配置属性和devServer.stats属于同一类型的配置属性 ,当它被设置为true的时候,控制台只输出第一次编译的信息,当你保存后再次编译的时候不会输出任何内容,包括错误和警告
8.compress 这是一个布尔型的值,当它被设置为true的时候对所有的服务器资源采用gzip压缩
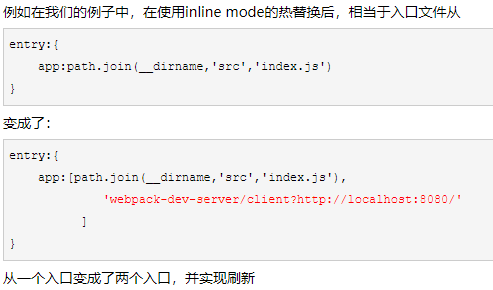
inline mode模式的刷新
var webpack = require('webpack')
module.exports = {
/*省略entry ,output等内容*/
plugins:[
new webpack.HotModuleReplacementPlugin()
],
devServer: {
inline:true,
hot:true
}
}