目录
使用IDEA生成数据库对应实体类和hibernate的映射文件
创建、运行环境
- IntelliJ IDEA 2018.1.5 x64
- mysql-5.7.19-winx64
- apache-maven-3.5.4
- project SDK: 1.8(java version "1.8.0_141")
- apache-tomcat-8.0.53
创建web工程
1. 打开工具

2. 在上图使用Create New Project创建你一个工程,然后选择Maven,并将Create from archetype打上对勾,然后选择maven-achetype-webapp,如下图所示,然后点击Next

3. 输入GroupId和ArtifactId名称,然后Next,
补充知识:
- GroupID 是项目组织唯一的标识符,实际对应JAVA的包的结构,是main目录里java的目录结构。
- ArtifactID是项目的唯一的标识符,实际对应项目的名称,就是项目根目录的名称。

4. 连接maven;选择自己本地安装的maven全局settings.xml;选择本地资源仓库(首次应用需要自己手动创建仓库),然后next

5. 出现如下图所示,保持默认,直接finish。如果你是第一次使用maven创建web工程,出现这一步之前可能还会有有一步骤,很简单的,看提示走。

6. 点击Finish后Maven就会创建相应的目录,并且在右下角弹出一个框,然后选择Enable Auto-Import,注意如果不选这个,当向pom.xml添加jar包时不会自动下载和更新,要手动才行,所以为了方便,不出错,一定要选上,如下图所示:

7. 创建好之后的初始项目及目录如下图所示:

8. 设置项目目录架构
创建Java编译的文件夹,创建一个java目录后,可能还不能创建包,需要将java设置为Sources Root目录。

创建resources资源文件夹,要设置成Resources Root属性才会自动去resources目录寻找配置文件。

创建测试test文件夹

静态资源文件夹目录,其他文件目录后面再继续完善

导架包配配置文件搭框架
1. 开始向pom.xml添加jar包依赖,首先要知道加入什么包,然后打开Maven仓库搜索,Maven的仓库地址为:http://mvnrepository.com/ 搜索org.hibernate,就会列出相应的信息。导入架包一定要平衡架包版本,不然会有不兼容问题出现。

依次导入依赖包到工程的pom.xml文件,自动下载架包。
<?xml version="1.0" encoding="UTF-8"?>

<project xmlns="http://maven.apache.org/POM/4.0.0"
         xmlns:xsi="http://www.w3.org/2001/XMLSchema-instance"
         xsi:schemaLocation="http://maven.apache.org/POM/4.0.0
         http://maven.apache.org/xsd/maven-4.0.0.xsd">
  <modelVersion>4.0.0</modelVersion>

  <groupId>org.kgc</groupId>
  <artifactId>kgcnewsSSH</artifactId>
  <version>1.0-SNAPSHOT</version>
  <packaging>war</packaging>

  <name>kgcnewsSSH Maven Webapp</name>
  <!-- FIXME change it to the project's website -->
  <url>http://www.example.com</url>

  <properties>
    <project.build.sourceEncoding>UTF-8</project.build.sourceEncoding>
    <maven.compiler.source>1.7</maven.compiler.source>
    <maven.compiler.target>1.7</maven.compiler.target>
  </properties>

  <dependencies>
    <dependency>
      <groupId>junit</groupId>
      <artifactId>junit</artifactId>
      <version>4.11</version>
      <scope>test</scope>
    </dependency>
      <!-- 添加Hibernate依赖 -->
      <!-- https://mvnrepository.com/artifact/org.hibernate/hibernate-core -->
      <dependency>
          <groupId>org.hibernate</groupId>
          <artifactId>hibernate-core</artifactId>
          <version>5.3.7.Final</version>
      </dependency>
      <!-- 添加struts2 依赖 -->
      <!-- https://mvnrepository.com/artifact/org.apache.struts/struts2-core -->
      <dependency>
          <groupId>org.apache.struts</groupId>
          <artifactId>struts2-core</artifactId>
          <version>2.5.14.1</version>
      </dependency>
      <!-- struts2 spring  整合的核心包-->
      <!-- https://mvnrepository.com/artifact/org.apache.struts/struts2-spring-plugin -->
      <dependency>
          <groupId>org.apache.struts</groupId>
          <artifactId>struts2-spring-plugin</artifactId>
          <version>2.5.14.1</version>
      </dependency>
      <!-- 导入spring依赖 -->
      <!-- https://mvnrepository.com/artifact/org.springframework/spring-core -->
      <dependency>
          <groupId>org.springframework</groupId>
          <artifactId>spring-core</artifactId>
          <version>5.0.8.RELEASE</version>
      </dependency>
      <!-- https://mvnrepository.com/artifact/org.springframework/spring-context -->
      <dependency>
          <groupId>org.springframework</groupId>
          <artifactId>spring-context</artifactId>
          <version>5.0.8.RELEASE</version>
      </dependency>
      <!-- https://mvnrepository.com/artifact/org.springframework/spring-jdbc -->
      <dependency>
          <groupId>org.springframework</groupId>
          <artifactId>spring-jdbc</artifactId>
          <version>5.0.8.RELEASE</version>
      </dependency>
      <!-- https://mvnrepository.com/artifact/org.springframework/spring-beans -->
      <dependency>
          <groupId>org.springframework</groupId>
          <artifactId>spring-beans</artifactId>
          <version>5.0.8.RELEASE</version>
      </dependency>
      <!-- https://mvnrepository.com/artifact/org.springframework/spring-web -->
      <dependency>
          <groupId>org.springframework</groupId>
          <artifactId>spring-web</artifactId>
          <version>5.0.8.RELEASE</version>
      </dependency>
      <!-- https://mvnrepository.com/artifact/org.springframework/spring-expression -->
      <dependency>
          <groupId>org.springframework</groupId>
          <artifactId>spring-expression</artifactId>
          <version>5.0.8.RELEASE</version>
      </dependency>
      <!-- https://mvnrepository.com/artifact/org.springframework/spring-orm -->
      <dependency>
          <groupId>org.springframework</groupId>
          <artifactId>spring-orm</artifactId>
          <version>5.0.8.RELEASE</version>
      </dependency>
      <!-- 动态代理 cglib就是封装了asm,简化了asm的操作,实现了在运行期动态生成新的class。-->
      <!-- https://mvnrepository.com/artifact/cglib/cglib -->
      <dependency>
          <groupId>cglib</groupId>
          <artifactId>cglib</artifactId>
          <version>3.2.6</version>
      </dependency>
      <!--spring aop包  注释方式使用事务管理 可以不引用-->
      <!-- https://mvnrepository.com/artifact/org.aspectj/aspectjrt -->
      <dependency>
          <groupId>org.aspectj</groupId>
          <artifactId>aspectjrt</artifactId>
          <version>1.9.1</version>
      </dependency>
      <!-- https://mvnrepository.com/artifact/org.aspectj/aspectjweaver -->
      <dependency>
          <groupId>org.aspectj</groupId>
          <artifactId>aspectjweaver</artifactId>
          <version>1.9.1</version>
      </dependency>
    <!-- 添加对数据库的支持 -->
    <!-- https://mvnrepository.com/artifact/mysql/mysql-connector-java -->
    <dependency>
      <groupId>mysql</groupId>
      <artifactId>mysql-connector-java</artifactId>
      <version>8.0.11</version>
    </dependency>
    <!-- https://mvnrepository.com/artifact/com.mchange/c3p0 -->
    <dependency>
      <groupId>com.mchange</groupId>
      <artifactId>c3p0</artifactId>
      <version>0.9.5.1</version>
    </dependency>
  </dependencies>

  <build>
    <finalName>kgcnewsSSH</finalName>
    <pluginManagement><!-- lock down plugins versions to avoid using Maven defaults (may be moved to parent pom) -->
      <plugins>
        <plugin>
          <artifactId>maven-clean-plugin</artifactId>
          <version>3.0.0</version>
        </plugin>
        <!-- see http://maven.apache.org/ref/current/maven-core/default-bindings.html#Plugin_bindings_for_war_packaging -->
        <plugin>
          <artifactId>maven-resources-plugin</artifactId>
          <version>3.0.2</version>
        </plugin>
        <plugin>
          <artifactId>maven-compiler-plugin</artifactId>
          <version>3.7.0</version>
        </plugin>
        <plugin>
          <artifactId>maven-surefire-plugin</artifactId>
          <version>2.20.1</version>
        </plugin>
        <plugin>
          <artifactId>maven-war-plugin</artifactId>
          <version>3.2.0</version>
        </plugin>
        <plugin>
          <artifactId>maven-install-plugin</artifactId>
          <version>2.5.2</version>
        </plugin>
        <plugin>
          <artifactId>maven-deploy-plugin</artifactId>
          <version>2.8.2</version>
        </plugin>
      </plugins>
    </pluginManagement>
  </build>
</project>
2. 在resources资源文件夹添加database.properties配置文件
mysql.driverClassName=com.mysql.jdbc.Driver
#在和mysql传递数据的过程中,使用unicode编码格式,并且字符集设置为utf-8
mysql.url=jdbc:mysql://localhost:3306/kgcnews?useUnicode=true&characterEncoding=utf-8&useSSL=false&serverTimezone=GMT
mysql.username=root
mysql.password=123456
3. 创建spring的配置文件,创建方法如下:

4. 输入spring配置文件的名称:applicationContext.xml,创建好了applicationContext.xml文件后的内容如下图所示:

5. 向applicationContext.xml添加配置信息(idea工具可以自动生成<beans>中的表头)如果是其他工具,则需要手动添加。
<?xml version="1.0" encoding="UTF-8"?>
<beans xmlns="http://www.springframework.org/schema/beans"
       xmlns:xsi="http://www.w3.org/2001/XMLSchema-instance"
       xmlns:context="http://www.springframework.org/schema/context"
       xmlns:tx="http://www.springframework.org/schema/tx"
       xsi:schemaLocation="http://www.springframework.org/schema/beans
       http://www.springframework.org/schema/beans/spring-beans.xsd
       http://www.springframework.org/schema/context
       http://www.springframework.org/schema/context/spring-context.xsd
       http://www.springframework.org/schema/tx
       http://www.springframework.org/schema/tx/spring-tx.xsd">

    <context:component-scan base-package="org.news.action"></context:component-scan>
    <context:component-scan base-package="org.news.service.**"></context:component-scan>
    <context:component-scan base-package="org.news.dao.**"></context:component-scan>

    <context:property-placeholder location = "classpath:database.properties" />
    <!-- 设置数据源连接字符串 -->
    <bean id="dataSource" class="com.mchange.v2.c3p0.ComboPooledDataSource">
        <property name="driverClass" value="${mysql.driverClassName}"></property>
        <property name="jdbcUrl" value="${mysql.url}"></property>
        <property name="user" value="${mysql.username}"></property>
        <property name="password" value="${mysql.password}"></property>
        <!-- 设置数据库连接池的最大连接数 -->
        <property name="maxPoolSize">
            <value>50</value>
        </property>
        <!-- 设置数据库连接池的最小连接数 -->
        <property name="minPoolSize">
            <value>5</value>
        </property>
        <!-- 设置数据库连接池的初始化连接数 -->
        <property name="initialPoolSize">
            <value>5</value>
        </property>
        <!-- 设置数据库连接池的连接最大空闲时间 -->
        <property name="maxIdleTime">
            <value>20</value>
        </property>
        <!-- c3p0缓存Statement的数量数 -->
        <property name="maxStatements">
            <value>50</value>
        </property>
        <!-- 当连接池里面的连接用完的时候,C3P0一下获取新的连接数 -->
        <property name="acquireIncrement">
            <value>20</value>
        </property>
    </bean>
    <!-- hibernate 管理-->
    <bean id="sessionFactory" class="org.springframework.orm.hibernate5.LocalSessionFactoryBean">
        <!-- 引用上面设置的数据源 -->
        <property name="dataSource">
            <ref bean="dataSource"/>
        </property>

        <property name="hibernateProperties">
            <props>
                <prop key="hibernate.dialect">org.hibernate.dialect.MySQLDialect</prop>
                <prop key="hibernate.autoReconnect">true</prop>
                <prop key="hibernate.connection.autocommit">true</prop>
                <prop key="hibernate.hbm2ddl.auto">update</prop>
                <prop key="hibernate.show_sql">true</prop>
                <prop key="hibernate.format_sql">true</prop>
                <!-- 解决session关闭问题 -->
                <prop key="hibernate.enable_lazy_load_no_trans">true</prop>
                <!-- spring 和 hibernate 整合的时候默认就是使用线程的,下面这一行不用写,写了反而要报错,此外 sessionFaction,不能使用openSession
                 既不能保存数据到数据库,还不能实现事务功能
                 -->
                <!--<prop key="current_session_context_class">thread</prop>-->
                <prop key="hibernate.max_fetch_depth">3</prop>
                <prop key="hibernate.connection.url" >jdbc:mysql://localhost:3306/kgcnews</prop>
                <prop key="hibernate.connection.driver_class">com.mysql.jdbc.Driver</prop>
            </props>
        </property>

        <!-- 扫描包的方式加载注解类 -->
        <property name="packagesToScan">
            <list>
                <value>org.news.pojo</value>
            </list>
        </property>
        <property name="mappingLocations">
            <list>
                <value>classpath:org/news/pojo/NewsCategoryEntity.hbm.xml</value>
                <value>classpath:org/news/pojo/NewsCommentEntity.hbm.xml</value>
                <value>classpath:org/news/pojo/NewsDetailEntity.hbm.xml</value>
                <value>classpath:org/news/pojo/NewsUserEntity.hbm.xml</value>
            </list>
        </property>

    </bean>
    <!-- 用注解来实现事物管理 -->
    <bean id="txManager" class="org.springframework.orm.hibernate5.HibernateTransactionManager">
        <property name="sessionFactory" ref="sessionFactory"/>
    </bean>
    <tx:annotation-driven transaction-manager="txManager"/>

</beans>
以下截图是最初的样式,在后面会自动生成**.hb.xml,如上面的配置文件。此配置文件有需要修改的地方如下图所示,在后面建好后再检查增加

6. 新建Struts的配置文件struts.xml,如下图所示:

7. 输入struts2 配置文件的名称:struts.xml,创建好了struts.xml文件后的内容如下图所示:

8. 向struts.xml配置文件添加配置信息
<?xml version="1.0" encoding="UTF-8"?>

<!DOCTYPE struts PUBLIC
        "-//Apache Software Foundation//DTD Struts Configuration 2.5//EN"
        "http://struts.apache.org/dtds/struts-2.5.dtd">

<struts>
    <!-- 修改常量管理struts 中的action的工程,这个常量的使用,必须引入 spring和struts的整合包,不然spring无法管理struts2 Action 中的实体类-->
    <constant name="struts.objectFactory" value="spring" />

    <package name="newsUser" extends="struts-default" namespace="/">
        <!-- aa 是url地址-->
        <action name="aa" class="org.news.action.NewsUserAction">
            <result name="success">/WEB-INF/test.jsp</result>
        </action>
    </package>
</struts>
9. 配置web.xml文件
<!DOCTYPE web-app PUBLIC
 "-//Sun Microsystems, Inc.//DTD Web Application 2.3//EN"
 "http://java.sun.com/dtd/web-app_2_3.dtd" >

<web-app>
  <display-name>Archetype Created Web Application</display-name>
  <context-param>
    <param-name>contextConfigLocation</param-name>
    <param-value>classpath:applicationContext.xml</param-value>
  </context-param>

  <filter>
    <filter-name>struts2</filter-name>
    <filter-class>org.apache.struts2.dispatcher.filter.StrutsPrepareAndExecuteFilter</filter-class>
  </filter>

  <filter-mapping>
    <filter-name>struts2</filter-name>
    <url-pattern>/*</url-pattern>
  </filter-mapping>

  <listener>
    <listener-class>org.springframework.web.context.ContextLoaderListener</listener-class>
  </listener>

</web-app>
使用IDEA生成数据库对应实体类和hibernate的映射文件
- 开始在Idea中连接数据库,首先找到右边侧边栏中的Database,然后点击+号,选择DataSource,最后选择Mysql,(注意:导入的数据库必须要设置表的主键)如下图所示:

- 输入数据库名,user和密码,也可以点击Test Connection测试连接情况,如下图所示:

- 如果Test Connection不能选择,说明没有装mysql驱动,可点击Download进行下载,如下图所示:

- 测试通过即可连接应用

- 连接成功后数据库将直接引入idea中,如下图所示:

- 查看idea左下角侧边栏是否有Persistence,如下图所示没有。

- 打开File->Project Structure

- 检查Modules中的spring,查看Project Structure中是否有相应的配置,如果没有则需要添加sessionFactory,如果在导入时还是没有要重新弄查看一下applicationContext.xml文件是否配置正确,如下图所示:


- 然后选择Modules,依次选择+号的Hibernate,如下图所示:


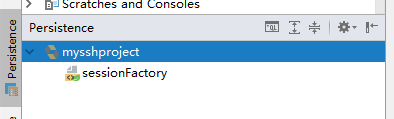
- 此时Persistence就会出现了,点击之后可以看到在applicationContext.xml添加sessionFactory出现了,如果没有出现,说明配置错误,如下图所示:
- 右键单击选择Generate Persistence Mapping->ByDatabase Schema,如下图所示:

- 选择连接的数据库,输入包的位置,并依次选择相应的信息,如下图所示:


- 选择之后,applicationContext.xml配置文件新增的配置如下:
<!-- 扫描包的方式加载注解类 -->
        <property name="packagesToScan">
            <list>
                <value>org.news.pojo</value>
            </list>
        </property>
        <property name="mappingLocations">
            <list>
                <value>classpath:org/news/pojo/NewsCategoryEntity.hbm.xml</value>
                <value>classpath:org/news/pojo/NewsCommentEntity.hbm.xml</value>
                <value>classpath:org/news/pojo/NewsDetailEntity.hbm.xml</value>
                <value>classpath:org/news/pojo/NewsUserEntity.hbm.xml</value>
            </list>
        </property>
- 给一个pojo示例:
- NewsUserEntity.java
package org.news.pojo;

import javax.persistence.*;

@Entity
@Table(name = "news_user", schema = "kgcnews", catalog = "")
public class NewsUserEntity {
    private long id;
    private String userName;
    private String password;
    private String email;
    private Integer userType;

    @Id
    @Column(name = "id")
    public long getId() {
        return id;
    }

    public void setId(long id) {
        this.id = id;
    }

    @Basic
    @Column(name = "userName")
    public String getUserName() {
        return userName;
    }

    public void setUserName(String userName) {
        this.userName = userName;
    }

    @Basic
    @Column(name = "password")
    public String getPassword() {
        return password;
    }

    public void setPassword(String password) {
        this.password = password;
    }

    @Basic
    @Column(name = "email")
    public String getEmail() {
        return email;
    }

    public void setEmail(String email) {
        this.email = email;
    }

    @Basic
    @Column(name = "userType")
    public Integer getUserType() {
        return userType;
    }

    public void setUserType(Integer userType) {
        this.userType = userType;
    }

    @Override
    public boolean equals(Object o) {
        if (this == o) return true;
        if (o == null || getClass() != o.getClass()) return false;

        NewsUserEntity that = (NewsUserEntity) o;

        if (id != that.id) return false;
        if (userName != null ? !userName.equals(that.userName) : that.userName != null) return false;
        if (password != null ? !password.equals(that.password) : that.password != null) return false;
        if (email != null ? !email.equals(that.email) : that.email != null) return false;
        if (userType != null ? !userType.equals(that.userType) : that.userType != null) return false;

        return true;
    }

    @Override
    public int hashCode() {
        int result = (int) (id ^ (id >>> 32));
        result = 31 * result + (userName != null ? userName.hashCode() : 0);
        result = 31 * result + (password != null ? password.hashCode() : 0);
        result = 31 * result + (email != null ? email.hashCode() : 0);
        result = 31 * result + (userType != null ? userType.hashCode() : 0);
        return result;
    }
}
- NewsUserEntity.hbm.xml
<?xml version='1.0' encoding='utf-8'?>
<!DOCTYPE hibernate-mapping PUBLIC
    "-//Hibernate/Hibernate Mapping DTD 3.0//EN"
    "http://www.hibernate.org/dtd/hibernate-mapping-3.0.dtd">
<hibernate-mapping>

    <class name="org.news.pojo.NewsUserEntity" table="news_user" schema="kgcnews">
        <id name="id" column="id"/>
        <property name="userName" column="userName"/>
        <property name="password" column="password"/>
        <property name="email" column="email"/>
        <property name="userType" column="userType"/>
    </class>
</hibernate-mapping>
创建类运行
献给看一下结构目录:

创建dao包和NewsUserDao.java接口
package org.news.dao;

import org.news.pojo.NewsUserEntity;

public interface NewsUserDao {
    public NewsUserEntity getUser(Long id);
}
创建dao的impl实现类包和实现类NewsUserDaoImpl.java
package org.news.dao.impl;

import org.hibernate.Session;
import org.hibernate.SessionFactory;
import org.news.dao.NewsUserDao;
import org.news.pojo.NewsUserEntity;
import org.springframework.stereotype.Repository;
import org.springframework.transaction.annotation.Transactional;

import javax.annotation.Resource;

@Repository("newsUserDao")
@Transactional
public class NewsUserDaoImpl implements NewsUserDao {
    @Resource(name = "sessionFactory")
    private SessionFactory sessionFactory;

    public NewsUserEntity getUser(Long id) {
        Session session=sessionFactory.getCurrentSession();
        //当getCurrentSession所在的方法,或者调用该方法的方法绑定了事务之后,session就与当前线程绑定了,也就能通过currentSession来获取,否则就不能。
        NewsUserEntity user=session.get(NewsUserEntity.class,id);
        return user;
    }
}
创建service包和接口NewsUserService.java
package org.news.service;

import org.news.pojo.NewsUserEntity;

public interface NewsUserService {
    public NewsUserEntity getUser(Long id);
}
创建实现类NewsUserServiceImpl.java
package org.news.service.impl;

import org.news.dao.NewsUserDao;
import org.news.pojo.NewsUserEntity;
import org.news.service.NewsUserService;
import org.springframework.stereotype.Service;
import org.springframework.transaction.annotation.Transactional;

import javax.annotation.Resource;

@Service("newsUserService")
public class NewsUserServiceImpl implements NewsUserService {
    //依赖dao
    @Resource
    private NewsUserDao newsUserDao;

    //注入事务管理
    @Transactional(rollbackFor = {Exception.class,RuntimeException.class} )
    public NewsUserEntity getUser(Long id) {
        return newsUserDao.getUser(id);
    }

}
创建action包和action类NewsUserAction.java
注意:我这里是继承ActionSupport类,所以,写方法,需要继承方法public String execute()
package org.news.action;

import com.opensymphony.xwork2.ActionSupport;
import org.news.pojo.NewsUserEntity;
import org.news.service.NewsUserService;
import org.springframework.beans.factory.annotation.Autowired;
import org.springframework.context.annotation.Scope;
import org.springframework.stereotype.Controller;

@Controller("newsUserAction")
@Scope("prototype")
public class NewsUserAction extends ActionSupport {
    //封装对象
    private NewsUserEntity newsUser;

    public NewsUserEntity getNewsUser() {
        return newsUser;
    }

    public void setNewsUser(NewsUserEntity newsUser) {
        this.newsUser = newsUser;
    }

    //依赖service
    @Autowired
    private NewsUserService newsUserService;

    //重写ActionSupport类的方法execute()
    public String execute(){
        newsUser = newsUserService.getUser(1l);
        System.out.println(newsUser);
        return SUCCESS;
    }
}
index.jsp
<%@ page contentType="text/html;charset=UTF-8" language="java" %>
<%@ taglib prefix="s" uri="/struts-tags" %>
<html>
<head>
    <title>SSH测试</title>
</head>
<body>

<h1>welcome to page</h1>
</body>
</html>
测试页面test.jsp
<%--
  Created by IntelliJ IDEA.
  User: Lenovo
  Date: 2018/12/6
  Time: 15:23
  To change this template use File | Settings | File Templates.
--%>
<%@ page contentType="text/html;charset=UTF-8" language="java" %>
<%@ taglib prefix="s" uri="/struts-tags" %>

<html>
<head>
    <title>测试</title>
</head>
<body>
用户名:<s:property value="newsUser.userName"></s:property>
用户密码:<s:property value="newsUser.password"></s:property>
邮箱:<s:property value="newsUser.email"></s:property>
</body>
</html>
部署服务器Tomcat运行


运行检查调bug
运行的首页:
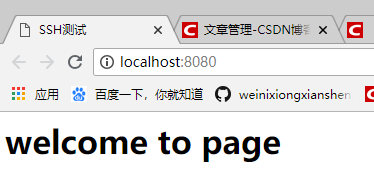
输入url:http://localhost:8080/aa 结果如下图:


前端已经取到值,说明成功。我这里没有出现错误,就没有总结了,不过看到两个网址上面有总结,可以学习下。这里只是简单的SSH配置框架,往后面写工程的时候再根据需求增加配置。
数据库我这里就不给了,但是要注意,数据库一定要设置主键。
参考:http://www.mamicode.com/info-detail-2128475.html
我这里的配置跟他的基本是一致的,因为这是我跟着他配的第一个SSH框架,另外需要注意的是,随着时间的推移,我们需要新的依赖架包,为了兼容,需要考虑统一的架包版本。