结合spring框架来实现CXF发布SOAP协议的服务,步骤基本相同,所不同的是的多了一些配置项,步骤如下
1. 服务端
第一步:创建web项目(引入jar包)
第二步:创建SEI接口
import javax.jws.WebService;
import javax.xml.ws.BindingType;
import javax.xml.ws.soap.SOAPBinding;

@WebService
@BindingType(SOAPBinding.SOAP12HTTP_BINDING)
public interface WeatherInterface {

    public String QueryWeather(String cityName);
}
第三步:创建SEI实现类
public class WeatherInterfaceImpl implements WeatherInterface {

    @Override
    public String QueryWeather(String cityName) {
        System.out.println("from client..." + cityName);
        if ("北京".equals(cityName)) {
            return "晴转多云";
        } else {
            return "雨转小雪";
        }
    }
}
第四步:配置spring配置文件,applicationContext.xml,用<jaxws:server>标签发布服务,设置1.服务地址;2.设置服务接口;3.设置服务实现类
<?xml version="1.0" encoding="UTF-8"?>
<beans xmlns="http://www.springframework.org/schema/beans"
    xmlns:xsi="http://www.w3.org/2001/XMLSchema-instance" xmlns:jaxws="http://cxf.apache.org/jaxws"
    xmlns:jaxrs="http://cxf.apache.org/jaxrs" xmlns:cxf="http://cxf.apache.org/core"
    xsi:schemaLocation="http://www.springframework.org/schema/beans
                            http://www.springframework.org/schema/beans/spring-beans.xsd
                            http://cxf.apache.org/jaxrs http://cxf.apache.org/schemas/jaxrs.xsd
                            http://cxf.apache.org/jaxws http://cxf.apache.org/schemas/jaxws.xsd
                            http://cxf.apache.org/core http://cxf.apache.org/schemas/core.xsd">

    <!-- <jaxws:server发布SOAP协议的服务 ,对JaxWsServerFactoryBean类封装-->
    <jaxws:server address="/weather" serviceClass="com.zang.ws.cxf.server.WeatherInterface">
        <jaxws:serviceBean>
            <ref bean="weatherInterface"/>
        </jaxws:serviceBean>

        <!-- 配置拦截器 -->
        <jaxws:inInterceptors>
            <ref bean="inIntercepter"/>
        </jaxws:inInterceptors>
        <jaxws:outInterceptors>
            <ref bean="outIntercepter"/>
        </jaxws:outInterceptors>
    </jaxws:server>
    <!-- 配置拦截器的bean -->
    <bean name="inIntercepter" class="org.apache.cxf.interceptor.LoggingInInterceptor"/>
    <bean name="outIntercepter" class="org.apache.cxf.interceptor.LoggingOutInterceptor"/>

    <!-- 配置服务实现类 -->
    <bean name="weatherInterface" class="com.zang.ws.cxf.server.WeatherInterfaceImpl"/>
</beans>
第五步:配置web.xml,配置spring配置文件地址和加载的listener,配置CXF的servlet。
<?xml version="1.0" encoding="UTF-8"?>
<web-app xmlns:xsi="http://www.w3.org/2001/XMLSchema-instance"
    xmlns="http://xmlns.jcp.org/xml/ns/javaee"
    xsi:schemaLocation="http://xmlns.jcp.org/xml/ns/javaee http://xmlns.jcp.org/xml/ns/javaee/web-app_3_1.xsd"
    id="WebApp_ID" version="3.1">
    <display-name>ws_cxf_spring_server</display-name>

    <!-- 设置spring的环境 -->
    <context-param>
        <!--contextConfigLocation是不能修改的 -->
        <param-name>contextConfigLocation</param-name>
        <param-value>classpath:applicationContext.xml</param-value>
    </context-param>
    <listener>
        <listener-class>org.springframework.web.context.ContextLoaderListener</listener-class>
    </listener>

    <!-- 配置CXF的Servlet -->
    <servlet>
        <servlet-name>CXF</servlet-name>
        <servlet-class>org.apache.cxf.transport.servlet.CXFServlet</servlet-class>
    </servlet>
    <servlet-mapping>
        <servlet-name>CXF</servlet-name>
        <url-pattern>/ws/*</url-pattern>
    </servlet-mapping>

    <welcome-file-list>
        <welcome-file>index.jsp</welcome-file>
    </welcome-file-list>
</web-app>
第六步:部署到tomcat下,启动tomcat
第七步:测试服务,阅读使用说明书 地址: http://localhost:8089/ws_cxf_spring_server/ws/weather?wsdl
如果直接创建实现类,可以使用Endpoint标签发布服务。步骤如下
创建实现类
@WebService
public class HelloWorld {
    public String sayHello(String name){
        return "hello,"+name;
    }
}
之前通过创建SEI接口实现时,applicationContext.xml中是用<jaxws:server>标签来发布服务;而直接通过创建类来实现时,applicationContext.xml中应使用<jaxws:endpoint>标签来发布服务。
<!-- <jaxws:endpoint发布SOAP协议的服务 ,对Endpoint类封装-->
<jaxws:endpoint address="/hello" implementor="com.zang.ws.cxf.server.HelloWorld"/>
重启tomcat,访问说明书 http://localhost:8089/ws_cxf_spring_server/ws/hello?wsdl
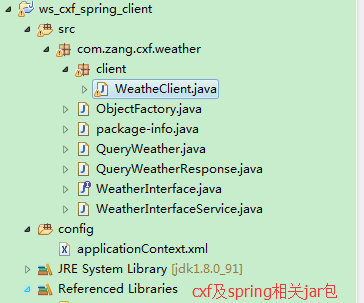
项目结构

2. 客户端
第一步:引入jar包
第二步:生成客户端代码 wsdl2java命令,详见客户端实现
第三步:配置spring配置文件,applicationContent.xml
<?xml version="1.0" encoding="UTF-8"?>
<beans xmlns="http://www.springframework.org/schema/beans"
    xmlns:xsi="http://www.w3.org/2001/XMLSchema-instance" xmlns:jaxws="http://cxf.apache.org/jaxws"
    xmlns:jaxrs="http://cxf.apache.org/jaxrs" xmlns:cxf="http://cxf.apache.org/core"
    xsi:schemaLocation="http://www.springframework.org/schema/beans
                            http://www.springframework.org/schema/beans/spring-beans.xsd
                            http://cxf.apache.org/jaxrs http://cxf.apache.org/schemas/jaxrs.xsd
                            http://cxf.apache.org/jaxws http://cxf.apache.org/schemas/jaxws.xsd
                            http://cxf.apache.org/core http://cxf.apache.org/schemas/core.xsd">

    <!-- <jaxws:client实现客户端 ,对JaxWsProxyFactoryBean类封装 -->
    <jaxws:client id="weatherClient"
        address="http://127.0.0.1:8089/ws_cxf_spring_server/ws/weather"
        serviceClass="com.zang.cxf.weather.WeatherInterface" />
</beans>
第四步:从spring上下文件获取服务实现类,调用查询方法,打印
import org.springframework.context.ApplicationContext;
import org.springframework.context.support.ClassPathXmlApplicationContext;

import com.zang.cxf.weather.WeatherInterface;

public class WeatheClient {

    public static void main(String[] args) {
        // 初始化spring的上下文
        ApplicationContext context = new ClassPathXmlApplicationContext("classpath:applicationContext.xml");
     // 调用查询方法
        WeatherInterface weatherInterface = (WeatherInterface) context.getBean("weatherClient");
        String weather = weatherInterface.queryWeather("济南");
        System.out.println(weather);
    }
}
项目结构