在上一篇博客 WebService之CXF快速入门(附Demo演示) 演示通过CXF发布SOAP服务,需要手动创建一个服务端供客户端连接。在此篇博客,我们把CXF与Spring进行整合,让Spring负责创建服务端对象。
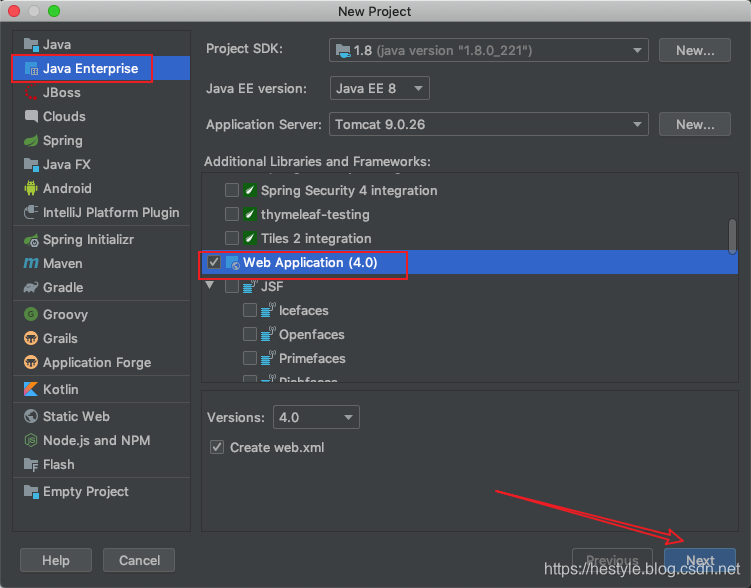
一、服务端开发
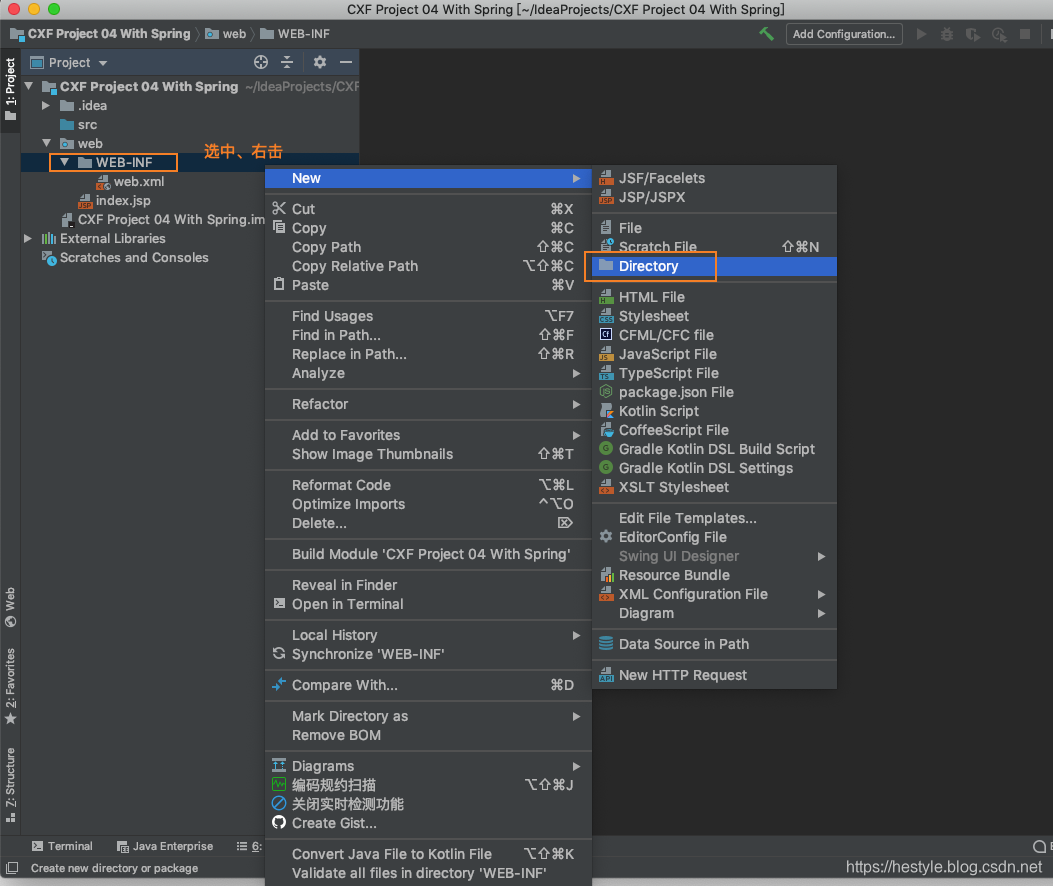
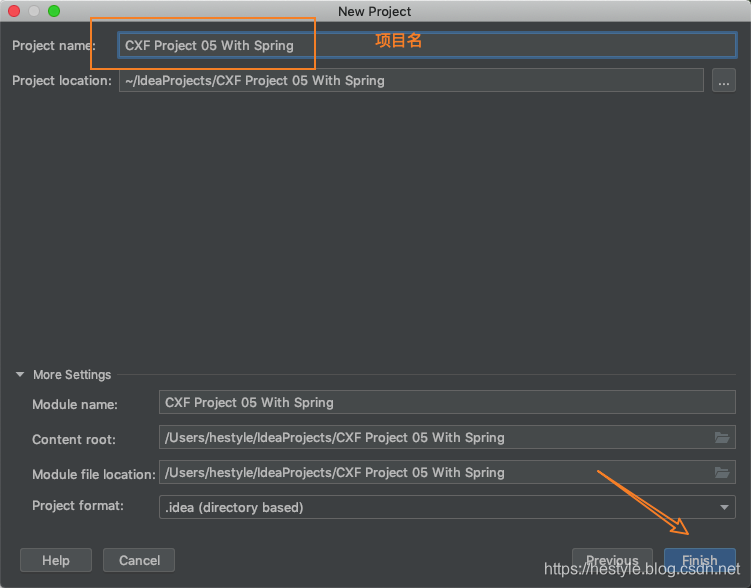
1、创建一个java web项目

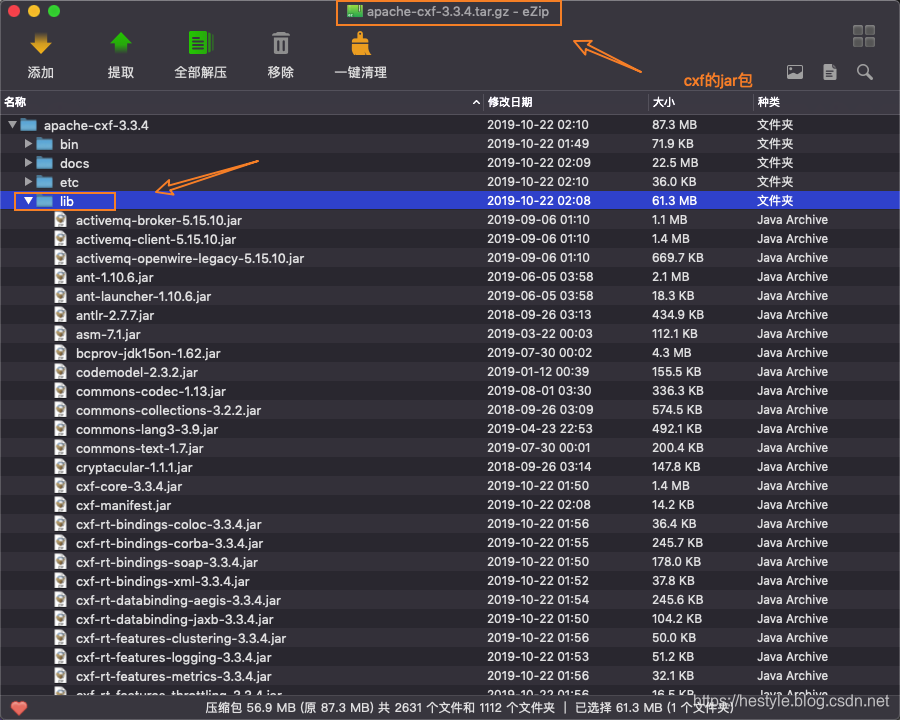
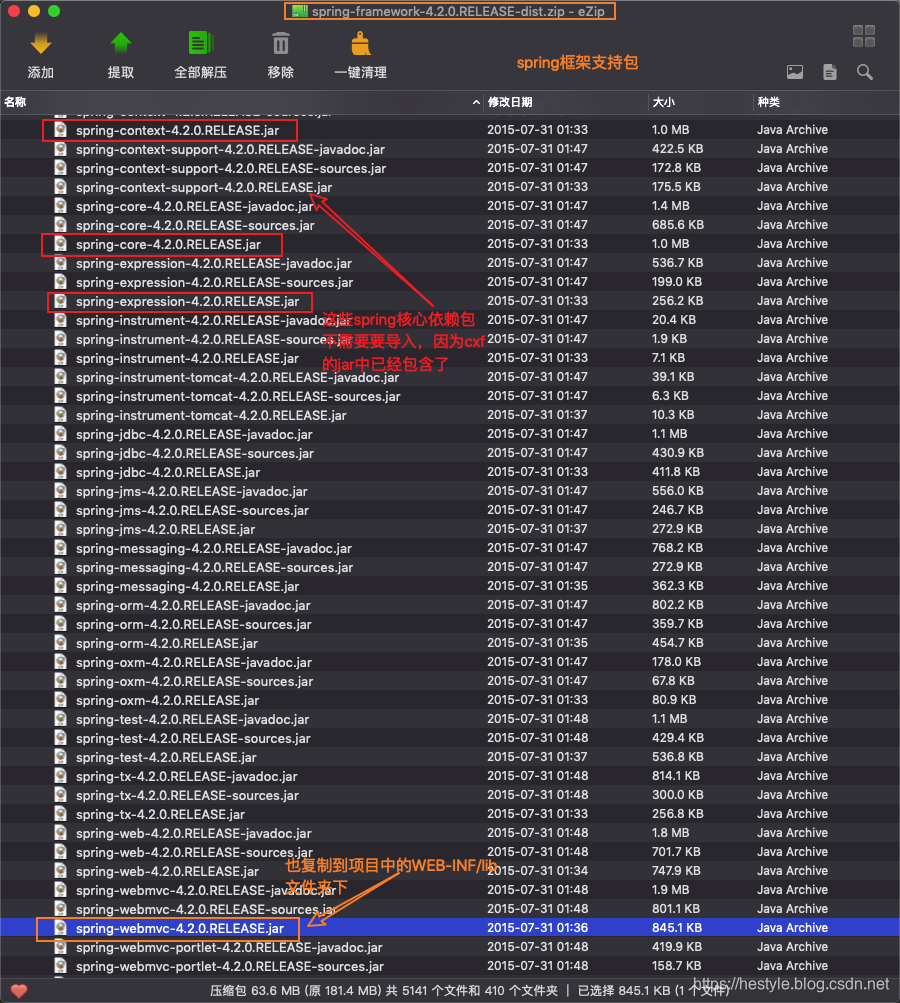
2、导入CXF、Spring的jar包到WEB-INF/lib中
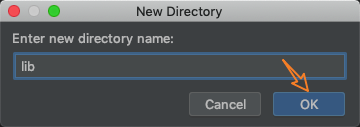
首先在WEB-INF文件夹下新建目录lib
复制CXF的jar包到项目中的WEB-INF/lib中
复制Spring框架中的springmvc包到项目中的WEB-INF/lib中
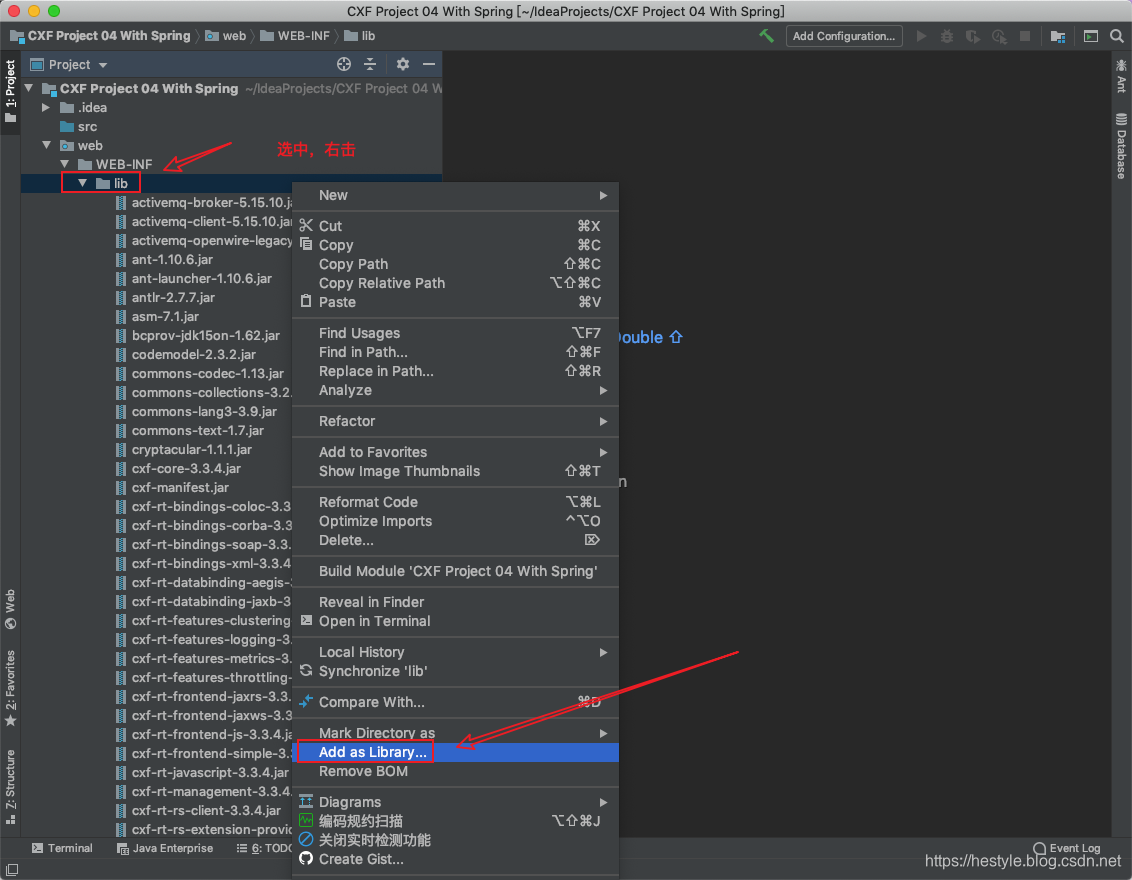
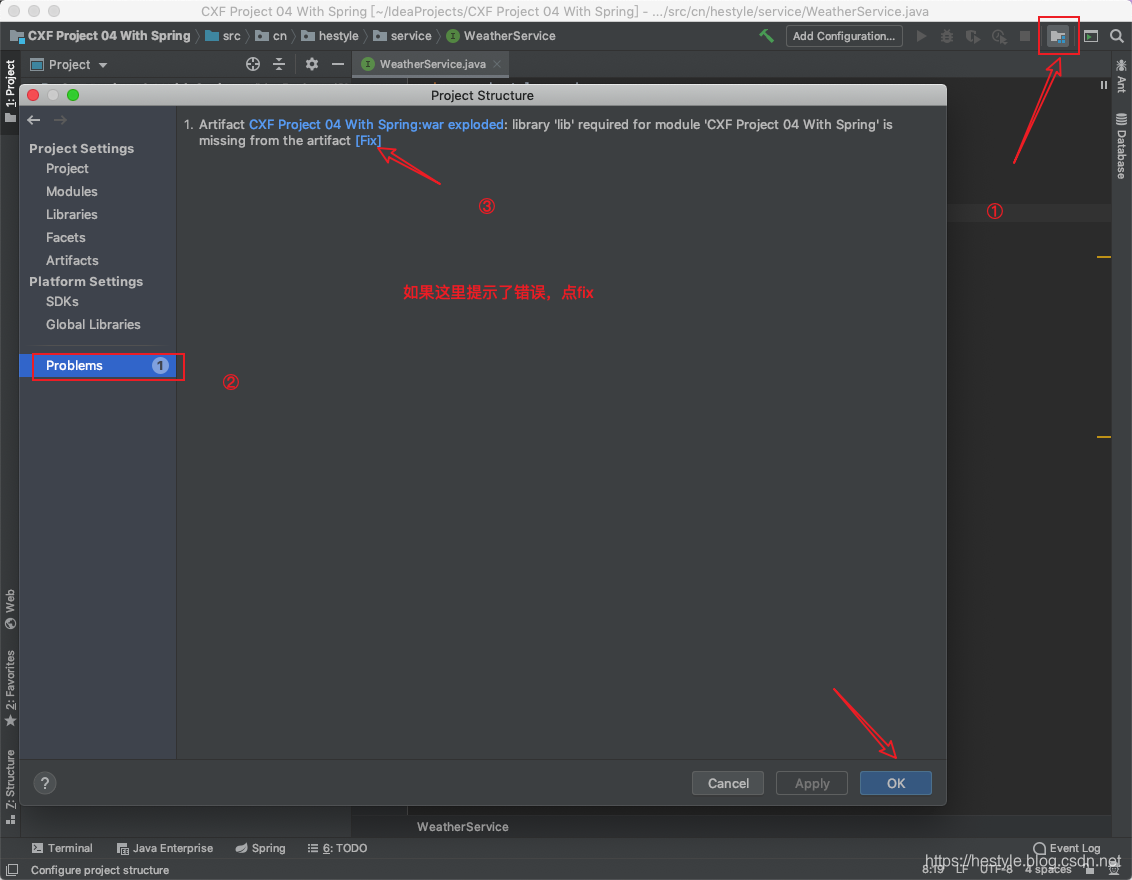
把WEB-INF/lib文件夹标记为项目Library

检查Project Structure是否有错误

3、编写服务接口、实现类
WeatherService接口
package cn.hestyle.service;

import javax.jws.WebService;

/**
 * description: WeatherService天气服务接口
 *
 * @author hestyle
 * @version 1.0
 * @className CXF Project 01 Server->WeatherService
 * @date 2019-12-08 17:20
 **/
//@WebService注解的作用是告诉CXF,这是服务接口
@WebService
public interface WeatherService {
    /**
     * 通过cityName查询天气
     * @param cityName 城市名
     * @return 该城市的天气
     */
    public String queryWeather(String cityName);
}
WeatherServiceImpl实现类
package cn.hestyle.service;

import cn.hestyle.service.WeatherService;

/**
 * description: WeatherService接口的实现类
 *
 * @author hestyle
 * @version 1.0
 * @className CXF Project 01 Server->WeatherServiceImpl
 * @date 2019-12-08 17:21
 **/
public class WeatherServiceImpl implements WeatherService {
    @Override
    public String queryWeather(String cityName) {
        String nowCityName = "武汉";
        String weatherStrOne = "晴,10~20°C,适合外出!";
        String weatherStrTwo = "阴,5~10°C,不宜外出!";
        if (cityName.equals(nowCityName)) {
            return cityName + weatherStrOne;
        } else {
            return cityName + weatherStrTwo;
        }
    }
}
4、编写spring配置文件applicationContext.xml,编写服务配置

<?xml version="1.0" encoding="UTF-8"?>
<beans xmlns="http://www.springframework.org/schema/beans"
       xmlns:xsi="http://www.w3.org/2001/XMLSchema-instance" xmlns:jaxws="http://cxf.apache.org/jaxws"
       xmlns:jaxrs="http://cxf.apache.org/jaxrs" xmlns:cxf="http://cxf.apache.org/core"
       xsi:schemaLocation="http://www.springframework.org/schema/beans
				            http://www.springframework.org/schema/beans/spring-beans.xsd
				            http://cxf.apache.org/jaxrs
				            http://cxf.apache.org/schemas/jaxrs.xsd
				            http://cxf.apache.org/jaxws
				            http://cxf.apache.org/schemas/jaxws.xsd
				            http://cxf.apache.org/core
				            http://cxf.apache.org/schemas/core.xsd">

    <!--1.配置个服务接口实现类  -->
    <bean id="weatherServiceImpl" class="cn.hestyle.service.WeatherServiceImpl"/>
    <!--2.配置cxf服务工厂bean  -->
    <jaxws:server address="/weather" serviceClass="cn.hestyle.service.WeatherService">
        <jaxws:serviceBean>
            <ref bean="weatherServiceImpl"/>
        </jaxws:serviceBean>
    </jaxws:server>
</beans>
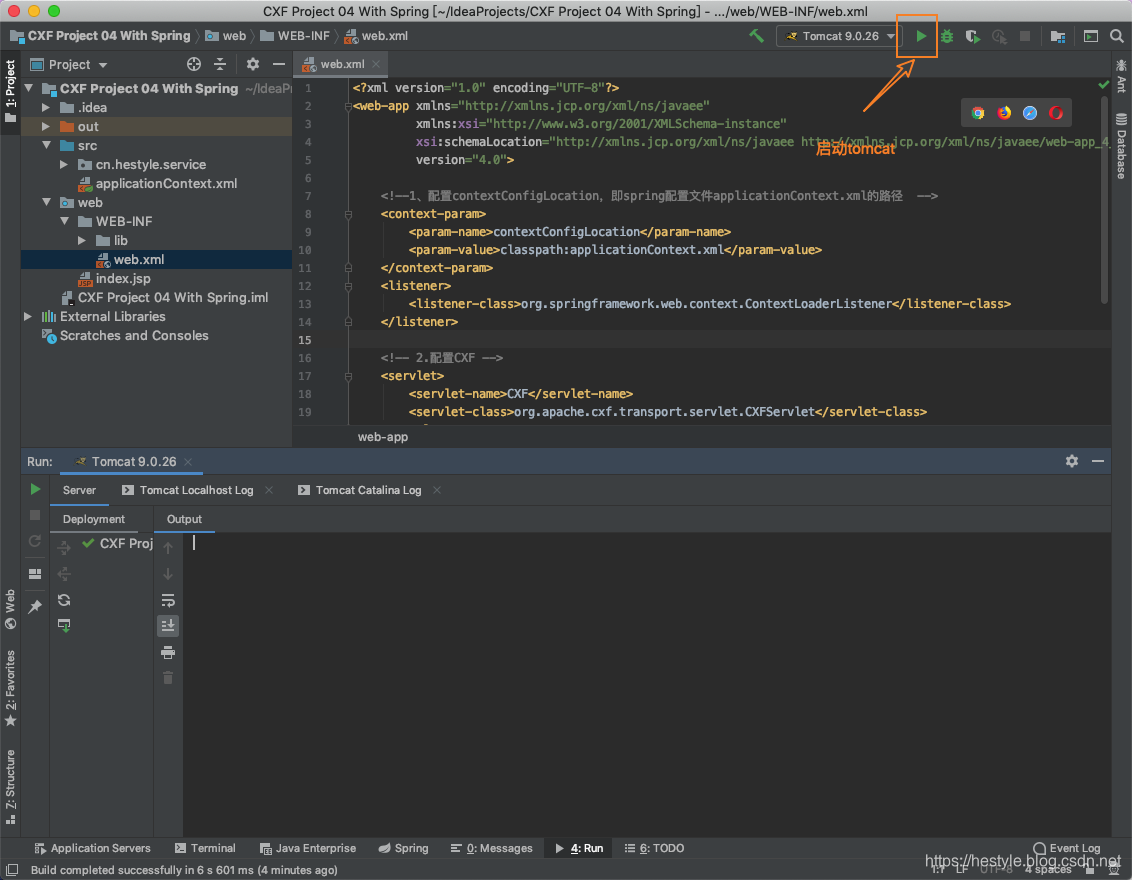
5、配置web.xml文件加载spring配置文件以及CXF请求拦截
<?xml version="1.0" encoding="UTF-8"?>
<web-app xmlns="http://xmlns.jcp.org/xml/ns/javaee"
         xmlns:xsi="http://www.w3.org/2001/XMLSchema-instance"
         xsi:schemaLocation="http://xmlns.jcp.org/xml/ns/javaee http://xmlns.jcp.org/xml/ns/javaee/web-app_4_0.xsd"
         version="4.0">

    <!--1、配置contextConfigLocation,即spring配置文件applicationContext.xml的路径  -->
    <context-param>
        <param-name>contextConfigLocation</param-name>
        <param-value>classpath:applicationContext.xml</param-value>
    </context-param>
    <listener>
        <listener-class>org.springframework.web.context.ContextLoaderListener</listener-class>
    </listener>

    <!-- 2.配置CXF拦截 -->
    <servlet>
        <servlet-name>CXF</servlet-name>
        <servlet-class>org.apache.cxf.transport.servlet.CXFServlet</servlet-class>
    </servlet>
    <servlet-mapping>
        <servlet-name>CXF</servlet-name>
        <url-pattern>/ws/*</url-pattern>
    </servlet-mapping>
</web-app>
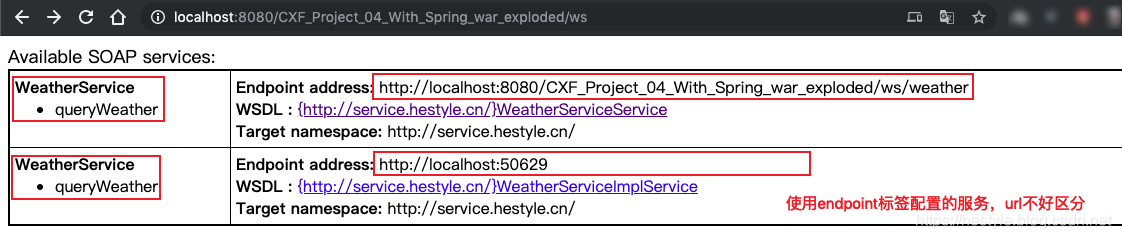
6、启动tomcat容器,在浏览器访问配置的服务
访问url
http://localhost:8080/CXF_Project_04_With_Spring_war_exploded/ws/weather?wsdl
#注意CXF_Project_04_With_Spring_war_exploded是tomcat给你项目自动生成的url,如果你的项目发生了变化,请自行修改
该界面会显示WebService说明书,说明服务端配置成功

7、发布服务的另外一种方式
在applicationContext.xml配置文件中,通过endpoint标签发布
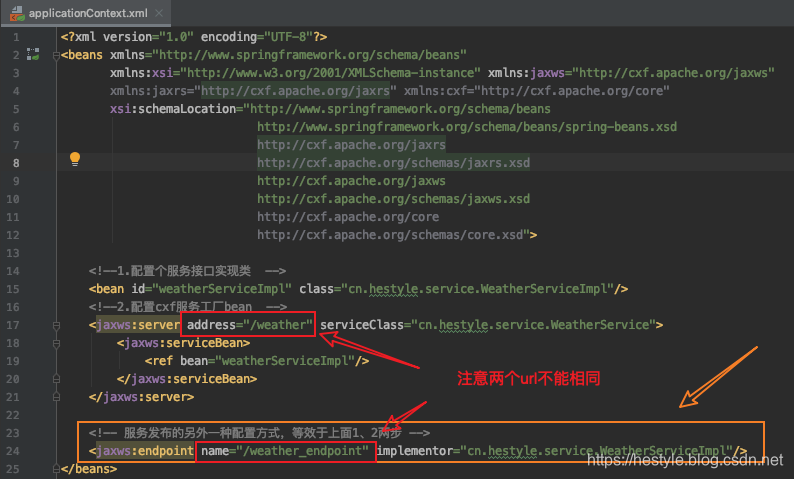
<!-- 服务发布的另外一种配置方式,等效于上面1、2两步 -->
<jaxws:endpoint name="/weather_endpoint" implementor="cn.hestyle.service.WeatherServiceImpl"/>
重启tomcat容器,访问url,查看项目中的所有服务
http://localhost:8080/CXF_Project_04_With_Spring_war_exploded/ws
以上就是服务端的主要配置过程。
二、客户端开发
开发客户端时,服务端项目需要保持运行状态!(虽然有些废话,不过还是会有人关掉服务端,然后说教程错了。。。)
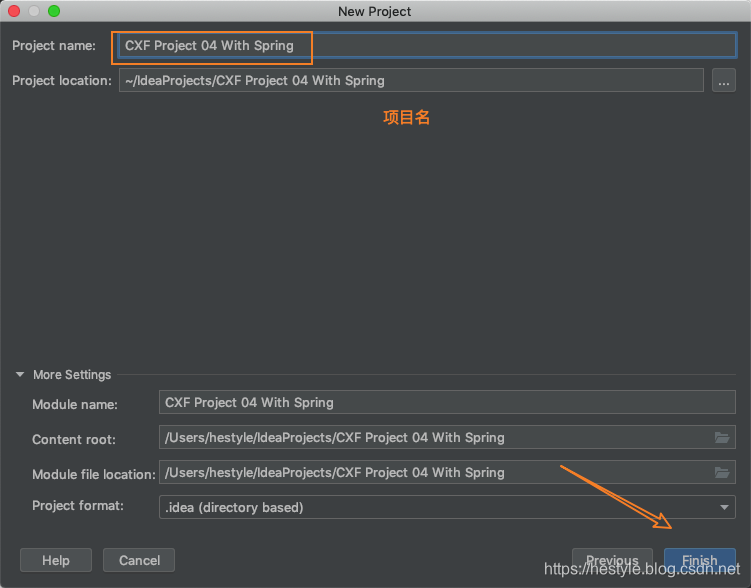
1、新建一个java web项目
2、导入CXF、Spring的jar包到WEB-INF/lib中
见服务端编写导入过程,把它的jar拷贝过来即可
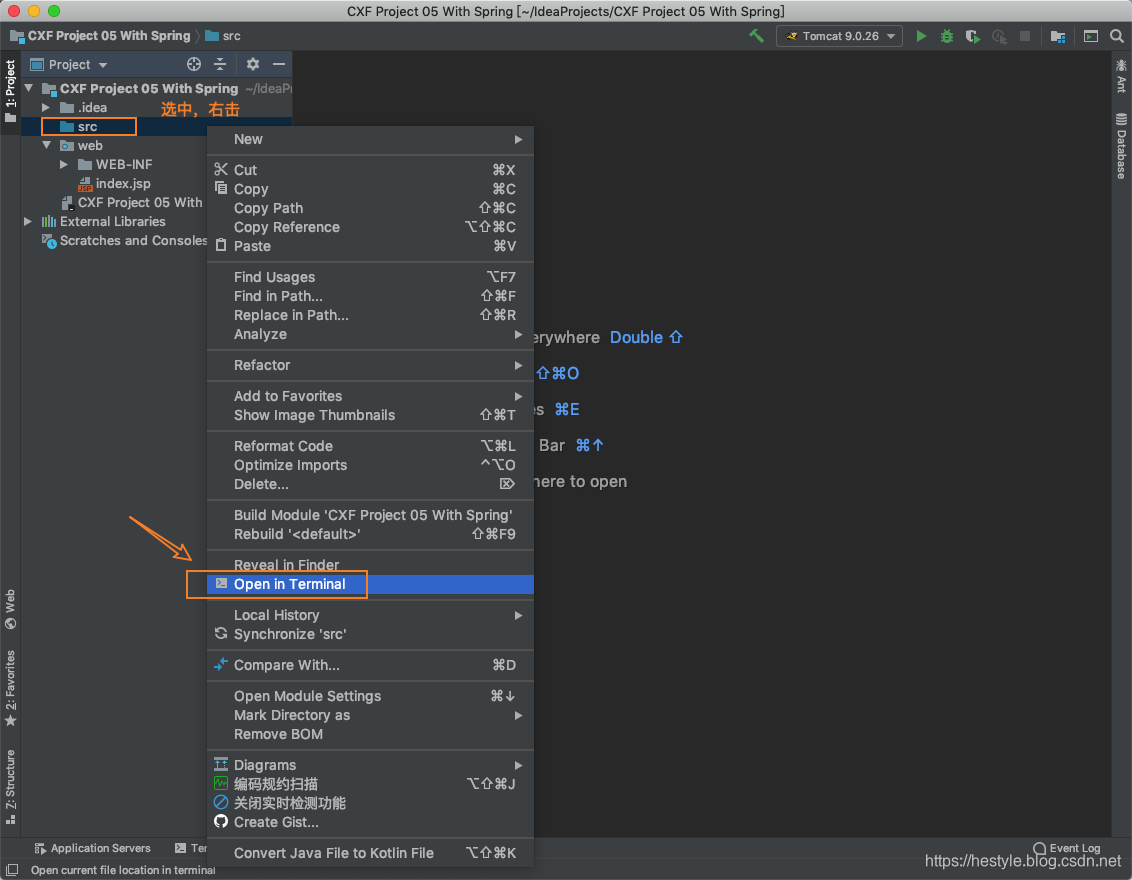
3、生成客户端代码
选中src目录,在终端打开
执行命令wsdl2java -d . http://localhost:8080/CXF_Project_04_With_Spring_war_exploded/ws/weather?wsdl
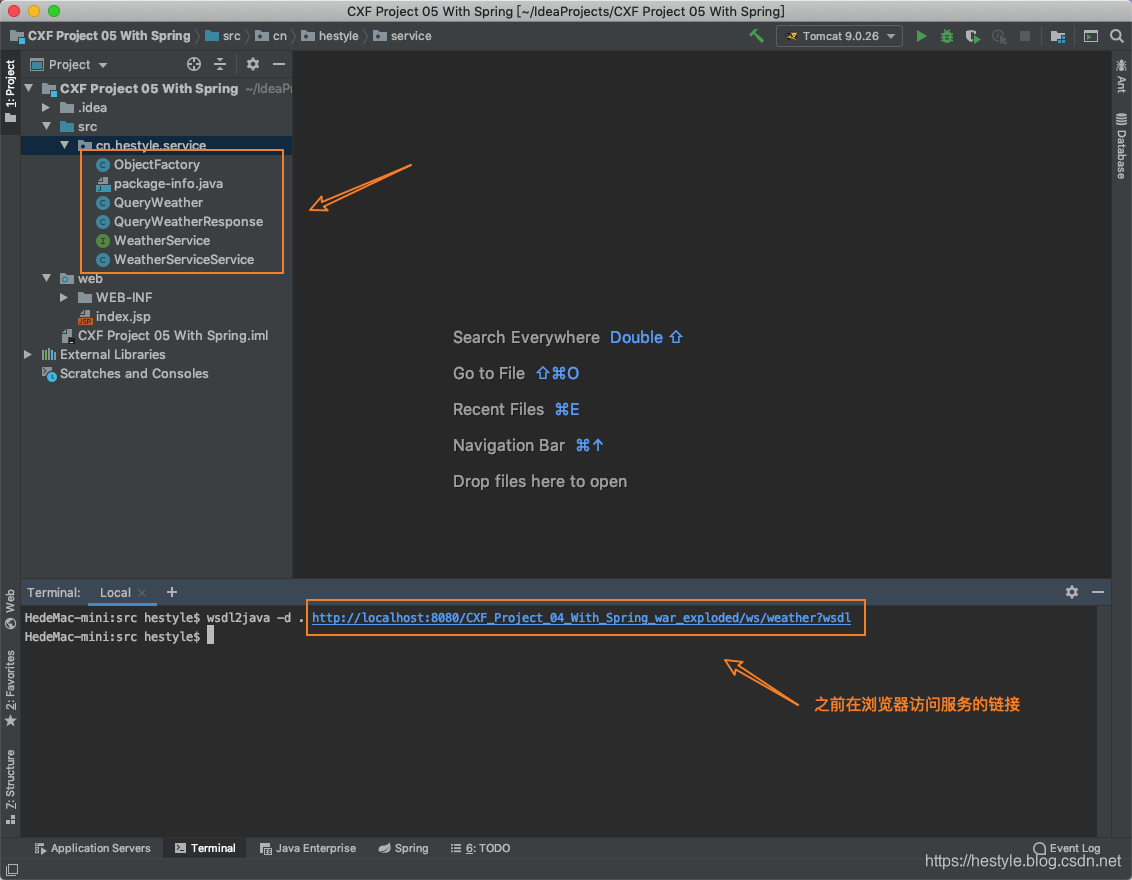
会在src根路径下生成客户端代码。
如果无法执行wsdl2java命令,说明你之前配置的CXF环境出现问题,请访问博客 WebService之CXF快速入门(附Demo演示),这篇博客介绍了如何配置。
4、编写Spring配置文件applicationContext.xml
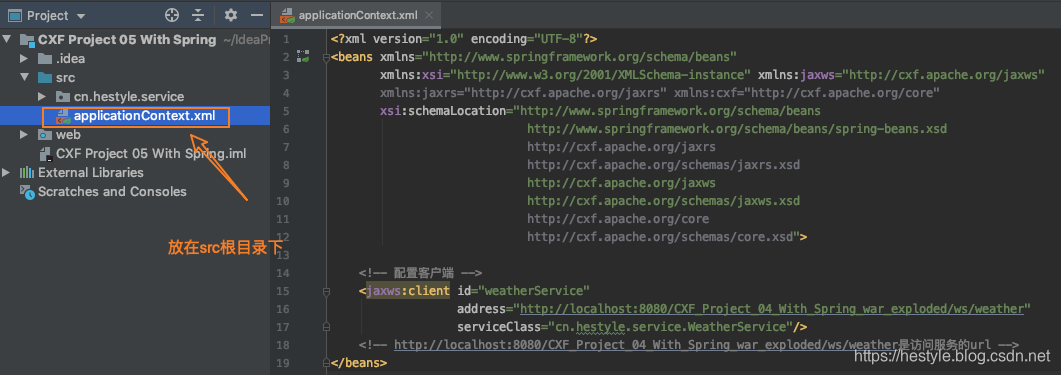
<?xml version="1.0" encoding="UTF-8"?>
<beans xmlns="http://www.springframework.org/schema/beans"
       xmlns:xsi="http://www.w3.org/2001/XMLSchema-instance" xmlns:jaxws="http://cxf.apache.org/jaxws"
       xmlns:jaxrs="http://cxf.apache.org/jaxrs" xmlns:cxf="http://cxf.apache.org/core"
       xsi:schemaLocation="http://www.springframework.org/schema/beans
				            http://www.springframework.org/schema/beans/spring-beans.xsd
				            http://cxf.apache.org/jaxrs
				            http://cxf.apache.org/schemas/jaxrs.xsd
				            http://cxf.apache.org/jaxws
				            http://cxf.apache.org/schemas/jaxws.xsd
				            http://cxf.apache.org/core
				            http://cxf.apache.org/schemas/core.xsd">

    <!-- 配置客户端 -->
    <jaxws:client id="weatherService"
                  address="http://localhost:8080/CXF_Project_04_With_Spring_war_exploded/ws/weather"
                  serviceClass="cn.hestyle.service.WeatherService"/>
    <!-- http://localhost:8080/CXF_Project_04_With_Spring_war_exploded/ws/weather是访问服务的url -->
</beans>
5、编写测试类
package cn.hestyle.test;

import cn.hestyle.service.WeatherService;
import org.springframework.context.ApplicationContext;
import org.springframework.context.support.ClassPathXmlApplicationContext;

/**
 * description: 测试客户端
 *
 * @author hestyle
 * @version 1.0
 * @className CXF Project 05 With Spring->Test01
 * @date 2019-12-10 18:25
 **/
public class Test01 {
    public static void main(String[] args) {
        //1、加载Spring配置文件
        ApplicationContext context = new ClassPathXmlApplicationContext("classpath:applicationContext.xml");
        //2、从spring容器获取weatherService对象
        WeatherService weatherService = (WeatherService) context.getBean("weatherService");
        //3、访问天气查询服务
        System.out.println(weatherService.queryWeather("北京"));
    }

}
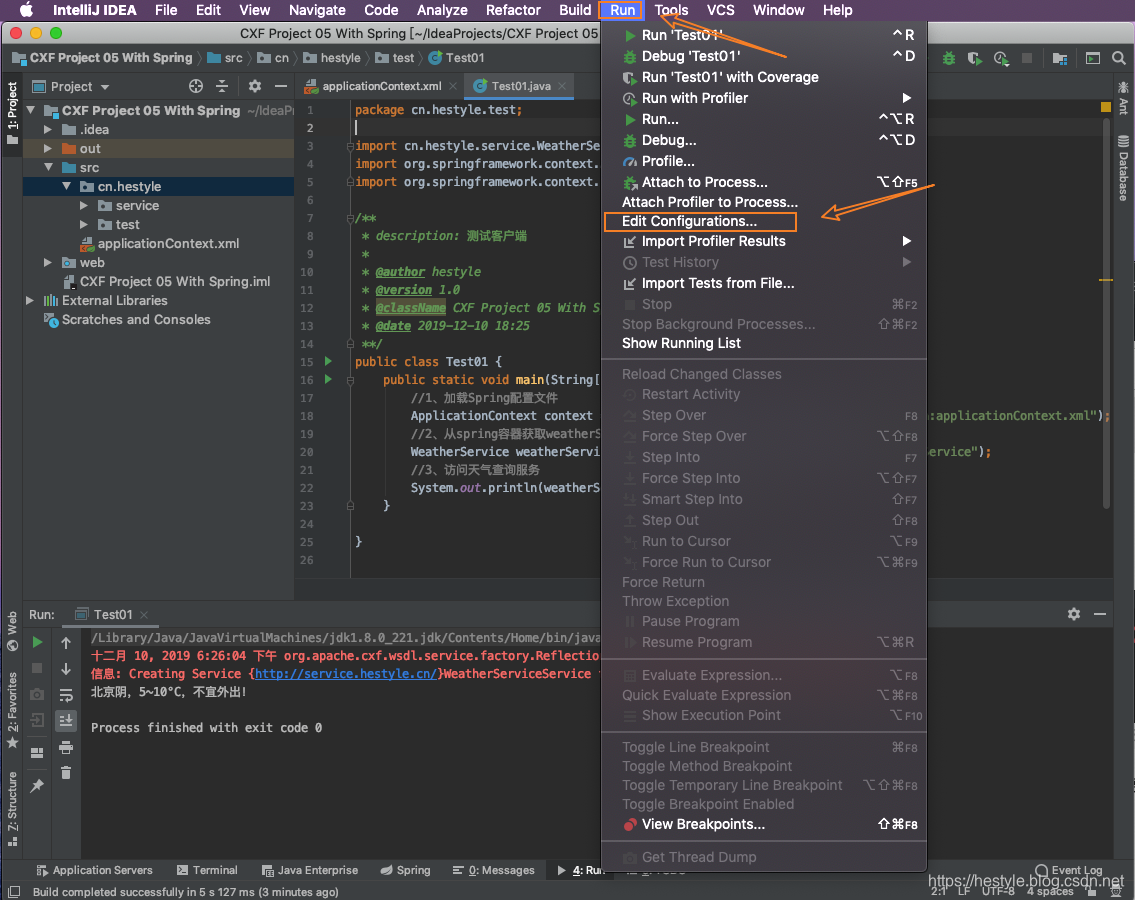
执行main方法,控制台输出。
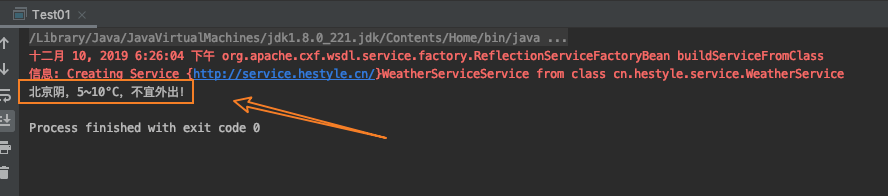
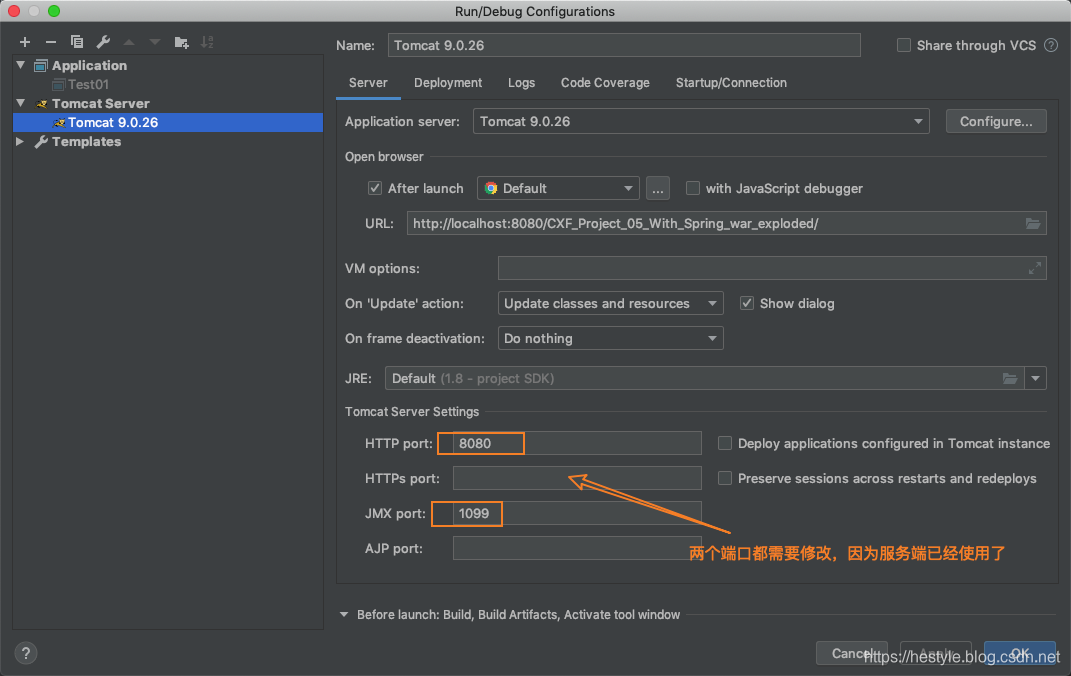
以上就是客户端编写的主要过程,顺便提一下,如果客户端的tomcat也要启动,则需要该端口,因为服务端把8080端口占据了。