1. Spring MVC 数据校验
Spring MVC 3.X 之后支持了 JSR-303 校验框架,本文使用 Hibernate Validator 校验框架进行数据的校验。Hibernate Validator 与 我们常说的 Hibernate 框架(Hibernate ORM)没有关系。
1.1 导入数据校验 jar 包
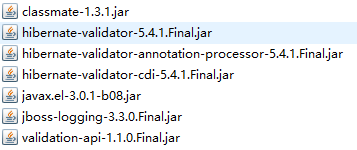
可以从官网下载下载最新的 JAR 包 hibernate-validator-5.4.1.Final-dist,点击下载 5.4.1 版本。然后就是将其中的 JAR 包导入项目的 lib 文件夹中。
1.2 配置 validator
在 springmvc.xml 中加入 validator 的配置,如下所示。其中校验器部分是必须配置,而校验错误信息配置可选,因为其有默认的校验错误信息配置文件(ValidationMessages.properties),我这里配置的校验错误信息配置文件为 CustomValidationMessages.properties 。
<!-- 校验器 -->
<bean id="validator"
	class="org.springframework.validation.beanvalidation.LocalValidatorFactoryBean">
	<!-- 校验器-->
	<property name="providerClass" value="org.hibernate.validator.HibernateValidator" />
	<!-- 指定校验使用的资源文件,默认使用classpath下的ValidationMessages.properties -->
	<property name="validationMessageSource" ref="messageSource" />
</bean>

<!-- 校验错误信息配置文件 -->
<bean id="messageSource"
	class="org.springframework.context.support.ReloadableResourceBundleMessageSource">
	<!-- 资源文件名-->
	<property name="basenames">
      	 <list>
           <value>classpath:CustomValidationMessages</value>
      	 </list>
   	</property>
	<!-- 资源文件编码格式 -->
	<property name="fileEncodings" value="utf-8" />
	<!-- 对资源文件内容缓存时间,单位秒 -->
	<property name="cacheSeconds" value="120" />
</bean>
1.3 将配置好的 validator 加到处理器适配器
这里需要将上面配置好的 validator 加到处理器适配器,配置方式如下,这里我我还配置了一个转换器(String转Date),转换器的配置方式请参考 SpringMVC学习笔记(四)—— Spring MVC 参数绑定 的 3.5 部分。
<mvc:annotation-driven
	conversion-service="conversionService"
	validator="validator">
</mvc:annotation-driven>
1.4 添加校验规则
接下来我们就需要添加校验规则了,校验规则在 POJO 中通过注解的方式进行添加。在添加校验规则之前,我们先了解一些常用的校验注解:
| 来源 | 注解 | 作用 |
|---|---|---|
| Bean Validation 中内置的 constraint | @Valid | 被注释的元素是一个对象,需要检查此对象的所有字段值 |
| Bean Validation 中内置的 constraint | @Null | 被注释的元素必须为 null |
| Bean Validation 中内置的 constraint | @NotNull | 被注释的元素必须不为 null |
| Bean Validation 中内置的 constraint | @AssertTrue | 被注释的元素必须为 true |
| Bean Validation 中内置的 constraint | @AssertFalse | 被注释的元素必须为 false |
| Bean Validation 中内置的 constraint | @Min(value) | 被注释的元素必须是一个数字,其值必须大于等于指定的最小值 |
| Bean Validation 中内置的 constraint | @Max(value) | 被注释的元素必须是一个数字,其值必须小于等于指定的最大值 |
| Bean Validation 中内置的 constraint | @DecimalMin(value) | 被注释的元素必须是一个数字,其值必须大于等于指定的最小值 |
| Bean Validation 中内置的 constraint | @DecimalMax(value) | 被注释的元素必须是一个数字,其值必须小于等于指定的最大值 |
| Bean Validation 中内置的 constraint | @Size(max, min) | 被注释的元素的大小必须在指定的范围内 |
| Bean Validation 中内置的 constraint | @Digits (integer, fraction) | 被注释的元素必须是一个数字,其值必须在可接受的范围内 |
| Bean Validation 中内置的 constraint | @Past | 被注释的元素必须是一个过去的日期 |
| Bean Validation 中内置的 constraint | @Future | 被注释的元素必须是一个将来的日期 |
| Bean Validation 中内置的 constraint | @Pattern(value) | 被注释的元素必须符合指定的正则表达式 |
| Hibernate Validator 附加的 constraint | 被注释的元素必须是电子邮箱地址 | |
| Hibernate Validator 附加的 constraint | @Length(min=, max=) | 被注释的字符串的大小必须在指定的范围内 |
| Hibernate Validator 附加的 constraint | @NotEmpty | 被注释的字符串的必须非空 |
| Hibernate Validator 附加的 constraint | @Range(min=, max=) | 被注释的元素必须在合适的范围内 |
| Hibernate Validator 附加的 constraint | @NotBlank | 被注释的字符串的必须非空 |
| Hibernate Validator 附加的 constraint | @URL(protocol=,host=,port=, regexp=,flags=) | 被注释的字符串必须是一个有效的url |
| Hibernate Validator 附加的 constraint | @CreditCardNumber | 被注释的字符串必须通过 Luhn 校验算法,银行卡,信用卡等号码一般都用 Luhn 计算合法性 |
| Hibernate Validator 附加的 constraint | @ScriptAssert(lang=, script=, alias=) | 要有Java Scripting API 即JSR223(“Scripting for the JavaTM Platform”)的实现 |
| Hibernate Validator 附加的 constraint | @SafeHtml(whitelistType=,additionalTags=) | classpath中要有jsoup包 |
在 POJO 中添加校验规则的方式是在成员变量上添加校验注解,具体如下:
package com.ssm.po;

import java.util.Date;

import javax.validation.constraints.Min;
import javax.validation.constraints.Past;

import org.hibernate.validator.constraints.NotBlank;
import org.hibernate.validator.constraints.NotEmpty;

public class Items {

    private Integer id;			//主键
    @NotEmpty(message="{items.name.notEmpty}")
    private String name;		//商品名称
    @Min(value=0,message="{items.price.error}")
    private Float price;		//价格
    private String pic;			//商品图片
    @Past(message="{items.createtime.error}")
    private Date createtime;	//创建时间
    @NotBlank(message="{items.detail.length.error}")
    private String detail;		//描述

    //get/set方法...

}
注意:如果每个注解的 message 属性值用{ }花括号括着,并且在 springmvc.xml 中配置了错误信息配置文件,那么就需要下面的 【1.5 添加错误消息配置文件】步骤,如果 message 的值直接是错误信息,例如:商品描述信息不能为空。那么就不需要使用{ }花括号括着并且不需要在 springmvc.xml 中配置错误信息配置文件。
1.5 添加错误消息配置文件(可不用配置)
如果是按照我上面的配置方式的,那么配置错误消息配置文件,在资源文件夹 config 下新建 properties 文件 CustomValidationMessages.properties,并加入下面代码。
# \u6DFB\u52A0\u6821\u9A8C\u9519\u8BEF\u63D0\u793A\u4FE1\u606F
items.name.notEmpty=\u5546\u54C1\u540D\u79F0\u4E0D\u80FD\u4E3A\u7A7A
items.price.error=\u5546\u54C1\u4EF7\u683C\u5FC5\u987B\u5927\u4E8E0
items.createtime.error=\u521B\u5EFA\u65F6\u95F4\u5FC5\u987B\u5C0F\u4E8E\u5F53\u524D\u65F6\u95F4
items.detail.length.error=\u5546\u54C1\u63CF\u8FF0\u4E0D\u4E3A\u7A7A
1.6 Controller 捕获错误消息
在 Controller 对应方法中的接收前台页面的参数的形参 POJO 前加上注解 @Valid 或者 @Validated ,并且在该形参后紧接着定义一个 BindingResult 类型的形参,换句话说就是在需要校验的 POJO 前添加注解 @Valid 或者 @Validated,在该 POJO 后添加形参 BindingResult result。
注意:@Valid 或者 @Validated 和 BindingResult result 是配对出现的,并且顺序是固定的(必须一前一后)。代码示例:
//保存商品信息
@RequestMapping(value="/saveItems",method=RequestMethod.POST)
public String saveItems(Model model,
		@Valid ItemsCustom itemsCustom, BindingResult result)
		throws Exception{
	System.out.println(itemsCustom);
	//获取校验的错误信息
	if(result.hasErrors()) {
		//输出错误信息
		List<ObjectError> allErrors = result.getAllErrors();
		for(ObjectError error : allErrors) {
			//将每一条错误信息传到model中,以用来页面展示
			model.addAttribute(error.getCode(), error.getDefaultMessage());
		}
		//将全部错误信息传到model中,以用来页面展示
		model.addAttribute("allErrors", allErrors);
		return "editItems";
	}

	return "forward:itemsList";
}
注意:error.getCode()是获取注解名称,大小写和该注解一致。
1.7 错误消息页面显示
错误信息在页面显示这需要在 Controller 中通过 Model 将错误信息传到页面上,在这里是通过代码model.addAttribute(error.getCode(), error.getDefaultMessage()); 具体 Controller 中将错误信息怎么传入 Model 中的代码在 1.6 中。然后在 JSP 页面中进行展示。
<!-- 显示全部错误信息 -->
<c:if test="${allErrors!=null }">
	<c:forEach items="${allErrors }" var="error">
		${error.defaultMessage }<br>
	</c:forEach>
</c:if>
	<form action="${pageContext.request.contextPath }/items/saveItems.action"
		method="post" >
		<input type="hidden" name="id" value="${itemsCustom.id }" /> 修改商品信息:
		<table width="70%" border=1 cellpadding="0" cellspacing="0">
			<tr>
				<td>商品名称</td>
				<td><input type="text" name="name" value="${itemsCustom.name }" /></td>
				<td width="300"><c:if test="${NotEmpty!=null }">${NotEmpty }</c:if></td>
			</tr>
			<tr>
				<td>商品价格</td>
				<td><input type="text" name="price" value="${itemsCustom.price }" /></td>
				<td><c:if test="${Min!=null }">${Min }</c:if></td>
			</tr>
			<tr>
				<td>商品生产日期</td>
				<td><input type="text" name="createtime"
					value="<fmt:formatDate value="${itemsCustom.createtime}" pattern="yyyy-MM-dd HH:mm:ss"/>" /></td>
				<td><c:if test="${Past!=null }">${Past }</c:if></td>
			</tr>
			<tr>
				<td>商品简介</td>
				<td>
					<textarea rows="3" cols="30"
						name="detail">${itemsCustom.detail }</textarea>
				</td>
				<td><c:if test="${NotBlank!=null }">${NotBlank }</c:if></td>
			</tr>
			<tr>
				<td colspan="3" align="center"><input type="submit" value="提交" />
				</td>
			</tr>
		</table>
	</form>
</body>
效果:

1.8 分组校验
首先定义分组,分组就是一个标识,一般是定义为一个接口:
public interface ValidGroup1 {

}
public interface ValidGroup2 {

}
然后就是指定分组,例如
@NotEmpty(message="{items.name.notEmpty}",groups= {ValidGroup1.class})
private String name;		//商品名称
最后在 Controller 方法中使用 @Validated(value={ValidGroup1.class})对 POJO 进行注解,当指定多个分组时中间用逗号分隔,例如:@Validated(value={ValidGroup1.class,ValidGroup2.class })。
注意:@Valid 不支持分组,所以用 @Validated。两者之间的不同点参考:@Valid和@Validated的总结区分
//保存商品信息
	@RequestMapping(value="/saveItems",method=RequestMethod.PUT)
	public String saveItems(Model model,
			@Validated(value= {ValidGroup1.class}) ItemsCustom itemsCustom, BindingResult result)
			throws Exception{
		System.out.println(itemsCustom);

		return "forward:itemsList";
	}
2. Spring MVC 数据回显
2.1 什么是数据回显
数据回显就是在表单提交失败后需要再回到表单页面重新填写,而提交前的数据将重新在页面进行上显示。
2.2 简单类型数据的数据回显
对于简单类型的数据,如:Integer、String、Float 等使用 Model 将传入的参数再放到 request 域实现显示,代码如下
@RequestMapping(value="/queryItemsById",method={RequestMethod.GET})
public String queryItemsById(Model model,Integer id)throws Exception{

	//传入的id重新放到request域
	model.addAttribute("id", id);
	return "editItems";
}
2.3 POJO 类型数据的数据回显
对于 POJO 类型的数据需要回显的话,思路是和简单类型数据的数据回显一样的。同时 Spring MVC 默认支持 POJO 数据回显,Spring MVC 自动将形参中的 POJO 重新放回 request 域中,request 的 key 为 POJO 的类名(首字母小写),代码:
//保存商品信息
@RequestMapping(value="/saveItems",method=RequestMethod.PUT)
public String saveItems(Model model, ItemsCustom itemsCustom)
		throws Exception{
	System.out.println(itemsCustom);
	return "editItems";
}
Spring MVC 自动将形参中的 POJO 重新放回 request 域中,request 的 key 为 POJO 的类名(首字母小写),这时的 key 为 itemsCustom,相当于调用下边的代码:
model.addAttribute("itemsCustom", itemsCustom);
在 JSP 页面中从“itemsCustom”中获取数据就是:
<tr>
	<td>商品名称</td>
	<td><input type="text" name="name" value="${itemsCustom.name }" /></td>
</tr>
<tr>
	<td>商品价格</td>
	<td><input type="text" name="price" value="${itemsCustom.price }" /></td>
</tr>
如果 key 不是 POJO 的类名(首字母小写),可以使用 @ModelAttribute 完成数据回显。
//保存商品信息
@RequestMapping(value="/saveItems",method=RequestMethod.PUT)
public String saveItems(Model model, @ModelAttribute("test") ItemsCustom itemsCustom)
		throws Exception{
	System.out.println(itemsCustom);
	return "editItems";
}
页面:
<tr>
	<td>商品名称</td>
	<td><input type="text" name="name" value="${test.name }" /></td>
</tr>
<tr>
	<td>商品价格</td>
	<td><input type="text" name="price" value="${test.price }" /></td>
</tr>
如果不用使用 @ModelAttribute 也可以使用model.addAttribute("test", itemsCustom)完成数据回显。
@ModelAttribute 注解还可以注解方法,用于页面更新某些不能更改的数据,
@ModelAttribute("itemsCustom")
public Map<String, Object> getItemsCustom(){

	Map<String, Object> itemsCustom = new HashMap<String,Object>(16);
	itemsCustom.put("name", "电脑");
	itemsCustom.put("price", 1234);

	return itemsCustom;
}