vue-cli工程化项目开发
目录
- vue-cli简介
- vue-cli环境搭建
- 多个界面的创建和显示
- 组件的使用
- 路由
- 网络请求
课程内容
1.vue-cli简介
q.vue-cli是什么?
vue-cli是一个工具, 是vue命令行中工具,能创建集成了很多技术的模板,
在这个基础上提供了其他的功能,例如测试,开发部署,es6转es5,…
q.vue-cli的版本
vue-cli 2 现在项目中使用
vue-cli 3 以后常用工具
2.vue-cli环境搭建
q.如何搭建这个环境?
-
Step1: 安装vue-cli工具
cnpm install -g vue-cli测试:
vue -V -
Step2: 创建项目
vue init webpack my-project说明: webpack是模板名
simple vue单文件模板
webpack-simple 模板
webpack 模板(全功能)说明:
ESLint ESLint 是一个代码规范和错误检查工具
unit tests 单元测试
e2e test 测试技术
Yarn是和npm类似的工具,好处是把下载做一个缓存
最后让我们选择用哪个工具下载依赖, 不选择 -
Step3: 安装依赖
cd hello cnpm install -
Step4: 开发模式启动项目
npm run dev
q.各个文件或目录的作用
目录截图


package.json node项目的配置文件
scripts选项 可以使用的命令
dependencies 依赖的库
devDependencies 开发的时候依赖
注意: 添加一个npm的库到项目
cnpm install 库名 --save
cnpm install 库名 --save-dev
index.html 单文件项目中文件
说明: 编译后的会自动插入到这个文件
src目录 放源代码的目录
static目录 放静态资源文件
config目录 程序的配置
build目录 存放组件脚本
q.src的结构
src/index.js 程序的入口
说明: 创建了一个vue实例,
依赖 App.vue
依赖 router
src/App.vue
说明: 核心代码 router-view
src/router/index.js
说明: 这个是整个程序的路由文件
src/components 放所有界面,放所有组件
文件结构
3.多个界面的创建和显示
案例: dou项目
q.如何显示多个界面
-
Step1.创建book界面
复制Helloworld.vue
删除不要的内容
创建book,music,film<template> <div> </div> </template> <script> export default { name: '', data () { return { } } } </script> <!-- Add "scoped" attribute to limit CSS to this component only --> <style scoped> </style> -
Step2.router/index.js导入组件
import Book from '@/components/Book' -
Step3.router/index.js设置每个界面路由
添加 /
添加 /book
添加 /music
添加 /film说明: 默认会显示 /book
export default new Router({ routes: [ { path: '/', name: 'HelloWorld', redirect:'/book' },{ path: '/book', name: 'book', component: Book },{ path: '/music', name: 'music', component: Music },{ path: '/film', name: 'film', component: Film },{ path: '/bookDetail/:id', name: 'bookDetail', component: BookDetail },{ path: '/musicDetail/:id', name: 'musicDetail', component: MusicDetail },{ path: '/filmDetail/:id', name: 'filmDetail', component: FilmDetail }, ] }) -
Step4.修改App.vue
去除默认图片
去除 #app 添加样式
添加tabbar router-link -
Step5.添加样式,改善显示效果
4.组件的使用
q.如何使用组件
-
Step1: 创建一个vue文件,在components中
在template中写html
在style中写css
在script中写js逻辑说明: export default {}
表示导出一个对象 -
Step2: 在book,music,film用,先导入这个组件
-
Step3: 界面添加属性 components,设置使用的组件
- Step4: 使用组件
5.路由
q.什么是SPA应用, 单页面应用
Single Page Application
vue写项目(多页面应用)
方式1: 把vue当成类似jquery库
使用一个网站由多个html构成
每个html中加载一个vue文件
方式2: 写一个html, 其他界面都是一个一个组件
这些组件切换, 相当于切换了页面
最大问题: 因为只有一个html,百度收录
前后端分类项目: 搜索引擎收录不好收录
方式3: 写一个html, 其他界面都是一个一个组件
使用 vue-cli 脚手架工具
一个界面所有html,css和js放在 .vue文件
一个组件所有html,css和js放在 .vue文件
q.如何使用vue-router实现路由
-
Step1: 导入vue-router
-
Step2: 创建需要切换的界面
-
Step3: 创建一个能切换界面对象 VueRouter
-
Step4: 在app实例加载路由对象
-
Step5: 视图创建router-view用显示当前页面
-
Step6: 视图中创建多个router-link切换界面
6.网络请求
q.在vue中如何实现http请求?
实现方式1: 使用原生ajax (太麻烦)
实现方式2: 使用jquery(太大,只用到ajax,不划算)
实现方式3: vue-resource (ajax库)
实现方式4: axios (vue现在推荐的)
q.如何实现一个基本的get请求
-
Step1: 导入库
-
Step2: 调用
axios.get(url).then(function(response){

  	}).catch(function(error){

  	})
q.在vue-cli中实现http请求
-
Step1 :安装需要的库
cnpm install axios --save -
Step2: 在src/main.js中导入这个库
import axios from 'axios'; // 消息请求 Vue.prototype.$http = axios; // 将axios挂载到Vue实例中的$http 上面 -
Step3: 在book.vue中调用
axios.post(ur).then(function(response){
  console.log(response)
}).catch(function(error){
  console.log(error)
})
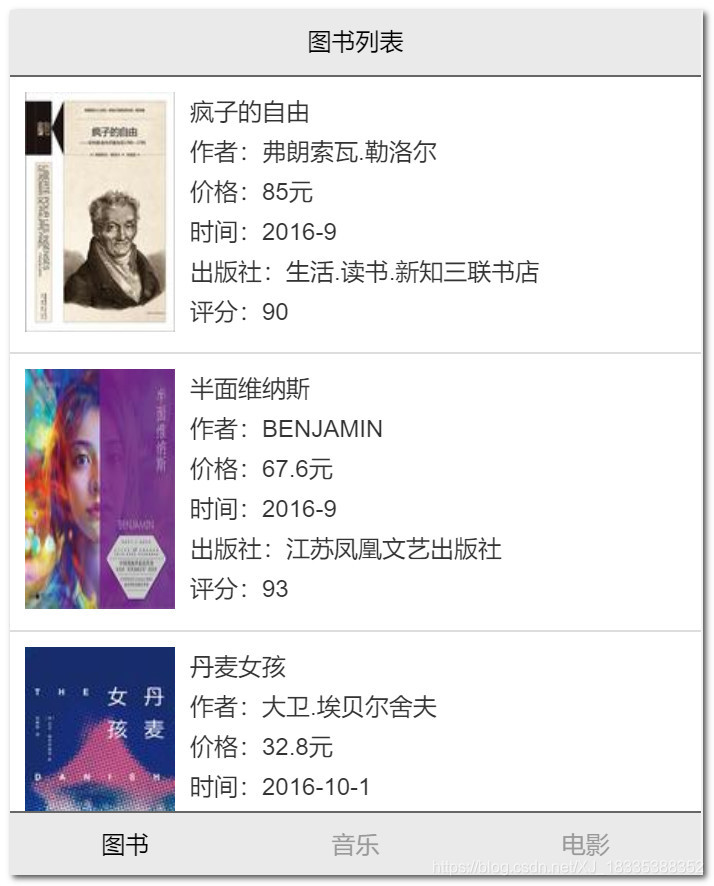
豆瓣项目展示
截图展示

APP.vue加入公共样式
#app {
  font-family: 'Avenir', Helvetica, Arial, sans-serif;
  -webkit-font-smoothing: antialiased;
  -moz-osx-font-smoothing: grayscale;
}
body{
  margin: 0;
}

.content{
  padding-top: 45px;
  padding-bottom: 45px;
}

a{
  text-decoration: none;
  color:#333;
}


.cell{
  padding:10px;
  border-bottom:1px solid #ddd;
  display: flex;
}
.cell>a{
  display: flex;
}
.cell-img img{
  width: 100px;
  height: 160px;
}
.cell-info{
  padding-left:10px;

  display: flex;
  flex-direction: column;
}
.cell-info span{
  display: block;
  line-height: 27px;
}
.info{
  padding:10px;
}
.info-title{
  line-height: 40px;
  font-size: 15px;
  font-weight: bold;
}
公共头部
<template>
  <div class="navbar">
	<div class="left">
		<a :href="leftUrl">{{leftTitle}}</a>
	</div>
	<div class="title">{{title}}</div>
	<div class="right"></div>
</div>
</template>

<script>
export default {
  name: 'navbar',
  props:["title","leftUrl","leftTitle"],
  data () {
    return {

    }
  }
}
</script>

<!-- Add "scoped" attribute to limit CSS to this component only -->
<style scoped>
.navbar{
	width: 100%;
	height: 44px;
	background: #eaeaea;
	border-bottom:1px solid #666;
	line-height: 44px;
	text-align: center;

	position: fixed;
	left:0;
	top:0;

	display: flex;
}
.left{
	flex-basis: 60px;
}
.title{
	flex-grow: 1;
}
.right{
	flex-basis: 60px;
}
</style>
公共底部
<template>
  <div class="tabbar">
  		<div class="tabbar">
			<a class="tabbar-item" :class="{'active':activeIndex==0}" href="#/book">图书</a>
			<a class="tabbar-item" :class="{'active':activeIndex==1}" href="#/music">音乐</a>
			<a class="tabbar-item" :class="{'active':activeIndex==2}" href="#/film">电影</a>
		</div>
  </div>
</template>

<script>
export default {
  name: 'tabbar',
  props:["activeIndex"],
  data () {
    return {

    }
  }
}
</script>

<!-- Add "scoped" attribute to limit CSS to this component only -->
<style scoped>
.tabbar{
	width: 100%;
	height: 44px;
	background: #eaeaea;
	border-top:1px solid #666;
	text-align: center;
	line-height: 44px;

	display: flex;
	justify-content: space-around;

	position: fixed;
	bottom:0;
	left:0;
}
.tabbar-item{
	color: #999;
}
.active{
	color: #000;
}
</style>
图书列表
<template>
  <div>
    <navbar title="图书列表"></navbar>
    <div class="content">
      <div class="tabview">

        <div class="cell" v-for="(item,index) in list" :key="index">
          <router-link :to="'/bookDetail/'+item.id">
            <div class="cell-img">
              <img :src="imagePrefix+item.image" alt="">
            </div>
            <div class="cell-info">
              <span>{{item.name}}</span>
              <span>作者:{{item.author}}</span>
              <span>价格:{{item.price}}元</span>
              <span>时间:{{item.pubdate}}</span>
              <span>出版社:{{item.publisher}}</span>
              <span>评分:{{item.rating}}</span>
            </div>
          </router-link>
        </div>

      </div>
    </div>
    <tabbar active-index="0"></tabbar>
  </div>
</template>

<script>
import Tabbar from './Tabbar.vue'
import Navbar from './Navbar.vue'

export default {
  name: 'book',
  data(){
    return{
      list:[],
      imagePrefix:'http://127.0.0.1/project/dou/api/'
    }
  },
  created(){
    var url = "http://127.0.0.1/project/dou/api/public/index.php?m=book&a=list"
    var that = this
		this.$http.get(url).then(function(res){
      var list = res.data.result
      console.log(list)

      that.list=list
    })
  },
	components:{
		Tabbar:Tabbar,
    Navbar:Navbar
	}
}
</script>

<!-- Add "scoped" attribute to limit CSS to this component only -->
<style scoped>

</style>
图书详情
<template>
  <div>
    <navbar title="图书详情" left-title="返回" left-url="javascript:history.back()"></navbar>
    <div class="content">
      <div class="cell">
        <div class="cell-img">
          <img :src="item.image?imagePrefix+item.image:''">
        </div>
        <div class="cell-info">
          <span>{{item.name}}</span>
          <span>作者:{{item.author}}</span>
          <span>价格:{{item.price}}元</span>
          <span>时间:{{item.pubdate}}</span>
          <span>出版社:{{item.publisher}}</span>
          <span>评分:{{item.rating}}</span>
        </div>
      </div>

      <div class="info">
        <div class="info-title">作者简介</div>
        <div>{{item.author_intro}}</div>
        <div class="info-title">图书简介</div>
        <div>{{item.introduce}}</div>
      </div>
    </div>
  </div>
</template>

<script>
import Tabbar from './Tabbar.vue'
import Navbar from './Navbar.vue'

export default {
  name: 'bookDetail',
  data(){
    return{
      item:{},
      imagePrefix:'http://127.0.0.1/project/dou/api/'
    }
  },
  created(){
    var id = this.$route.params.id;
    console.log(id)
    var url = "http://127.0.0.1/project/dou/api/public/index.php?m=book&a=detail"+"&id="+id
    var that = this
    this.$http.get(url).then(function(res){
      var item = res.data.result
      console.log(item)
      that.item = item
    })
  },
	components:{
		Tabbar:Tabbar,
    Navbar:Navbar
	}
}
</script>

<!-- Add "scoped" attribute to limit CSS to this component only -->
<style scoped>

</style>