在使用之前要先安装nodejs和angular-cli。
1、打开Idea,然后新建项目,选择Node.js and NPM,如下图所示:

2、输入项目名称,选择项目位置,Node interpreter是默认选择的node.js,如果没有自动选择则需要手动选择,其余选择默认即可,如下图所示:

3、在创建好之后生成的目录信息如下图所示:

4、如果这些都不是所需要的,则选择之后将其删除,然后手动创建目录,如下图所示:

5、删除之后目录结构,删除后的目录结构如下图所示:

6、重新编辑package.json文件,文件内容如下所示:
{
  "name": "angular2-myapp",
  "version": "0.0.0",
  "scripts": {
    "ng": "ng",
    "start": "ng serve",
    "build": "ng build",
    "test": "ng test",
    "lint": "ng lint",
    "e2e": "ng e2e"
  },
  "private": true,
  "dependencies": {
    "@angular/animations": "~7.1.0",
    "@angular/common": "~7.1.0",
    "@angular/compiler": "~7.1.0",
    "@angular/core": "~7.1.0",
    "@angular/forms": "~7.1.0",
    "@angular/platform-browser": "~7.1.0",
    "@angular/platform-browser-dynamic": "~7.1.0",
    "@angular/router": "~7.1.0",
    "core-js": "^2.5.4",
    "rxjs": "~6.3.3",
    "tslib": "^1.9.0",
    "zone.js": "~0.8.26"
  },
  "devDependencies": {
    "@angular-devkit/build-angular": "~0.11.0",
    "@angular/cli": "~7.1.0",
    "@angular/compiler-cli": "~7.1.0",
    "@angular/language-service": "~7.1.0",
    "@types/node": "~8.9.4",
    "@types/jasmine": "~2.8.8",
    "@types/jasminewd2": "~2.0.3",
    "codelyzer": "~4.5.0",
    "jasmine-core": "~2.99.1",
    "jasmine-spec-reporter": "~4.2.1",
    "karma": "~3.1.1",
    "karma-chrome-launcher": "~2.2.0",
    "karma-coverage-istanbul-reporter": "~2.0.1",
    "karma-jasmine": "~1.1.2",
    "karma-jasmine-html-reporter": "^0.2.2",
    "protractor": "~5.4.0",
    "ts-node": "~7.0.0",
    "tslint": "~5.11.0",
    "typescript": "~3.1.6"
  }
}
7、编辑好之后,打开左下角的Terminal,然后输入npm install,如下图所示:

8、回车之后就开始下载相应的依赖包,如下图所示:

9、如果没有配置错误,则即可下载成功,如下图所示:

10、下载好之后就会多了一个node_modules目录,并且在根目录创建一个angular.json文件,如下图所示:

11、angular.json文件内容为:
{
  "$schema": "./node_modules/@angular/cli/lib/config/schema.json",
  "version": 1,
  "newProjectRoot": "projects",
  "projects": {
    "angular2-myapp": {
      "root": "",
      "sourceRoot": "src",
      "projectType": "application",
      "prefix": "app",
      "schematics": {},
      "architect": {
        "build": {
          "builder": "@angular-devkit/build-angular:browser",
          "options": {
            "outputPath": "dist/angular2-myapp",
            "index": "src/index.html",
            "main": "src/main.ts",
            "polyfills": "src/polyfills.ts",
            "tsConfig": "src/tsconfig.app.json"
          }
        },
        "serve": {
          "builder": "@angular-devkit/build-angular:dev-server",
          "options": {
            "browserTarget": "angular2-myapp:build"
          },
          "configurations": {
            "production": {
              "browserTarget": "angular2-myapp:build:production"
            }
          }
        }
      }
    }
  },
  "defaultProject": "angular2-myapp"
}
12、在根目录创建一个src目录,如下图所示:

13、在src中新建一个app目录,如下图所示:

14、在app目录中新建一个app.component.ts文件,如下图所示:

15、app.component.ts文件内容如下所示:
import {Component} from '@angular/core';
@Component({//使用@Component装饰器来定义一个AppComponent组件,Component组件是创建用户界面的主要组件
    selector: 'app',//组件标签,定义之后就可以在html文件中使用<app></app>直接使用该组件了
    template: '<h1>Hello {{title}}',
})
export class AppComponent {
    title = 'Angular2';//标题
}
16、然后在src目录新建一个tsconfig.app.json文件,如下图所示:

17、tsconfig.app.json文件内容为:
{
  "compileOnSave": false,
  "compilerOptions": {
    "baseUrl": "./",
    "outDir": "../out-tsc/app",
    "sourceMap": true,
    "declaration": false,
    "module": "es2015",
    "moduleResolution": "node",
    "emitDecoratorMetadata": true,
    "experimentalDecorators": true,
    "importHelpers": true,
    "target": "es5",
    "types": [],
    "typeRoots": [
      "node_modules/@types"
    ],
    "lib": [
      "es2018",
      "dom"
    ]
  },
  "exclude": [
    "test.ts",
    "**/*.spec.ts"
  ]
}
18、在src目录新建一个main.ts文件,如下图所示:

19、main.ts文件内容如下:
import { platformBrowserDynamic } from '@angular/platform-browser-dynamic';
import { NgModule } from '@angular/core';//导入NgModule,NgModule是我们组织Angular应用所必须的
import { BrowserModule } from '@angular/platform-browser';//导入BrowserModule,导入 BrowserModule 是因为它提供了启动和运行浏览器应用的那些基本的服务提供商.
import { AppComponent } from 'app/app.component';

@NgModule({//我们在 @NgModule 的元数据中配置我们导入的模块,因为我们需要依赖 BrowserModule 所以我们在 imports 中添加了它,然后我们又在 declarations 和 bootstrap 选项中添加了 AppComponent 组件.
    declarations: [
        AppComponent//在 declarations添加了 AppComponent 组件
    ],
    imports: [
        BrowserModule
    ],
    providers: [],
    bootstrap: [AppComponent]//bootstrap选项中添加了 AppComponent 组件
})
class AppModule {
}
platformBrowserDynamic().bootstrapModule(AppModule).catch(err => console.error(err));
20、在src目录新建一个polyfills.ts文件,如下图所示:

22、polyfills.ts文件内容如下:
/**
 * This file includes polyfills needed by Angular and is loaded before the app.
 * You can add your own extra polyfills to this file.
 *
 * This file is divided into 2 sections:
 *   1. Browser polyfills. These are applied before loading ZoneJS and are sorted by browsers.
 *   2. Application imports. Files imported after ZoneJS that should be loaded before your main
 *      file.
 *
 * The current setup is for so-called "evergreen" browsers; the last versions of browsers that
 * automatically update themselves. This includes Safari >= 10, Chrome >= 55 (including Opera),
 * Edge >= 13 on the desktop, and iOS 10 and Chrome on mobile.
 *
 * Learn more in https://angular.io/guide/browser-support
 */

/***************************************************************************************************
 * BROWSER POLYFILLS
 */

/** IE9, IE10 and IE11 requires all of the following polyfills. **/
// import 'core-js/es6/symbol';
// import 'core-js/es6/object';
// import 'core-js/es6/function';
// import 'core-js/es6/parse-int';
// import 'core-js/es6/parse-float';
// import 'core-js/es6/number';
// import 'core-js/es6/math';
// import 'core-js/es6/string';
// import 'core-js/es6/date';
// import 'core-js/es6/array';
// import 'core-js/es6/regexp';
// import 'core-js/es6/map';
// import 'core-js/es6/weak-map';
// import 'core-js/es6/set';

/**
 * If the application will be indexed by Google Search, the following is required.
 * Googlebot uses a renderer based on Chrome 41.
 * https://developers.google.com/search/docs/guides/rendering
 **/
// import 'core-js/es6/array';

/** IE10 and IE11 requires the following for NgClass support on SVG elements */
// import 'classlist.js';  // Run `npm install --save classlist.js`.

/** IE10 and IE11 requires the following for the Reflect API. */
// import 'core-js/es6/reflect';

/**
 * Web Animations `@angular/platform-browser/animations`
 * Only required if AnimationBuilder is used within the application and using IE/Edge or Safari.
 * Standard animation support in Angular DOES NOT require any polyfills (as of Angular 6.0).
 **/
// import 'web-animations-js';  // Run `npm install --save web-animations-js`.

/**
 * By default, zone.js will patch all possible macroTask and DomEvents
 * user can disable parts of macroTask/DomEvents patch by setting following flags
 */

// (window as any).__Zone_disable_requestAnimationFrame = true; // disable patch requestAnimationFrame
// (window as any).__Zone_disable_on_property = true; // disable patch onProperty such as onclick
// (window as any).__zone_symbol__BLACK_LISTED_EVENTS = ['scroll', 'mousemove']; // disable patch specified eventNames

/*
* in IE/Edge developer tools, the addEventListener will also be wrapped by zone.js
* with the following flag, it will bypass `zone.js` patch for IE/Edge
*/
// (window as any).__Zone_enable_cross_context_check = true;

/***************************************************************************************************
 * Zone JS is required by default for Angular itself.
 */
import 'zone.js/dist/zone';  // Included with Angular CLI.


/***************************************************************************************************
 * APPLICATION IMPORTS
 */
23、在src目录新建一个index.html文件,如下图所示:

24、index.html文件内容如下:
<!doctype html>
<html lang="en">
<head>
    <meta charset="utf-8">
    <title>MyApp</title>
    <base href="/">

    <meta name="viewport" content="width=device-width, initial-scale=1">
    <link rel="icon" type="image/x-icon" href="favicon.ico">
</head>
<body>
<app></app>
</body>
</html>
25、最后执行ng serve --open编译,如下图所示:

26、在编译完成之后就进入运行状态,如下图所示:

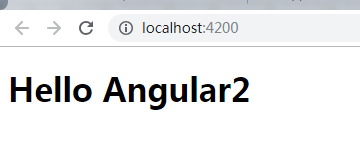
27、运行后就会自动打开默认浏览器,注意:最好使用谷歌浏览器,IE10以下浏览器无法显示,如下图所示:
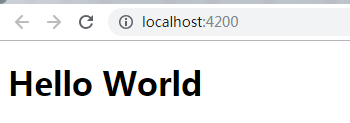
28、修改app.component.ts文件中的title内容,如下图所示:

29、当修改后程序会自动更新页面,而不需要重新刷新,如下图所示: