一、安装环境
宿主机=> win7,虚拟机 centos => 系统版本:CentOS Linux release 7.5.1804 (Core),ip地址 192.168.1.168

二、nginx下载
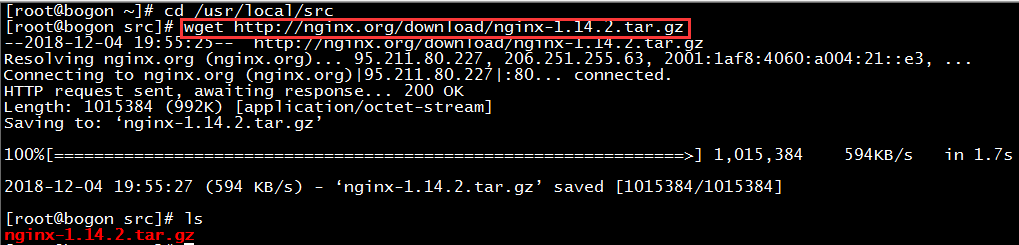
打开官网: http://nginx.org/ ,选择 nginx-1.14.1 stable 版本,

打开链接找到 nginx-1.14.2,右键复制链接地址,

将其下载到目录 /usr/local/src 中,
三、nginx安装
1、解压nginx-1.14.2.tar.gz

2、进入nginx-1.14.2目录查看原始文件

3、执行 ./configure 命令,指定安装路径为 /usr/local/nginx

执行完毕报如下错误:
./configure: error: the HTTP rewrite module requires the PCRE library.
You can either disable the module by using --without-http_rewrite_module
option, or install the PCRE library into the system, or build the PCRE library
statically from the source with nginx by using --with-pcre=<path> option.
大意是 HTTP的重写模块需要PCRE库的支持,要么通过--without-http_rewrite_module忽略此模块,要么将PCRE安装进系统,
要么构筑PCRE库的源码并通过 --with-pcre=<path>选项指定其所在路径,这里选择最后一项,下载PCRE源码到 /usr/local/src 。
3.1、打开 http://pcre.org/ ,找到 ftp://ftp.csx.cam.ac.uk/pub/software/programming/pcre/

点击进入找到 pcre2-10.21.tar.bz2 最新版,复制链接地址下载,这个是pcre2新版本,可能会不兼容,此处测试一下

3.2、下载

3.3、解压

3.4、 重新执行 ./configure

结果又报如下错误:
./configure: error: the HTTP gzip module requires the zlib library.
You can either disable the module by using --without-http_gzip_module
option, or install the zlib library into the system, or build the zlib library
statically from the source with nginx by using --with-zlib=<path> option.
意思是缺少 zlib 库,如同pcre一样,我们下载解压zlib
3.5、打开 http://www.zlib.net/ ,找到

复制链接地址并下载到 /usr/local/src 目录中

解压

3.6、再次执行 ../configure 命令
./configure --prefix=/usr/local/nginx --with-pcre=/usr/local/src/pcre2-10.21 --with-zlib=/usr/local/src/zlib-1.2.11

3.7 、继续执行 make && make install

结果报错:
src/core/ngx_regex.h:15:18: fatal error: pcre.h: No such file or directory
#include <pcre.h>
^
compilation terminated.
make[1]: *** [objs/src/core/nginx.o] Error 1
make[1]: Leaving directory `/usr/local/src/nginx-1.14.2'
make: *** [build] Error 2
查询资料,应该还是 pcre 版本问题,可能 pcre 2版本高的问题吧,尝试下载 pcre-8.42.tar.bz2 版本

下载

解压

3.8、再次尝试执行 ./configure 命令
./configure --prefix=/usr/local/nginx --with-pcre=/usr/local/src/pcre-8.42 --with-zlib=/usr/local/src/zlib-1.2.11

3.9、未报错,再次执行 make && make install

执行结果成功安装 nginx

四、nginx 启动
运行 sbin 下的 nginx 如下

说明运行成功,如果有诸如 nginx: [emerg] bind() to 0.0.0.0:80 failed (98: Address already in use) 之类的提示,说明是80端口被占用了,使用fuser -n tcp 80查看80端口被谁占用,
使用 kill -9 pid号 关闭后重新启动 nginx 即可
五、nginx 测试
在客户端浏览器输入centos主机ip地址,测试 nginx 服务器是否可访问
 、
、
nginx无法访问,看一下网络是否连通
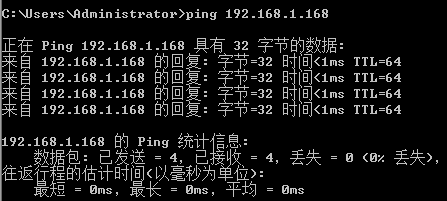
网络没问题,很大可能就是防火墙问题了,systemctl status firewalld 查看防火墙状态

可知防火墙处于开启状态,此时可以关闭防火墙,也可将80端口配置为允许,此处配置80端口为允许,
firewall-cmd --zone=public --add-port=80/tcp --permanent

重新载入 firewall-cmd --reload ,并查看80端口开启状态 firewall-cmd --list-ports

到此,成功配置防火墙例外80端口,再次测试 nginx ,如下

说明 nginx 服务器已经搭建成功。
六、nginx 安装总结
1、nginx编译安装需要 pcre 和 zlib 库的支持,且 pcre2-10 最新版容易出错,最好使用 pcre-8版本。
2、注意nginx 启动时80端口是否被占用。
3、如果nginx启动成功,但不能访问时,首先查看网络是否处于连通状态,当网络连通时查看防火墙状态及80端口是否被拒绝