前言
spring boot是基于注解开发的Spring IOC,之前接触过IOC,这个概念并不奇怪,简单点说就是spring管理bean的容器。IOC容器一般具备两个基本功能:1、通过描述管理Bean,包括发布和获取。2、描述Bean之间的依赖关系。这两个问题深究下去是没有边界的,尤其是Bean之间的依赖关系,这个就是spring的核心。
测试环境搭建
之前参看了慕课网上的一个教程,觉得其中针对spring的测试环境搭建有可取之处,所以这里打算进行一个总结
1、构建maven项目
2、在resource目录下创建spring的配置文件,这里比较简单,只是配置了注解扫描

3、Base测试类的编写
package com.test;

import org.apache.commons.lang3.StringUtils;
import org.junit.After;
import org.junit.Before;
import org.junit.runner.RunWith;
import org.springframework.beans.BeansException;
import org.springframework.context.support.ClassPathXmlApplicationContext;
import org.springframework.test.context.ContextConfiguration;
import org.springframework.test.context.junit4.SpringJUnit4ClassRunner;

/**
 * autor:liman
 * mobilNo:15528212893
 * mail:[email protected]
 * comment:
 */
@RunWith(SpringJUnit4ClassRunner.class)
public class BaseTest {

    private ClassPathXmlApplicationContext context;

    private String springXmlPath;

    public BaseTest(){

    }

    public BaseTest (String springXmlPath){
        this.springXmlPath = springXmlPath;
    }

    @Before
    public void before(){
        if(StringUtils.isEmpty(springXmlPath)){
            springXmlPath = "classpath*:spring-*.xml";
        }
        try{
            context = new ClassPathXmlApplicationContext(springXmlPath.split("[,\\s]+"));
            context.start();
        }catch (Exception e){
            e.printStackTrace();
        }
    }

    @After
    public void after(){
        context.destroy();
    }

    protected <T extends Object> T getBean(String beanId){
        try {
            return (T) context.getBean(beanId);
        }catch (Exception e){
            e.printStackTrace();
            return null;
        }
    }

    protected <T extends Object> T getBean(Class<T> clazz){
        try{
            return context.getBean(clazz);
        }catch (BeansException e){
            e.printStackTrace();
            return null;
        }
    }

}
基础类中用到了@Before表示在标注了@Test注解的方法执行之前执行,@After会在标注了@Test注解的方法执行之后执行。这样会在学习不同的spring的模块时,我们只需要修改spring的配置文件即可,在子类中加载需要学习的spring的配置文件即可完成配置。
下述代码就是一个子测试类的实例。
@RunWith(BlockJUnit4ClassRunner.class)
public class AutowritingTest extends BaseTest {

    public AutowritingTest(){
        super("classpath:spring-autowriting.xml");
    }

    @Test
    public void testAutowriting(){
        AutoWritingService autoWritingService=super.getBean("autoWritingService");
        autoWritingService.saySomething();
    }
}
IOC容器简介
spring中所有的容器都需要实现BeanFactory接口,BeanFactory接口的功能并不强大,因此spring在该接口的基础上还设计了一个更为高级的接口,ApplicationContext接口,这个就是BeanFactory的子接口之一。
在Spring中也可以通过注解来实现容器的操作,@Configuration这个注解就是实现这个功能的。实例代码如下:
package com.learn.spring.annotationBean.bean;

import org.springframework.context.annotation.Bean;
import org.springframework.context.annotation.Configuration;

/**
 * autor:liman
 * mobilNo:15528212893
 * mail:[email protected]
 * comment:
 */
@Configuration  //表示这是一个Java配置文件,Spring会根据他来生成IOC容器去装配Bean
public class StoreConfig {

    /**
     * 如果不指定名称,默认是方法名作为bean的name
     * @return
     */
    @Bean(name="stringStore",initMethod = "initMethod",destroyMethod = "destroyMethod")
    public Store getStringStore(){
        return new StringStore();
    }
}
然后就可以使用相应的ApplicationContext来构建自己的IOC容器,如下所示:
package com.learn.spring.annotationBean.bean;
import org.springframework.context.ApplicationContext;
import org.springframework.context.annotation.AnnotationConfigApplicationContext;
/**
* autor:liman
* mobilNo:15528212893
* mail:[email protected]
* comment:
*/
public class IOCTest {
public static void main(String[] args) {
ApplicationContext applicationContext = new AnnotationConfigApplicationContext(StoreConfig.class);
StringStore stringStore = applicationContext.getBean(StringStore.class);
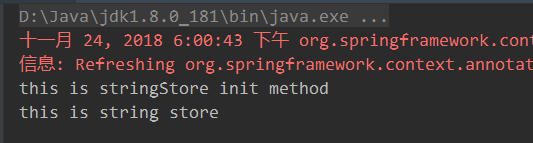
stringStore.printStore();
}
}
实例bean中的代码
package com.learn.spring.annotationBean.bean;

/**
 * autor:liman
 * mobilNo:15528212893
 * mail:[email protected]
 * comment:
 */
public class StringStore implements Store {

    public void initMethod(){
        System.out.println("this is stringStore init method");
    }

    public void destroyMethod(){
        System.out.println("this is stringStore destroy method");
    }

    @Override
    public void printStore() {
        System.out.println("this is string store");
    }
}
运行结果:
@Autowired注解
这个是用的最多的注解,没有之一,@Autowired提供这样的规则,首先它会根据类型找到对应的Bean,如果对应类型的Bean不是唯一的,那么它会根据其属性名称和Bean的名称进行匹配。如果匹配成功,就会使用该Bean,如果无法匹配,则抛出异常。
@Primary和@Quelifier注解:通常我们在实际开发中@Autowired注入的一般是接口类型,一个接口会对应多个实现类,@Primary是一个修改优先权的注解,当我们有多个实现类的时候,在某一个实现类上加上该注解,则Autowired会优先注入这个实现类类型的属性
@Quelifier注解,显示的指定需要注入的类型@Quelifier中指定相应的类型即可。
生命周期
spring中Bean的生命周期这个东西一直理解的较为模糊,Bean的生命周期大致分为Bean定义、Bean的初始化、Bean的生存期和Bean的销毁4个部分。大致过程如下:

后两步实例化和依赖注入,这两步有时候会在容器中获取bean的时候完成,在ComponentScan中有一个配置项lazyInit,如果该属性配置为true,表示spring将采用延迟加载,如果为false,就不进行延迟加载。
bean生命周期
spring IOC容器对Bean的生命周期进行管理的过程如下:
1、通过构造器或工厂方法创建bean实例
2、为bean的属性设置值和对其它bean的引用
3、调用bean的初始化方法
4、bean可以使用了
5、当容器关闭时,调用bean的销毁方法
bean的初始化方法和销毁方法可以通过配置指定。具体实例如下所示:
测试所用的bean实例:
package com.learn.spring.annotationBean.bean.lifecycle;

/**
 * autor:liman
 * mobilNo:15528212893
 * mail:[email protected]
 * comment:
 */
public class Person {

    private String name;
    private int age;
    private String sex;

    public Person(){
        System.out.println("执行person构造方法");
    }

    public void init(){
        System.out.println("执行person初始化方法");
    }

    public void destory(){
        System.out.println("执行person销毁方法");
    }

    public void fun(){
        System.out.println("正在使用person实例");
    }

    public String getName() {
        return name;
    }

    public void setName(String name) {
        this.name = name;
    }

    public int getAge() {
        return age;
    }

    public void setAge(int age) {
        this.age = age;
    }

    public String getSex() {
        return sex;
    }

    public void setSex(String sex) {
        this.sex = sex;
    }
}
对bean的配置(这里采用xml配置,只是简单实现讲解该实例)
<?xml version="1.0" encoding="UTF-8"?>
<beans xmlns="http://www.springframework.org/schema/beans"
       xmlns:xsi="http://www.w3.org/2001/XMLSchema-instance"
       xmlns:context="http://www.springframework.org/schema/context"
       xsi:schemaLocation="http://www.springframework.org/schema/beans http://www.springframework.org/schema/beans/spring-beans.xsd http://www.springframework.org/schema/context http://www.springframework.org/schema/context/spring-context.xsd">


<bean id="person" class="com.learn.spring.annotationBean.bean.lifecycle.Person" init-method="init" destroy-method="destory"></bean>
</beans>
测试实例:
package com.test.annotationBean;

import com.learn.spring.annotationBean.bean.lifecycle.Person;
import com.test.BaseTest;
import org.junit.Test;
import org.junit.runner.RunWith;
import org.junit.runners.BlockJUnit4ClassRunner;

/**
 * autor:liman
 * mobilNo:15528212893
 * mail:[email protected]
 * comment:
 * 测试bean的生命周期
 */
@RunWith(BlockJUnit4ClassRunner.class)
public class LifeCycleTest extends BaseTest {

    public LifeCycleTest(){
        super("spring-lifecycle.xml");
    }

    @Test
    public void testLifeCycle(){
        Person person = (Person)super.getBean("person");
        person.fun();
    }
}
运行结果:

Bean的后置处理器
bean后置处理允许在调用初始化方法前后对bean进行额外的处理,bean后置处理器对IOC容器的所有bean实例逐一处理,而非单一处理。(即:对当前所有spring中的bean都有效)
自己实现的PostProcessor需要实现BeanPostProcessor接口,同时也需要将这个实现类交给spring IOC管理
package com.learn.spring.annotationBean.bean.lifecycle;

import org.springframework.beans.BeansException;
import org.springframework.beans.factory.config.BeanPostProcessor;

/**
 * autor:liman
 * mobilNo:15528212893
 * mail:[email protected]
 * comment:
 * 自己的后置bean处理器,需要实现BeanPostProcessor接口
 */
public class MyBeanPostProcessor implements BeanPostProcessor {
    @Override
    public Object postProcessBeforeInitialization(Object o, String s) throws BeansException {
        System.out.println("BeforeInitialization"+o+","+s);
        return o;
    }

    @Override
    public Object postProcessAfterInitialization(Object o, String s) throws BeansException {
        System.out.println("AfterInitialization"+o+","+s);
        return o;
    }
}
同时也要讲处理器交给spring IOC管理
<!--前置后置的处理器也需要交给IOC-->
    <bean id="myBeanPostProcessor" class="com.learn.spring.annotationBean.bean.lifecycle.MyBeanPostProcessor"></bean>
这样bean的生命周期就变成了
1、通过构造器或工厂方法创建Bean实例
2、为bean的属性设置值或者其他引用
3、调用postProcessBeforeInitialization方法,参数为Bean实例和beanName
4、调用Bean的初始化方法
5、调用postProcessAfterInitialization方法,参数为Bean实例和beanName
6、使用Bean的目标方法
7、容器关闭时销毁Bean。调用Bean的销毁方法。
测试结果:

在执行person的init方法之前和之后,加入了process的处理。
Bean的作用域
这个算是一个比较小的内容,这个内容在spring的官方文档中已经解释的相当清楚了,这里只需要明确,默认情况下spring给的是单例的,而不是多例的,如果需要使用多例的,需要将scope改成prototype。