版权声明:原创不易,欢迎分享和转载,同时请注明出处,谢谢! https://blog.csdn.net/lijing742180/article/details/84232698
POST请求分类:
1、根据是否修改代码,分为两种方式:
- 一种是在UI界面添加后自动生成脚本,一种是直接在脚本中添加
2、根据请求参数的不同,主要可以分为两种:
- param为key value格式
- body为json格式
一、通过UI方式发送POST请求–key/value参数
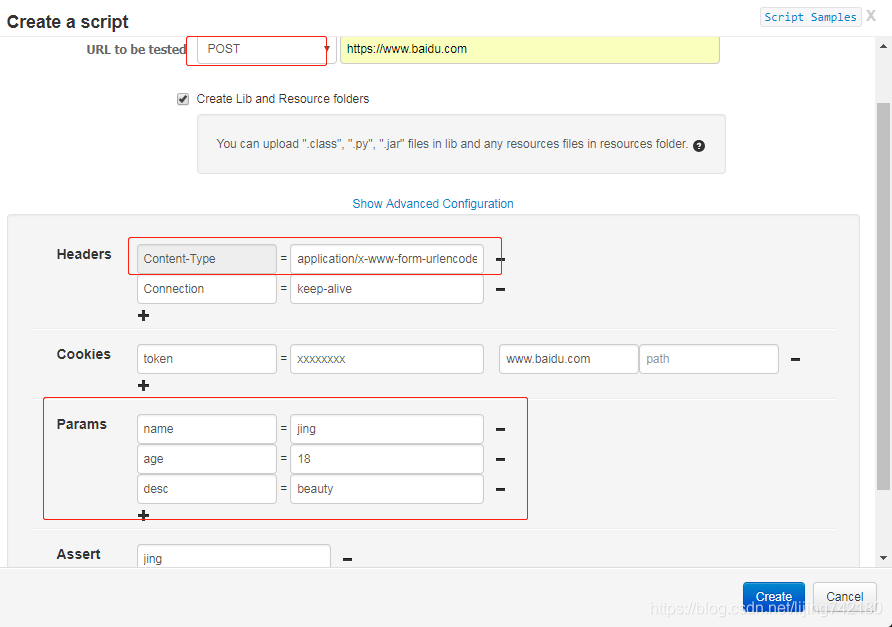
- 通过 UI 设置:脚本 -> 新建脚本 -> 显示高级配置
- 当选择了请求方法为POST后,在高级配置中默认会在headers中显示Content-Type为x-www-form-urlencoded,同时,添加key/value格式的params:
生成代码如下(由于篇幅限制,去掉import部分):
@RunWith(GrinderRunner)
@FixMethodOrder(MethodSorters.NAME_ASCENDING)
class TestRunner {

	public static GTest test
	public static HTTPRequest request
	public static NVPair[] headers = []
	public static NVPair[] params = []
	public static Cookie[] cookies = []

	@BeforeProcess
	public static void beforeProcess() {
		HTTPPluginControl.getConnectionDefaults().timeout = 6000
		test = new GTest(1, "www.baidu.com")
		request = new HTTPRequest()
		// Set header datas
		List<NVPair> headerList = new ArrayList<NVPair>()
		headerList.add(new NVPair("Content-Type", "application/x-www-form-urlencoded"))
		headerList.add(new NVPair("Connection", "keep-alive"))
		headers = headerList.toArray()
		// Set param datas
		List<NVPair> paramList = new ArrayList<NVPair>()
		paramList.add(new NVPair("name", "jing"))
		paramList.add(new NVPair("age", "18"))
		paramList.add(new NVPair("desc", "beauty"))
		params = paramList.toArray()
		// Set cookie datas
		List<Cookie> cookieList = new ArrayList<Cookie>()
		cookieList.add(new Cookie("token", "xxxxxxxx", "www.baidu.com", "", new Date(32503647599000L), false))
		cookies = cookieList.toArray()
		grinder.logger.info("before process.");
	}

	@BeforeThread
	public void beforeThread() {
		test.record(this, "test")
		grinder.statistics.delayReports=true;
		grinder.logger.info("before thread.");
	}

	@Before
	public void before() {
		request.setHeaders(headers)
		cookies.each { CookieModule.addCookie(it, HTTPPluginControl.getThreadHTTPClientContext()) }
		grinder.logger.info("before thread. init headers and cookies");
	}

	@Test
	public void test(){
		HTTPResponse result = request.POST("https://www.baidu.com", params)

		assertThat(result.statusCode, is(200))
		assertThat(result.getText(), containsString("jing"))
	}
}
从以上代码可以看出,这种方式跟之前使用GET方式添加参数的效果一样,都是把参数添加在@BeforeProcess,不同的只是在@Test中使用的是request.POST方法。
二、通过UI方式发送POST请求–json
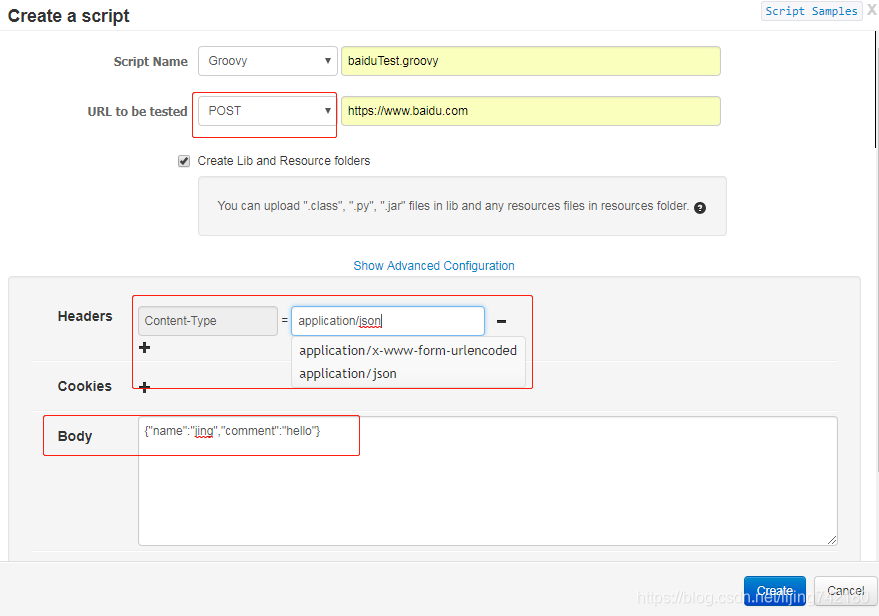
- 通过 UI 设置:脚本 -> 新建脚本 -> 显示高级配置
- 当选择了请求方法为POST后,在高级配置中的headers中选择Content-Type为application/json,同时,添加json字符串:
生成代码如下(由于篇幅限制,去掉import部分):
@RunWith(GrinderRunner)
@FixMethodOrder(MethodSorters.NAME_ASCENDING)
class TestRunner {

	public static GTest test
	public static HTTPRequest request
	public static NVPair[] headers = []
	public static String body = "{\"name\":\"jing\",\"comment\":\"hello\"}"
	public static Cookie[] cookies = []

	@BeforeProcess
	public static void beforeProcess() {
		HTTPPluginControl.getConnectionDefaults().timeout = 6000
		test = new GTest(1, "www.baidu.com")
		request = new HTTPRequest()
		// Set header datas
		List<NVPair> headerList = new ArrayList<NVPair>()
		headerList.add(new NVPair("Content-Type", "application/json"))
		headers = headerList.toArray()
		grinder.logger.info("before process.");
	}

	@BeforeThread
	public void beforeThread() {
		test.record(this, "test")
		grinder.statistics.delayReports=true;
		grinder.logger.info("before thread.");
	}

	@Before
	public void before() {
		request.setHeaders(headers)
		cookies.each { CookieModule.addCookie(it, HTTPPluginControl.getThreadHTTPClientContext()) }
		grinder.logger.info("before thread. init headers and cookies");
	}

	@Test
	public void test(){
		HTTPResponse result = request.POST("https://www.baidu.com", body.getBytes())

		assertThat(result.statusCode, is(200))
	}
}
从以上代码可以看出,这种方式是在静态变量中定义了body的内容,在@BeforeProcess中添加json请求头,并在@Test中的request.POST方法中加入了body参数。
关键代码如下:
public static String body = "{\"name\":\"jing\",\"comment\":\"hello\"}"

headerList.add(new NVPair("Content-Type", "application/json"))

HTTPResponse result = request.POST("https://www.baidu.com", body.getBytes())
三、直接在脚本中为POST请求添加json格式的body
- 使用UI方式添加的json字符串默认是在创建静态变量body的同时添加的;
- 直接修改脚本的话,就比较灵活,可以在类的任意位置添加,然后在POST请求中调用
(但是要注意变量作用域的问题)
// 定义json字符串
String jsonStr = '{"name": "jing"}';

//在@Test的POST方法中使用json字符串,同时添加header
request.POST("https://www.baidu.com", jsonStr.getBytes(), [
    new NVPair("Content-Type", "application/json"
] as NVPair[])
其中,需要注意的是:
POST(java.lang.String uri, byte[] data)
此方法中接收body参数时需要把字符串转成字节数组。