文章目录
配置Mysql主从
需求说明
配置Mysql主从,并配置zabbix监控主从的状态
环境说明
| ip | 服务器类型 |
|---|---|
| 172.16.11.22 | mysql-master端 |
| 172.16.11.21 | mysql-slave端 |
| 172.16.11.20 | zabbix服务器 |
需搭建好Mysql环境,如何搭建看这里–> 搭建Mysql
操作步骤
- 172.16.11.22
①.修改配置文件,添加如下两行
[root@lizihan ~]# vim /etc/my.cnf
log-bin=mysql-log                  //开启log-bin日志
server-id=1                       //数据库服务器的唯一标识符,主服务器的id要比从服务器小
[root@lizihan ~]# service mysqld restart
②.创建同步账号给从数据库同步用
mysql> create user 'relap'@'172.16.11.21' identified by 'relap123!';               //创建账号
Query OK, 0 rows affected (0.00 sec)

mysql> grant replication slave on *.* to 'relay'@'172.16.11.21' identified by 'relay123!';              //同步授权
Query OK, 0 rows affected, 1 warning (0.00 sec)

mysql> flush privileges;                  //刷新权限
Query OK, 0 rows affected (0.00 sec)

mysql> show master status;                  //查看master状态
+------------------+----------+--------------+------------------+-------------------+
| File             | Position | Binlog_Do_DB | Binlog_Ignore_DB | Executed_Gtid_Set |
+------------------+----------+--------------+------------------+-------------------+
| mysql-log.000001 |     1102 |              |                  |                   |
+------------------+----------+--------------+------------------+-------------------+
1 row in set (0.00 sec)
- 172.16.11.21
①.修改配置文件,添加如下两行
[root@lizihan ~]# vim /etc/my.cnf
relay-log=mysql-relay.log
server-id=8
[root@lizihan ~]# service mysqld restart
②.配置并启动主从复制
扫描二维码关注公众号,回复:
4239764 查看本文章

[root@lizihan ~]# mysql -uroot -plzh123!
mysql> change master to                 //这里的master_log_pos为之前master状态里面的position值
    -> master_host='172.16.11.22',
    -> master_user='relay',
    -> master_password='relay123!',
    -> master_log_file='mysql-log.000001',
    -> master_log_pos=1102;
Query OK, 0 rows affected, 2 warnings (0.01 sec)
mysql> start slave;             //启动主从复制

mysql> show slave status \G
*************************** 1. row ***************************
               Slave_IO_State:
                  Master_Host: 172.16.11.22
                  Master_User: relay
                  Master_Port: 3306
                Connect_Retry: 60
              Master_Log_File: mysql-log.000001
          Read_Master_Log_Pos: 1102
               Relay_Log_File: mysql-relay.000001
                Relay_Log_Pos: 4
        Relay_Master_Log_File: mysql-log.000001
             Slave_IO_Running: Yes              //必须为Yes
            Slave_SQL_Running: Yes            //必须为Yes
              Replicate_Do_DB:
          Replicate_Ignore_DB:
           Replicate_Do_Table:
       Replicate_Ignore_Table:
      Replicate_Wild_Do_Table:
  Replicate_Wild_Ignore_Table:
                   Last_Errno: 0
                   Last_Error:
                 Skip_Counter: 0
          Exec_Master_Log_Pos: 1102
              Relay_Log_Space: 154
              Until_Condition: None
               Until_Log_File:
                Until_Log_Pos: 0
           Master_SSL_Allowed: No
           Master_SSL_CA_File:
           Master_SSL_CA_Path:
              Master_SSL_Cert:
            Master_SSL_Cipher:
               Master_SSL_Key:
        Seconds_Behind_Master: NULL
Master_SSL_Verify_Server_Cert: No
                Last_IO_Errno: 0
                Last_IO_Error:
               Last_SQL_Errno: 0
               Last_SQL_Error:
  Replicate_Ignore_Server_Ids:
             Master_Server_Id: 0
                  Master_UUID:
             Master_Info_File: /opt/data/master.info
                    SQL_Delay: 0
          SQL_Remaining_Delay: NULL
      Slave_SQL_Running_State:
           Master_Retry_Count: 86400
                  Master_Bind:
      Last_IO_Error_Timestamp:
     Last_SQL_Error_Timestamp:
               Master_SSL_Crl:
           Master_SSL_Crlpath:
           Retrieved_Gtid_Set:
            Executed_Gtid_Set:
                Auto_Position: 0
         Replicate_Rewrite_DB:
                 Channel_Name:
           Master_TLS_Version:
1 row in set (0.00 sec)
结果测试
- 172.16.11.22
在主服务器上面写入数据
mysql> create database zhangshan;
Query OK, 1 row affected (0.01 sec)

mysql> show databases;
+--------------------+
| Database           |
+--------------------+
| information_schema |
| mysql              |
| performance_schema |
| sys                |
| zhangshan          |
+--------------------+
5 rows in set (0.01 sec)
- 172.16.11.21
在从服务器上面查看
mysql> show databases;
+--------------------+
| Database           |
+--------------------+
| information_schema |
| mysql              |
| performance_schema |
| sys                |
| zhangshan          |
+--------------------+
5 rows in set (0.00 sec)
报错解决
1.当在从服务器上配置主从复制的时候配置写错
解决方法:
①.stop slave //停止slave主从复制
②.reset slave all //删除主从配置
重新配置即可
2.出现Slave_IO_Running: No
可能是因为pos值或者log_file文件名不对
①.先锁表,使主数据库无法写入数据,检查错误,然后删除配置重新配好再解锁
 flush tables with read lock;            //锁表
 unlock tables;                 //解锁表
配置zabbix监控主从状态
通过zabbix监控其I/O线程和SQL线程的状态来查看主从是否同步出现异常
这里就不详细搭建lamp和zabbix了,如何搭建请看下面的文档
如何搭建lamp–> 搭建lamp
如何搭建zabbix --> 搭建zabbix
如何添加监控–> 添加监控
操作步骤
- 172.16.11.21
①.在mysql的slave端安装zabbix-agent并配置
[root@lizihan ~]# wget http://repo.zabbix.com/zabbix/4.0/rhel/7/x86_64/zabbix-agent-4.0.0-2.el7.x86_64.rpm
[root@lizihan ~]# rpm -ivh zabbix-agent-4.0.0-2.el7.x86_64.rpm
[root@lizihan ~]# vim /etc/zabbix/zabbix_agentd.conf
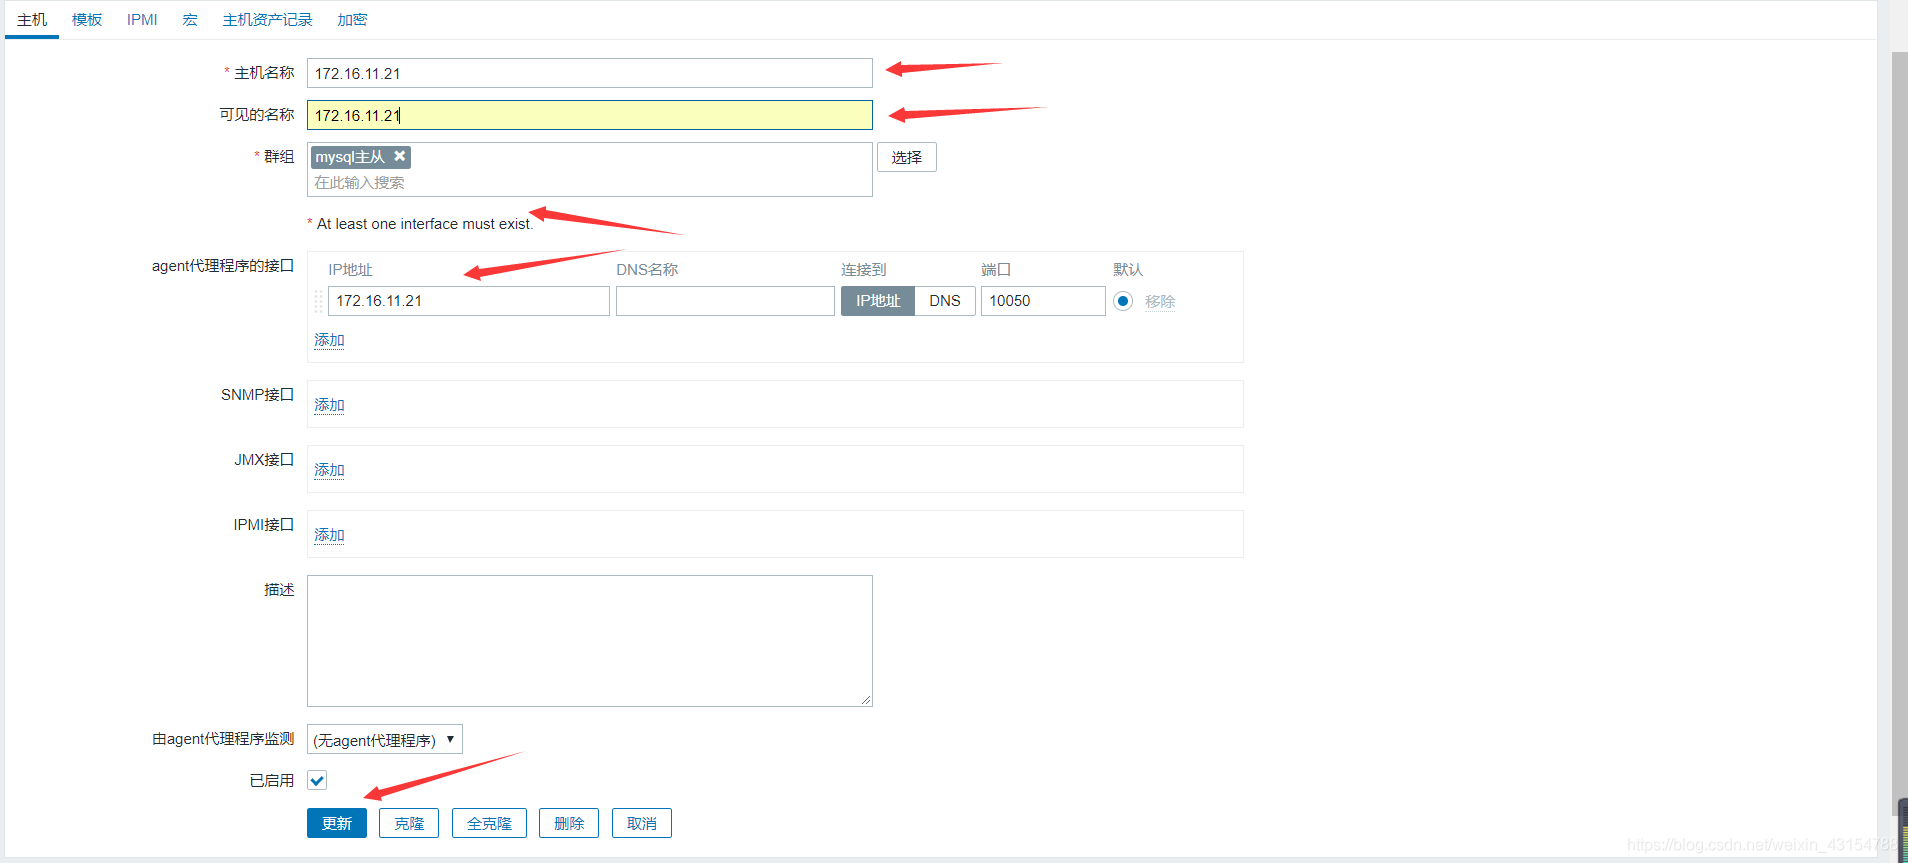
Server=172.16.11.20 //修改地址为服务端ip
ServerActive=172.16.11.20 //修改为服务端ip
Hostname=172.16.11.21 //后面接的名称要与web界面配置的名字相同
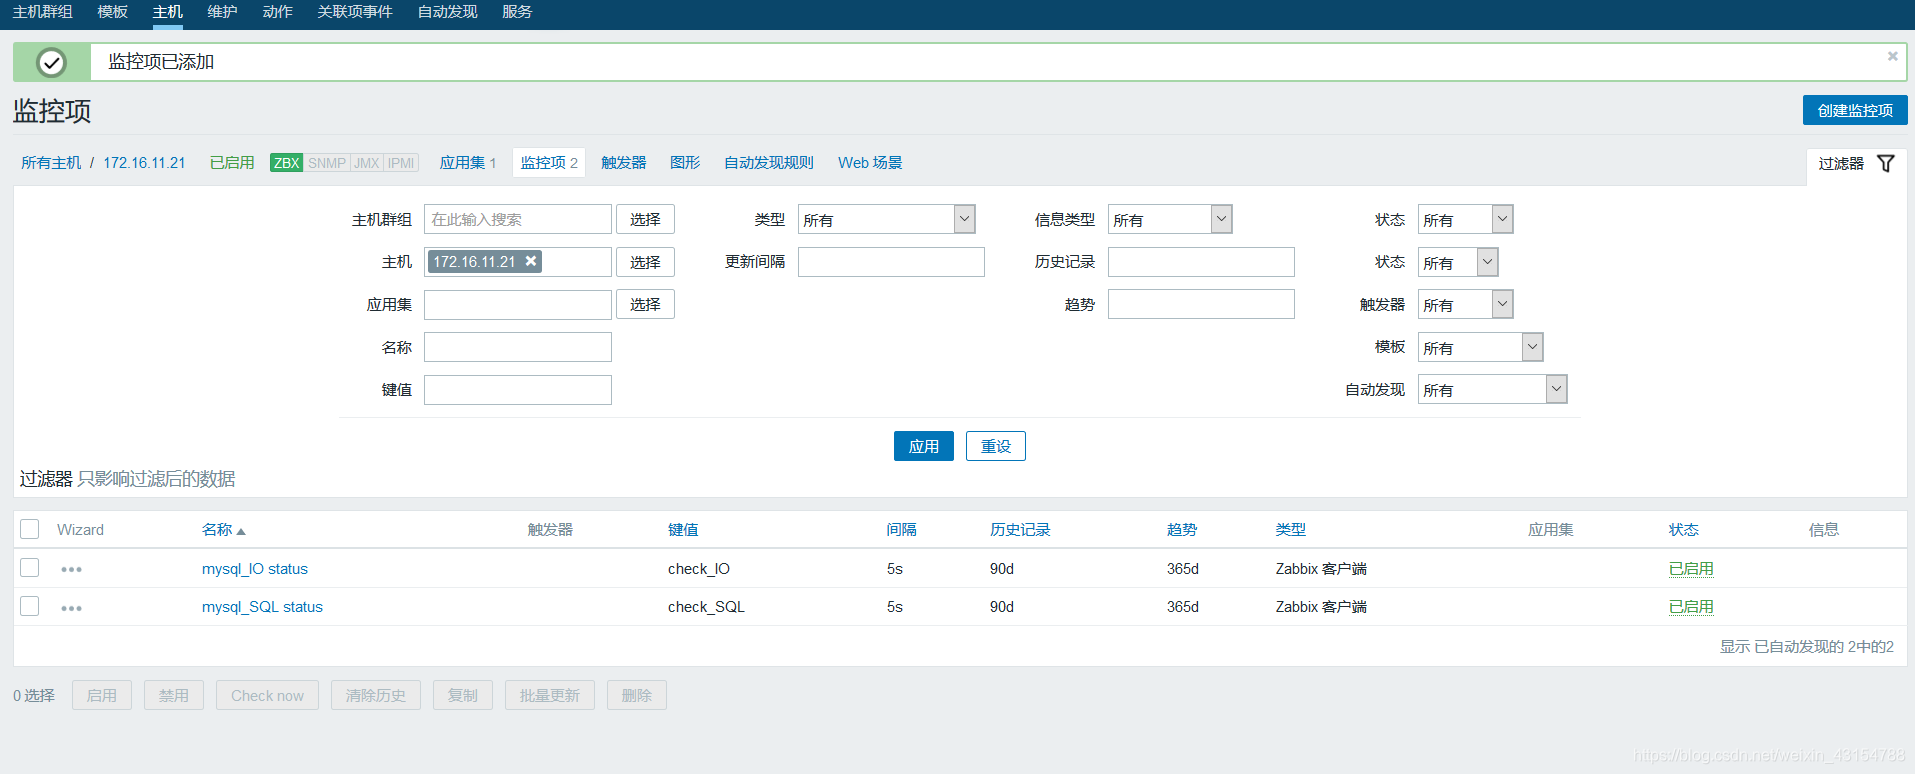
②.写监控I/O线程和SQL线程的脚本
为了防止把密码写到命令里面会出现警告,影响过滤,需要将用户和密码添加到配置文件里面
[root@lizihan ~]# vim /etc/my.cnf
[client]            //把用户和密码添加到client里面,可以不输密码登陆Mysql
user=root
password=lzh123!
[root@lizihan ~]# mkdir /scripts/
[root@lizihan ~]# vim /scripts/IO.sh             //监控IO线程
#!/bin/bash

stat=`mysql -e 'show slave status \G' | grep -i 'running:' | sed -n '1p' | awk -F '[: ]+' '{print $3}'`

if [ $stat == Yes ];then
    echo '0'
else

    echo '1'
fi
[root@lizihan ~]# vim /scripts/SQL.sh            //监控SQL线程
#!/bin/bash

stat=`mysql -e 'show slave status \G' | grep -i 'running:' | sed -n '2p' | awk -F '[: ]+' '{print $3}'`

if [ $stat == Yes ];then
    echo '0'
else
    echo '1'
fi
③.修改配置文件添加脚本路径
[root@lizihan ~]# vim /etc/zabbix/zabbix_agentd.conf
UnsafeUserParameters=0 //把值修改为1
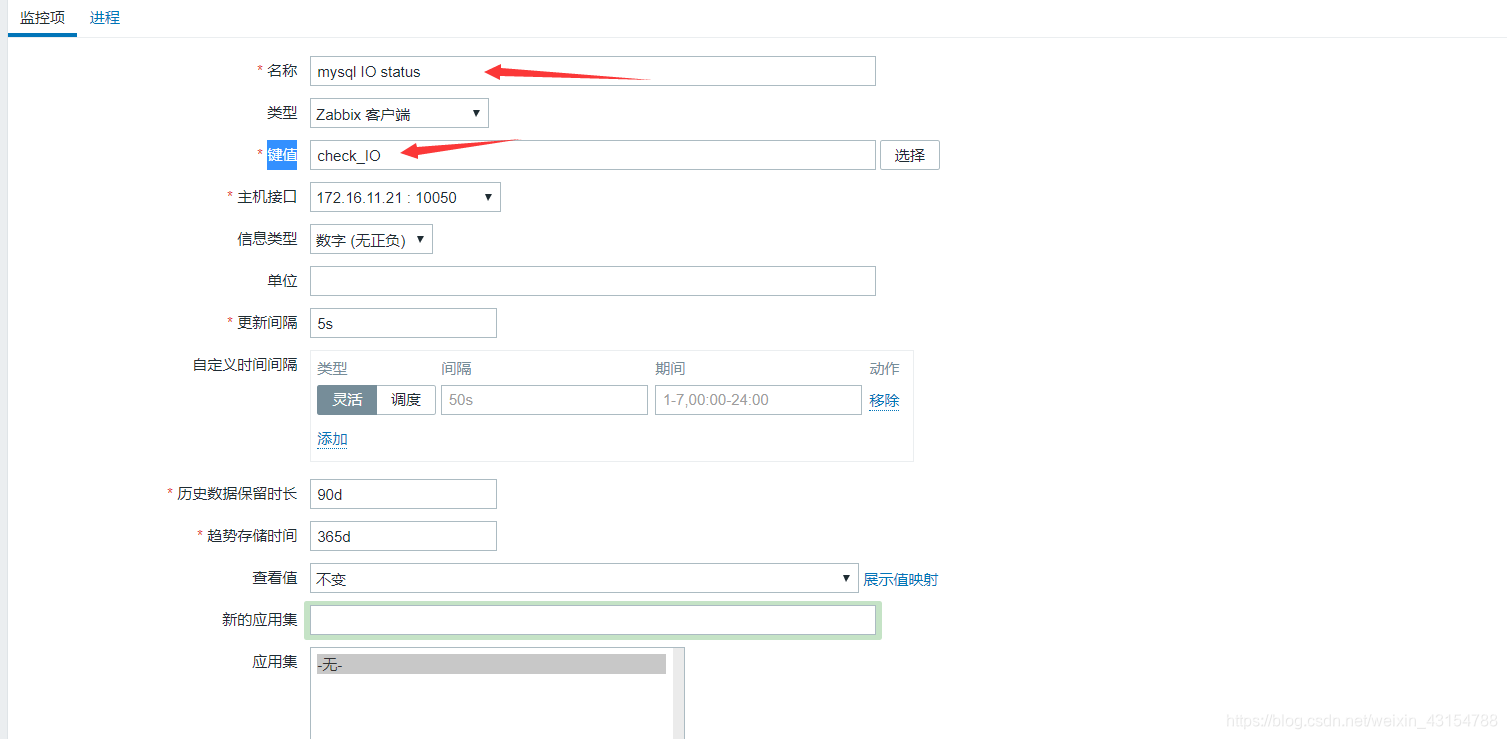
UserParameter=check_io,/bin/bash /scripts/io.sh //脚本的路径
zabbix的web页面配置
添加主机
添加监控项

添加触发器
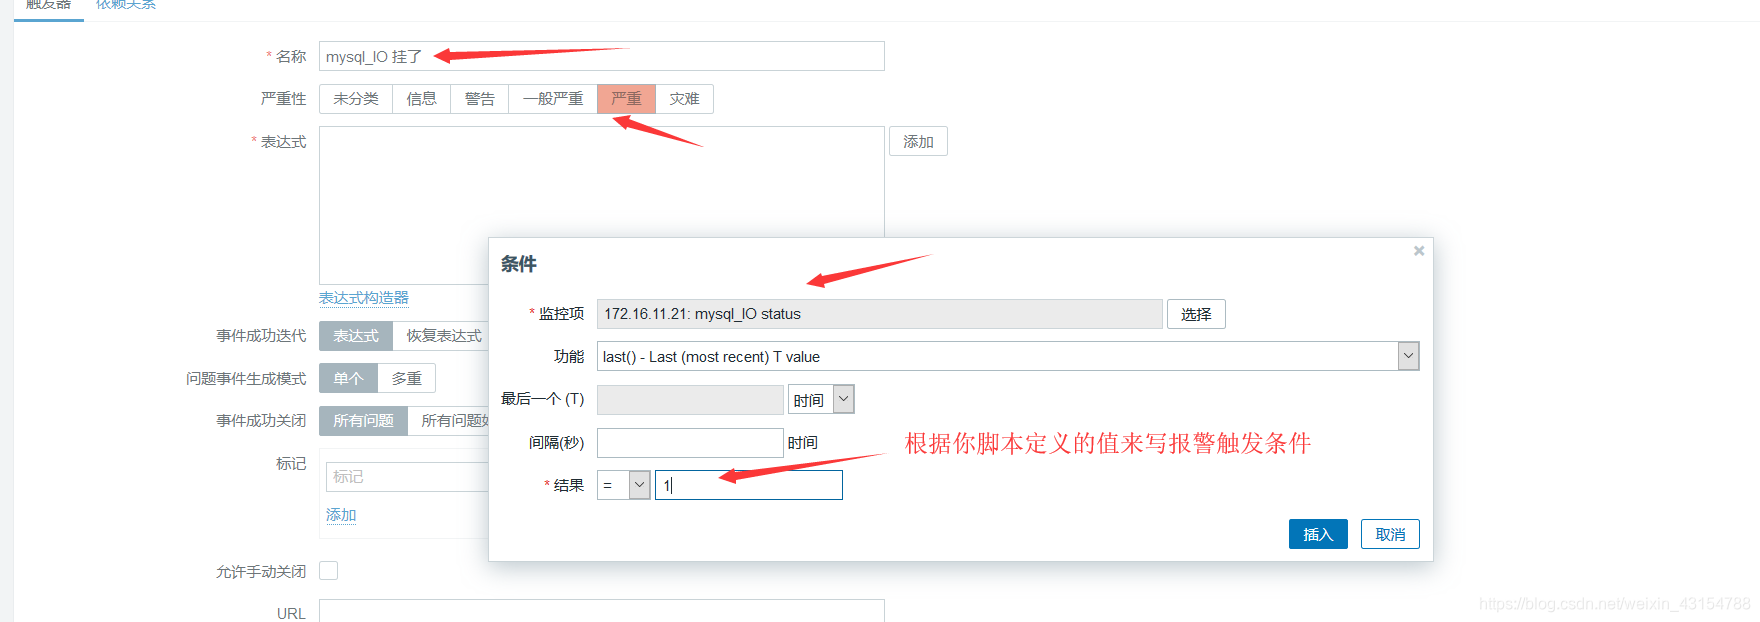
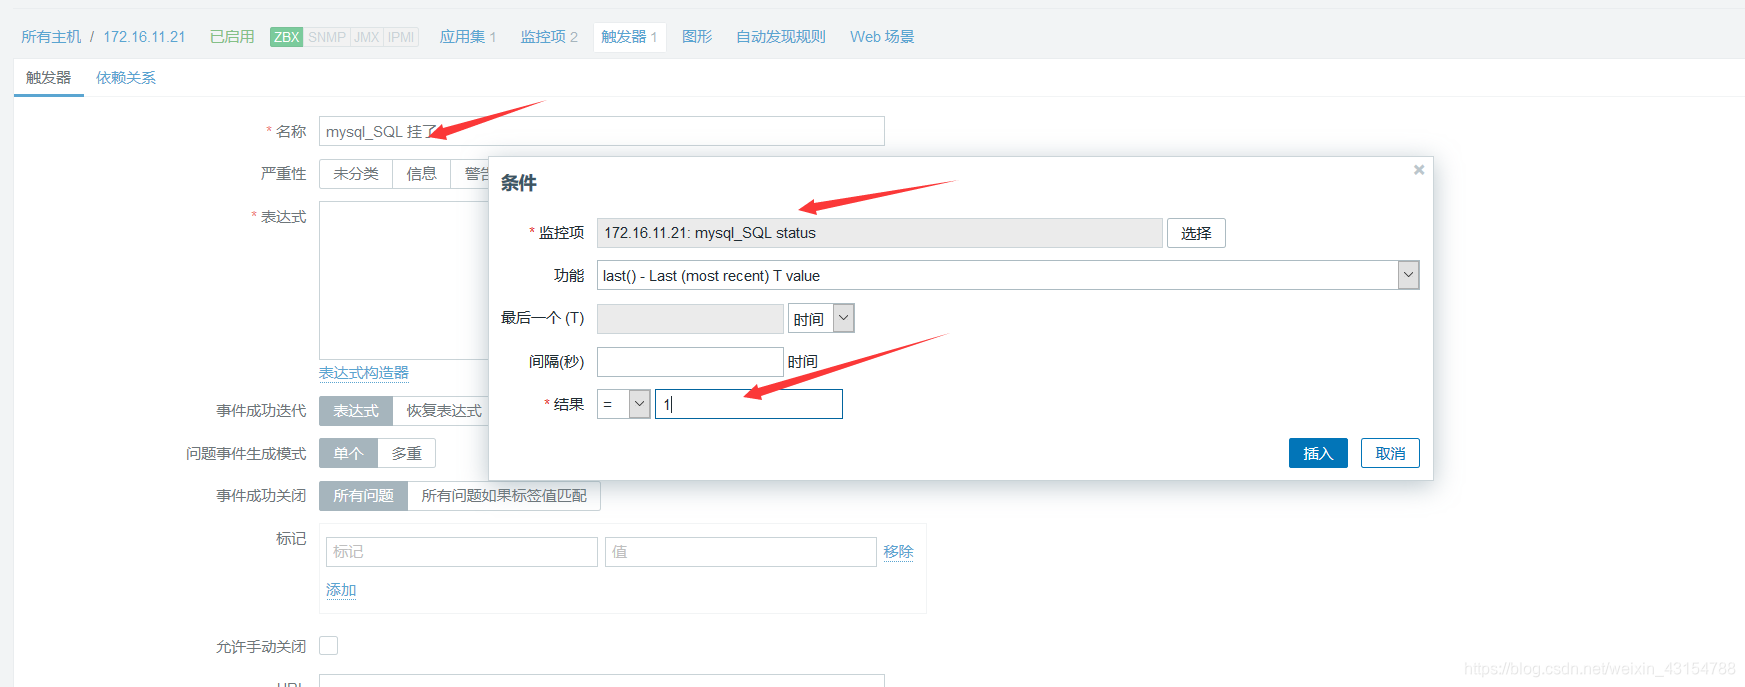
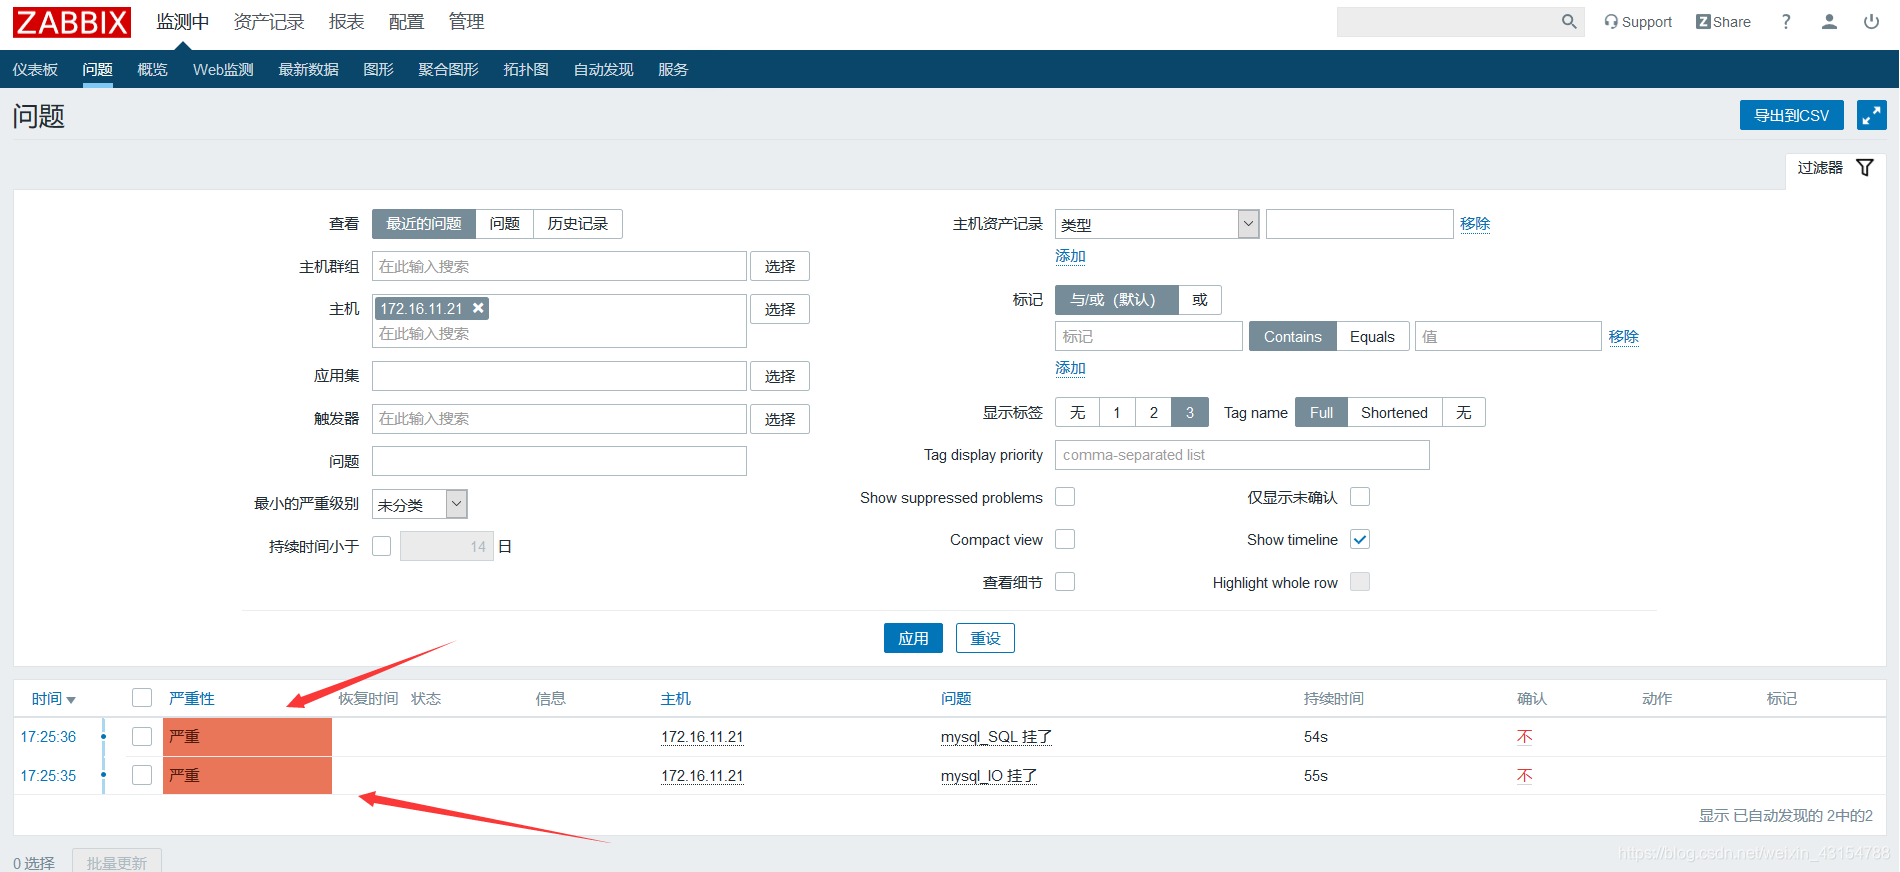
结果测试
当停掉mysql_slave的时候,可以看到已经触发报警
mysql> stop slave;
Query OK, 0 rows affected (0.01 sec)