版权声明:本文为博主原创文章,未经博主允许不得转载。 https://blog.csdn.net/java_collect/article/details/84480588
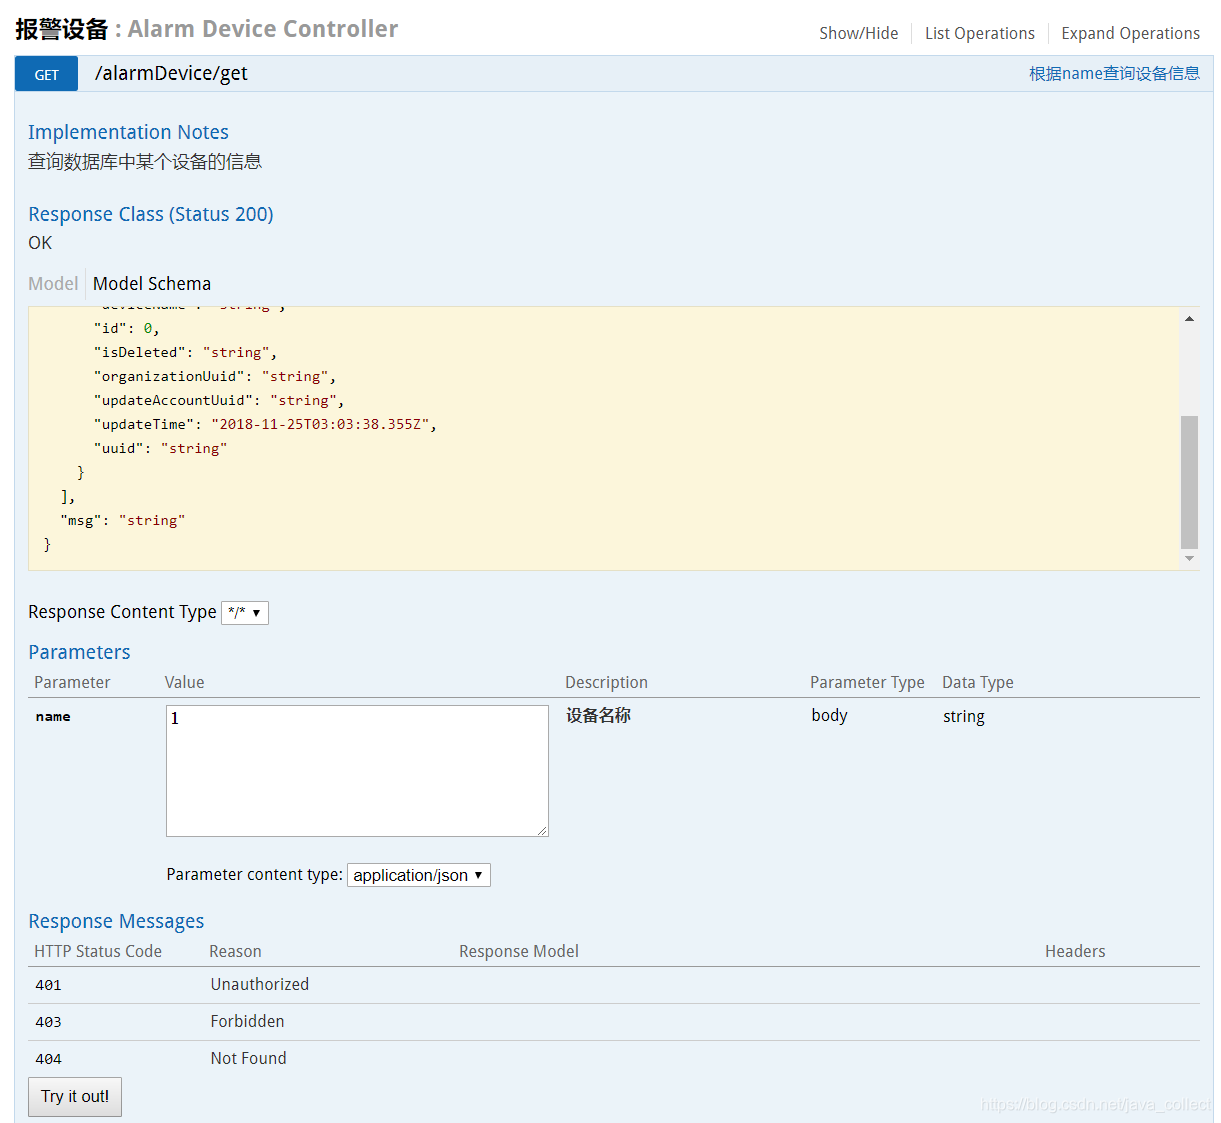
Swagger会自动根据我们的接口来生成一个html页面,在这个页面上我们可以看到所有接口信息,信息中包含了有哪些参数,每个参数代表什么意思,如果是一个带body体的请求,还会自动帮我们生成json格式的body。并且还可以像http请求工具那样进行接口请求.极大的方便了我们编写接口文档。
1. 如何使用
1.1 引入依赖
注意版本,经常会有些意想不到的问题。2.2.2也是比较常用的版本
 <!--swagger的依赖start-->
        <dependency>
            <groupId>io.springfox</groupId>
            <artifactId>springfox-swagger2</artifactId>
            <version>2.4.0</version>
        </dependency>
        <dependency>
            <groupId>io.springfox</groupId>
            <artifactId>springfox-swagger-ui</artifactId>
            <version>2.4.0</version>
        </dependency>
 <!--swagger的依赖end-->
1.2 swagger配置类
@Configuration
@EnableSwagger2
public class Swagger2Config {
//swagger2的配置文件,这里可以配置swagger2的一些基本的内容,比如扫描的包等等
    @Bean
    public Docket createRestApi() {
        return new Docket(DocumentationType.SWAGGER_2)
                .apiInfo(apiInfo())
                .select()
                //为当前包路径
                .apis(RequestHandlerSelectors.basePackage("com.jun.cloud"))
                .paths(PathSelectors.any())
                .build();
    }

    //构建 api文档的详细信息函数
    private ApiInfo apiInfo() {
        return new ApiInfoBuilder()
                //页面标题
                .title("Spring Boot 测试使用 Swagger2 构建RESTful API")
                //创建人
                .contact(new Contact("余生君", "https://blog.csdn.net/java_collect", ""))
                //版本号
                .version("1.0")
                //描述
                .description("API 描述")
                .build();
    }
}
本例采用指定扫描的包路径来定义(apis),Swagger会扫描该包下所有Controller定义的API,并产生文档内容(除了被@ApiIgnore指定的请求)
1.3 在controller上编写我们的接口信息
@RestController
@RequestMapping("/alarmDevice")
@Api(tags = "设备")
public class AlarmDeviceController {

    @Autowired
    private IAlarmDeviceService alarmDeviceService;

    /**
    * 根据name查询设备信息
    */
    @GetMapping("/name/get")
    @ApiOperation(value = "根据name查询设备信息", notes = "查询数据库中某个设备的信息")
    public BaseResponse<List<AlarmDevice>> getByName(@ApiParam(name = "name", value = "设备名称", required = true) String name){
        List<AlarmDevice> alarmDeviceList = alarmDeviceService.getByName(name);
        return new BaseResponse<>("200",alarmDeviceList);
    }

    @GetMapping("/{id}")
    @ApiOperation(value = "根据id查询设备信息", notes = "查询数据库中某个设备的信息")
    @ApiImplicitParam(name = "name", value = "设备唯一标识", required = true, dataType = "string",paramType = "path")
    public BaseResponse<List<AlarmDevice>> get(@PathVariable String id){
        List<AlarmDevice> alarmDeviceList = alarmDeviceService.getById(id);
        return new BaseResponse<>("200",alarmDeviceList);
    }

    //@ApiIgnore//使用该注解忽略这个API
    /**
    * 如果方法参数过多,可使用ApiImplicitParams和ApiImplicitParam写在方法上
    */
    @GetMapping("/list")
    @ApiOperation(value = "分页查询设备列表", notes = "")
    @ApiImplicitParams({
        @ApiImplicitParam(name = "pageNo", value = "页码", required = true, dataType = "Long"),
        @ApiImplicitParam(name = "pageNum", value = "页数", required = true, dataType = "Long")

    })
    public BaseResponse<List<AlarmDevice>> list(Integer pageNo, Integer pageNum){
        //List<AlarmDevice> alarmDeviceList = alarmDeviceService.getByName(name);
        return new BaseResponse<List<AlarmDevice>>("200",null);
    }

}
@ApiModel(value="user对象",description="用户对象user")
public class User{

     @ApiModelProperty(value="用户名",name="username",example="xingguo")
     private String username;

     @ApiModelProperty(value="状态",name="state",required=true)
      private Integer state;

      private String password;
      private String nickName;

      @ApiModelProperty(value="id数组",hidden=true)
      private String[] ids;
- @Api:修饰整个类,描述Controller的作用
- @ApiOperation:描述一个类的一个方法,或者说一个接口
- @ApiParam:单个参数描述
- @ApiModel:用对象来接收参数
- @ApiIgnore:使用该注解忽略这个API
- @ApiParamImplicitL:一个请求参数
- @ApiParamsImplicit 多个请求参数
更详细的swagger的注解含义可以参考github官网和这篇博客
1.4 访问http://ip:port/swagger-ui.html却404?
很有可能是静态资源映射的问题,可以尝试添加:
@Configuration
public class ServletContextConfig extends WebMvcConfigurationSupport {
     /**
     * 这个自定义的类继承自WebMvcConfigurationSupport,spring boot有一个子类EnableWebMvcConfiguration,并且是自动config的.
      * 我们知道,如果一个类用户自己在容器中生成了bean,spring boot就不会帮你自动config。
      * 所以,问题的原因是我们把spring boot自定义的那个bean覆盖了
     */
     @Override
    public void addResourceHandlers(ResourceHandlerRegistry registry) {
        registry.addResourceHandler("/**").addResourceLocations("classpath:/static/");
        registry.addResourceHandler("swagger-ui.html").addResourceLocations("classpath:/META-INF/resources/");
         super.addResourceHandlers(registry);
    }

 }
1.5 结合swagger生成离线文档
swagger2markup的github官网。即利用swagger.json生成md文档或asciidoc文档,然后可转为html,pdf,word格式文档。