版权声明:本文为博主原创文章,未经博主允许不得转载。 https://blog.csdn.net/hiwoshixiaoyu/article/details/84393496
常用精美button

代码路径:
包含了很多的小例子,可以给我个星哦。
https://github.com/hiwoshixiaoyu/Qt-Demo
qss样式如下:
QPushButton#pushButton
{
background-color:rgb(134,183,200);
border:2px solid #5F92B2;
border-radius:5px;
color:white
}
QPushButton#pushButton:hover
{
background-color:rgb(0,130,150);
border:2px solid #5F92B2;
border-radius:5px;
color:white;
}
QPushButton#pushButton:hover:pressed
{
background-color:rgb(85,170,255);
border:2px solid #3C80B1;
border-radius:5px;
color:white;
}


QPushButton#pushButton_2{
    border: 1px solid #333333;
    padding: 4px;
    min-width: 65px;
    min-height: 12px;
}

QPushButton#pushButton_2:hover {
    background-color: #333333;
    border-color: #444444;
}

QPushButton#pushButton_2:pressed {
    background-color: #111111;
    border-color: #333333;
    color: yellow;
}

QPushButton#pushButton_2:disabled {
    color: #333333;
}


QPushButton#pushButton_3
{
    color:white;
    background-color:rgb(14 , 150 , 254);
    border-radius:5px;
}

QPushButton#pushButton_3:hover
{
    color:white;
    background-color:rgb(44 , 137 , 255);
}

QPushButton#pushButton_3:pressed
{
    color:white;
    background-color:rgb(14 , 135 , 228);
    padding-left:3px;
    padding-top:3px;
}


QPushButton#pushButton_4{
    border: 1px solid #C0C0C0;
    background-color:#C0C0C0;
    border-style: solid;
    border-radius:0px;
    width: 40px;
    height:20px;
    padding:0 0px;
    margin:0 0px;
}

QPushButton#pushButton_4:pressed{
    border: 1px solid black;
    background-color:#C0C0C0;
    border-style: solid;
    border-radius:0px;
    width: 40px;
    height:20px;
    padding:0 0px;
    margin:0 0px;
}

QPushButton#pushButton_5{
    border: 1px solid #C0C0C0;
    background-color:#FFFFFF;
    border-style: solid;
    border-radius:0px;
    width: 100px;
    height:20px;
    padding:0 0px;
}

QPushButton#pushButton_5:hover{
    border: 1px solid #E3C46F;
    background-color:#FEF4BF;
    border-style: solid;
    border-radius:2px;
    width: 40px;
    height:20px;
    padding:0 0px;
}
QPushButton#pushButton_5:pressed{
    background-color:#EAF0FF;
    border: 1px solid #AAB4C4;
    width: 40px;
    height:20px;
    padding:0 0px;
    border-radius:1px;
}

QPushButton#pushButton_6{
    color:red;
    background-color:rgb(30,75,10);
	border-style:outset;
    border-width:2px;
    border-color:rgb(10,45,110);
	border-radius:10px;
	font:bold 14px;
	min-width:100px;
    min-height:20px;
    padding:4px;
}

QPushButton#pushButton_6:pressed {
	background-color:rgb(40,85,20);
    border-style:inset;
    padding-left:6px;
    padding-top:6px;
}

QPushButton#pushButton_7{
	border:2px solid red;
}
QPushButton#pushButton_7:pressed {
	border:2px solid black;
}
Qt添加渐变色:
右键控件
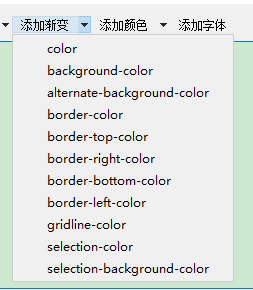
渐变色的样式