就以闹钟的例子开头吧(后续小节皆以闹钟为例,所有源代码只列关键部分)。
public class ScheduleDemo {

    public static void main(String[] args) throws InterruptedException {
        long delay = 1000;  // 一秒后开始执行
        long period = 2000; // 执行间隔
        Timer timer = new Timer();
        AlarmTask alarm = new AlarmTask("闹钟1");
        log.info("["+Thread.currentThread().getName()+"]开启闹钟调度!");
        timer.schedule(alarm,delay,period);
    }

    /**
     *     模拟闹钟
     */
    static class AlarmTask extends TimerTask{
        String name ;
        public AlarmTask(String name){
            this.name=name;
        }
        @Override
        public void run() {
            log.info("["+Thread.currentThread().getName()+"]"+name+":嘀。。。");
            Thread.sleep(1000); //模拟闹钟执行时间,省略异常。。。
        }
    }
}
一秒以后闹钟每隔两秒执行一次。
[main]    开启闹钟调度!
[Timer-0] 闹钟1:嘀。。。
[Timer-0] 闹钟1:嘀。。。
[Timer-0] 闹钟1:嘀。。。
从打印结果可以看到,闹钟调度与执行并非一线程。
下面是Timer时序图,可以了解Timer的大概流程。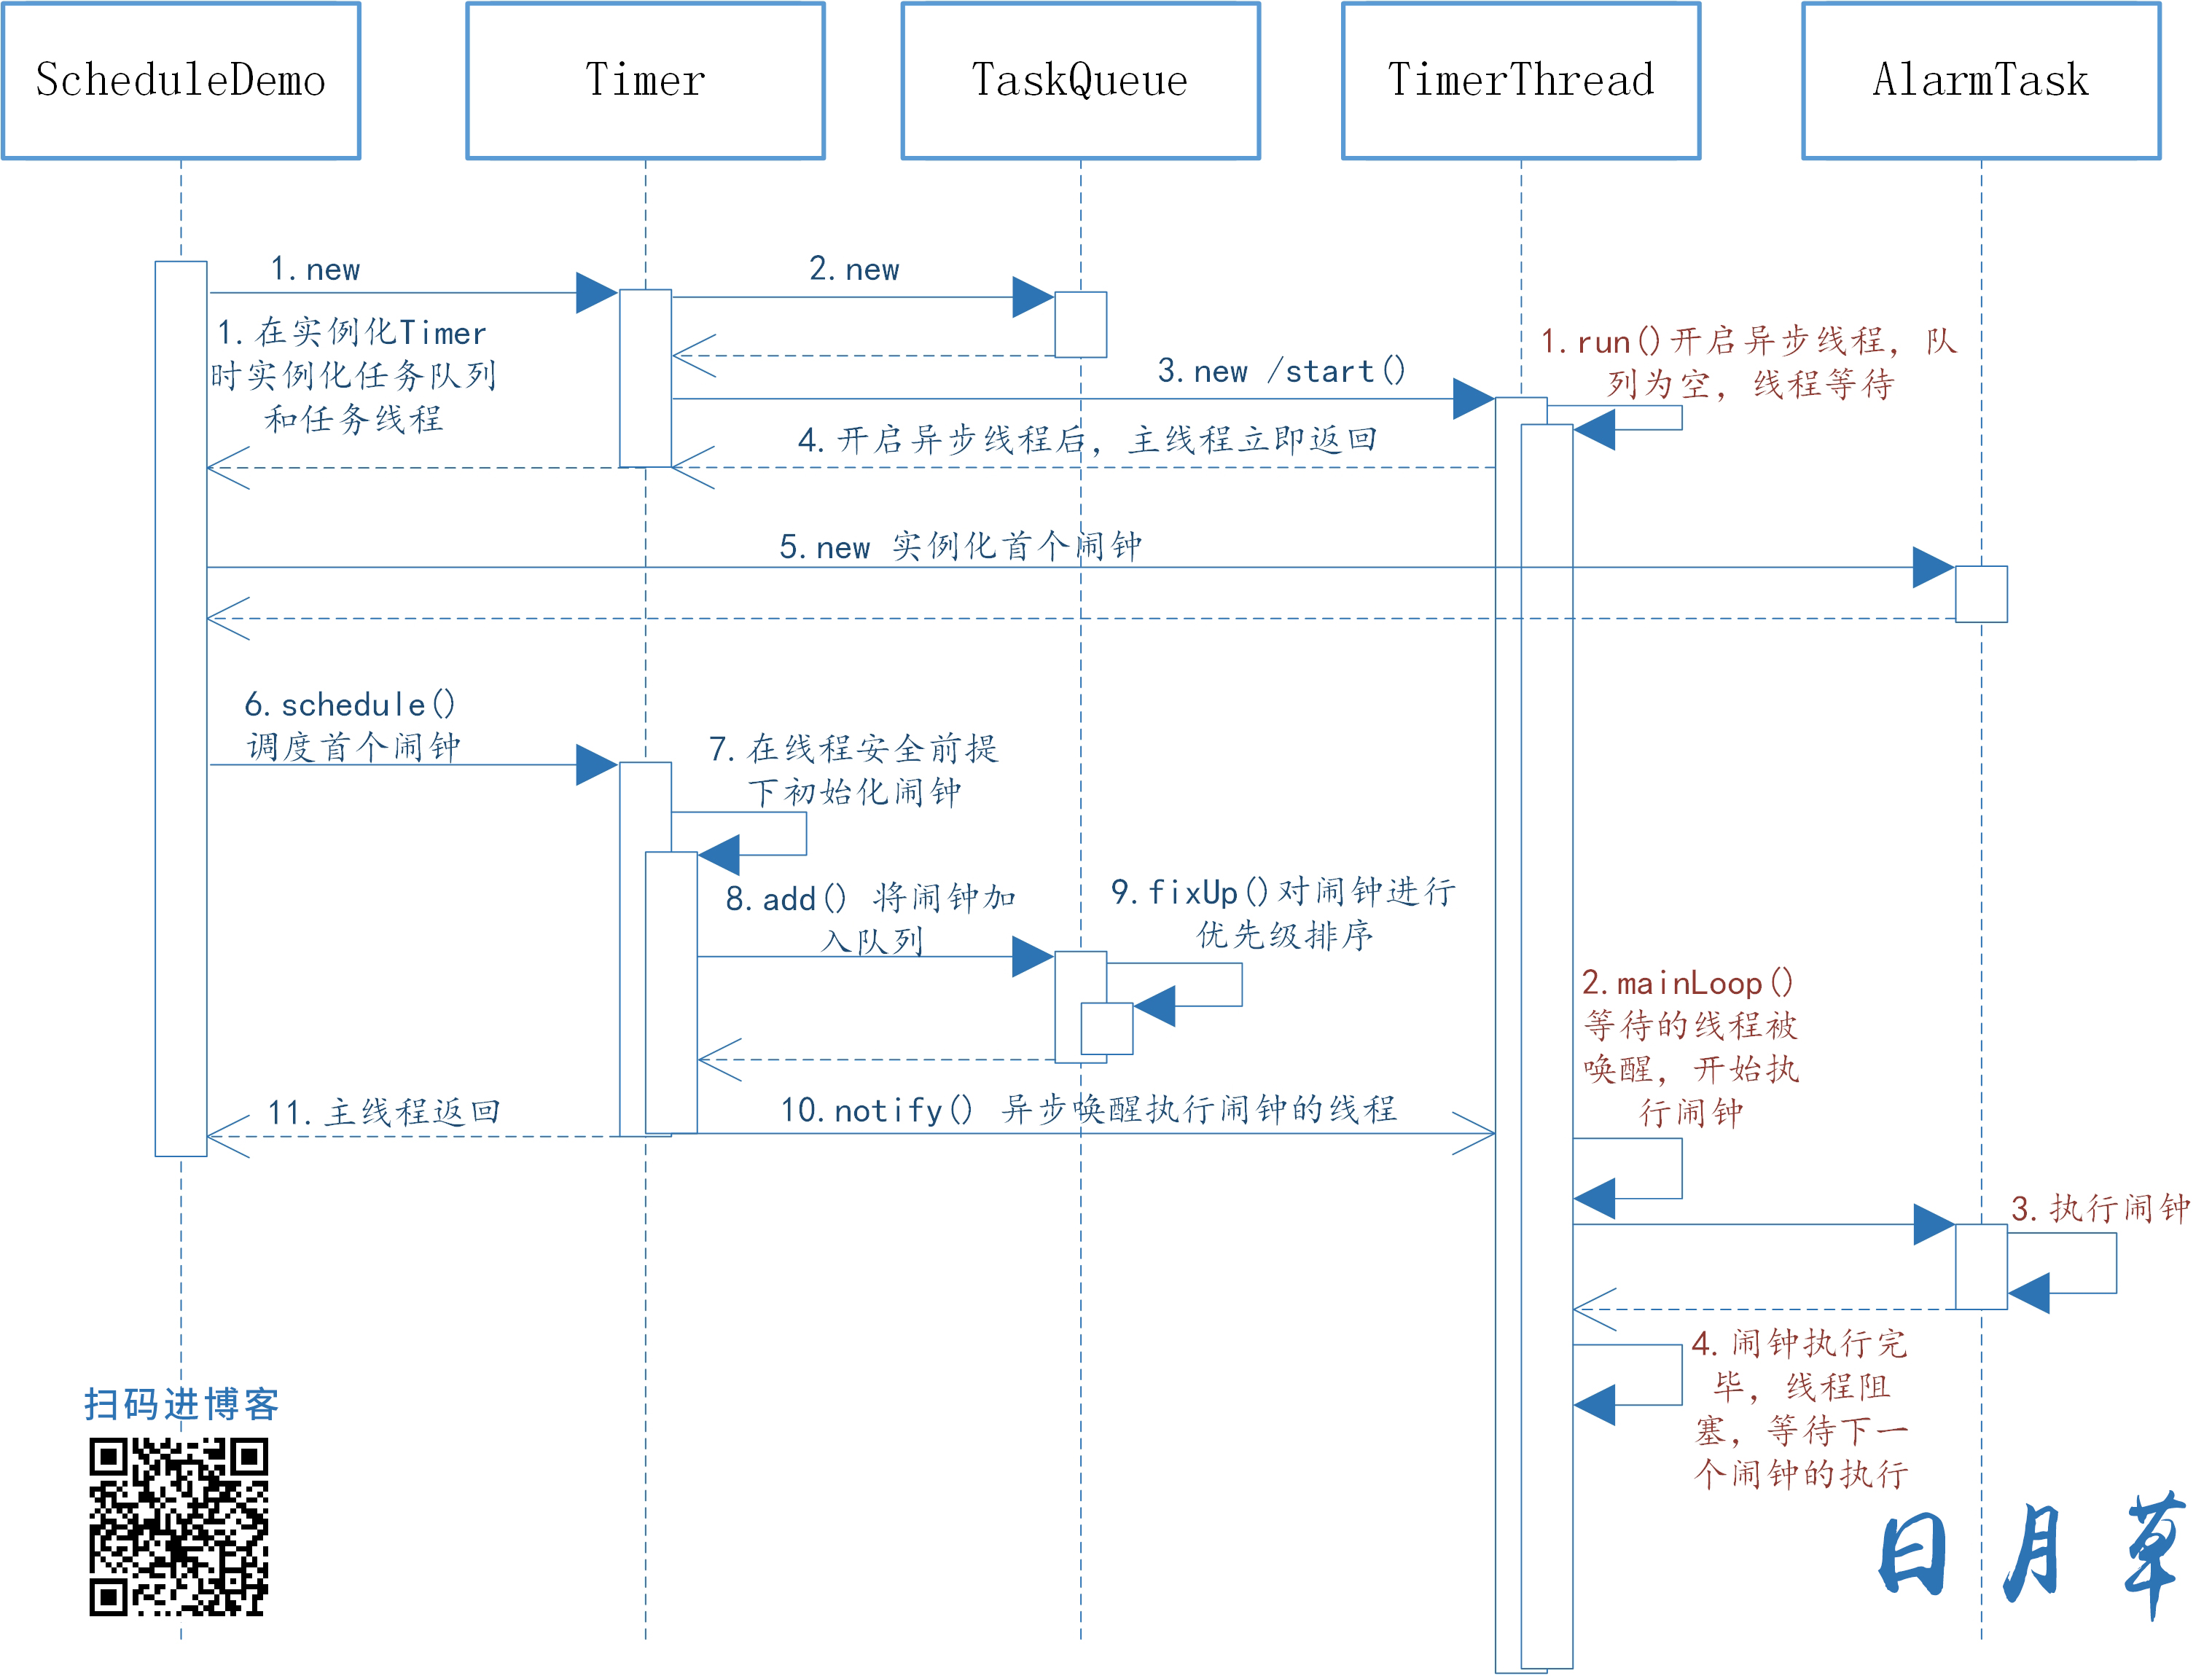
下面开始分析Timer源码。
public class Timer {

    private final TaskQueue queue = new TaskQueue();

    private final TimerThread thread = new TimerThread(queue);

    public Timer() {
        this("Timer-" + serialNumber());
    }

    public Timer(String name) {
        thread.setName(name);
        thread.start();
    }
可以看到,Timer中维护了一个内部线程与队列,且在实例化Timer的同时,就已初始化好了。在初始化Timer时,内部线程TimerThread开始启动,下面是TimerThread的执行过程。
class TimerThread extends Thread {

    public void run() {
        mainLoop();
    }

    private void mainLoop() {
        while (true) {
                synchronized(queue) {
                    // 队列为空,线程被阻塞
                    while (queue.isEmpty() && newTasksMayBeScheduled)
                        queue.wait();
可以看到,虽然线程TimerThread已启动,但因队列为空,线程被阻塞(等待queue锁)。
以上是Timer timer = new Timer()的整个运行过程,继续看timer.schedule(alarm,delay,period)。
public class Timer {

    public void schedule(TimerTask task, long delay, long period) {
        sched(task, System.currentTimeMillis()+delay, -period);
    }

    private void sched(TimerTask task, long time, long period) {
        synchronized(queue) {
               synchronized(task.lock) {
                  task.nextExecutionTime = time;
                  task.period = period;
                  task.state = TimerTask.SCHEDULED;
                }
           // 将闹钟加入队列
            queue.add(task);
            // 此时正好满足条件,主线程释放queue锁,并唤醒TimerThread
            if (queue.getMin() == task)
                queue.notify();
        }
    }
从源码可看出,主线程正好满足queue.getMin() == task,此时将唤醒TimerThread线程(waiting)并释放queue锁。
下面再切换到TimerThread的运行场景。
private void mainLoop() {
    while (true) {
            synchronized(queue) {
                while (queue.isEmpty() && newTasksMayBeScheduled)
                    queue.wait();
                if (queue.isEmpty())
                    break;
                task = queue.getMin();
                synchronized(task.lock) {
                    currentTime = System.currentTimeMillis();
                    executionTime = task.nextExecutionTime;
                    // 已经到了执行时间
                    if (taskFired = (executionTime<=currentTime)) {
                        // ...重新定义下次闹钟执行时间
                    }
                }
                if (!taskFired)
                    // 执行时间未到,线程再次阻塞
                    queue.wait(executionTime - currentTime);
            }
            if (taskFired)
                task.run(); // 同步执行用户定义的闹钟
    }
}
通过上面的源码分析,TimerThread被唤醒后,将判断执行时间,时间到则初始化下次闹钟的执行时间并运行本次闹钟,否则线程将等待指定时间。
如此周而复始。。