属性配置
spring.datasource.url: jdbc:mysql://127.0.0.1:3306/
spring.datasource.username: root
spring.datasource.password: 123456
spring.datasource.driver-class-name: com.mysql.jdbc
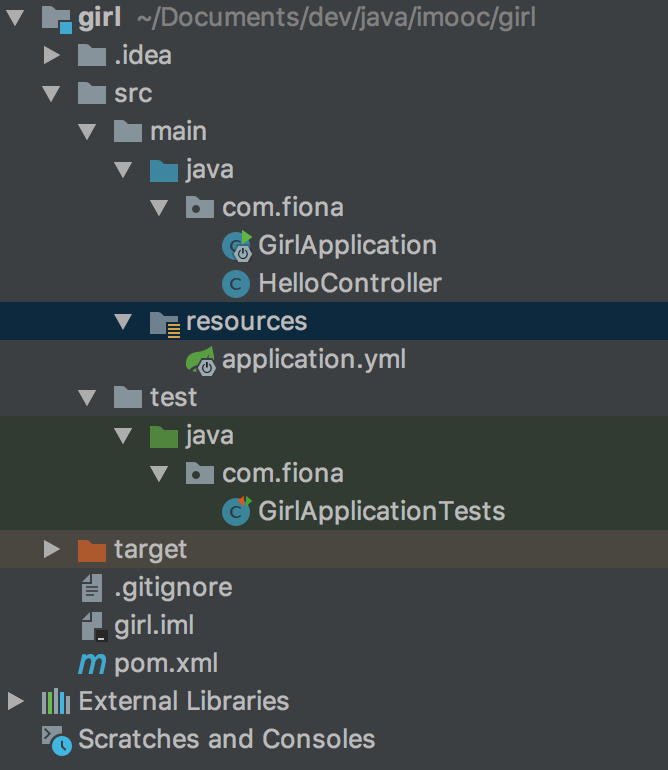
删除girl项目中resource目录下static和templates目录。
application.properties是项目的配置文件。
简单配置一下端口和context-path:
server.port=8081
server.servlet.context-path=/girl
启动项目,访问 http://127.0.0.1:8080/hello 不起作用,因为我们改了端口号,并且给url加上类前缀。新的访问地址:http://127.0.0.1:8081/girl/hello
配置文件类型
默认项目是.properties文件,但推荐使用.yml文件格式。
在.yml文件中,上述端口和路径的配置可写成:
server:
  port: 8081
  servlet:
    context-path: /girl
注意:yml语法冒号后面必须加上空格。否则是错误的。idea对yml语法了很好对支持。
配置文件只需要一个,我们这里把.properties文件删除,留下.yml配置文件。至此,项目的目录结构为下图所示。
举个例子
通过一个小例子来感受配置文件的使用。
假如6个女生分别size为A、B、C、D、E、F
如果目的是找出size大于B的女生,那么为们在配置文件中把size配成B。
application.yml文件内容改成:
server:
  port: 8080
cupSize: B
在HelloController里使用 @Value 来写。代码如下所示。
package com.fiona;

import org.springframework.beans.factory.annotation.Value;
import org.springframework.web.bind.annotation.RequestMapping;
import org.springframework.web.bind.annotation.RequestMethod;
import org.springframework.web.bind.annotation.RestController;

@RestController
public class HelloController {

    @Value("${cupSize}")
    private String cupSize;

    @RequestMapping(value = "/hello",method = RequestMethod.GET)
    public String say() {
        return cupSize;
    }
}
浏览器访问 127.0.0.1:8080/hello
女生还有年龄属性,我们把配置文件加上age属性。
age: 18
和cupSize类似,我们在HelloController加上age属性:
@RestController
public class HelloController {

    @Value("${cupSize}")
    private String cupSize;

    @Value("${age}")
    private Integer age;

    @RequestMapping(value = "/hello",method = RequestMethod.GET)
    public String say() {
        return cupSize + age;
    }
}
我们可以看到age是Integer类型的,配置文件中不需要判断类型。只需要在注入进来的地方设置属性类型就可以了。
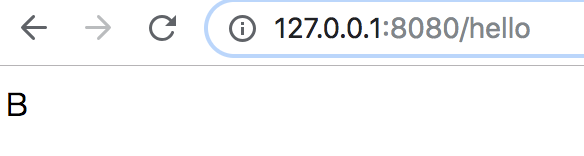
启动项目,在浏览器中返回结果 B18
如何在配置里再使用配置呢?
application.yml中改成:

server:
  port: 8080
cupSize: B
age: 18
content: "cupSize: ${cupSize}, age: ${age}"
HelloController中改成:
package com.fiona;

import org.springframework.beans.factory.annotation.Value;
import org.springframework.web.bind.annotation.RequestMapping;
import org.springframework.web.bind.annotation.RequestMethod;
import org.springframework.web.bind.annotation.RestController;

@RestController
public class HelloController {

    @Value("${cupSize}")
    private String cupSize;

    @Value("${age}")
    private Integer age;

    @Value("${content}")
    private String content;

    @RequestMapping(value = "/hello",method = RequestMethod.GET)
    public String say() {
        return content;
    }
}
浏览器刷新一下
cupSize: B, age: 18
配置写到类里面
application.yml内容修改成:
server:
  port: 8080
girl:
  cupSize: B
  age: 18
在 com.fiona包中新建一个GirlProperties类,使用@ConfigurationProperties(prefix = “girl”) 获取前缀是girl的配置。
此时出现问题 Spring Boot Configuration Annotation Processor not found in classpath
在pom.xml中加上maven包依赖
<dependency>
    <groupId> org.springframework.boot </groupId>
    <artifactId>spring-boot-configuration-processor</artifactId>
    <optional> true </optional>
</dependency>
package com.fiona;

import org.springframework.boot.context.properties.ConfigurationProperties;

@Component
@ConfigurationProperties(prefix = "girl")
public class GirlProperties {

    private String cupSize;

    private Integer age;

    public String getCupSize() {
        return cupSize;
    }

    public void setCupSize(String cupSize) {
        this.cupSize = cupSize;
    }

    public Integer getAge() {
        return age;
    }

    public void setAge(Integer age) {
        this.age = age;
    }
}
package com.fiona;

import org.springframework.beans.factory.annotation.Autowired;
import org.springframework.web.bind.annotation.RequestMapping;
import org.springframework.web.bind.annotation.RequestMethod;
import org.springframework.web.bind.annotation.RestController;

@RestController
public class HelloController {

    @Autowired
    private GirlProperties girlProperties;

    @RequestMapping(value = "/hello",method = RequestMethod.GET)
    public String say() {
        return girlProperties.getCupSize();
    }
}
浏览器请求 http://127.0.0.1:8080/hello ,显示结果B
不同环境使用不同配置
假设需求:开发环境 cupSize需求为B,生成环境cupSize需求为F
将application.yml拷贝两份,分别命名为application-dev.yml和application-prod.yml
application-dev.yml
server:
  port: 8080
girl:
  cupSize: B
  age: 18
application-prod.yml
server:
  port: 8081
girl:
  cupSize: F
  age: 18
application.yml
当前使用的是dev的配置
spring:
  profiles:
    active: dev
访问 http://127.0.0.1:8080/hello 显示B
spring:
  profiles:
    active: prod
访问 http://127.0.0.1:8081/hello 显示F
此时,我们可以通过第三种启动方式启动一种环境配置,再在idea里启动另一种,具体如下:
打开命令行
cd ~/Documents/dev/java/imooc/girl mvn install(项目路径)
cd target
java -jar girl-0.0.1-SNAPSHOT.jar ----spring.profiles.active=prod
暂停停止服务按键盘control+c
再将idea中application.yml配置 active: dev 启动项目
可以访问:127.0.0.1:8081/hello 显示F
可以访问:127.0.0.1:8080/hello 显示B
总结
属性配置
| @Value |
|---|
| @Component |
| @ConfigurationProperties |