详解 Hello World
Activity
一个可视化的界面,独立的窗口,继承来自AppCompatActivity;
- MainActivity
- onCreate()
- setContentView()
package com.e.myapplication;

import androidx.appcompat.app.AppCompatActivity;
import android.os.Bundle;

public class MainActivity extends AppCompatActivity {


	//重写了父类的方法 当这个界面别启动的时候 就开始执行 onCreate
    @Override
    protected void onCreate(Bundle savedInstanceState) {


        super.onCreate(savedInstanceState);
        //设置内容视图 打开布局文件 layout
        //R 为每一个资源文件按类别分配一个索引
        setContentView(R.layout.activity_main);
    }
}
布局文件
activity_main.xml
<?xml version="1.0" encoding="utf-8"?>
<androidx.constraintlayout.widget.ConstraintLayout xmlns:android="http://schemas.android.com/apk/res/android"
    xmlns:app="http://schemas.android.com/apk/res-auto"
    xmlns:tools="http://schemas.android.com/tools"
    android:layout_width="match_parent"
    android:layout_height="match_parent"
    tools:context=".MainActivity">

    <TextView
        android:layout_width="wrap_content"
        android:layout_height="wrap_content"
        android:text="Hello World!"
        app:layout_constraintBottom_toBottomOf="parent"
        app:layout_constraintLeft_toLeftOf="parent"
        app:layout_constraintRight_toRightOf="parent"
        app:layout_constraintTop_toTopOf="parent" />

</androidx.constraintlayout.widget.ConstraintLayout>
清单文件
AndroidManifest.xml
<?xml version="1.0" encoding="utf-8"?>
<manifest xmlns:android="http://schemas.android.com/apk/res/android"
    package="com.e.myapplication">

    <application
        android:allowBackup="true"
        android:icon="@mipmap/ic_launcher"
        android:label="@string/app_name"
        android:roundIcon="@mipmap/ic_launcher_round"
        android:supportsRtl="true"
        android:theme="@style/AppTheme">
        <activity android:name=".MainActivity">
        	//指定启动界面
            <intent-filter>
                <action android:name="android.intent.action.MAIN" />

                <category android:name="android.intent.category.LAUNCHER" />
            </intent-filter>
        </activity>
    </application>

</manifest>
布局
布局是指对界面结构的全面规划与安排,通过api中提供的各种布局能够快速的完成对于界面的设计;
常用布局
线性布局(LinearLayout)
垂直线性布局(vertical);
水平线性布局(horizontal);

代码文件:
//chatting_layout.xml
<?xml version="1.0" encoding="utf-8"?>
<LinearLayout xmlns:android="http://schemas.android.com/apk/res/android"
    xmlns:app="http://schemas.android.com/apk/res-auto"
    android:orientation="vertical" android:layout_width="match_parent"
    android:layout_height="match_parent">

    <LinearLayout
        android:layout_width="match_parent"
        android:layout_height="60dp"
        android:orientation="horizontal"
        android:background="#333333"
        android:paddingLeft="15dp">

        <TextView
            android:layout_width="wrap_content"
            android:layout_height="wrap_content"
            android:text="<"
            android:textColor="#ffffff"
            android:textSize="50dp"
            android:layout_gravity="center_vertical"/>

        <TextView
            android:layout_width="0dp"
            android:layout_height="wrap_content"
            android:layout_weight="1"
            android:text="耳朵"
            android:textSize="50dp"
            android:textColor="#ffffff"
            android:layout_gravity="center_vertical"/>

        <ImageView
            android:layout_width="0dp"
            android:layout_height="wrap_content"
            android:layout_weight="0.5"
            android:layout_gravity="center_vertical"
            app:srcCompat="@mipmap/ic_launcher_round" />
    </LinearLayout>

    <LinearLayout
        android:layout_width="match_parent"
        android:layout_height="0dp"
        android:orientation="horizontal"
        android:layout_weight="1">

    </LinearLayout>

    <LinearLayout
        android:layout_width="match_parent"
        android:layout_height="60dp"
        android:orientation="horizontal"
        android:background="#cccccc">

        <ImageView
            android:layout_width="0dp"
            android:layout_height="wrap_content"
            android:layout_gravity="center_vertical"
            android:layout_weight="1"
            app:srcCompat="@mipmap/yuyin" />

        <ImageView
            android:layout_width="0dp"
            android:layout_height="wrap_content"
            android:layout_weight="1"
            android:layout_gravity="center_vertical"
            app:srcCompat="@mipmap/xiaolian" />

        <TextView
            android:layout_width="0dp"
            android:layout_height="match_parent"
            android:layout_weight="4"/>

        <ImageView
            android:layout_width="0dp"
            android:layout_height="wrap_content"
            android:layout_weight="1"
            android:layout_gravity="center_vertical"
            app:srcCompat="@mipmap/jiahao" />

    </LinearLayout>

</LinearLayout>
运行效果:

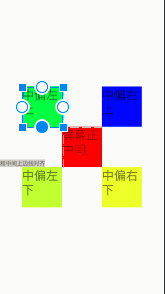
相对布局(RelativeLayout)
相对布局不区分代码前后的关系,代码前后并不能决定组件的位置;

相对布局重要属性
1.相对于父容器(取值:true / false),如:android:layout_alignParentRight;
2.相对于其他控件(取值:其他控件id),如:android:layout_toRightOf;
在参照物的某一边:
layout_toRightOf
layout_toLeftOf
layout_above
layout_below
和参照物的某边线对齐:
layout_alignBottom
layout_alignTopTop
layout_alignTopLeft
layout_alignTopRight
代码文件:
//relative_test.xml
<?xml version="1.0" encoding="utf-8"?>
<RelativeLayout xmlns:android="http://schemas.android.com/apk/res/android"
    android:layout_width="match_parent" android:layout_height="match_parent">
    <TextView
        android:id="@+id/center"
        android:layout_width="100dp"
        android:layout_height="100dp"
        android:textSize="30sp"
        android:text="屏幕正中间"
        android:background="#ff0000"
        android:layout_centerInParent="true"/>
    <TextView
        android:layout_width="100dp"
        android:layout_height="100dp"
        android:textSize="30sp"
        android:text="中偏左上"
        android:background="#00ff00"
        android:layout_toLeftOf="@+id/center"
        android:layout_above="@+id/center"/>
    <TextView
        android:layout_width="100dp"
        android:layout_height="100dp"
        android:textSize="30sp"
        android:text="中偏右上"
        android:background="#0000ff"
        android:layout_toRightOf="@+id/center"
        android:layout_above="@+id/center"/>
    <TextView
        android:layout_width="100dp"
        android:layout_height="100dp"
        android:textSize="30sp"
        android:text="中偏左下"
        android:background="#ccff00"
        android:layout_toLeftOf="@+id/center"
        android:layout_below="@+id/center"/>
    <TextView
        android:layout_width="100dp"
        android:layout_height="100dp"
        android:textSize="30sp"
        android:text="中偏右下"
        android:background="#eeff00"
        android:layout_toRightOf="@+id/center"
        android:layout_below="@+id/center"/>
    <TextView
        android:layout_width="wrap_content"
        android:layout_height="wrap_content"
        android:text="和中间上边线对齐"
        android:background="#cccccc"
        android:layout_alignBottom="@+id/center"/>
</RelativeLayout>
运行演示:
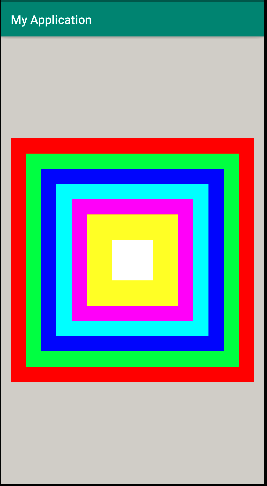
帧布局(FrameLayout)

FrameLayout
重要属性
android:layout_gravity//控件重力
android:foreground//前景
android:foregroundGravity//前景重力
代码文件:
//frame_layout.xml
<?xml version="1.0" encoding="utf-8"?>
<FrameLayout xmlns:android="http://schemas.android.com/apk/res/android"
    android:orientation="vertical" android:layout_width="match_parent"
    android:layout_height="match_parent"
    android:background="#cccccc"
    android:foreground="@mipmap/t"
    android:foregroundGravity="center">
    <TextView
        android:layout_width="400dp"
        android:layout_height="400dp"
        android:background="#ff0000"
        android:layout_gravity="center"/>
    <TextView
        android:layout_width="350dp"
        android:layout_height="350dp"
        android:background="#00ff00"
        android:layout_gravity="center"/>
    <TextView
        android:layout_width="300dp"
        android:layout_height="300dp"
        android:background="#0000ff"
        android:layout_gravity="center"/>
    <TextView
        android:layout_width="250dp"
        android:layout_height="250dp"
        android:background="#00ffff"
        android:layout_gravity="center"/>
    <TextView
        android:layout_width="200dp"
        android:layout_height="200dp"
        android:background="#ff00ff"
        android:layout_gravity="center"/>
    <TextView
        android:layout_width="150dp"
        android:layout_height="150dp"
        android:background="#ffff00"
        android:layout_gravity="center"/>

</FrameLayout>
运行演示:
表格布局(TableLayout)

网格布局(GridLayout)

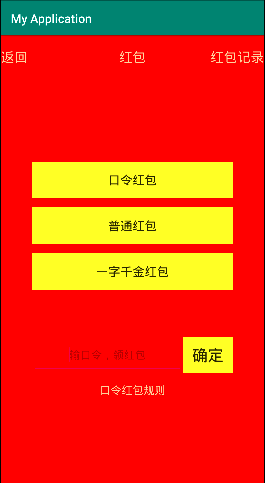
约束布局(ConstraintLayout)

重要属性
app:layout_constraintBottom_toBottomOf//约束当前view的底部位置
app:layput_constraintVertical_bias//垂直偏移量
代码文件:
//constraint_layout.xml
<?xml version="1.0" encoding="utf-8"?>
<androidx.constraintlayout.widget.ConstraintLayout xmlns:android="http://schemas.android.com/apk/res/android"
    xmlns:tools="http://schemas.android.com/tools"
    android:layout_width="match_parent"
    android:layout_height="match_parent"
    xmlns:app="http://schemas.android.com/apk/res-auto"
    android:background="#ff0000">

    <!--
    app:android:layout_constraint方位_to方位Of="?"
    ? :1.方位    2.引用其他控件id
     app:layout_constraintLeft_toLeftOf="parent"
     app:layout_constraintRight_toRightOf="parent"
     app:layout_constraintTop_toTopOf="parent"
     app:layout_constraintBottom_toBottomOf="parent"

     app:layout_constraintVertical_bias="0.5" 垂直偏移量 正中间
     app:layout_constraintHorizontal_bias="0.5" 水平偏移量 正中间
    -->

    <TextView
        android:id="@+id/textView6"
        android:layout_width="wrap_content"
        android:layout_height="wrap_content"
        android:layout_marginTop="20dp"
        android:text="红包"
        android:textColor="#f6d5a8"
        android:textSize="22sp"
        app:layout_constraintLeft_toLeftOf="parent"
        app:layout_constraintRight_toRightOf="parent"
        app:layout_constraintTop_toTopOf="parent" />

    <TextView
        android:id="@+id/textView3"
        android:layout_width="wrap_content"
        android:layout_height="wrap_content"
        android:text="< 返回"
        android:textSize="22sp"
        android:textColor="#f6d5a8"
        android:layout_marginTop="20dp"
        app:layout_constraintLeft_toLeftOf="parent"
        app:layout_constraintTop_toTopOf="parent"/>

    <TextView
        android:id="@+id/textView5"
        android:layout_width="wrap_content"
        android:layout_height="wrap_content"
        android:text="红包记录"
        android:textSize="22sp"
        android:textColor="#f6d5a8"
        android:layout_marginTop="20dp"
        app:layout_constraintRight_toRightOf="parent"
        app:layout_constraintTop_toTopOf="parent"/>

    <Button
        android:id="@+id/button2"
        android:layout_width="330dp"
        android:layout_height="60dp"
        android:background="#ffff00"
        android:text="一字千金红包"
        android:textSize="20sp"
        app:layout_constraintBottom_toBottomOf="parent"
        app:layout_constraintEnd_toEndOf="parent"
        app:layout_constraintStart_toStartOf="parent"
        app:layout_constraintTop_toTopOf="parent"
        app:layout_constraintVertical_bias="0.53" />

    <Button
        android:id="@+id/button"
        android:layout_width="330dp"
        android:layout_height="60dp"
        android:background="#ffff00"
        android:text="普通红包"
        android:textSize="20sp"
        android:layout_marginBottom="15dp"
        app:layout_constraintBottom_toTopOf="@+id/button2"
        app:layout_constraintEnd_toEndOf="parent"
        app:layout_constraintStart_toStartOf="parent" />

    <Button
        android:id="@+id/button3"
        android:layout_width="330dp"
        android:layout_height="60dp"
        android:background="#ffff00"
        android:text="口令红包"
        android:textSize="20sp"
        android:layout_marginBottom="15dp"
        app:layout_constraintBottom_toTopOf="@+id/button"
        app:layout_constraintEnd_toEndOf="parent"
        app:layout_constraintStart_toStartOf="parent" />

    <LinearLayout
        android:id="@+id/linearLayout"
        android:layout_width="330dp"
        android:layout_height="60dp"
        android:orientation="horizontal"
        app:layout_constraintBottom_toBottomOf="parent"
        app:layout_constraintEnd_toEndOf="parent"
        app:layout_constraintStart_toStartOf="parent"
        app:layout_constraintTop_toBottomOf="@+id/button2"
        app:layout_constraintVertical_bias="0.3">

        <EditText
            android:layout_width="0dp"
            android:layout_height="match_parent"
            android:layout_weight="3"
            android:gravity="center"
            android:hint="输口令,领红包" />

        <Button
            android:layout_width="0dp"
            android:layout_height="match_parent"
            android:layout_gravity="center"
            android:layout_weight="1"
            android:background="#ffff00"
            android:text="确定"
            android:textSize="26sp" />

    </LinearLayout>

    <TextView
        android:id="@+id/textView7"
        android:layout_width="wrap_content"
        android:layout_height="wrap_content"
        android:text="口令红包规则"
        android:textSize="18sp"
        android:textColor="#f6d5a8"
        android:layout_marginTop="15dp"
        app:layout_constraintEnd_toEndOf="parent"
        app:layout_constraintStart_toStartOf="parent"
        app:layout_constraintTop_toBottomOf="@+id/linearLayout" />

</androidx.constraintlayout.widget.ConstraintLayout>
运行演示:
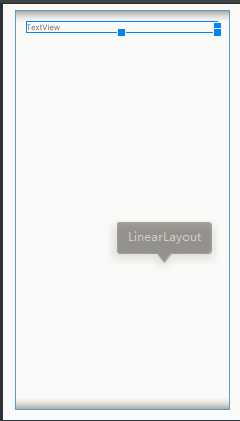
添加布局
利用xml文件设计
布局重要属性
android:layout_width//宽度
android:layout_height//高度
android:layout_padding//内边距
android:layout_margin//外边距
代码文件:
<?xml version="1.0" encoding="utf-8"?>
<LinearLayout xmlns:android="http://schemas.android.com/apk/res/android"
    android:orientation="vertical" android:layout_width="match_parent"
    android:layout_height="match_parent"
    android:layout_margin="20dp"
    android:padding="20dp">

    <TextView
        android:id="@+id/textView"
        android:layout_width="match_parent"
        android:layout_height="wrap_content"
        android:text="TextView" />
</LinearLayout>
运行效果:
线性布局重要属性
android:orientation//方向
当 android:orientation=”vertical” 时, 只有水平方向的设置才起作用,垂直方向的设置不起作用。即:left,right,center_horizontal 是生效的。vertical为垂直布局。
当 android:orientation=”horizontal” 时, 只有垂直方向的设置才起作用,水平方向的设置不起作用。即:top,bottom,center_vertical 是生效的。horizontal为水平布局。
android:layout_weight//权重
有 android:layout_weight 的组件先不动,等剩余的组件分配完空间以后,占领剩余的所有空间,具有 android:layout_weight 的组件 layout_width 设置成 0dp;
代码文件:
<?xml version="1.0" encoding="utf-8"?>
<LinearLayout xmlns:android="http://schemas.android.com/apk/res/android"
    android:orientation="horizontal" android:layout_width="match_parent"
    android:layout_height="match_parent"
    android:layout_margin="20dp"
    android:padding="20dp">

    <TextView
        android:id="@+id/textView"
        android:layout_width="0dp"
        android:layout_height="wrap_content"
        android:text="TextView"
        android:background="#ff0000"
            android:layout_weight="1"/>

    <TextView
        android:id="@+id/textView1"
        android:layout_width="wrap_content"
        android:layout_height="wrap_content"
        android:text="TextView"
        android:background="#00ff00" />
    <TextView
        android:id="@+id/textView2"
        android:layout_width="wrap_content"
        android:layout_height="wrap_content"
        android:text="TextView"
        android:background="#0000ff" />
</LinearLayout>
运行效果:

同理,利用 layout_weight 这样的属性,可以设置组件按比例显示,比如按照比例 1:1:1 显示;
代码文件:
<?xml version="1.0" encoding="utf-8"?>
<LinearLayout xmlns:android="http://schemas.android.com/apk/res/android"
    android:orientation="horizontal" android:layout_width="match_parent"
    android:layout_height="match_parent"
    android:layout_margin="20dp"
    android:padding="20dp">

    <TextView
        android:id="@+id/textView"
        android:layout_width="0dp"
        android:layout_height="wrap_content"
        android:text="TextView"
        android:background="#ff0000"
        android:layout_weight="1"/>

    <TextView
        android:id="@+id/textView1"
        android:layout_width="0dp"
        android:layout_height="wrap_content"
        android:text="TextView"
        android:background="#00ff00"
        android:layout_weight="1"/>
    <TextView
        android:id="@+id/textView2"
        android:layout_width="0dp"
        android:layout_height="wrap_content"
        android:text="TextView"
        android:background="#0000ff"
        android:layout_weight="1"/>
</LinearLayout>
运行效果:

android:layout_gravity//重力
可以控制组件的位置,bottom、top、center、left、right 等;
代码文件:
//linearlayout_test.xml
<?xml version="1.0" encoding="utf-8"?>
<LinearLayout xmlns:android="http://schemas.android.com/apk/res/android"
    android:orientation="horizontal" android:layout_width="match_parent"
    android:layout_height="match_parent"
    android:layout_margin="20dp"
    android:padding="20dp">

    <TextView
        android:id="@+id/textView"
        android:layout_width="0dp"
        android:layout_height="wrap_content"
        android:text="TextView"
        android:background="#ff0000"
        android:layout_weight="1"
        android:layout_gravity="bottom"/>

    <TextView
        android:id="@+id/textView1"
        android:layout_width="0dp"
        android:layout_height="wrap_content"
        android:text="TextView"
        android:background="#00ff00"
        android:layout_weight="1"
        android:layout_gravity="center"/>
    <TextView
        android:id="@+id/textView2"
        android:layout_width="0dp"
        android:layout_height="wrap_content"
        android:text="TextView"
        android:background="#0000ff"
        android:layout_weight="1"/>
</LinearLayout>
运行效果:

使用java代码添加
代码文件:
//MainActivity.java
package com.e.myapplication;

import androidx.appcompat.app.AppCompatActivity;

import android.graphics.Color;
import android.os.Bundle;
import android.view.ViewGroup;
import android.widget.LinearLayout;

public class MainActivity extends AppCompatActivity {


    @Override
    protected void onCreate(Bundle savedInstanceState) {


        super.onCreate(savedInstanceState);
//        setContentView(R.layout.activity_main);
        //1.根布局为线性布局 对象为本 MainActivity
        LinearLayout linearLayout = new LinearLayout(this);
        //2,设置宽高 和窗口等宽等高 MATCH_PARENT MATCH=匹配 PARENT=父容器
        linearLayout.setLayoutParams(new LinearLayout.LayoutParams(ViewGroup.LayoutParams.MATCH_PARENT, ViewGroup.LayoutParams.MATCH_PARENT));
        //3.背景设置为红色
        linearLayout.setBackgroundColor(Color.RED);
        //4.指定此Activity的内容视图为该线性布局
        setContentView(linearLayout);
    }
}
运行效果:

UI基础控件
通用属性
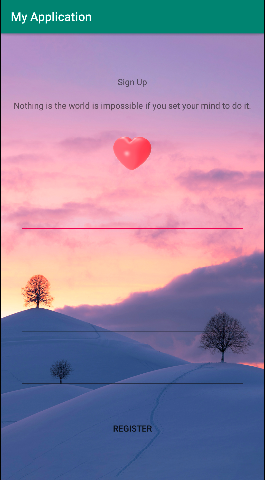
小案例


代码文件:
//activity_main.xml
<?xml version="1.0" encoding="utf-8"?>
<LinearLayout xmlns:android="http://schemas.android.com/apk/res/android"
    android:orientation="vertical" android:layout_width="match_parent"
    android:layout_height="match_parent"
    android:background="@mipmap/qk"
    android:gravity="center_horizontal">
    <TextView
        android:layout_width="wrap_content"
        android:layout_height="wrap_content"
        android:text="Sign Up"
        android:layout_marginTop="70dp"/>
    <TextView
        android:layout_width="wrap_content"
        android:layout_height="wrap_content"
        android:text="Nothing is the world is impossible if you set your mind to do it."
        android:layout_margin="20dp"/>
    <ImageView
        android:layout_width="69dp"
        android:layout_height="75dp"
        android:src="@mipmap/love"
        android:layout_margin="10dp"/>
    <EditText
        android:layout_width="match_parent"
        android:layout_height="wrap_content"
        android:layout_marginLeft="30dp"
        android:layout_marginRight="30dp"
        android:layout_marginTop="40dp"/>
    <EditText
        android:layout_width="match_parent"
        android:layout_height="wrap_content"
        android:layout_marginLeft="30dp"
        android:layout_marginRight="30dp"
        android:layout_marginTop="40dp"/>
    <EditText
        android:layout_width="match_parent"
        android:layout_height="wrap_content"
        android:layout_marginLeft="30dp"
        android:layout_marginRight="30dp"
        android:layout_marginTop="40dp"/>
    <EditText
        android:layout_width="match_parent"
        android:layout_height="wrap_content"
        android:layout_marginLeft="30dp"
        android:layout_marginRight="30dp"
        android:layout_marginTop="40dp"/>

    <Button
        android:layout_width="match_parent"
        android:layout_height="50dp"
        android:layout_marginLeft="30dp"
        android:layout_marginTop="40dp"
        android:layout_marginRight="30dp"
        android:background="#00000000"
        android:text="Register" />
</LinearLayout>
运行效果:
View
- 处理文本内容的View(TextView)
- 被点击的View(Button)
- 处理图片内容的View(ImageView)
- 接收用户信息输入的View(EditView)
- 进度条类的View(ProgressBar)
TextView的继承体系

ScrollView标签里只能设置一个组件,否则app异常出错。解决的方法是在ScrollView中假如布局,才可以加入更多组件;
代码文件:
<?xml version="1.0" encoding="utf-8"?>
<ScrollView xmlns:android="http://schemas.android.com/apk/res/android"
    android:orientation="vertical" android:layout_width="match_parent"
    android:layout_height="match_parent">

    <!--android:textSize="22sp"设置字体的大小
    android:textColor="#00ffff"设置字体的颜色
    android:lineSpacingMultiplier="1.5"设置倍距
    android:lineSpacingExtra="15sp"修改间距
    -->
    <LinearLayout
        android:layout_width="match_parent"
        android:layout_height="match_parent"
        android:orientation="vertical">

        <TextView
            android:layout_width="match_parent"
            android:layout_height="match_parent"
            android:text="@string/long_txt"
            android:textSize="22sp"
            android:textColor="#00ffff"
            android:lineSpacingExtra="15sp"/>
        <ImageView
            android:layout_width="50dp"
            android:layout_height="50dp"
            android:src="@mipmap/love"
            android:layout_gravity="center_horizontal"/>
    </LinearLayout>

</ScrollView>
运行演示:

设置文字段落的单行模式,单行文字走动的效果,需要注意的是,一个界面只有一个焦点,所以只能设置一个跑马灯;
代码文件:
//activity_text2
<?xml version="1.0" encoding="utf-8"?>
<LinearLayout xmlns:android="http://schemas.android.com/apk/res/android"
    android:layout_width="match_parent" android:layout_height="match_parent">
    <!--android:singleLine="true"设置单行模式
    android:ellipsize="start"设置省略号的位置
    android:focusable="true"设置可以获取焦点
    android:focusableInTouchMode="true"设置在触摸时可以获取焦点
    android:marqueeRepeatLimit="marquee_forever"设置跑马灯时常
    -->
    <TextView
        android:layout_width="match_parent"
        android:layout_height="match_parent"
        android:singleLine="true"
        android:text="@string/long_txt"
        android:ellipsize="marquee"
        android:focusable="true"
        android:focusableInTouchMode="true"
        android:marqueeRepeatLimit="marquee_forever"/>

</LinearLayout>
运行效果:

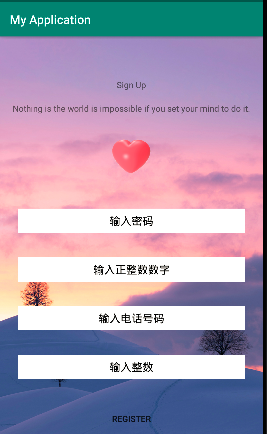
EditView
android:inputType//输入类型
android:hint//提示文字输入
android: maxLength//输入位数限制
代码文件:
//activity_main.xml
<?xml version="1.0" encoding="utf-8"?>
<LinearLayout xmlns:android="http://schemas.android.com/apk/res/android"
    android:orientation="vertical" android:layout_width="match_parent"
    android:layout_height="match_parent"
    android:background="@mipmap/qk"
    android:gravity="center_horizontal">
    <TextView
        android:layout_width="wrap_content"
        android:layout_height="wrap_content"
        android:text="Sign Up"
        android:layout_marginTop="70dp"/>
    <TextView
        android:layout_width="wrap_content"
        android:layout_height="wrap_content"
        android:text="Nothing is the world is impossible if you set your mind to do it."
        android:layout_margin="20dp"/>
    <ImageView
        android:layout_width="69dp"
        android:layout_height="75dp"
        android:src="@mipmap/love"
        android:layout_margin="10dp"/>

    <!--android:inputType 输入类型
    textPassword 密码输入
    number 正数字输入
    numberSigned 整数
    numberDecimal 小数
    phone 电话号码输入
    | 可以连接多个属性 numberSigned | numberDecimal

    android:hint输入提示
    android:maxLength输入长度限制
    -->
    <EditText
        android:layout_width="match_parent"
        android:layout_height="40dp"
        android:layout_marginLeft="30dp"
        android:layout_marginRight="30dp"
        android:layout_marginTop="40dp"
        android:inputType="textPassword"
        android:hint="输入密码"
        android:gravity="center"
        android:textColorHint="#000000"
        android:maxLength="5"
        android:background="@mipmap/t"/>
    <EditText
        android:layout_width="match_parent"
        android:layout_height="40dp"
        android:layout_marginLeft="30dp"
        android:layout_marginRight="30dp"
        android:layout_marginTop="40dp"
        android:inputType="number"
        android:hint="输入正整数数字"
        android:gravity="center"
        android:textColorHint="#000000"
        android:maxLength="3"
        android:background="@mipmap/t"/>
    <EditText
        android:layout_width="match_parent"
        android:layout_height="40dp"
        android:layout_marginLeft="30dp"
        android:layout_marginRight="30dp"
        android:layout_marginTop="40dp"
        android:inputType="phone"
        android:hint="输入电话号码"
        android:gravity="center"
        android:textColorHint="#000000"
        android:maxLength="11"
        android:background="@mipmap/t"/>
    <EditText
        android:layout_width="match_parent"
        android:layout_height="40dp"
        android:layout_marginLeft="30dp"
        android:layout_marginRight="30dp"
        android:layout_marginTop="40dp"
        android:inputType="numberSigned"
        android:hint="输入整数"
        android:gravity="center"
        android:textColorHint="#000000"
        android:maxLength="3"
        android:background="@mipmap/t"/>

    <Button
        android:layout_width="match_parent"
        android:layout_height="50dp"
        android:layout_marginLeft="30dp"
        android:layout_marginTop="40dp"
        android:layout_marginRight="30dp"
        android:background="#00000000"
        android:text="Register" />
</LinearLayout>
运行效果:

Button
Button注册点击事件的方法
- 自定义内部类
//ButtonActivity.java
package com.e.myapplication;

import androidx.appcompat.app.AppCompatActivity;

import android.os.Bundle;
import android.util.Log;
import android.view.View;
import android.widget.Button;

public class ButtonActivity extends AppCompatActivity {


    @Override
    protected void onCreate(Bundle savedInstanceState) {


        super.onCreate(savedInstanceState);
        setContentView(R.layout.activity_button);
        Button btn1 = findViewById(R.id.btn1);
        //点击事件 被点击时候触发的事件
        MyClickListener myClickListener = new MyClickListener();
        btn1.setOnClickListener(myClickListener);//为按钮注册点击事件监听器
    }
    class MyClickListener implements View.OnClickListener {


        @Override
        public void onClick(View view) {


            Log.e("TAB", "刚刚点击的按钮是注册了内部类监听器对象的按钮");
        }
    }
}
- 匿名内部类
//ButtonActivity.java
package com.e.myapplication;

import androidx.appcompat.app.AppCompatActivity;

import android.os.Bundle;
import android.util.Log;
import android.view.View;
import android.widget.Button;

public class ButtonActivity extends AppCompatActivity {


    @Override
    protected void onCreate(Bundle savedInstanceState) {


        super.onCreate(savedInstanceState);
        setContentView(R.layout.activity_button);
        Button bt2 = findViewById(R.id.btn2);
        bt2.setOnClickListener(new View.OnClickListener() {


            @Override
            public void onClick(View view) {


                Log.e("TBB", "刚刚点击的按钮是注册了匿名内部类监听器对象的按钮");
            }
        });
    }

}
- 当前Activity去实现事件的接口
//ButtonActivity.java
package com.e.myapplication;

import androidx.appcompat.app.AppCompatActivity;

import android.os.Bundle;
import android.util.Log;
import android.view.View;
import android.widget.Button;

public class ButtonActivity extends AppCompatActivity implements View.OnClickListener {


    @Override
    protected void onCreate(Bundle savedInstanceState) {


        super.onCreate(savedInstanceState);
        setContentView(R.layout.activity_button);
        Button bt3 = findViewById(R.id.btn3);
        bt3.setOnClickListener(this);
    }

    @Override
    public void onClick(View view) {


        Log.e("POP", "刚刚点击的按钮是注册了当前Activity去实现接口监听器对象的按钮");
    }
}
- 在布局文件中添加点击事件属性
//xml
    <Button
        android:id="@+id/btn4"
        android:layout_width="match_parent"
        android:layout_height="wrap_content"
        android:text="在布局文件中添加点击事件属性"
        android:onClick="MyClick"/>

//ButtonActivity.java
package com.e.myapplication;

import androidx.appcompat.app.AppCompatActivity;

import android.os.Bundle;
import android.util.Log;
import android.view.View;
import android.widget.Button;

public class ButtonActivity extends AppCompatActivity {


    @Override
    protected void onCreate(Bundle savedInstanceState) {


        super.onCreate(savedInstanceState);
        setContentView(R.layout.activity_button);

    }
    public void MyClick(View view) {


        Log.e("RER", "通过xml绑定的事件");
    }
}
当俩个点击事件的实现方法相同的时候,可以使用v.getId来使用;
//xml
    <Button
        android:id="@+id/btn4"
        android:layout_width="match_parent"
        android:layout_height="wrap_content"
        android:text="在布局文件中添加点击事件属性_1"
        android:onClick="MyClick"/>
    <Button
        android:id="@+id/btn5"
        android:layout_width="match_parent"
        android:layout_height="wrap_content"
        android:text="在布局文件中添加点击事件属性_2"
        android:onClick="MyClick"/>
//ButtonActivity.java
package com.e.myapplication;

import androidx.appcompat.app.AppCompatActivity;

import android.os.Bundle;
import android.util.Log;
import android.view.View;
import android.widget.Button;

public class ButtonActivity extends AppCompatActivity {


    @Override
    protected void onCreate(Bundle savedInstanceState) {


        super.onCreate(savedInstanceState);
        setContentView(R.layout.activity_button);

    }
    //参数:被点击的控件对象
    public void MyClick(View view) {


        switch (view.getId()) {


            case R.id.btn4:
                Log.e("RER", "通过xml绑定的事件_1");
                break;
            case R.id.btn5:
                Log.e("RER", "通过xml绑定的事件_2");
                break;
            default:
        }
    }
}
ImageView
用来显示和控制图像的控件,可以对它进行放大、缩小、旋转等操作,常用的属性有:
android:src
android:background
<!--
android:src 指定前景的背景资源 能够保证图片不变形 按照原来的比例
android:background 设置背景 会按照组件的实际比例变形
-->
<ImageView
    android:layout_width="69dp"
    android:layout_height="75dp"
    android:src="@mipmap/love"
    android:background="#ffffff"
    android:layout_margin="10dp"/>
带按钮的图片显示控件;
<ImageButton
    android:layout_width="300dp"
    android:layout_height="300dp"
    android:background="@mipmap/love"/>
ProgressBar
进度条,默认情况下是圆形的,没有刻度,只是一个不断旋转的动画效果。通过设置 style ,可以显示传统的水平带刻度进度条;
静态进度条
代码文件:
//activity_progreaa_Bar.xml
<?xml version="1.0" encoding="utf-8"?>
<LinearLayout xmlns:android="http://schemas.android.com/apk/res/android"
    xmlns:app="http://schemas.android.com/apk/res-auto"
    xmlns:tools="http://schemas.android.com/tools"
    android:layout_width="match_parent"
    android:layout_height="match_parent"
    tools:context=".ProgressBarActivity"
    android:orientation="vertical">

    <!---
    进度条,默认属性样式是转圈,修改样式需设计分格
    style设置风格 style="?android:attr/progressBarStyleHorizontal" 设置水平进度条的样式
    android:progress="30" 设置进度
    android:max="200" 设置最大值
    android:indeterminate="true" 设置进度条一直滚动
    -->
    <ProgressBar
        android:layout_width="wrap_content"
        android:layout_height="wrap_content"/>
    <ProgressBar
        android:layout_width="match_parent"
        android:layout_height="wrap_content"
        style="?android:attr/progressBarStyleHorizontal"
        android:progress="30"
        android:max="200"/>
    <ProgressBar
        android:layout_marginTop="100dp"
        android:layout_width="match_parent"
        android:layout_height="wrap_content"
        style="?android:attr/progressBarStyleHorizontal"
        android:indeterminate="true"/>

</LinearLayout>
效果演示:

动态进度条
动态显示的进度条需要在java中配合设置才可以正常的显示吗,使用了线程;
代码文件:
//activity_progreaa_Bar.xml
<ProgressBar
    android:id="@+id/progess"
    android:layout_marginTop="100dp"
    android:layout_width="match_parent"
    android:layout_height="wrap_content"
    style="?android:attr/progressBarStyleHorizontal"/>
//ProgressBarActivity.java
package com.e.myapplication;

import androidx.appcompat.app.AppCompatActivity;

import android.os.Bundle;
import android.widget.ProgressBar;

public class ProgressBarActivity extends AppCompatActivity {


    @Override
    protected void onCreate(Bundle savedInstanceState) {


        super.onCreate(savedInstanceState);
        setContentView(R.layout.activity_progress_bar);

        final ProgressBar progressBar = findViewById(R.id.progess);

        /*
        * 在Android中,4.0以后是不能直接在线程中操作控件的
        * 进度条是个特例 所以对象命名必须为 progressBar
        * 1000代表的是毫秒
        * */
        new Thread() {


            public void run() {


                for(int i = 1; i <= 100; i ++) {


                    progressBar.setProgress(i);
                    try {


                        Thread.sleep(1000);
                    } catch (InterruptedException e) {


                        e.printStackTrace();
                    }
                }
            }
        }.start();
    }
}
小案例升级
增加了输入为空判断、进度条隐藏显示、进度条走动;
代码文件:
//activity_main.xml
<?xml version="1.0" encoding="utf-8"?>
<LinearLayout xmlns:android="http://schemas.android.com/apk/res/android"
    android:orientation="vertical" android:layout_width="match_parent"
    android:layout_height="match_parent"
    android:background="@mipmap/qk"
    android:gravity="center_horizontal">
    <TextView
        android:layout_width="wrap_content"
        android:layout_height="wrap_content"
        android:text="Sign Up"
        android:textSize="35dp"
        android:layout_marginTop="70dp"/>
    <TextView
        android:layout_width="wrap_content"
        android:layout_height="wrap_content"
        android:text="Nothing is the world is impossible if you set your mind to do it."
        android:layout_margin="20dp"/>

    <!--
    android:src 指定前景的背景资源 能够保证图片不变形 按照原来的比例
    android:background 设置背景 会按照组件的实际比例变形
    -->
    <ImageView
        android:layout_width="69dp"
        android:layout_height="75dp"
        android:src="@mipmap/love"
        android:background="#ffffff"
        android:layout_margin="10dp"/>
    <!--
    <ImageButton
        android:layout_width="300dp"
        android:layout_height="300dp"
        android:background="@mipmap/love"/>
     -->

    <!--android:inputType 输入类型
    textPassword 密码输入
    number 正数字输入
    numberSigned 整数
    numberDecimal 小数
    phone 电话号码输入
    | 可以连接多个属性 numberSigned | numberDecimal

    android:hint输入提示
    android:maxLength输入长度限制
    -->
    <EditText
        android:id="@+id/password"
        android:layout_width="match_parent"
        android:layout_height="40dp"
        android:layout_marginLeft="30dp"
        android:layout_marginRight="30dp"
        android:layout_marginTop="40dp"
        android:inputType="textPassword"
        android:hint="输入密码"
        android:gravity="center"
        android:textColorHint="#000000"
        android:maxLength="5"
        android:background="@mipmap/t"/>
    <EditText
        android:id="@+id/number"
        android:layout_width="match_parent"
        android:layout_height="40dp"
        android:layout_marginLeft="30dp"
        android:layout_marginRight="30dp"
        android:layout_marginTop="40dp"
        android:inputType="number"
        android:hint="输入正整数数字"
        android:gravity="center"
        android:textColorHint="#000000"
        android:maxLength="3"
        android:background="@mipmap/t"/>

    <ProgressBar
        android:id="@+id/progess1"
        android:layout_width="match_parent"
        android:layout_height="wrap_content"
        android:layout_marginTop="20dp"
        style="?android:attr/progressBarStyleHorizontal"
        android:visibility="invisible"/>
    <EditText
        android:layout_width="match_parent"
        android:layout_height="40dp"
        android:layout_marginLeft="30dp"
        android:layout_marginRight="30dp"
        android:layout_marginTop="20dp"
        android:inputType="phone"
        android:hint="输入电话号码"
        android:gravity="center"
        android:textColorHint="#000000"
        android:maxLength="11"
        android:background="@mipmap/t"/>
    <EditText
        android:layout_width="match_parent"
        android:layout_height="40dp"
        android:layout_marginLeft="30dp"
        android:layout_marginRight="30dp"
        android:layout_marginTop="40dp"
        android:inputType="numberSigned"
        android:hint="输入整数"
        android:gravity="center"
        android:textColorHint="#000000"
        android:maxLength="3"
        android:background="@mipmap/t"/>

    <Button
        android:layout_width="match_parent"
        android:layout_height="50dp"
        android:layout_marginLeft="30dp"
        android:layout_marginTop="40dp"
        android:layout_marginRight="30dp"
        android:background="#00000000"
        android:text="Register"
        android:onClick="register"/>

</LinearLayout>
//MainActivity.java
package com.e.myapplication;

import androidx.appcompat.app.AppCompatActivity;

import android.graphics.Color;
import android.os.Bundle;
import android.view.View;
import android.view.ViewGroup;
import android.widget.EditText;
import android.widget.LinearLayout;
import android.widget.ProgressBar;
import android.widget.Toast;

public class MainActivity extends AppCompatActivity {


    @Override
    protected void onCreate(Bundle savedInstanceState) {


        super.onCreate(savedInstanceState);
        setContentView(R.layout.activity_main);
//        //1.根布局为线性布局 对象为本 MainActivity
//        LinearLayout linearLayout = new LinearLayout(this);
//        //2,设置宽高 和窗口等宽等高 MATCH_PARENT MATCH=匹配 PARENT=父容器
//        linearLayout.setLayoutParams(new LinearLayout.LayoutParams(ViewGroup.LayoutParams.MATCH_PARENT, ViewGroup.LayoutParams.MATCH_PARENT));
//        //3.背景设置为红色
//        linearLayout.setBackgroundColor(Color.RED);
//        //4.指定此Activity的内容视图为该线性布局
//        setContentView(linearLayout);

    }
    public void register(View view) {


        //1.判断输入是否为空
        EditText editText = findViewById(R.id.password);
        EditText editText1 = findViewById(R.id.number);
        String str = editText.getText().toString();
        String str1 = editText1.getText().toString();
        if(str.equals("") || str1.equals("")) {


            //2.如果为空则提示
            //无焦点提示
            //参数1 环境上下文(依赖的对象) 参数2 提示的文本 参数3 提示需要持续的时间
            Toast.makeText(this, "输入不能为空", Toast.LENGTH_SHORT).show();
        } else {


            //3.不为空则出示进度条
            final ProgressBar progressBar = findViewById(R.id.progess1);
            progressBar.setVisibility(View.VISIBLE);
            new Thread() {


                public void run() {


                    for(int i = 1; i <= 100; i ++) {


                        progressBar.setProgress(i);
                        try {


                            Thread.sleep(500);
                        } catch (InterruptedException e) {


                            e.printStackTrace();
                        }
                    }
                }
            }.start();
        }
    }
}
运行演示:


CheckBox
- 系统封装的复选控件;
- 两种状态:选中及未选中
setChecked() isChecked(); - 监听状态变化:
setOnCheckedChangeListener;
代码文件:
//CheckBox.java
package com.e.myapplication;

import androidx.appcompat.app.AppCompatActivity;

import android.os.Bundle;
import android.util.Log;
import android.view.View;
import android.widget.CompoundButton;

public class CheckBox extends AppCompatActivity {


    @Override
    protected void onCreate(Bundle savedInstanceState) {


        super.onCreate(savedInstanceState);
        setContentView(R.layout.activity_check_box);

        android.widget.CheckBox checkBox = findViewById(R.id.checkBox);
        //设置它的状态
        checkBox.setChecked(false);
        //获取它的状态
        boolean ischecked = checkBox.isChecked();

        checkBox.setOnCheckedChangeListener(new CompoundButton.OnCheckedChangeListener() {


            @Override
            public void onCheckedChanged(CompoundButton compoundButton, boolean b) {


                Log.d("TDD", "check : " + b);
            }
        });
    }
}
//activity_check_box.xml
<?xml version="1.0" encoding="utf-8"?>
<LinearLayout xmlns:android="http://schemas.android.com/apk/res/android"
    xmlns:app="http://schemas.android.com/apk/res-auto"
    xmlns:tools="http://schemas.android.com/tools"
    android:layout_width="match_parent"
    android:layout_height="match_parent"
    tools:context=".CheckBox"
    android:orientation="vertical">

    <CheckBox
        android:id="@+id/checkBox"
        android:layout_width="match_parent"
        android:layout_height="wrap_content"
        android:checked="true"
        android:text="CheckBox"/>

</LinearLayout>
运行演示:


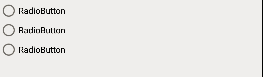
RadioButton
- 单选控件;
- 可以和RadioGroup一起使用,只能选择一个;
- 和CheckBox的区别
通过点击无法变为未选中;
一组RadioButton只能同时选中一个;
在大部分UI框架中默认都是圆形表示;
代码文件:
//activity_check_box.xml
<RadioGroup
    android:layout_width="match_parent"
    android:layout_height="match_parent" >

    <RadioButton
        android:id="@+id/radioButton"
        android:layout_width="wrap_content"
        android:layout_height="wrap_content"
        android:text="RadioButton" />

    <RadioButton
        android:id="@+id/radioButton2"
        android:layout_width="wrap_content"
        android:layout_height="wrap_content"
        android:text="RadioButton" />

    <RadioButton
        android:id="@+id/radioButton3"
        android:layout_width="wrap_content"
        android:layout_height="wrap_content"
        android:text="RadioButton" />
</RadioGroup>
运行演示:
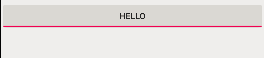
ToggleButton
- 切换程序中的状态;
- 两种状态:
android:textOn
android:textOff
setChecked(boolean) setOnCheckedChangeListener;
代码文件:
//CheckBox.java
ToggleButton toggleButton = findViewById(R.id.toggleButton);
//设置它的状态
toggleButton.setChecked(true);
//获取它的状态
boolean istoggle = toggleButton.isChecked();

toggleButton.setOnCheckedChangeListener(new CompoundButton.OnCheckedChangeListener() {


    @Override
    public void onCheckedChanged(CompoundButton compoundButton, boolean b) {


        Log.d("TDD", "toggcheck : " + b);
    }
});
//activity_check_box.xml
<ToggleButton
    android:id="@+id/toggleButton"
    android:layout_width="match_parent"
    android:layout_height="wrap_content"
    android:text="ToggleButton"
    android:textOn="Hello"
    android:textOff="Bye"
    android:checked="false" />
运行演示:

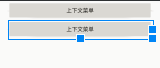
SeekBar
- 使用场景:音乐的进度条;
- 简单使用与事件监听:
setProgress
setOnSeekBarChangeListener - 注意事项:
onStartTrackingTouch//开始记录
onStopTrackingTouch//结束记录
代码文件:
//CheckBox.java
//设置它的状态
SeekBar seekBar = findViewById(R.id.seekBar);
seekBar.setMax(100);
seekBar.setProgress(50);

seekBar.setOnSeekBarChangeListener(new SeekBar.OnSeekBarChangeListener() {


    @Override
    public void onProgressChanged(SeekBar seekBar, int i, boolean b) {


        Log.d("TDD", "OnProgressChange" + i);
    }

    @Override
    public void onStartTrackingTouch(SeekBar seekBar) {


        Log.d("TDD", "onStartTrackingTouch" + seekBar.getProgress());
    }

    @Override
    public void onStopTrackingTouch(SeekBar seekBar) {


        Log.d("TDD", "onStopTrackingTouch" + seekBar.getProgress());
    }
});
//activity_check_box.xml
<SeekBar
    android:id="@+id/seekBar"
    android:layout_width="match_parent"
    android:layout_height="wrap_content"
    android:max="100"
    android:progress="30"
    android:layout_marginLeft="20sp"
    android:layout_marginRight="20dp"/>
运行演示:


Activity
什么是Activity:
可以理解为是一个界面;
启动Activity:
android:label=""是给主界面起名字;
//AndroidManifest.xml
<activity android:name=".TestActivity"
    android:label="">
    <intent-filter>
        <action android:name="android.intent.action.MAIN" />
        <category android:name="android.intent.category.LAUNCHER" />
    </intent-filter>
</activity>
//TestActivity.java
package com.e.myapplication;

import androidx.appcompat.app.AppCompatActivity;

public class TestActivity extends AppCompatActivity {


}
Activity和layout的关系:
这里的Activity是上面创建的TestActivity,layout是创建的activity_text.xml,使用 setContentView联系起来;
//TestActivity.java
package com.e.myapplication;

import android.os.Bundle;

import androidx.annotation.Nullable;
import androidx.appcompat.app.AppCompatActivity;

public class TestActivity extends AppCompatActivity {


    @Override
    protected void onCreate(@Nullable Bundle savedInstanceState) {


        super.onCreate(savedInstanceState);
        setContentView(R.layout.activity_text);
    }
}
Activity和View的关系:
在TestActivity.java文件中,通过findViewById可以把在layout中的View和Activity联系起来;
Activity之间的跳转(Intent)
- Activity之间的跳转;

打开的界面将会以栈的形式保存下来,退回去的过程就是出栈的过程;
关键代码:
//TestActivity.java
Intent intent = new Intent(当前Activity.this, 目标Activity.class);
startActivity(intent);
四种启动模式
标准模式在 AndroidManifest.xml 中设置,可以在每个文件中使用android:launchMode=""来设置,默认使用的是standard;
//AndroidMaifest.xml
<activity android:name=".TestActivity"
    android:launchMode="singleTop"
    android:label="">
    <intent-filter>
        <action android:name="android.intent.action.MAIN" />
        <category android:name="android.intent.category.LAUNCHER" />
    </intent-filter>
</activity>
- standard(代码默认的就是标准模式)

- singleTop

在标准模式下打开Activity会直接入栈叠加,相同的也不会做任何的处理,例如:ABCC,而singleTop不一样,会自动的处理顶层相同的Activity,例如:ABCC处理成ABC,相同的界面无论打开多少次,只保存一次,那么对应的,返回去的时候就只返回一次;
- singleTask
 只有一个,一旦发现前面打开的Activity有当前这个的时候,就会清空之间的Activity;
- singlelnstance

独占性,例如:打电话;
四种启动模式的应用
不仅仅可以使用上述的四种模式在 AndroidManifest.xml 中设置,也可以在所对应的java文件Activity中设置;
intent.addFlags(Intent.FLAG_ACTIVITY_CLEAR_TASK);对应singleTask
intent.addFlags(Intent.FLAG_ACTIVITY_CLEAR_TOP);对应singleTop
intent.addFlags(Intent.FLAG_ACTIVITY_NEW_TASK);对应singlelnstance

Menu
选项菜单(OptionMenu)
选项菜单是一个应用的主菜单用于放置对应用产生全局影响的操作,新建文件夹menu,在里面创建option.xml菜单资源,在菜单的嵌套中顶多能有一级嵌套;
代码文件:
//option.xml
<?xml version="1.0" encoding="utf-8"?>
<menu xmlns:android="http://schemas.android.com/apk/res/android">
    <group />
    <item android:title="保存"/>
    <item android:title="设置"/>
    <item android:title="更多菜单">
        <menu>
            <item android:title="下载"/>
            <item android:title="更新"/>
            <item android:title="反馈"/>
        </menu>
    </item>
</menu>
表示在activity_main界面上使用菜单资源menu.xml,重写方法onCreateOptionsMenu,利用getMenuInflater().inflate(R.menu.option, menu);进行设置;
//MenuActivity.java
package com.e.myapplication;

import android.os.Bundle;
import android.view.Menu;

import androidx.annotation.Nullable;
import androidx.appcompat.app.AppCompatActivity;

public class MenuActivity extends AppCompatActivity {


    @Override
    protected void onCreate(@Nullable Bundle savedInstanceState) {


        super.onCreate(savedInstanceState);
        setContentView(R.layout.activity_main);
    }

    @Override
    public boolean onCreateOptionsMenu(Menu menu) {


        getMenuInflater().inflate(R.menu.option, menu);
        return true;
    }
}
运行演示:
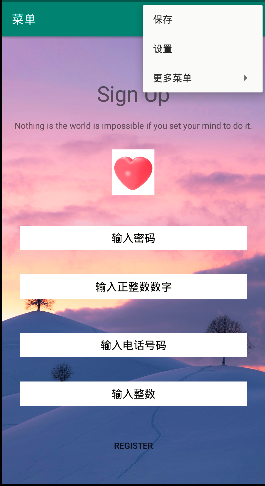
针对这个菜单选项还有一些可以设置的属性,在menu文件夹下的option.xml设置;
app:showAsAction="always"可以把一个菜单选项固定在上边框,直接溢出显示,never不显示,ifRoom有空间就显示;
代码文件:
//option.xml
<?xml version="1.0" encoding="utf-8"?>
<menu xmlns:android="http://schemas.android.com/apk/res/android"
    xmlns:app="http://schemas.android.com/apk/res-auto">
    <group />
    <item android:title="保存"
        app:showAsAction="always"/>
    <item android:title="设置"/>
    <item android:title="更多菜单">
        <menu>
            <item android:title="下载"/>
            <item android:title="更新"/>
            <item android:title="反馈"/>
        </menu>
    </item>
</menu>
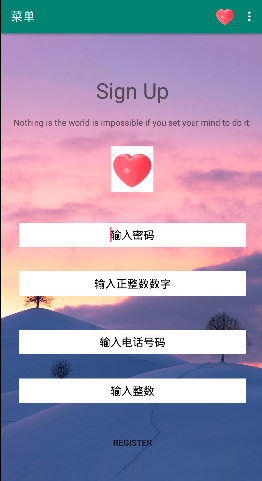
运行效果:

android:icon="@图片地址"也可以将上面对应的文字的地方换成图标来显示;
代码文件:
//option.xml
<?xml version="1.0" encoding="utf-8"?>
<menu xmlns:android="http://schemas.android.com/apk/res/android"
    xmlns:app="http://schemas.android.com/apk/res-auto">
    <group />
    <item android:title="保存"
        android:icon="@mipmap/love"
        app:showAsAction="always"/>
    <item android:title="设置"/>
    <item android:title="更多菜单">
        <menu>
            <item android:title="下载"/>
            <item android:title="更新"/>
            <item android:title="反馈"/>
        </menu>
    </item>
</menu>
运行演示:
为了让设置的选项有实际的效果,不至于那么的冗余,在MenuActivity.java中重写方法``用来处理所设置的菜单选项,当然,前面的option.xml中的是需要设置id的;
特别需要知道的是Toast.makeText(this, "文本提示", Toast.LENGTH_SHORT).show();实在APP界面弹窗显示;
代码文件:
//option.xml
<?xml version="1.0" encoding="utf-8"?>
<menu xmlns:android="http://schemas.android.com/apk/res/android"
    xmlns:app="http://schemas.android.com/apk/res-auto">
    <group />
    <item android:title="保存"
        android:id="@+id/save"
        android:icon="@mipmap/love"
        app:showAsAction="ifRoom"/>
    <item android:title="设置"
        android:id="@+id/setting"/>
    <item android:title="更多菜单">
        <menu>
            <item android:title="下载"/>
            <item android:title="更新"/>
            <item android:title="退出"
                android:id="@+id/exit"/>
        </menu>
    </item>
</menu>
//MenuActivity.java
package com.e.myapplication;

import android.os.Bundle;
import android.view.Menu;
import android.view.MenuItem;
import android.widget.Toast;

import androidx.annotation.Nullable;
import androidx.appcompat.app.AppCompatActivity;

public class MenuActivity extends AppCompatActivity {


    @Override
    protected void onCreate(@Nullable Bundle savedInstanceState) {


        super.onCreate(savedInstanceState);
        setContentView(R.layout.activity_main);
    }

    @Override
    public boolean onCreateOptionsMenu(Menu menu) {


        getMenuInflater().inflate(R.menu.option, menu);
        return true;
    }

    @Override
    public boolean onOptionsItemSelected(MenuItem item) {


        switch (item.getItemId()) {


            case R.id.save:
                Toast.makeText(this, "保存", Toast.LENGTH_SHORT).show();
                break;
            case R.id.setting:
                Toast.makeText(this,"设置", Toast.LENGTH_SHORT).show();
                break;
            case R.id.exit:
                finish();
                break;
            default:
        }
        return super.onOptionsItemSelected(item);
    }
}
运行演示:
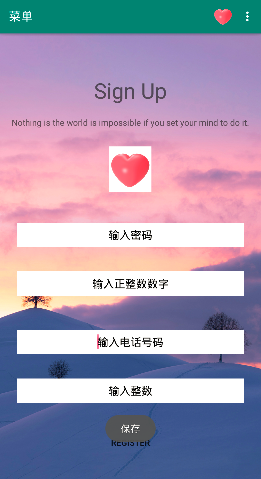
按下退出,因为在MenuActivity.java中设置了finish(),所以会自动地退出APP;
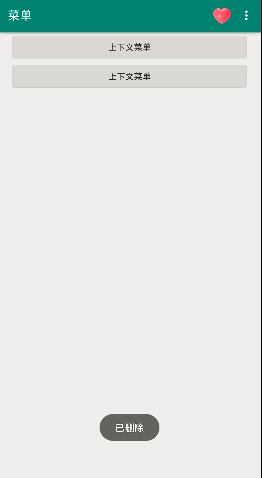
上下文菜单(ContextMenu)
ContexMenu实现
代码文件:
//context.xml
<?xml version="1.0" encoding="utf-8"?>
<menu xmlns:android="http://schemas.android.com/apk/res/android">

    <item android:title="删除"
        android:id="@+id/delete"/>
    <item android:title="重命名"
        android:id="@+id/over"/>
</menu>

//activity_menu.xml
<?xml version="1.0" encoding="utf-8"?>
<LinearLayout xmlns:android="http://schemas.android.com/apk/res/android"
    android:orientation="vertical" android:layout_width="match_parent"
    android:layout_height="match_parent">

    <Button
        android:id="@+id/ctx_btn"
        android:layout_width="match_parent"
        android:layout_height="wrap_content"
        android:text="上下文菜单"
        android:layout_marginRight="20dp"
        android:layout_marginLeft="20dp"/>

    <Button
        android:id="@+id/ctx_btt"
        android:layout_width="match_parent"
        android:layout_height="wrap_content"
        android:text="上下文菜单"
        android:layout_marginRight="20dp"
        android:layout_marginLeft="20dp"/>

</LinearLayout>
//MenuActivity.java
package com.e.myapplication;

import android.os.Bundle;
import android.view.ContextMenu;
import android.view.Menu;
import android.view.MenuItem;
import android.view.View;
import android.widget.Toast;

import androidx.annotation.Nullable;
import androidx.appcompat.app.AppCompatActivity;

public class MenuActivity extends AppCompatActivity {


    @Override
    protected void onCreate(@Nullable Bundle savedInstanceState) {


        super.onCreate(savedInstanceState);
        setContentView(R.layout.activity_menu);
        //ctx_btn: 演示 ContextMenu
        //1.注册
        registerForContextMenu(findViewById(R.id.ctx_btn));
        //2.创建、覆盖
        //3.菜单项的操作
    }

    //2.创建、覆盖
    @Override
    public void onCreateContextMenu(ContextMenu menu, View v, ContextMenu.ContextMenuInfo menuInfo) {


        getMenuInflater().inflate(R.menu.context, menu);
    }

    //3.菜单项的操作
    @Override
    public boolean onContextItemSelected(MenuItem item) {


        switch (item.getItemId()) {


            case R.id.delete:
                Toast.makeText(this, "已删除", Toast.LENGTH_SHORT).show();
                break;
            case R.id.over:
                Toast.makeText(this, "已重命名", Toast.LENGTH_SHORT).show();
                break;
            default:
        }
        return super.onContextItemSelected(item);
    }
}
运行演示:


为按钮设置上下文操作模式
第一小点 实现接口ActionMode CallBack
第二小点 在View的长按事件中启动上下文操作模式
代码文件:
//context.xml
<?xml version="1.0" encoding="utf-8"?>
<menu xmlns:android="http://schemas.android.com/apk/res/android">

    <item android:title="删除"
        android:id="@+id/delete"/>
    <item android:title="重命名"
        android:id="@+id/over"/>
</menu>
//activity_menu.xml
<?xml version="1.0" encoding="utf-8"?>
<LinearLayout xmlns:android="http://schemas.android.com/apk/res/android"
    android:orientation="vertical" android:layout_width="match_parent"
    android:layout_height="match_parent">

    <Button
        android:id="@+id/ctx_btn"
        android:layout_width="match_parent"
        android:layout_height="wrap_content"
        android:text="上下文菜单"
        android:layout_marginRight="20dp"
        android:layout_marginLeft="20dp"/>

    <Button
        android:id="@+id/ctx_btt"
        android:layout_width="match_parent"
        android:layout_height="wrap_content"
        android:text="上下文菜单"
        android:layout_marginRight="20dp"
        android:layout_marginLeft="20dp"/>

</LinearLayout>
//Activity_Menu.java
package com.e.myapplication;

import android.os.Bundle;
import android.util.Log;
import android.view.ActionMode;
import android.view.ContextMenu;
import android.view.Menu;
import android.view.MenuItem;
import android.view.View;
import android.widget.Toast;

import androidx.annotation.Nullable;
import androidx.appcompat.app.AppCompatActivity;

public class MenuActivity extends AppCompatActivity {


    @Override
    protected void onCreate(@Nullable Bundle savedInstanceState) {


        super.onCreate(savedInstanceState);
        setContentView(R.layout.activity_menu);

        //4.为按钮设置上下文操作模式
            //第一小点 实现接口ActionMode CallBack
            //第二小点 在View的长按事件中启动上下文操作模式
        findViewById(R.id.ctx_btn).setOnLongClickListener(new View.OnLongClickListener() {


            @Override
            public boolean onLongClick(View view) {


                startActionMode(cb);
                return false;
            }
        });
    }

    ActionMode.Callback cb = new ActionMode.Callback() {


        //创建 在启动上下文操作模式(startActionMode(Callback))时调用
        @Override
        public boolean onCreateActionMode(ActionMode actionMode, Menu menu) {


            Log.e("TDD", "创建");
            getMenuInflater().inflate(R.menu.context, menu);
            return true;
        }
        //在创建方法后进行调用
        @Override
        public boolean onPrepareActionMode(ActionMode actionMode, Menu menu) {


            Log.e("TDD", "准备");
            return false;
        }

        @Override
        public boolean onActionItemClicked(ActionMode actionMode, MenuItem item) {


            Log.e("TDD", "点击");
            switch (item.getItemId()) {


                case R.id.delete:
                    Toast.makeText(MenuActivity.this, "已删除", Toast.LENGTH_SHORT).show();
                    break;
                case R.id.over:
                    Toast.makeText(MenuActivity.this, "已重命名", Toast.LENGTH_SHORT).show();
                    break;
                default:
            }
            return true;
        }
        //上下文操作结束时被调用
        @Override
        public void onDestroyActionMode(ActionMode actionMode) {


            Log.e("TDD", "结束");
        }
    };
}
运行演示:


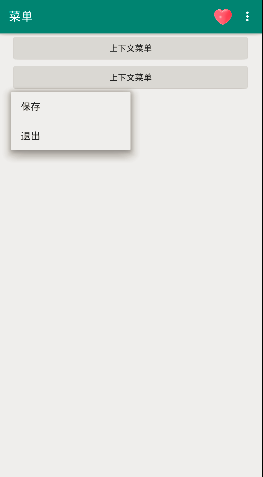
弹出菜单(PopupMenu)
一个模态形式展示的弹出风格的菜单绑在View上,一般出现咋被绑定的View的下方;
代码文件:
//context.xml
<?xml version="1.0" encoding="utf-8"?>
<menu xmlns:android="http://schemas.android.com/apk/res/android">

   <item android:title="删除"
       android:id="@+id/delete"/>
   <item android:title="重命名"
       android:id="@+id/over"/>
</menu>
//activity_menu.xml
<?xml version="1.0" encoding="utf-8"?>
<LinearLayout xmlns:android="http://schemas.android.com/apk/res/android"
    android:orientation="vertical" android:layout_width="match_parent"
    android:layout_height="match_parent">

    <Button
        android:id="@+id/ctx_btn"
        android:layout_width="match_parent"
        android:layout_height="wrap_content"
        android:text="上下文菜单"
        android:layout_marginRight="20dp"
        android:layout_marginLeft="20dp"/>

    <Button
        android:id="@+id/ctx_btt"
        android:layout_width="match_parent"
        android:layout_height="wrap_content"
        android:text="上下文菜单"
        android:layout_marginRight="20dp"
        android:layout_marginLeft="20dp"/>

</LinearLayout>
//MenuActivity.java
package com.e.myapplication;

import android.os.Bundle;
import android.util.Log;
import android.view.ActionMode;
import android.view.ContextMenu;
import android.view.Menu;
import android.view.MenuItem;
import android.view.View;
import android.widget.Button;
import android.widget.PopupMenu;
import android.widget.Toast;

import androidx.annotation.Nullable;
import androidx.appcompat.app.AppCompatActivity;

public class MenuActivity extends AppCompatActivity {


    @Override
    protected void onCreate(@Nullable Bundle savedInstanceState) {


        super.onCreate(savedInstanceState);
        setContentView(R.layout.activity_menu);

        //popup_btn: 演示PopupMenu
        final Button btn = findViewById(R.id.popup_btn);
        btn.setOnClickListener(new View.OnClickListener() {


            @Override
            public void onClick(View view) {


                //实例化(参数二 是指出现在谁的下方)
                PopupMenu popupMenu = new PopupMenu(MenuActivity.this, btn);
                //加载菜单资源 利用MenuInflater
                popupMenu.getMenuInflater().inflate(R.menu.context, popupMenu.getMenu());
                //为PopupMenu设置点击监听器
                popupMenu.setOnMenuItemClickListener(new PopupMenu.OnMenuItemClickListener() {


                    @Override
                    public boolean onMenuItemClick(MenuItem menuItem) {


                        switch (menuItem.getItemId()) {


                            case R.id.delete:
                                Toast.makeText(MenuActivity.this, "已删除", Toast.LENGTH_SHORT).show();
                                break;
                            case R.id.over:
                                Toast.makeText(MenuActivity.this, "已重命名", Toast.LENGTH_SHORT).show();
                                break;
                            default:
                        }
                        return false;
                    }
                });
                //显示PopupMenu
                popupMenu.show();
            }
        });
    }
}
运行演示:

Menu创建的方式
通过xml定义
getMenuInflater().inflate(R.menu.option, menu);
popupMenu.getMenuInflater().inflate(R.menu.context, popupMenu.getMenu());
通过Java定义
在点击事件中代替xml所处的位置进行设置;
代码文件:
//MenuActivity.java
package com.e.myapplication;

import android.os.Bundle;
import android.util.Log;
import android.view.ActionMode;
import android.view.ContextMenu;
import android.view.Menu;
import android.view.MenuItem;
import android.view.SubMenu;
import android.view.View;
import android.widget.Button;
import android.widget.PopupMenu;
import android.widget.Toast;

import androidx.annotation.Nullable;
import androidx.appcompat.app.AppCompatActivity;

public class MenuActivity extends AppCompatActivity {


    @Override
    protected void onCreate(@Nullable Bundle savedInstanceState) {


        super.onCreate(savedInstanceState);
        setContentView(R.layout.activity_menu);

        //popup_btn: 演示PopupMenu
        final Button btn = findViewById(R.id.popup_btn);
        btn.setOnClickListener(new View.OnClickListener() {


            @Override
            public void onClick(View view) {


                //实例化(参数二 是指出现在谁的下方)
                PopupMenu popupMenu = new PopupMenu(MenuActivity.this, btn);
                //加载菜单资源 利用MenuInflater
                //popupMenu.getMenuInflater().inflate(R.menu.context, popupMenu.getMenu());
                popupMenu.getMenu().add(1, 1, 1, "删除");
                SubMenu sub =  popupMenu.getMenu().addSubMenu(1, 2, 2, "更多");
                sub.add(2, 3, 1, "保存");
                sub.add(2, 4, 2, "退出");
                //为PopupMenu设置点击监听器
                popupMenu.setOnMenuItemClickListener(new PopupMenu.OnMenuItemClickListener() {


                    @Override
                    public boolean onMenuItemClick(MenuItem menuItem) {


                        switch (menuItem.getItemId()) {


                            /*
                            case R.id.delete:
                                Toast.makeText(MenuActivity.this, "已删除", Toast.LENGTH_SHORT).show();
                                break;
                            case R.id.over:
                                Toast.makeText(MenuActivity.this, "更多", Toast.LENGTH_SHORT).show();
                                break;
                            default:
                             */
                            case 1:
                                Toast.makeText(MenuActivity.this, "已删除", Toast.LENGTH_SHORT).show();
                                break;
                            case 3:
                                Toast.makeText(MenuActivity.this, "已保存", Toast.LENGTH_SHORT).show();
                                break;
                            case 4:
                                Toast.makeText(MenuActivity.this, "已退出", Toast.LENGTH_SHORT).show();
                                finish();
                                break;
                            default:
                        }
                        return false;
                    }
                });
                //显示PopupMenu
                popupMenu.show();
            }
        });
    }
}
演示效果:
xml定义的优势
- 清晰的菜单结构;
- 将菜单内容与应用的逻辑代码分离;
- 资源适配更容易;
Menu显示总结
onCreateOptionsMenu方法必须返回true
onOptionsItemSelected方法必须返回true
AlertDialog
AlertDialog
自定义Dialog
pupWindow
AlertDialog
对话框: 消息提示机制,常用于向 用户传递信息,提示或警告用户的行为,通常的方法有:
setTitle
setMessage
create
show
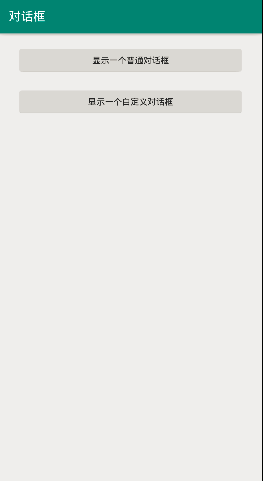
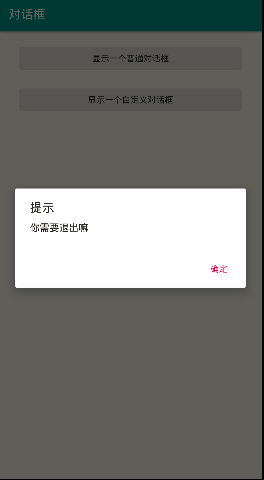
第一种实现方法
不直接的使用AlertDialog,使用构建器;
代码文件:
//activity_dialog.xml
<?xml version="1.0" encoding="utf-8"?>
<LinearLayout xmlns:android="http://schemas.android.com/apk/res/android"
    android:orientation="vertical" android:layout_width="match_parent"
    android:layout_height="match_parent">

    <Button
        android:id="@+id/but1"
        android:layout_width="match_parent"
        android:layout_height="wrap_content"
        android:layout_marginRight="30dp"
        android:layout_marginLeft="30dp"
        android:layout_marginTop="20dp"
        android:text="显示一个普通对话框"
        android:onClick="MyClick"/>

    <Button
        android:id="@+id/but2"
        android:layout_width="match_parent"
        android:layout_height="wrap_content"
        android:layout_marginRight="30dp"
        android:layout_marginLeft="30dp"
        android:layout_marginTop="20dp"
        android:text="显示一个自定义对话框"
        android:onClick="MyClick"/>

</LinearLayout>
//DialogActivity.java
package com.e.myapplication;

import android.content.DialogInterface;
import android.os.Bundle;
import android.view.View;

import androidx.annotation.Nullable;
import androidx.appcompat.app.AlertDialog;
import androidx.appcompat.app.AppCompatActivity;

public class DialogActivity extends AppCompatActivity {


    @Override
    protected void onCreate(@Nullable Bundle savedInstanceState) {


        super.onCreate(savedInstanceState);
        setContentView(R.layout.activity_dialog);


    }
    public void MyClick(View view) {


        switch (view.getId()) {


            case R.id.but1:
                //实例化一个构建器
                AlertDialog.Builder builder = new AlertDialog.Builder(this);
                builder.setTitle("提示");
                builder.setMessage("你需要退出嘛");
                builder.setPositiveButton("确定", new DialogInterface.OnClickListener() {


                    @Override
                    public void onClick(DialogInterface dialogInterface, int i) {


                        finish();
                    }
                });
                builder.show();
//                AlertDialog dialog = builder.create();
//                dialog.show();
                break;
            case R.id.but2:

                break;
            default:
        }
    }
}
运行演示:
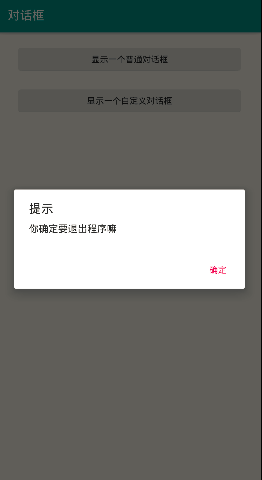
第二种实现方法
直接使用 AlertDialog;
代码文件:
//activity_dialog.xml
<?xml version="1.0" encoding="utf-8"?>
<LinearLayout xmlns:android="http://schemas.android.com/apk/res/android"
    android:orientation="vertical" android:layout_width="match_parent"
    android:layout_height="match_parent">

    <Button
        android:id="@+id/but1"
        android:layout_width="match_parent"
        android:layout_height="wrap_content"
        android:layout_marginRight="30dp"
        android:layout_marginLeft="30dp"
        android:layout_marginTop="20dp"
        android:text="显示一个普通对话框"
        android:onClick="MyClick"/>

    <Button
        android:id="@+id/but2"
        android:layout_width="match_parent"
        android:layout_height="wrap_content"
        android:layout_marginRight="30dp"
        android:layout_marginLeft="30dp"
        android:layout_marginTop="20dp"
        android:text="显示一个自定义对话框"
        android:onClick="MyClick"/>

</LinearLayout>
//DialogActivity.java
package com.e.myapplication;

import android.app.Dialog;
import android.content.DialogInterface;
import android.os.Bundle;
import android.view.View;

import androidx.annotation.Nullable;
import androidx.appcompat.app.AlertDialog;
import androidx.appcompat.app.AppCompatActivity;

public class DialogActivity extends AppCompatActivity {


    @Override
    protected void onCreate(@Nullable Bundle savedInstanceState) {


        super.onCreate(savedInstanceState);
        setContentView(R.layout.activity_dialog);

    }
    public void showMormalDialog() {


        AlertDialog dialog = new AlertDialog.Builder(this).create();
        dialog.setTitle("提示");
        dialog.setMessage("你确定要退出程序嘛");
        dialog.setButton(DialogInterface.BUTTON_POSITIVE, "确定", new DialogInterface.OnClickListener() {


            @Override
            public void onClick(DialogInterface dialogInterface, int i) {


                finish();
            }
        });
        dialog.show();
    }

    public void MyClick(View view) {


        switch (view.getId()) {


            case R.id.but1:

                break;
            case R.id.but2:
                showMormalDialog();
                break;
            default:
        }
    }
}
运行演示:
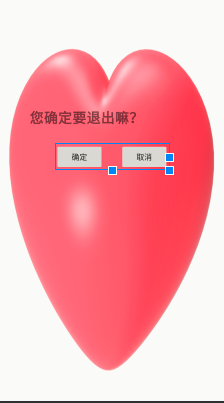
自定义Dialog
- 设置布局
代码文件:
//dialog_layout.xml
<?xml version="1.0" encoding="utf-8"?>
<LinearLayout xmlns:android="http://schemas.android.com/apk/res/android"
    android:orientation="vertical" android:layout_width="match_parent"
    android:layout_height="match_parent"
    android:gravity="center_horizontal"
    android:background="@mipmap/love">

    <TextView
        android:layout_width="300dp"
        android:layout_height="wrap_content"
        android:text="您确定要退出嘛?"
        android:textStyle="bold"
        android:textSize="25sp"
        android:layout_marginTop="200dp" />

    <LinearLayout
        android:layout_width="wrap_content"
        android:layout_height="wrap_content"
        android:orientation="horizontal"
        android:layout_marginTop="30dp">

        <Button
            android:id="@+id/yes"
            android:layout_width="wrap_content"
            android:layout_height="wrap_content"
            android:text="确定"/>
        <Button
            android:id="@+id/no"
            android:layout_width="wrap_content"
            android:layout_height="wrap_content"
            android:text="取消"
            android:layout_marginLeft="30dp"/>

    </LinearLayout>

</LinearLayout>
效果图:
- 设置Style
代码文件:
//styles.xml
<resources>

    <!-- Base application theme. -->
    <style name="AppTheme" parent="Theme.AppCompat.Light.DarkActionBar">
        <!-- Customize your theme here. -->
        <item name="colorPrimary">@color/colorPrimary</item>
        <item name="colorPrimaryDark">@color/colorPrimaryDark</item>
        <item name="colorAccent">@color/colorAccent</item>
    </style>

    //新增
    <style name="MyDialog" parent="android:style/Theme.Dialog">
        <item name="android:windowNoTitle">true</item>
        <item name="android:windowBackground">@android:color/transparent</item>
    </style>

</resources>
- 自定义Dialog
代码文件:
//MyDialog.java
package com.e.myapplication;

import android.app.Dialog;
import android.content.Context;
import android.view.View;

import androidx.annotation.NonNull;

public class MyDialog extends Dialog {


    public MyDialog(@NonNull Context context, int themeResId) {


        super(context, themeResId);
        setContentView(R.layout.dialog_layout);

        findViewById(R.id.yes).setOnClickListener(new View.OnClickListener() {


            @Override
            public void onClick(View view) {


                System.exit(0);
            }
        });

        findViewById(R.id.no).setOnClickListener(new View.OnClickListener() {


            @Override
            public void onClick(View view) {


                dismiss();
            }
        });
    }
}
//DialogActivity.java
package com.e.myapplication;

import android.app.Dialog;
import android.content.DialogInterface;
import android.os.Bundle;
import android.view.View;

import androidx.annotation.Nullable;
import androidx.appcompat.app.AlertDialog;
import androidx.appcompat.app.AppCompatActivity;

public class DialogActivity extends AppCompatActivity {


    @Override
    protected void onCreate(@Nullable Bundle savedInstanceState) {


        super.onCreate(savedInstanceState);
        setContentView(R.layout.activity_dialog);

    }

    public void MyClick(View view) {


        switch (view.getId()) {


            case R.id.but1:

                break;
            case R.id.but2:
                MyDialog dialog = new MyDialog(this, R.style.MyDialog);
                dialog.show();
                break;
            default:
        }
    }
}
- 显示

PopupWindow
设置弹窗
- 创建PopupWindow对象实例
- 设置背景,注册事件监听器和添加动画
- 显示PopupWindow
代码文件:
//popup_layout.xml
<?xml version="1.0" encoding="utf-8"?>
<LinearLayout xmlns:android="http://schemas.android.com/apk/res/android"
    android:orientation="horizontal" android:layout_width="match_parent"
    android:layout_height="match_parent"
    android:padding="2dp">

    <TextView
        android:id="@+id/choose"
        android:layout_width="60dp"
        android:layout_height="30dp"
        android:text="选择"
        android:textColor="#ffffff"
        android:gravity="center"
        android:background="#000000"/>
    <TextView
        android:id="@+id/chooseall"
        android:layout_width="60dp"
        android:layout_height="30dp"
        android:text="全选"
        android:textColor="#ffffff"
        android:gravity="center"
        android:background="#000000"/>
    <TextView
        android:id="@+id/copy"
        android:layout_width="60dp"
        android:layout_height="30dp"
        android:text="复制"
        android:textColor="#ffffff"
        android:gravity="center"
        android:background="#000000"/>


</LinearLayout>
效果:

//activity_	dialog.xml
<?xml version="1.0" encoding="utf-8"?>
<LinearLayout xmlns:android="http://schemas.android.com/apk/res/android"
    android:orientation="vertical" android:layout_width="match_parent"
    android:layout_height="match_parent">

    <Button
        android:id="@+id/but1"
        android:layout_width="match_parent"
        android:layout_height="wrap_content"
        android:layout_marginRight="30dp"
        android:layout_marginLeft="30dp"
        android:layout_marginTop="20dp"
        android:text="显示一个普通对话框"
        android:onClick="MyClick"/>

    <Button
        android:id="@+id/but2"
        android:layout_width="match_parent"
        android:layout_height="wrap_content"
        android:layout_marginRight="30dp"
        android:layout_marginLeft="30dp"
        android:layout_marginTop="20dp"
        android:text="显示一个自定义对话框"
        android:onClick="MyClick"/>

    <Button
        android:id="@+id/but3"
        android:layout_width="wrap_content"
        android:layout_height="wrap_content"
        android:text="弹窗"
        android:layout_gravity="center_horizontal"
        android:layout_marginTop="20dp"
        android:onClick="MyClick"/>

</LinearLayout>
效果:

//DialogActivity.java
package com.e.myapplication;

import android.app.Dialog;
import android.content.DialogInterface;
import android.graphics.Color;
import android.graphics.drawable.ColorDrawable;
import android.os.Bundle;
import android.view.LayoutInflater;
import android.view.View;
import android.widget.PopupWindow;
import android.widget.Toast;

import androidx.annotation.Nullable;
import androidx.appcompat.app.AlertDialog;
import androidx.appcompat.app.AppCompatActivity;

public class DialogActivity extends AppCompatActivity {


    @Override
    protected void onCreate(@Nullable Bundle savedInstanceState) {


        super.onCreate(savedInstanceState);
        setContentView(R.layout.activity_dialog);

    }

    public void showPopupWindow(View view) {


        //1.实例化一个对象
        //参数1 :用在弹窗中的view 参数2和参数3 是弹窗的宽高 参数4 能否设置焦点

        View v = LayoutInflater.from(this).inflate(R.layout.popup_layout, null);//将整个布局当作一个视图处理

        final PopupWindow popupWindow = new PopupWindow(v, 490, 90, true);
        //2.设置背景(背景、动画)
            //设置背景
        popupWindow.setBackgroundDrawable(new ColorDrawable(Color.TRANSPARENT));//设置背景为透明色
            //设置能相应外部事件的点击事件
        popupWindow.setOutsideTouchable(true);
            //设置弹窗能相应点击事件
        popupWindow.setTouchable(true);
        //3.显示
            //参数1 锚
            //参数2 3 相对于锚在x,y方向的偏移量
        popupWindow.showAsDropDown(view, -100, 0);

        //为弹窗中的文本添加点击事件
        v.findViewById(R.id.choose).setOnClickListener(new View.OnClickListener() {


            @Override
            public void onClick(View view) {


                Toast.makeText(DialogActivity.this, "你点击了选择", Toast.LENGTH_SHORT).show();
                popupWindow.dismiss();//点击以后消失
            }
        });
        v.findViewById(R.id.chooseall).setOnClickListener(new View.OnClickListener() {


            @Override
            public void onClick(View view) {


                Toast.makeText(DialogActivity.this, "你点击了全选", Toast.LENGTH_SHORT).show();
                popupWindow.dismiss();
            }
        });
        v.findViewById(R.id.copy).setOnClickListener(new View.OnClickListener() {


            @Override
            public void onClick(View view) {


                Toast.makeText(DialogActivity.this, "你点击了复制", Toast.LENGTH_SHORT).show();
                popupWindow.dismiss();
            }
        });

    }
    public void MyClick(View view) {


        switch (view.getId()) {


            case R.id.but1:

                break;
            case R.id.but2:

                break;
            case R.id.but3:
                showPopupWindow(view);
            default:
        }
    }
}
效果:

设置弹窗动画
- 创建动画资源

//translate.xml
<?xml version="1.0" encoding="utf-8"?>
<set xmlns:android="http://schemas.android.com/apk/res/android">
    <translate
        android:fromXDelta="0"
        android:toXDelta="0"
        android:fromYDelta="300"
        android:toYDelta="0"
        android:duration="2000">
    </translate>
</set>
- 创建一个style应用刚刚的动画资源

//styles.xml
<resources>

    <!-- Base application theme. -->
    <style name="AppTheme" parent="Theme.AppCompat.Light.DarkActionBar">
        <!-- Customize your theme here. -->
        <item name="colorPrimary">@color/colorPrimary</item>
        <item name="colorPrimaryDark">@color/colorPrimaryDark</item>
        <item name="colorAccent">@color/colorAccent</item>
    </style>
    <style name="MyDialog" parent="android:style/Theme.Dialog">
        <item name="android:windowNoTitle">true</item>
        <item name="android:windowBackground">@android:color/transparent</item>
    </style>
    <style name="translate_anmi">
        <item name="android:windowEnterAnimation">@anim/translate</item>
    </style>

</resources>
- 对当前弹窗的动画风格设置为第二步的资源索引
//DialogActivity.java
package com.e.myapplication;

import android.app.Dialog;
import android.content.DialogInterface;
import android.graphics.Color;
import android.graphics.drawable.ColorDrawable;
import android.os.Bundle;
import android.view.LayoutInflater;
import android.view.View;
import android.widget.PopupWindow;
import android.widget.Toast;

import androidx.annotation.Nullable;
import androidx.appcompat.app.AlertDialog;
import androidx.appcompat.app.AppCompatActivity;

public class DialogActivity extends AppCompatActivity {


    @Override
    protected void onCreate(@Nullable Bundle savedInstanceState) {


        super.onCreate(savedInstanceState);
        setContentView(R.layout.activity_dialog);

    }

    public void showPopupWindow(View view) {


        //1.实例化一个对象
        //参数1 :用在弹窗中的view 参数2和参数3 是弹窗的宽高 参数4 能否设置焦点

        View v = LayoutInflater.from(this).inflate(R.layout.popup_layout, null);//将整个布局当作一个视图处理

        final PopupWindow popupWindow = new PopupWindow(v, 490, 90, true);
        //2.设置背景(背景、动画)
            //设置背景
        popupWindow.setBackgroundDrawable(new ColorDrawable(Color.TRANSPARENT));//设置背景为透明色
            //设置能相应外部事件的点击事件
        popupWindow.setOutsideTouchable(true);
            //设置弹窗能相应点击事件
        popupWindow.setTouchable(true);
            //设置弹窗动画
        popupWindow.setAnimationStyle(R.style.translate_anmi);
        //3.显示
            //参数1 锚
            //参数2 3 相对于锚在x,y方向的偏移量
        popupWindow.showAsDropDown(view, -100, 0);

        //为弹窗中的文本添加点击事件
        v.findViewById(R.id.choose).setOnClickListener(new View.OnClickListener() {


            @Override
            public void onClick(View view) {


                Toast.makeText(DialogActivity.this, "你点击了选择", Toast.LENGTH_SHORT).show();
                popupWindow.dismiss();//点击以后消失
            }
        });
        v.findViewById(R.id.chooseall).setOnClickListener(new View.OnClickListener() {


            @Override
            public void onClick(View view) {


                Toast.makeText(DialogActivity.this, "你点击了全选", Toast.LENGTH_SHORT).show();
                popupWindow.dismiss();
            }
        });
        v.findViewById(R.id.copy).setOnClickListener(new View.OnClickListener() {


            @Override
            public void onClick(View view) {


                Toast.makeText(DialogActivity.this, "你点击了复制", Toast.LENGTH_SHORT).show();
                popupWindow.dismiss();
            }
        });

    }
    public void MyClick(View view) {


        switch (view.getId()) {


            case R.id.but1:

                break;
            case R.id.but2:

                break;
            case R.id.but3:
                showPopupWindow(view);
            default:
        }
    }
}
运行演示:
从下到上显示出来;

ArrayAdapter适配器
数组适配器,只能用来显示单一的文本。构造方法:
ArrayAdapter(Context context, int resource, int textviewld, List<T>objects)
代码文件:
//activity_dialog.xml
<?xml version="1.0" encoding="utf-8"?>
<LinearLayout xmlns:android="http://schemas.android.com/apk/res/android"
    android:orientation="vertical" android:layout_width="match_parent"
    android:layout_height="match_parent">

    <Button
        android:id="@+id/but1"
        android:layout_width="match_parent"
        android:layout_height="wrap_content"
        android:layout_marginRight="30dp"
        android:layout_marginLeft="30dp"
        android:layout_marginTop="20dp"
        android:text="显示一个普通对话框"
        android:onClick="MyClick"/>

    <Button
        android:id="@+id/but2"
        android:layout_width="match_parent"
        android:layout_height="wrap_content"
        android:layout_marginRight="30dp"
        android:layout_marginLeft="30dp"
        android:layout_marginTop="20dp"
        android:text="显示一个自定义对话框"
        android:onClick="MyClick"/>

    <Button
        android:id="@+id/but3"
        android:layout_width="wrap_content"
        android:layout_height="wrap_content"
        android:text="弹窗"
        android:layout_gravity="center_horizontal"
        android:layout_marginTop="20dp"
        android:onClick="MyClick"/>

    <Button
        android:id="@+id/but4"
        android:layout_width="wrap_content"
        android:layout_height="wrap_content"
        android:text="Adapter"
        android:layout_gravity="center_horizontal"
        android:layout_marginTop="20dp"
        android:onClick="MyClick"/>

</LinearLayout>
效果:

//arrary_item_layout.xml
<?xml version="1.0" encoding="utf-8"?>
<LinearLayout xmlns:android="http://schemas.android.com/apk/res/android"
    android:orientation="horizontal" android:layout_width="match_parent"
    android:layout_height="wrap_content"
    android:gravity="center_vertical"
    android:padding="10dp">

    <ImageView
        android:layout_width="40dp"
        android:layout_height="40dp"
        android:src="@mipmap/love"/>
    <TextView
        android:id="@+id/item_tx"
        android:layout_width="wrap_content"
        android:layout_height="wrap_content"
        android:text="测试"
        android:layout_marginLeft="15dp"/>

</LinearLayout>
效果:

//DialogActivity.java
package com.e.myapplication;

import android.app.Dialog;
import android.content.DialogInterface;
import android.graphics.Color;
import android.graphics.drawable.ColorDrawable;
import android.os.Bundle;
import android.view.LayoutInflater;
import android.view.View;
import android.widget.ArrayAdapter;
import android.widget.PopupWindow;
import android.widget.Toast;

import androidx.annotation.Nullable;
import androidx.appcompat.app.AlertDialog;
import androidx.appcompat.app.AppCompatActivity;

public class DialogActivity extends AppCompatActivity {


    @Override
    protected void onCreate(@Nullable Bundle savedInstanceState) {


        super.onCreate(savedInstanceState);
        setContentView(R.layout.activity_dialog);

    }

    public void showArrayDialog() {


        final String[] items = {

    "Java", "C++", "C", "PHP"};
        //数组适配器
        //参数1 环境 参数2 布局资源索引 指的是每一项所呈现的样式 参数3 数据源
//        ArrayAdapter arrayAdapter = new ArrayAdapter(this, R.layout.support_simple_spinner_dropdown_item, items);
        //参数3 int textviewId 指定文本需要放在布局中对应的Id文本空间的位置
        ArrayAdapter arrayAdapter = new ArrayAdapter(this, R.layout.arrary_item_layout,R.id.item_tx , items);
        AlertDialog.Builder builder = new AlertDialog.Builder(this)
                .setTitle("请选择")
                //参数1 适配器对象(对数据显示样式的规则制定) 参数2 监听器
                .setAdapter(arrayAdapter, new DialogInterface.OnClickListener() {


                    @Override
                    public void onClick(DialogInterface dialogInterface, int i) {


                        Toast.makeText(DialogActivity.this,items[i], Toast.LENGTH_SHORT).show();
                        dialogInterface.dismiss();
                    }
                });
        builder.show();
    }

    public void MyClick(View view) {


        switch (view.getId()) {


            case R.id.but1:

                break;
            case R.id.but2:

                break;
            case R.id.but3:

                break;
            case R.id.but4:
                showArrayDialog();
            default:
        }
    }
}
运行效果:

