在JavaWeb中,随着Intellij IDEA的广泛使用,所用的Maven插件在以后的JavaEE中开发也将是个趋势,通过Maven仓库,我们可以不用下载所关联的Jar包就可以进行引用,还是很方便整个工程管理的。
因为自己也是第一次接触Spring项目,而且前前后后鼓捣了十多次,这次成功的将Spring项目运行起来,特意记录之,方法很多种,适合自己的便是合适的,大神请绕道。
目标:
搭建一个Maven插件的Spring项目HelloWord
环境:
- windows 7 64位
- intellij IDEA 64
- Maven
搭建步骤:
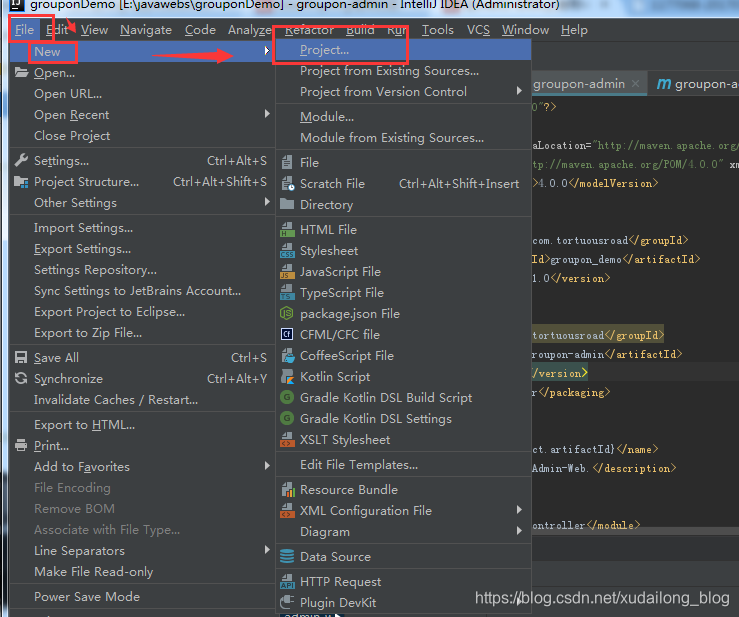
(一):File – New-- project
如下图:
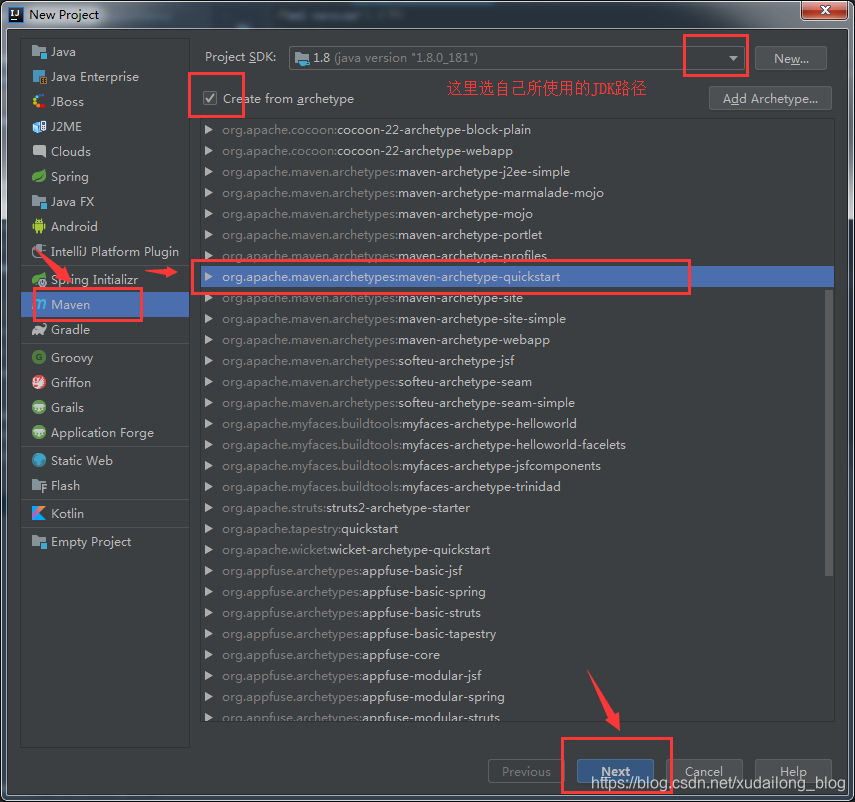
(二)选择Maven项目,选择配置好的JDK,勾选Createformarchetype的单选框,选中quickstart,并点击Next
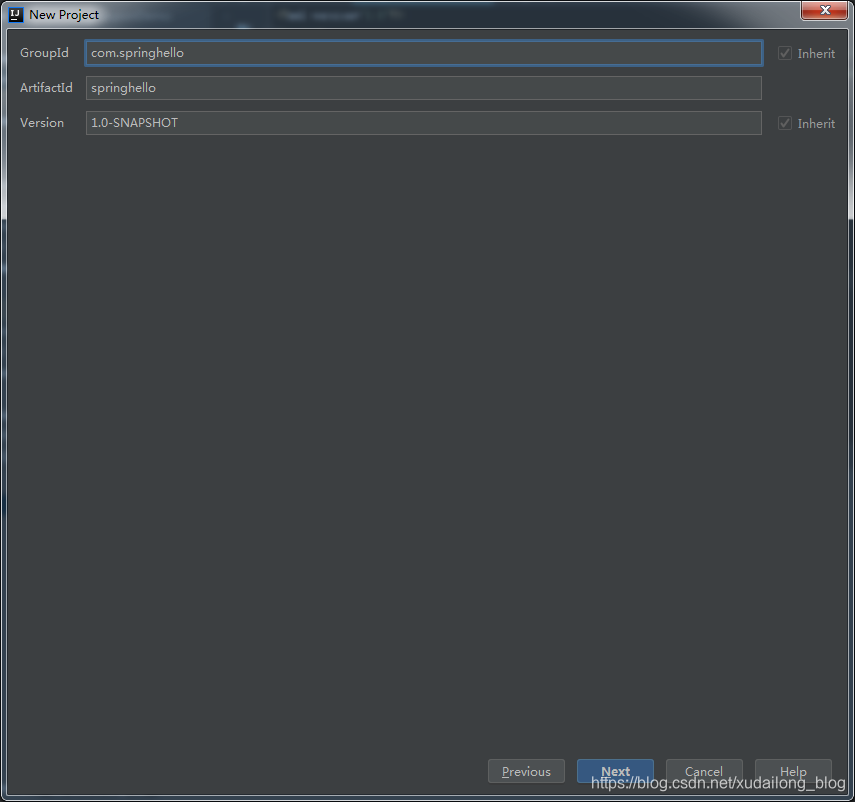
(三)下面的GroupId一般是com.公司名.项目名,ArtifactId则是项目工程名,Version可以不用动
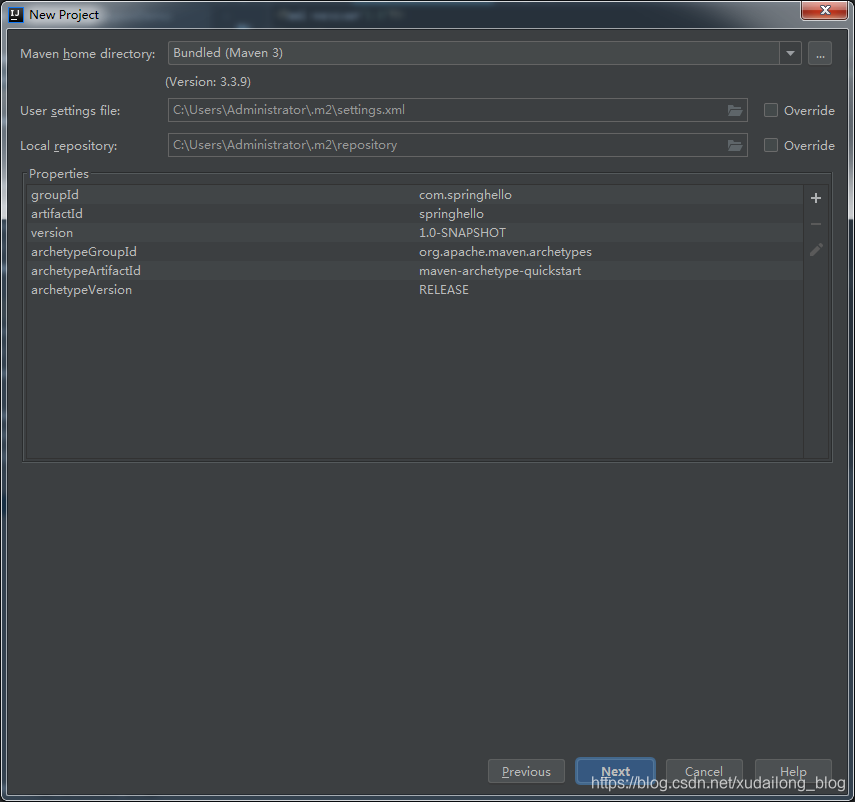
(四)一开始的Maven设置
(五)修改Maven设置,不懂的话,可以查看历史博客:
Windows 7 下Maven的下载安装配置 (配置本地仓库及修改路径)
Maven设置网络中央仓库的镜像
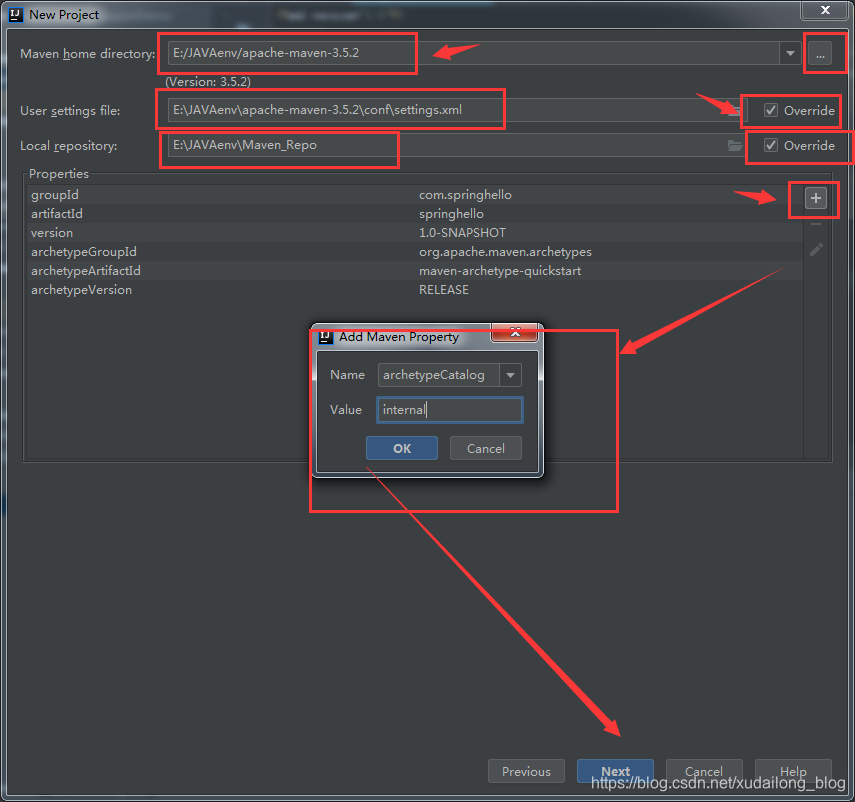
如上图:设置Maven后还需添加个
archetypeCatalog

internal
点击OK,点击next。
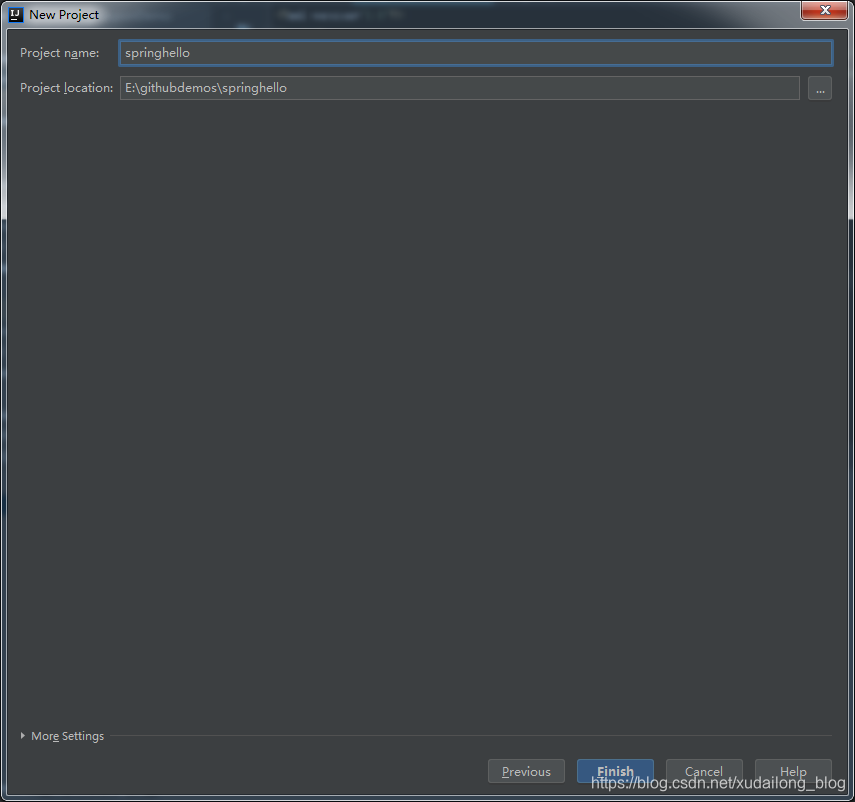
(六)填写项目名称,及项目路径,然后点击Finish。
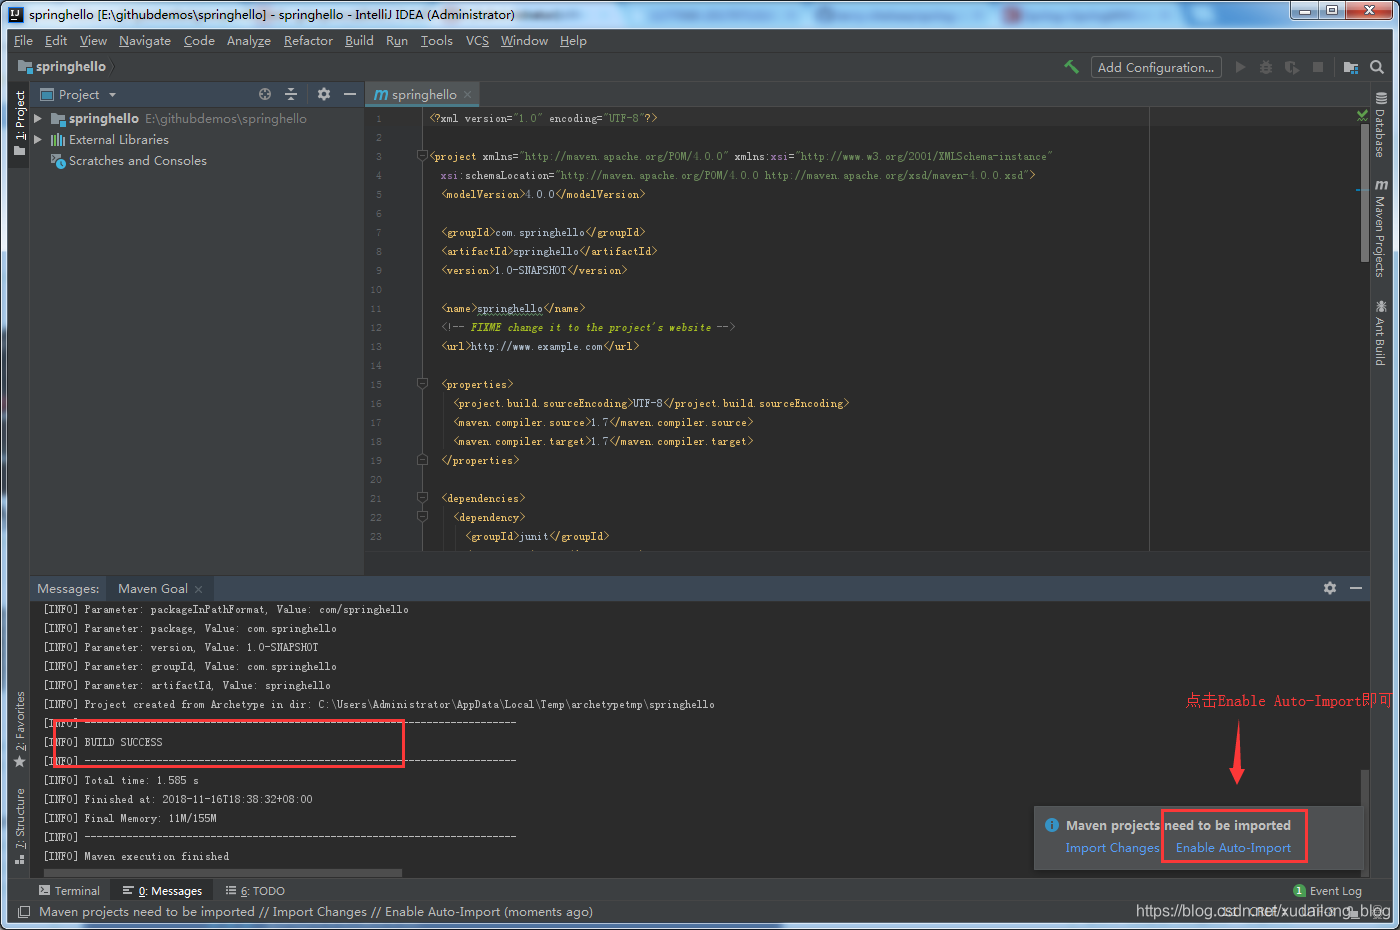
(七)这里我们选择New Window打开项目

(八)当出现BUILD SUCCESS 即为创建项目成功
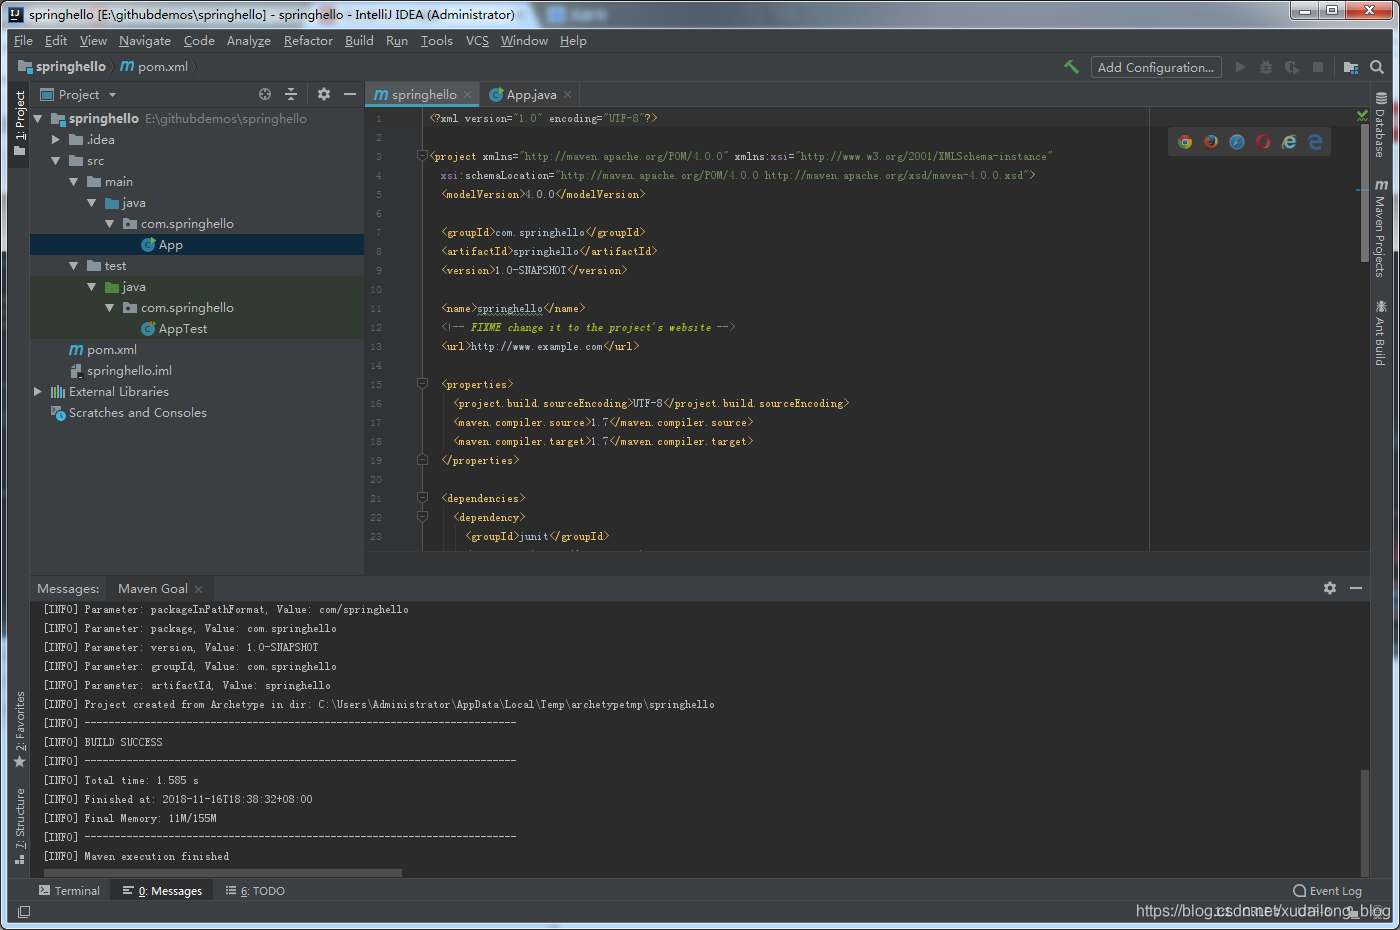
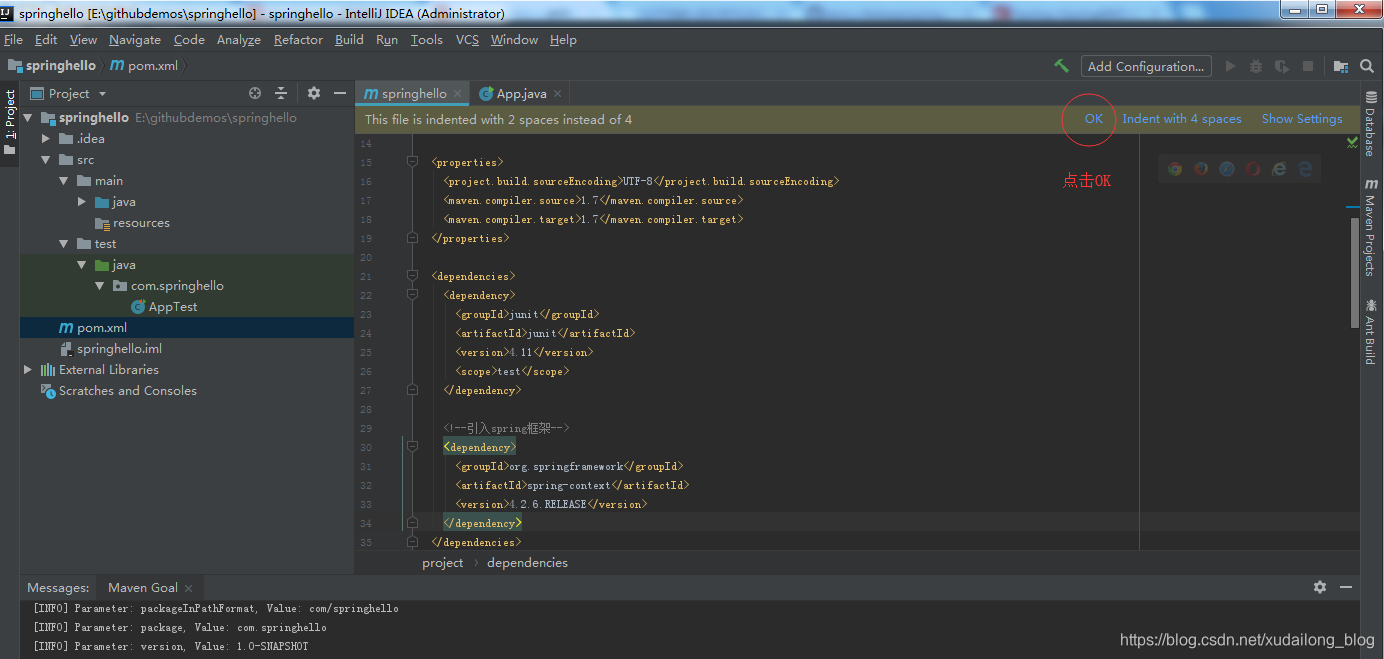
(九)展开后的整个目录结构
(十)在main文件夹下创建resources文件夹用于存放资源文件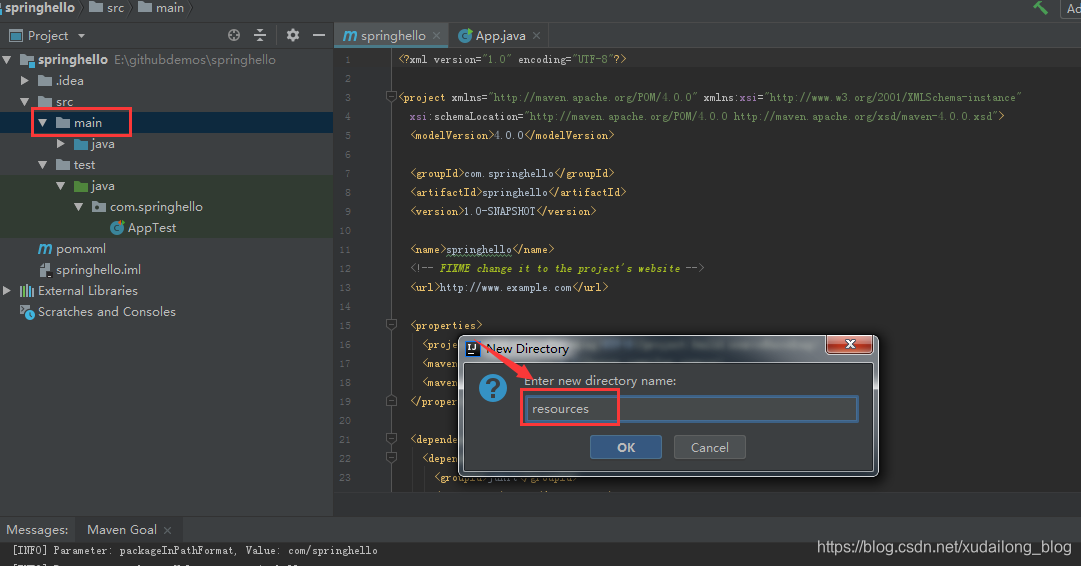
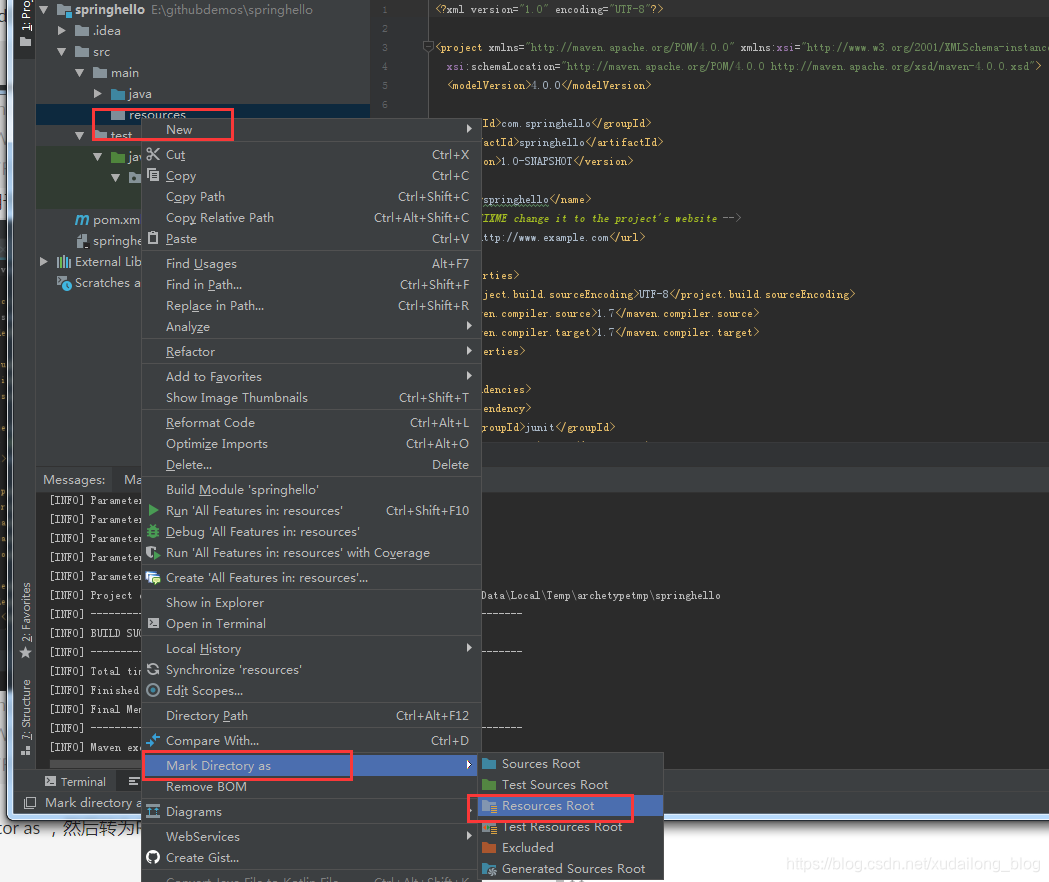
(十一)在resources上右键,选择make director as ,然后转为Resources Root
添加Spring框架
(十二)添加Spring框架,将下面的代码复制到项目目录的pom.xml文件中
    <!--引入spring框架-->
    <dependency>
      <groupId>org.springframework</groupId>
      <artifactId>spring-context</artifactId>
      <version>4.2.6.RELEASE</version>
    </dependency>
整个pom.xml文件内容:
<?xml version="1.0" encoding="UTF-8"?>

<project xmlns="http://maven.apache.org/POM/4.0.0" xmlns:xsi="http://www.w3.org/2001/XMLSchema-instance"
  xsi:schemaLocation="http://maven.apache.org/POM/4.0.0 http://maven.apache.org/xsd/maven-4.0.0.xsd">
  <modelVersion>4.0.0</modelVersion>

  <groupId>com.springhello</groupId>
  <artifactId>springhello</artifactId>
  <version>1.0-SNAPSHOT</version>

  <name>springhello</name>
  <!-- FIXME change it to the project's website -->
  <url>http://www.example.com</url>

  <properties>
    <project.build.sourceEncoding>UTF-8</project.build.sourceEncoding>
    <maven.compiler.source>1.7</maven.compiler.source>
    <maven.compiler.target>1.7</maven.compiler.target>
  </properties>

  <dependencies>
    <dependency>
      <groupId>junit</groupId>
      <artifactId>junit</artifactId>
      <version>4.11</version>
      <scope>test</scope>
    </dependency>

    <!--引入spring框架-->
    <dependency>
      <groupId>org.springframework</groupId>
      <artifactId>spring-context</artifactId>
      <version>4.2.6.RELEASE</version>
    </dependency>
  </dependencies>

  <build>
    <pluginManagement><!-- lock down plugins versions to avoid using Maven defaults (may be moved to parent pom) -->
      <plugins>
        <plugin>
          <artifactId>maven-clean-plugin</artifactId>
          <version>3.0.0</version>
        </plugin>
        <!-- see http://maven.apache.org/ref/current/maven-core/default-bindings.html#Plugin_bindings_for_jar_packaging -->
        <plugin>
          <artifactId>maven-resources-plugin</artifactId>
          <version>3.0.2</version>
        </plugin>
        <plugin>
          <artifactId>maven-compiler-plugin</artifactId>
          <version>3.7.0</version>
        </plugin>
        <plugin>
          <artifactId>maven-surefire-plugin</artifactId>
          <version>2.20.1</version>
        </plugin>
        <plugin>
          <artifactId>maven-jar-plugin</artifactId>
          <version>3.0.2</version>
        </plugin>
        <plugin>
          <artifactId>maven-install-plugin</artifactId>
          <version>2.5.2</version>
        </plugin>
        <plugin>
          <artifactId>maven-deploy-plugin</artifactId>
          <version>2.8.2</version>
        </plugin>
      </plugins>
    </pluginManagement>
  </build>
</project>
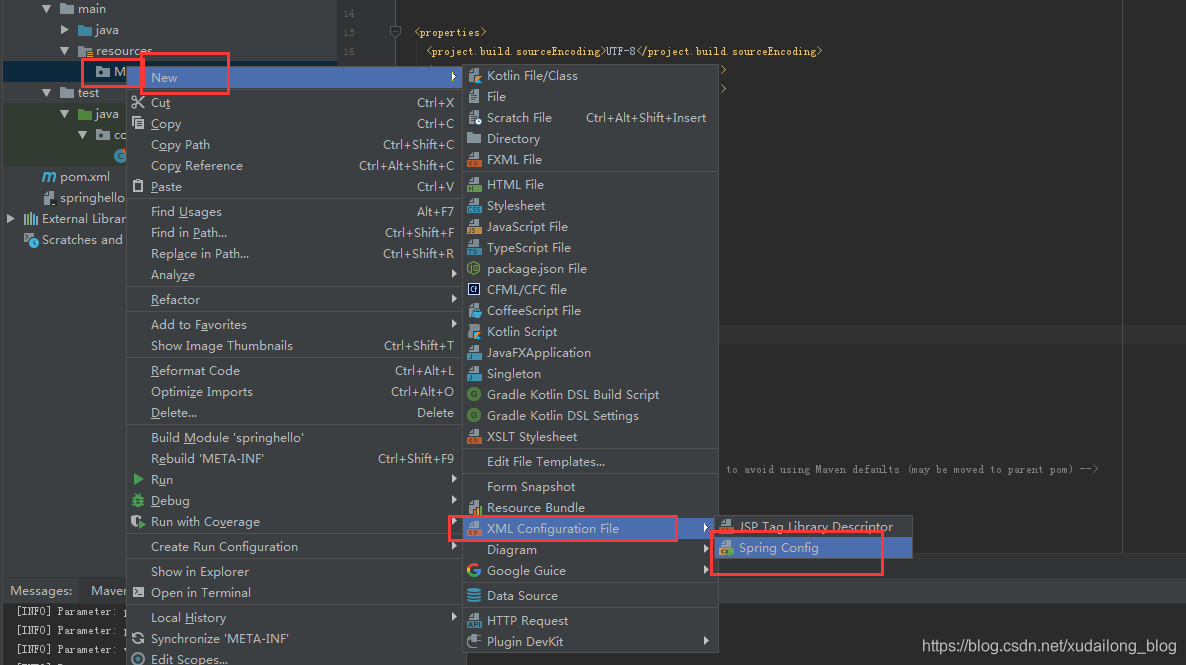
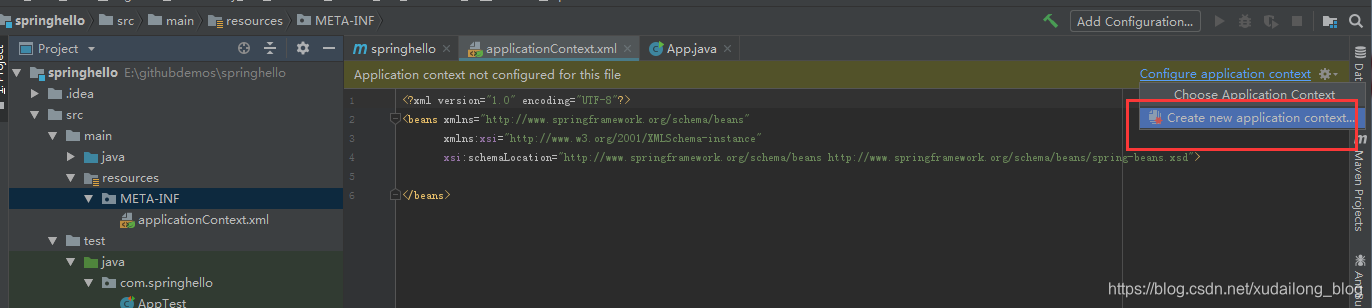
(十三)在resources下新建META-INF包,在META-INF下新建applicationContext.xml
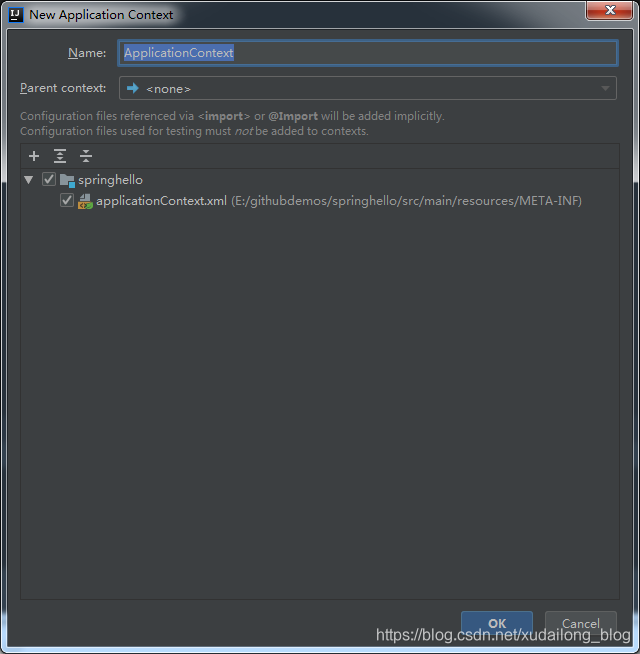
(十四)自动关联ApplicationContext,点击OK
applicationContext.xml里面的代码如下所示:
<?xml version="1.0" encoding="UTF-8"?>
<beans xmlns="http://www.springframework.org/schema/beans"
       xmlns:xsi="http://www.w3.org/2001/XMLSchema-instance"
       xsi:schemaLocation="http://www.springframework.org/schema/beans http://www.springframework.org/schema/beans/spring-beans.xsd">

</beans>
(十五)新建controller包和HelloWord.java,Main.java:
HelloWord.java:
package com.springhello.controller;

public class HelloWord {
    private String name;
    private int age;

    public int getAge() {
        return age;
    }

    public void setAge(int age) {
        this.age = age;
    }

    public String getName() {
        return name;
    }

    public void setName(String name) {
        this.name = name;
    }

    public void hello() {
        System.out.println("hello   :  " + name + "  " + age);
    }
}
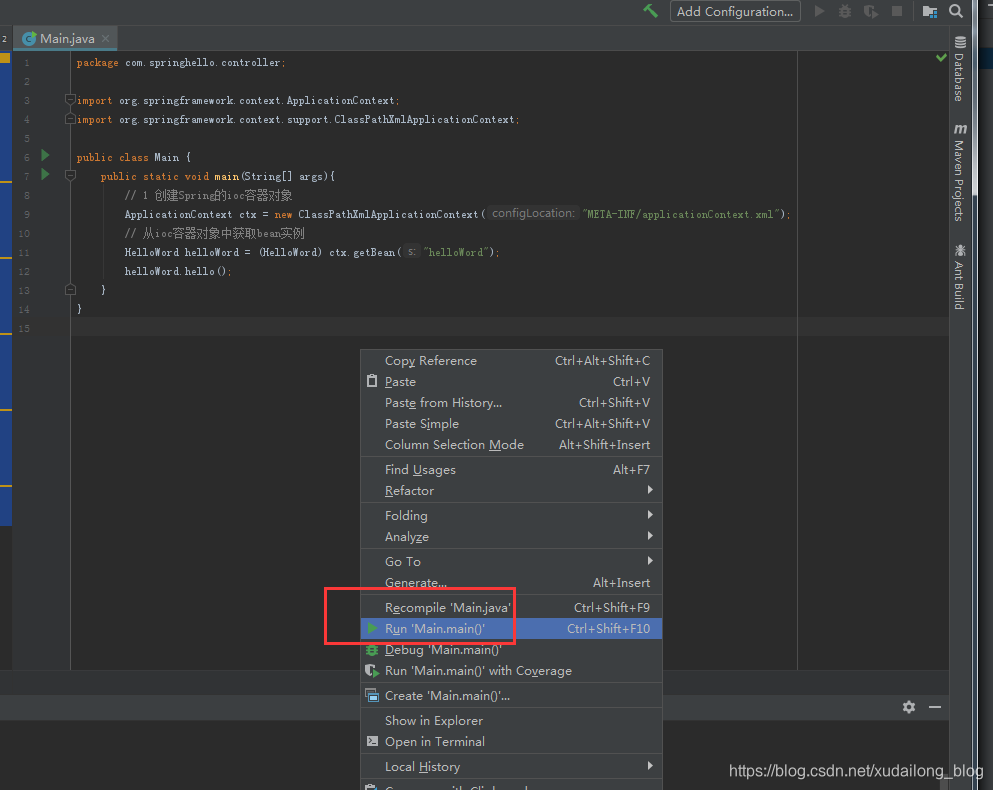
Main.java:
package com.springhello.controller;

import org.springframework.context.ApplicationContext;
import org.springframework.context.support.ClassPathXmlApplicationContext;

public class Main {
    public static void main(String[] args){
        // 1 创建Spring的ioc容器对象
        ApplicationContext ctx = new ClassPathXmlApplicationContext("META-INF/applicationContext.xml");
        // 从ioc容器对象中获取bean实例
        HelloWord helloWord = (HelloWord) ctx.getBean("helloWord");
        helloWord.hello();
    }
}
如图所示:

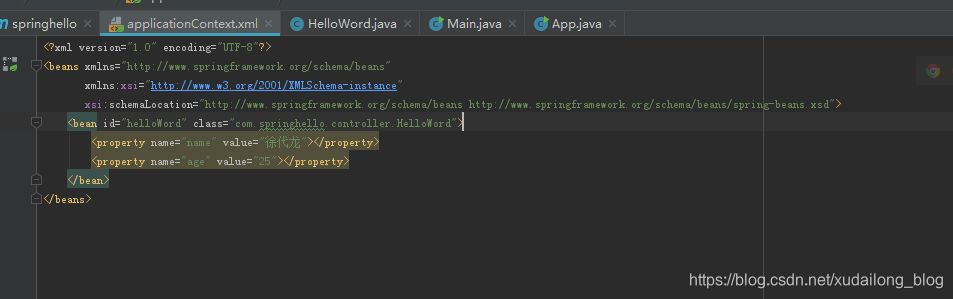
(十六)在applicationContext.xml中配置bean
代码如下:
    <bean id="helloWord" class="com.springhello.controller.HelloWord">
        <property name="name" value="徐代龙"></property>
        <property name="age" value="25"></property>
    </bean>
截图如下:
(十七)选择Main.class文件区域,然后右键运行
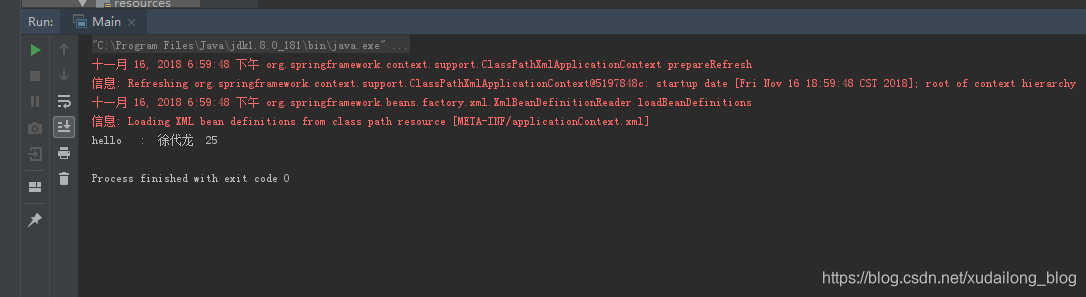
运行成功的代码:
以上就是我们在IntelliJ IDEA上使用Maven创建Spring项目HelloWorld。
个人网站:http://xudailong.cc
关注「蛇崽网盘教程资源」公众号 ,在微信后台回复「领取资源」,获取IT资源200G干货大全。
更多资源请访问:
https://blog.csdn.net/xudailong_blog/article/details/78762262
某课视频教程
https://xudailong.cc/2018/09/30/muke-courses/
关注「蛇崽网盘教程资源」公众号 ,在微信后台回复「领取资源」,获取IT资源200G干货大全。
在微信后台回复「130个小程序」,即可免费领取享有导入就能跑的微信小程序