根据搜集的资料安装测试并在安装测试过程中整理的文档,如有不足希望不吝赐教。
目录
一、前提
- 本文档是在《CentOS7中hyperledger-fabric1.1 - 2+6多机安装部署、部分异常处理以及使用configtxlator对区块基本信息查询(kafka共识,手动非docker方式)》的基础上进行修改,更理想的情况是在配置多节点fabric网络时就使用fabric-ca。
- 安装go1.9+,并设置正确的GOPATN环境变量
- 安装libtool包:yum -y install libtool
参考:fabric-ca 部署环境
https://blog.csdn.net/xxzjwdnlwx/article/details/80736670
二、安装部署Fabric-CA
1.下载安装
执行如下代码(以下使用fabric-ca 1.1.0版本,请自行选择版本):
go get -u github.com/hyperledger/fabric-ca/cmd/...或者使用:
go get -u github.com/hyperledger/fabric-ca/cmd/fabric-ca-server
go get -u github.com/hyperledger/fabric-ca/cmd/fabric-ca-client
注意:如果已经克隆了fabric-ca仓库,请确保在运行“go get”命令之前已经在主分支上了。否则,可能会报错。
执行完毕后会在$GOPATH/bin目录下看到生成的2个文件:fabric-ca-client、fabric-ca-server
【异常及解决办法】
如果有error: RPC failed; result=18, HTTP code = 200错误,可以试试如下命令:
git config --global http.postBuffer 24288000完成后可以通过如下命令查看。git config --list
如果go get或者git clone命令速度很慢或者为0,可以尝试修改hosts文件:vim /etc/hosts添加如下内容并重试:
192.30.253.112 github.com
使用git clone命令也可以添加参数--depth=1只拉取最近一个revision,类似:
git clone --depth=1 https://github.com/hyperledger/fabric-ca.git
2.部署
这里将fabric-ca部署在/opt/app/fabric-ca/server目录中,分别执行如下三行命令:
mkdir -p /opt/app/fabric-ca/server

cp -rf /opt/gopath/bin/*  /opt/app/fabric-ca/server

ln -s /opt/app/fabric-ca/server/fabric-ca-client  /usr/bin/fabric-ca-client
使用下面两行命令直接启动ca,fabric-ca admin的名称为admin,密码为pass。(这里只是演示,生产中使用,你需要根据实际的情况配置)
cd /opt/app/fabric-ca/server

./fabric-ca-server start -b admin:pass --cfg.affiliations.allowremove  --cfg.identities.allowremove &
注意:这里只是演示用法,直接用sqlite存储用户信息,生产中,请根据情况配置ldap或者mysql等数据库:HyperLedger FabricCA Config Database and LDAP。
【异常及解决办法】
如果启动报错:Version is not set for fabric-ca library,这是因为在启动时调用了lib/metadata包中version.go的Version变量,但是在初始化启动时默认没有赋值。可通过如下两种办法解决:
1.直接在变量后赋值
修改:/opt/gopath/src/github.com/hyperledger/fabric-ca/lib/metadata/version.go
vim /opt/gopath/src/github.com/hyperledger/fabric-ca/lib/metadata/version.go在文中找到var Version string修改为:var Version string = "1.1.0"重新编译(go get …)即可;
2.可在编译时赋值
go get -v -ldflags "-X github.com/hyperledger/fabric-ca/lib/metadata.Version=1.1.0" github.com/hyperledger/fabric-ca/cmd/...
三。生成证书
1.生成fabric-ca admin证书
创建所需文件夹,分别执行下面三条命令:
cd ~
mkdir fabriccert
mkdir fabric-ca-files
使用下面两行命令生成fabric-ca admin的凭证,用-H参数指定client目录:
mkdir -p `pwd`/fabric-ca-files/admin

fabric-ca-client enroll -u http://admin:pass@localhost:7054 -H `pwd`/fabric-ca-files/admin
完成后目录结构如图(tree可能需要安装):

也可以用环境变量FABRIC_CA_CLIENT_HOME指定了client的工作目录,生成的用户凭证将存放在这个目录中。使用如下三行命令:
export FABRIC_CA_CLIENT_HOME=`pwd`/fabric-ca-files/admin

mkdir -p $FABRIC_CA_CLIENT_HOME

fabric-ca-client enroll -u http://admin:pass@localhost:7054
为了防止混乱,后面的演示操作中,都直接用-H指定目录。
2创建联盟.
上面启动方式会默认创建两个组织,如下:
fabric-ca-client -H `pwd`/fabric-ca-files/admin affiliation list如图

为了查看信息的时候,看到的输出比较简洁,用下面的命令将其删除:
fabric-ca-client -H `pwd`/fabric-ca-files/admin  affiliation remove --force  org1;
fabric-ca-client -H `pwd`/fabric-ca-files/admin  affiliation remove --force  org2;
如图:

然后执行下面命令创建联盟:
fabric-ca-client  -H `pwd`/fabric-ca-files/admin  affiliation add com
fabric-ca-client  -H `pwd`/fabric-ca-files/admin  affiliation add com.example
fabric-ca-client  -H `pwd`/fabric-ca-files/admin  affiliation add com.example.org1
fabric-ca-client  -H `pwd`/fabric-ca-files/admin  affiliation add com.example.org2
fabric-ca-client  -H `pwd`/fabric-ca-files/admin  affiliation add com.example.org3
创建联盟如下:

3.为每个组织准备msp
为example.com准备msp,将ca证书等存放example.com组织的目录中:
mkdir -p ./fabric-ca-files/example.com/msp
fabric-ca-client getcacert -M `pwd`/fabric-ca-files/example.com/msp
完成后会得到证书文件:
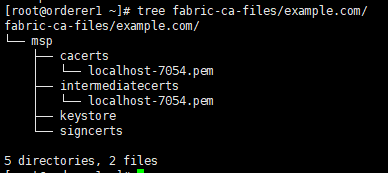
注意通过getcacert得到msp目录中只有CA证书。
同样的方式为org1.example.com、org2.example.com和org3.example.com获取msp(每行一条命令):
mkdir -p fabric-ca-files/org1.example.com/msp
mkdir -p fabric-ca-files/org2.example.com/msp
mkdir -p fabric-ca-files/org3.example.com/msp
fabric-ca-client getcacert -M `pwd`/fabric-ca-files/org1.example.com/msp
fabric-ca-client getcacert -M `pwd`/fabric-ca-files/org2.example.com/msp
fabric-ca-client getcacert -M `pwd`/fabric-ca-files/org3.example.com/msp
这里是用getcacert为每个组织准备需要的ca文件,在生成创始块的时候会用到。
在1.1.0版本的fabric-ca中,只会生成组件或用户在操作区块链的时候用到的证书和密钥,不会生成用来加密grpc通信的证书(tls证书)。这里继续沿用之前cryptogen生成的tls证书,在最后的重新部署操作,只会替换msp目录。
但是需要将验证tls证书的ca添加到msp目录中,如下(路径要根据自己实际情况修改):
cp -rf /etc/hyperledger/fabric/crypto-config/ordererOrganizations/example.com/msp/tlscacerts fabric-ca-files/example.com/msp/

cp -rf /etc/hyperledger/fabric/crypto-config/peerOrganizations/org1.example.com/msp/tlscacerts fabric-ca-files/org1.example.com/msp/

cp -rf /etc/hyperledger/fabric/crypto-config/peerOrganizations/org2.example.com/msp/tlscacerts fabric-ca-files/org2.example.com/msp/

cp -rf /etc/hyperledger/fabric/crypto-config/peerOrganizations/org3.example.com/msp/tlscacerts fabric-ca-files/org3.example.com/msp/
如果在你的环境中,各个组件域名的证书,是由第三方CA签署的,就将第三方CA的根证书添加到tlscacerts目录中。
4.注册example.com的管理员
注册example.com的管理员[email protected]
将fabric-ca-files/admin/fabric-ca-client-config.yaml其中的id部分修改为:
id:
  name: [email protected]
  type: client
  affiliation: com.example
  maxenrollments: 0
  attributes:
    - name: hf.Registrar.Roles
      value: client,orderer,peer,user
    - name: hf.Registrar.DelegateRoles
      value: client,orderer,peer,user
    - name: hf.Registrar.Attributes
      value: "*"
    - name: hf.GenCRL
      value: true
    - name: hf.Revoker
      value: true
    - name: hf.AffiliationMgr
      value: true
    - name: hf.IntermediateCA
      value: true
    - name: role
      value: admin
      ecert: true
注意最后一行role属性,是我们自定义的属性,在配置文件中是单独设置ecert属性为true或者false,如果在命令行中,添加后缀:ecert表示true。
直接执行下面的命令,即可完成用户[email protected]注册,注意这时候的注册使用fabricCA的admin账号完成的:
fabric-ca-client register -H `pwd`/fabric-ca-files/admin --id.secret=password如果不用--id.secret指定密码,会自动生成密码。
其它配置的含义是用户名为[email protected],类型是client,它能够管理com.example.*下的用户,如下:
--id.name [email protected] //用户名
--id.type client //类型为client
--id.affiliation "com.example" //权利访问
hf.Registrar.Roles=client,orderer,peer,user //能够管理的用户类型
hf.Registrar.DelegateRoles=client,orderer,peer,user //可以授权给子用户管理的用户类型
hf.Registrar.Attributes=* //可以为子用户设置所有属性
hf.GenCRL=true //可以生成撤销证书列表
hf.Revoker=true //可以撤销用户
hf.AffiliationMgr=true //能够管理联盟
hf.IntermediateCA=true //可以作为中间CA
role=admin:ecert //自定义属性
生成[email protected]凭证:
mkdir -p ./fabric-ca-files/example.com/admin

fabric-ca-client enroll -u http://[email protected]:password@localhost:7054  -H `pwd`/fabric-ca-files/example.com/admin

ls ./fabric-ca-files/example.com/admin
这时候可以用[email protected]的身份查看联盟:
fabric-ca-client affiliation list -H `pwd`/fabric-ca-files/example.com/admin
最后需要将[email protected]的证书复制到example.com/msp/admincerts/
mkdir fabric-ca-files/example.com/msp/admincerts/

cp fabric-ca-files/example.com/admin/msp/signcerts/cert.pem  fabric-ca-files/example.com/msp/admincerts/
只有这样,才能具备管理员权限。
5.注册org1.example.com的管理员
注册org1.example.com的管理员[email protected]
mkdir -p ./fabric-ca-files/org1.example.com/admin修改fabric-ca-files/admin/fabric-ca-client-config.yaml中的id部分:
vim fabric-ca-files/admin/fabric-ca-client-config.yaml修改为:
id:
  name: [email protected]
  type: client
  affiliation: com.example.org1
  maxenrollments: 0
  attributes:
    - name: hf.Registrar.Roles
      value: client,orderer,peer,user
    - name: hf.Registrar.DelegateRoles
      value: client,orderer,peer,user
    - name: hf.Registrar.Attributes
      value: "*"
    - name: hf.GenCRL
      value: true
    - name: hf.Revoker
      value: true
    - name: hf.AffiliationMgr
      value: true
    - name: hf.IntermediateCA
      value: true
    - name: role
      value: admin
      ecert: true
注册:
fabric-ca-client register -H `pwd`/fabric-ca-files/admin --id.secret=password生成凭证:
fabric-ca-client enroll -u http://[email protected]:password@localhost:7054 -H `pwd`/fabric-ca-files/org1.example.com/admin
查看联盟:
fabric-ca-client affiliation list -H `pwd`/fabric-ca-files/org1.example.com/admin
注意与[email protected]的区别,这里只能看到组织com.example.org1。
将[email protected]的证书复制到org1.example.com的msp/admincerts中:
mkdir fabric-ca-files/org1.example.com/msp/admincerts/

cp fabric-ca-files/org1.example.com/admin/msp/signcerts/cert.pem fabric-ca-files/org1.example.com/msp/admincerts/在[email protected]中也需要创建msp/admincerts目录,通过peer命令操作fabric的时候会要求admincerts存在:
mkdir fabric-ca-files/org1.example.com/admin/msp/admincerts/

cp fabric-ca-files/org1.example.com/admin/msp/signcerts/cert.pem fabric-ca-files/org1.example.com/admin/msp/admincerts/
如下:

另外,这里没有使用中间CA,将intermediatecerts中的空文件删除,否则peer会提示Warning(注:在实际操作中发现,文中指出的并没有删除intermediatecerts目录,因此在最后需要自行检查一次以确认全部删除):
rm fabric-ca-files/org1.example.com/admin/msp/intermediatecerts/*6.注册org2.example.com的管理员
6、7与5类似,以下只简单记录。
注册org2.example.com的管理员[email protected]
mkdir -p ./fabric-ca-files/org2.example.com/admin修改fabric-ca-files/admin/fabric-ca-client-config.yaml中的id部分
vim fabric-ca-files/admin/fabric-ca-client-config.yaml修改为:
id:
  name: [email protected]
  type: client
  affiliation: com.example.org2
  maxenrollments: 0
  attributes:
    - name: hf.Registrar.Roles
      value: client,orderer,peer,user
    - name: hf.Registrar.DelegateRoles
      value: client,orderer,peer,user
    - name: hf.Registrar.Attributes
      value: "*"
    - name: hf.GenCRL
      value: true
    - name: hf.Revoker
      value: true
    - name: hf.AffiliationMgr
      value: true
    - name: hf.IntermediateCA
      value: true
    - name: role
      value: admin
      ecert: true
注册:
fabric-ca-client register -H `pwd`/fabric-ca-files/admin --id.secret=password生成凭证:
fabric-ca-client enroll -u http://[email protected]:password@localhost:7054 -H `pwd`/fabric-ca-files/org2.example.com/admin查看联盟:
fabric-ca-client affiliation list -H `pwd`/fabric-ca-files/org2.example.com/admin注意与[email protected]的区别,这里只能看到组织com.example.org2。
将[email protected]的证书复制到org2.example.com的msp/admincerts中:
mkdir fabric-ca-files/org2.example.com/msp/admincerts/

cp fabric-ca-files/org2.example.com/admin/msp/signcerts/cert.pem fabric-ca-files/org2.example.com/msp/admincerts/在[email protected]中也需要创建msp/admincerts目录,通过peer命令操作fabric的时候会要求admincerts存在:
mkdir fabric-ca-files/org2.example.com/admin/msp/admincerts/

cp fabric-ca-files/org2.example.com/admin/msp/signcerts/cert.pem fabric-ca-files/org2.example.com/admin/msp/admincerts/另外,这里没有使用中间CA,将intermediatecerts中的空文件删除,否则peer会提示Warning(注:在实际操作中发现,文中指出的并没有删除intermediatecerts目录,因此在最后需要自行检查一次以确认全部删除):
rm fabric-ca-files/org2.example.com/admin/msp/intermediatecerts/*7.注册org3.example.com的管理员
略。参考5、6
四、各个组织分别使用自己的Admin账户创建其它账号
example.com、org1.example.com、org2.example.com、org3.example.com四个组织这时候可以分别使用自己的Admin账号创建子账号。
1.orderer0.example.com
使用[email protected]注册账号orderer0.example.com。注意这时候指定的目录是fabric-ca-files/example.com/admin/。
修改fabric-ca-files/example.com/admin/fabric-ca-client-config.yaml:
vim fabric-ca-files/example.com/admin/fabric-ca-client-config.yaml内容如下:
id:
  name: orderer0.example.com
  type: orderer
  affiliation: com.example
  maxenrollments: 0
  attributes:
    - name: role
      value: orderer
      ecert: true
注册以及生成凭证:
fabric-ca-client register -H `pwd`/fabric-ca-files/example.com/admin --id.secret=password

mkdir ./fabric-ca-files/example.com/orderer0

fabric-ca-client enroll -u http://orderer0.example.com:password@localhost:7054 -H `pwd`/fabric-ca-files/example.com/orderer0将[email protected]的证书复制到fabric-ca-files/example.com/orderer0/msp/admincerts:
mkdir fabric-ca-files/example.com/orderer0/msp/admincerts

cp fabric-ca-files/example.com/admin/msp/signcerts/cert.pem fabric-ca-files/example.com/orderer0/msp/admincerts/
2.orderer1.example.com
略。参考1、orderer0.example.com
3.peer0.org1.example.com
使用[email protected]注册账号peer0.org1.example.com。这时候指定的目录是fabric-ca-files/org1.example.com/admin/。
修改fabric-ca-files/org1.example.com/admin/fabric-ca-client-config.yaml:
vim fabric-ca-files/org1.example.com/admin/fabric-ca-client-config.yaml内容如下:
id:
  name: peer0.org1.example.com
  type: peer
  affiliation: com.example.org1
  maxenrollments: 0
  attributes:
    - name: role
      value: peer
      ecert: true
注册以及生成凭证:
fabric-ca-client register -H `pwd`/fabric-ca-files/org1.example.com/admin --id.secret=password

mkdir ./fabric-ca-files/org1.example.com/peer0

fabric-ca-client enroll -u http://peer0.org1.example.com:password@localhost:7054 -H `pwd`/fabric-ca-files/org1.example.com/peer0
将[email protected]的证书复制到fabric-ca-files/org1.example.com/peer0/msp/admincerts:
mkdir fabric-ca-files/org1.example.com/peer0/msp/admincerts

cp fabric-ca-files/org1.example.com/admin/msp/signcerts/cert.pem fabric-ca-files/org1.example.com/peer0/msp/admincerts/
4.peer1.org1.example.com
略。参考:
1.orderer0.example.com
3.peer0.org1.example.com
5.peer0.org2.example.com
略。参考:
1.orderer0.example.com
3.peer0.org1.example.com
6.peer1.org2.example.com
略。参考:
1.orderer0.example.com
3.peer0.org1.example.com
7.peer0.org3.example.com
略。参考:
1.orderer0.example.com
3.peer0.org1.example.com
8.peer1.org3.example.com
略。参考:
1.orderer0.example.com
3.peer0.org1.example.com
五、重新部署启动fabric网络
1.修改configtx.yaml
因为我们不能保证一次成功,因此在重新部署之前需要对之前的配置做一个简单的备份。在编辑本文档的时候备份过程如下:
- 首先关闭fabric网络,关闭方法参考《CentOS7 - fabric1.1多机部署时切换默认goleaveldb为CouchDB》;
- 除了orderer0机器以外(留用crypto-config目录修改,其余文件与其他机器类似),删除其他机器上/etc/hyperledger/fabric目录下除*.yaml全部文件(如非必要*.pak文件也可以保留);
- 备份fabric目录,执行以下命令:cp -r /etc/hyperledger/fabric /etc/hyperledger/fabric-bak
- 删除kafka所有topic,参考《centos - 环境构建-centOS安装jdk、zk和kafka》
- 删除所有couchdb中数据(如果没有替换默认leavedb为couchdb则忽略)
- 删除所有机器上/var/hyperledger/production目录下文件
- 删除所有/data/hyperledger/production目录下文件(如果有)
执行完上面的操作后进入/etc/hyperledger/fabric目录,修改configtx.yaml,将其中的msp路径修改为通过fabric-ca创建的msp目录,修改部分如下:

2.替换msp
替换example.com中的msp
rm -rf crypto-config/ordererOrganizations/example.com/msp

cp -rf /root/fabric-ca-files/example.com/msp crypto-config/ordererOrganizations/example.com/
替换orderer0.example.com中的msp
rm -rf crypto-config/ordererOrganizations/example.com/orderers/orderer0.example.com/msp

cp -rf /root/fabric-ca-files/example.com/orderer0/msp crypto-config/ordererOrganizations/example.com/orderers/orderer0.example.com/
替换orderer1.example.com中的msp
rm -rf crypto-config/ordererOrganizations/example.com/orderers/orderer1.example.com/msp

cp -rf /root/fabric-ca-files/example.com/orderer1/msp crypto-config/ordererOrganizations/example.com/orderers/orderer1.example.com/
替换org1.example.com中的msp
rm -rf crypto-config/peerOrganizations/org1.example.com/msp

cp -rf /root/fabric-ca-files/org1.example.com/msp crypto-config/peerOrganizations/org1.example.com/
替换peer0.org1.example.com中的msp
rm -rf crypto-config/peerOrganizations/org1.example.com/peers/peer0.org1.example.com/msp/

cp -rf /root/fabric-ca-files/org1.example.com/peer0/msp crypto-config/peerOrganizations/org1.example.com/peers/peer0.org1.example.com/
替换peer1.org1.example.com中的msp
rm -rf crypto-config/peerOrganizations/org1.example.com/peers/peer1.org1.example.com/msp/

cp -rf /root/fabric-ca-files/org1.example.com/peer1/msp crypto-config/peerOrganizations/org1.example.com/peers/peer1.org1.example.com/
其余org2和org3类似org1,参考上文即可,
因为替换目录比较繁琐,因此,可以将替换的命令写到一个简单的sh脚本中执行(上面生成证书的步骤以及下面第3步中大量重复的的命令都可以,有兴趣的可以自己搞搞),检查无误后使用脚本替换文件,以下是一个简单的脚本文件示例,自己才学疏浅,只能保证基本能用,但这一定不是最优,如果有更好的希望不吝赐教:
#!/bin/bash
echo "start"

echo "example.com"
rm -rf crypto-config/ordererOrganizations/example.com/msp
cp -rf /root/fabric-ca-files/example.com/msp crypto-config/ordererOrganizations/example.com/

echo "orderer0.example.com"
rm -rf crypto-config/ordererOrganizations/example.com/orderers/orderer0.example.com/msp
cp -rf /root/fabric-ca-files/example.com/orderer0/msp crypto-config/ordererOrganizations/example.com/orderers/orderer0.example.com/

echo "end"注意:以上替换完成后并没有替换彻底,经过观察发现部分目录下没有tlscacerts目录,如/etc/hyperledger/fabric/crypto-config/ordererOrganizations/example.com/users/[email protected]/msp/下,需要从别的位置将其拷贝一份即可。
3.异常及解决办法
如果只执行了以上操作,那么在执行创建channel过程中可能会报错:
Error: got unexpected status: BAD_REQUEST -- error authorizing update: error validating DeltaSet: policy for [Group] /Channel/Application not satisfied: Failed to reach implicit threshold of 1 sub-policies, required 1 remaining
错误原因是[email protected] 等本地admin没有设置成ca生成的证书,还是使用之前的证书,替换之后不再报错。
具体需要根据自己的配置进行替换或者自行对比原始目录与新目录,以下贴出大致的替换规则可作为参考:
替换orderer
将/etc/hyperledger/fabric/crypto-config/ordererOrganizations/example.com/users/[email protected]/msp/下文件替换为/root/fabric-ca-files/example.com/admin/msp/下相应文件(好像是/root/fabric-ca-files/admin/msp/记不清了)
替换org1(org2和org3类似)
将/etc/hyperledger/fabric/crypto-config/peerOrganizations/org1.example.com/users/[email protected]/msp/下文件替换为/root/fabric-ca-files/org1.example.com/admin/msp/下相应文件
在执行替换证书的过程中,一定要清楚要替换的证书的目录,否则很容易出现替换不完全,报错的情况。
4.重新启动项目
之前的操作如果没有特殊情况都是在同一台机器上执行,本例使用orderer0机器,因此,需要将修改完成的crypto-config目录拷贝到其他机器/etc/hyperledger/fabric目录中。
之后的操作可以参考《CentOS7中hyperledger-fabric1.1 - 2+6多机安装部署》文中第四、五部分,此处不再赘述。
六、其他
1.查看某个端口占用(以7054为例)
netstat -lnp | grep 70542.查看某个程序进程(以fabric为例)
ps -ef|grep fabric|grep -v grep3.git查看&切换代码版本
查看当前使用分支版本:
git branch -a
切换版本,以切换到 release-1.1为例:
git checkout -b release-1.1 origin/release-1.1
再次再次查看当前分支版本:

可见当前已经切换到release-1.1,切换完成。
END