一、部署环境与方案
硬件环境:Ubuntu20.04.虚拟机两台
软件环境:
| 名称 | 版本号 |
|---|---|
| fabric | 2.4.9 |
| docker | 20.10.21 |
| docker-compose | 1.25.0 |
| go | 1.18.1 |
部署方案:3个orderer、2个组织、每个组织2个普通节点,通过静态IP的方式实现Hyperledger Fabric多机部署。
该部署多机环境是在已经配置好fabric环境的前提下进行的,如没有配置,请先查看
fabric 环境快速搭建—Ubuntu20.04系统下使用fabric官方脚本搭建
二、建立多机部署的文件夹
在正式开始之前建议先获取root权限,这样在后续安装相对较方便,否则一直加sudo觉得很麻烦
sudo su
进入fabric-samples文件夹下
虚拟机1和虚拟机2的操作
mkdir multiple-deployment
cd multiple-deployment
以下是虚拟机1的操作,复制fabric样例中的名为abstore的链码(智能合约)到chaincode/go下
mkdir chaincode
mkdir chaincode/go
cp -r ../chaincode/abstore/go/* chaincode/go
下载链码的依赖包
cd chaincode/go
go env -w GOPROXY=https://goproxy.io,direct
go env -w GO111MODULE=on
go mod vendor
ls
生成之后可以看到在go文件夹下面生成了存放链码(智能合约)依赖的vendor文件夹

三、生成证书以及通道配置
虚拟机1的操作:
在multiple-deployment文件夹下新建crypto-config.yaml文件和configtx.yaml文件
cd ../..
touch crypto-config.yaml
touch configtx.yaml
将以下内容写进crypto-config.yaml文件中
OrdererOrgs:
  - Name: Orderer
    Domain: example.com
    Specs:
      - Hostname: orderer0
      - Hostname: orderer1
      - Hostname: orderer2

PeerOrgs:
  - Name: Org1
    Domain: org1.example.com
    EnableNodeOUs: true
    Template:
      Count: 2
    Users:
      Count: 1
  - Name: Org2
    Domain: org2.example.com
    EnableNodeOUs: true
    Template:
      Count: 2
    Users:
      Count: 1
将以下内容写进configtx.yaml文件中
Organizations:
    - &OrdererOrg
        Name: OrdererOrg
        ID: OrdererMSP
        MSPDir: crypto-config/ordererOrganizations/example.com/msp
        Policies:
            Readers:
                Type: Signature
                Rule: "OR('OrdererMSP.member')"
            Writers:
                Type: Signature
                Rule: "OR('OrdererMSP.member')"
            Admins:
                Type: Signature
                Rule: "OR('OrdererMSP.admin')"

    - &Org1
        Name: Org1MSP
        ID: Org1MSP
        MSPDir: crypto-config/peerOrganizations/org1.example.com/msp
        Policies:
            Readers:
                Type: Signature
                Rule: "OR('Org1MSP.admin', 'Org1MSP.peer', 'Org1MSP.client')"
            Writers:
                Type: Signature
                Rule: "OR('Org1MSP.admin', 'Org1MSP.client')"
            Admins:
                Type: Signature
                Rule: "OR('Org1MSP.admin')"
            Endorsement:
                Type: Signature
                Rule: "OR('Org1MSP.peer')"

        AnchorPeers:
            - Host: peer0.org1.example.com
              Port: 7051

    - &Org2
        Name: Org2MSP
        ID: Org2MSP
        MSPDir: crypto-config/peerOrganizations/org2.example.com/msp
        Policies:
            Readers:
                Type: Signature
                Rule: "OR('Org2MSP.admin', 'Org2MSP.peer', 'Org2MSP.client')"
            Writers:
                Type: Signature
                Rule: "OR('Org2MSP.admin', 'Org2MSP.client')"
            Admins:
                Type: Signature
                Rule: "OR('Org2MSP.admin')"
            Endorsement:
                Type: Signature
                Rule: "OR('Org2MSP.peer')"

        AnchorPeers:
            - Host: peer0.org2.example.com
              Port: 7051

Capabilities:
    Channel: &ChannelCapabilities
        V2_0: true
    Orderer: &OrdererCapabilities
        V2_0: true
    Application: &ApplicationCapabilities
        V2_0: true

Application: &ApplicationDefaults

    Organizations:

    Policies:
        Readers:
            Type: ImplicitMeta
            Rule: "ANY Readers"
        Writers:
            Type: ImplicitMeta
            Rule: "ANY Writers"
        Admins:
            Type: ImplicitMeta
            Rule: "MAJORITY Admins"
        LifecycleEndorsement:
            Type: ImplicitMeta
            Rule: "MAJORITY Endorsement"
        Endorsement:
            Type: ImplicitMeta
            Rule: "MAJORITY Endorsement"

    Capabilities:
        <<: *ApplicationCapabilities

Orderer: &OrdererDefaults

    OrdererType: etcdraft

    Addresses: # orderer 集群节点
        - orderer0.example.com:7050
        - orderer1.example.com:8050
        - orderer2.example.com:7050
    # Batch Timeout: The amount of time to wait before creating a batch
    BatchTimeout: 2s

    # Batch Size: Controls the number of messages batched into a block
    BatchSize:

        MaxMessageCount: 10

        AbsoluteMaxBytes: 99 MB

        PreferredMaxBytes: 512 KB

    Organizations:

    Policies:
        Readers:
            Type: ImplicitMeta
            Rule: "ANY Readers"
        Writers:
            Type: ImplicitMeta
            Rule: "ANY Writers"
        Admins:
            Type: ImplicitMeta
            Rule: "MAJORITY Admins"
        # BlockValidation specifies what signatures must be included in the block
        # from the orderer for the peer to validate it.
        BlockValidation:
            Type: ImplicitMeta
            Rule: "ANY Writers"

Channel: &ChannelDefaults

    Policies:
        # Who may invoke the 'Deliver' API
        Readers:
            Type: ImplicitMeta
            Rule: "ANY Readers"
        # Who may invoke the 'Broadcast' API
        Writers:
            Type: ImplicitMeta
            Rule: "ANY Writers"
        # By default, who may modify elements at this config level
        Admins:
            Type: ImplicitMeta
            Rule: "MAJORITY Admins"

    Capabilities:
        <<: *ChannelCapabilities

Profiles:

    TwoOrgsChannel:
        Consortium: SampleConsortium
        <<: *ChannelDefaults
        Application:
            <<: *ApplicationDefaults
            Organizations:
                - *Org1
                - *Org2
            Capabilities:
                <<: *ApplicationCapabilities

    SampleMultiNodeEtcdRaft:
        <<: *ChannelDefaults
        Capabilities:
            <<: *ChannelCapabilities
        Orderer:
            <<: *OrdererDefaults
            OrdererType: etcdraft
            EtcdRaft:
                Consenters:
                - Host: orderer0.example.com
                  Port: 7050
                  ClientTLSCert: crypto-config/ordererOrganizations/example.com/orderers/orderer0.example.com/tls/server.crt
                  ServerTLSCert: crypto-config/ordererOrganizations/example.com/orderers/orderer0.example.com/tls/server.crt
                - Host: orderer1.example.com
                  Port: 8050
                  ClientTLSCert: crypto-config/ordererOrganizations/example.com/orderers/orderer1.example.com/tls/server.crt
                  ServerTLSCert: crypto-config/ordererOrganizations/example.com/orderers/orderer1.example.com/tls/server.crt
                - Host: orderer2.example.com
                  Port: 7050
                  ClientTLSCert: crypto-config/ordererOrganizations/example.com/orderers/orderer2.example.com/tls/server.crt
                  ServerTLSCert: crypto-config/ordererOrganizations/example.com/orderers/orderer2.example.com/tls/server.crt
            Addresses:
                - orderer0.example.com:7050
                - orderer1.example.com:8050
                - orderer2.example.com:7050
            Organizations:
            - *OrdererOrg
            Capabilities:
                <<: *OrdererCapabilities
        Application:
            <<: *ApplicationDefaults
            Organizations:
            - <<: *OrdererOrg
        Consortiums:
            SampleConsortium:
                Organizations:
                - *Org1
                - *Org2
虚拟机1的操作:
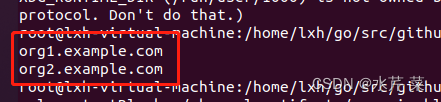
通过cryptogen命令生成证书配置
cryptogen generate --config=./crypto-config.yaml
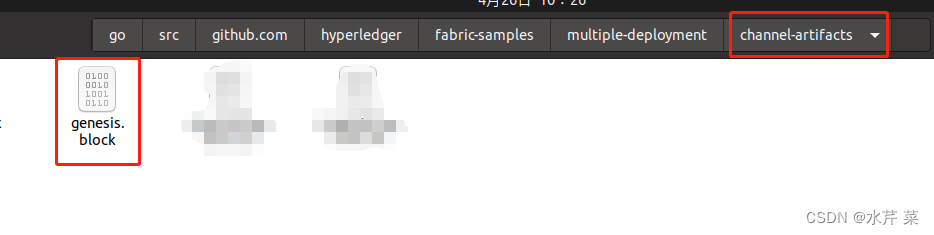
通过configtxgen命令生成创世区块
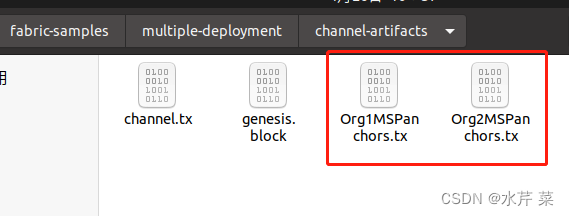
configtxgen -profile SampleMultiNodeEtcdRaft -channelID multiple-deployment-channel -outputBlock ./channel-artifacts/genesis.block

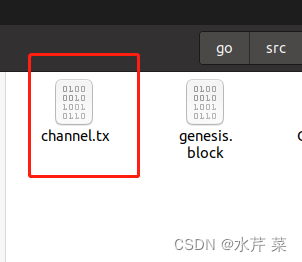
通过configtxgen命令生成通道配置
configtxgen -profile TwoOrgsChannel -outputCreateChannelTx ./channel-artifacts/channel.tx -channelID mychannel

定义组织1的锚节点(也称主节点)
configtxgen -profile TwoOrgsChannel -outputAnchorPeersUpdate ./channel-artifacts/Org1MSPanchors.tx -channelID mychannel -asOrg Org1MSP
 定义组织2的锚节点
configtxgen -profile TwoOrgsChannel -outputAnchorPeersUpdate ./channel-artifacts/Org2MSPanchors.tx -channelID mychannel -asOrg Org2MSP

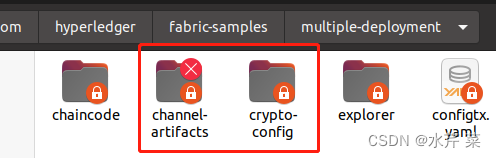
将channel-artifacts和crypto-config这两个文件夹拷贝到虚拟机2中。(从虚拟机1中拖拽至windows桌面,然后复制到虚拟机2,如遇到无法拖拽的情况,可以将两个文件夹打包成.tar格式的压缩包,然后进行拖拽和解压。注意一定要用虚拟机1中的这两个文件,不要用以上操作在继续在虚拟机2中在执行一遍,这样生成的证书不同,稍后无法建立连接)
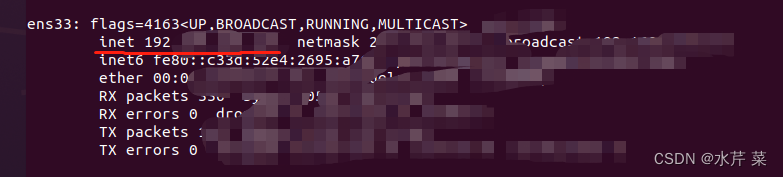
四、IP与域名映射配置(虚拟机1和2都需要设定)
通过修改/etc/hosts文件 添加IP地址与域名的映射
先查看两台虚拟机中的域名,输入ifconfig可查看
修改/etc/hosts文件指令
sudo vim /etc/hosts
按I插入,插入完成后按ESC退出插入,输入:wq!保存退出,如下图所示:
虚拟机1的IP orderer0.example.com
虚拟机1的IP orderer1.example.com
虚拟机2的IP orderer2.example.com
虚拟机1的IP peer0.org1.example.com
虚拟机1的IP peer1.org1.example.com
虚拟机2的IP peer0.org2.example.com
虚拟机2的IP peer1.org2.example.com
五、编写网络启动脚本并启动网络
虚拟机1的操作:
touch docker-compose-up.yaml
将以下内容写入docker-compose-up.yaml中,yaml文件中的虚拟机的IP记得修改成你的虚拟机IP
version: '2'

services:
  orderer0.example.com:
    container_name: orderer0.example.com
    image: hyperledger/fabric-orderer
    environment:
      - FABRIC_LOGGING_SPEC=DEBUG
      - ORDERER_GENERAL_LISTENADDRESS=0.0.0.0
      - ORDERER_GENERAL_BOOTSTRAPMETHOD=file
      - ORDERER_GENERAL_BOOTSTRAPFILE=/var/hyperledger/orderer/orderer.genesis.block
      - ORDERER_GENERAL_LOCALMSPID=OrdererMSP
      - ORDERER_GENERAL_LOCALMSPDIR=/var/hyperledger/orderer/msp
      # enabled TLS
      - ORDERER_GENERAL_TLS_ENABLED=true
      - ORDERER_GENERAL_TLS_PRIVATEKEY=/var/hyperledger/orderer/tls/server.key
      - ORDERER_GENERAL_TLS_CERTIFICATE=/var/hyperledger/orderer/tls/server.crt
      - ORDERER_GENERAL_TLS_ROOTCAS=[/var/hyperledger/orderer/tls/ca.crt]
      - ORDERER_GENERAL_CLUSTER_CLIENTCERTIFICATE=/var/hyperledger/orderer/tls/server.crt
      - ORDERER_GENERAL_CLUSTER_CLIENTPRIVATEKEY=/var/hyperledger/orderer/tls/server.key
      - ORDERER_GENERAL_CLUSTER_ROOTCAS=[/var/hyperledger/orderer/tls/ca.crt]
    working_dir: /opt/gopath/src/github.com/hyperledger/fabric
    command: orderer
    volumes:
        - ./channel-artifacts/genesis.block:/var/hyperledger/orderer/orderer.genesis.block
        - ./crypto-config/ordererOrganizations/example.com/orderers/orderer0.example.com/msp:/var/hyperledger/orderer/msp
        - ./crypto-config/ordererOrganizations/example.com/orderers/orderer0.example.com/tls/:/var/hyperledger/orderer/tls
    ports:
      - 7050:7050
    extra_hosts:
      - "orderer0.example.com:虚拟机1的IP"
      - "orderer1.example.com:虚拟机1的IP"
      - "orderer2.example.com:虚拟机2的IP"

  orderer1.example.com:
    container_name: orderer1.example.com
    image: hyperledger/fabric-orderer
    environment:
      - FABRIC_LOGGING_SPEC=INFO
      - ORDERER_GENERAL_LISTENADDRESS=0.0.0.0
      - ORDERER_GENERAL_BOOTSTRAPMETHOD=file
      - ORDERER_GENERAL_BOOTSTRAPFILE=/var/hyperledger/orderer/orderer.genesis.block
      - ORDERER_GENERAL_LOCALMSPID=OrdererMSP
      - ORDERER_GENERAL_LOCALMSPDIR=/var/hyperledger/orderer/msp
      # enabled TLS
      - ORDERER_GENERAL_TLS_ENABLED=true
      - ORDERER_GENERAL_TLS_PRIVATEKEY=/var/hyperledger/orderer/tls/server.key
      - ORDERER_GENERAL_TLS_CERTIFICATE=/var/hyperledger/orderer/tls/server.crt
      - ORDERER_GENERAL_TLS_ROOTCAS=[/var/hyperledger/orderer/tls/ca.crt]
      - ORDERER_GENERAL_CLUSTER_CLIENTCERTIFICATE=/var/hyperledger/orderer/tls/server.crt
      - ORDERER_GENERAL_CLUSTER_CLIENTPRIVATEKEY=/var/hyperledger/orderer/tls/server.key
      - ORDERER_GENERAL_CLUSTER_ROOTCAS=[/var/hyperledger/orderer/tls/ca.crt]
    working_dir: /opt/gopath/src/github.com/hyperledger/fabric
    command: orderer
    volumes:
        - ./channel-artifacts/genesis.block:/var/hyperledger/orderer/orderer.genesis.block
        - ./crypto-config/ordererOrganizations/example.com/orderers/orderer1.example.com/msp:/var/hyperledger/orderer/msp
        - ./crypto-config/ordererOrganizations/example.com/orderers/orderer1.example.com/tls/:/var/hyperledger/orderer/tls
    ports:
      - 8050:8050
    extra_hosts:
      - "orderer0.example.com:虚拟机1的IP"
      - "orderer1.example.com:虚拟机1的IP"
      - "orderer2.example.com:虚拟机2的IP"

  peer0.org1.example.com:
    container_name: peer0.org1.example.com
    image: hyperledger/fabric-peer
    environment:
      - CORE_VM_ENDPOINT=unix:///host/var/run/docker.sock
      - CORE_PEER_ID=peer0.org1.example.com
      - CORE_PEER_ADDRESS=peer0.org1.example.com:7051
      - CORE_PEER_LISTENADDRESS=0.0.0.0:7051
      - CORE_PEER_CHAINCODEADDRESS=peer0.org1.example.com:7052
      - CORE_PEER_CHAINCODELISTENADDRESS=0.0.0.0:7052
      - CORE_PEER_GOSSIP_BOOTSTRAP=peer0.org1.example.com:7051
      - CORE_PEER_GOSSIP_EXTERNALENDPOINT=peer0.org1.example.com:7051
      - CORE_PEER_LOCALMSPID=Org1MSP
      - FABRIC_LOGGING_SPEC=INFO
      - CORE_PEER_TLS_ENABLED=true
      - CORE_PEER_GOSSIP_USELEADERELECTION=true
      - CORE_PEER_GOSSIP_ORGLEADER=false
      - CORE_PEER_PROFILE_ENABLED=true
      - CORE_PEER_TLS_CERT_FILE=/etc/hyperledger/fabric/tls/server.crt
      - CORE_PEER_TLS_KEY_FILE=/etc/hyperledger/fabric/tls/server.key
      - CORE_PEER_TLS_ROOTCERT_FILE=/etc/hyperledger/fabric/tls/ca.crt
      # Allow more time for chaincode container to build on install.
      - CORE_CHAINCODE_EXECUTETIMEOUT=300s
    working_dir: /opt/gopath/src/github.com/hyperledger/fabric/peer
    command: peer node start
    volumes:
       - /var/run/:/host/var/run/
       - ./crypto-config/peerOrganizations/org1.example.com/peers/peer0.org1.example.com/msp:/etc/hyperledger/fabric/msp
       - ./crypto-config/peerOrganizations/org1.example.com/peers/peer0.org1.example.com/tls:/etc/hyperledger/fabric/tls
    ports:
      - 7051:7051
      - 7052:7052
      - 7053:7053
    extra_hosts:
      - "orderer0.example.com:虚拟机1的IP"
      - "orderer1.example.com:虚拟机1的IP"
      - "orderer2.example.com:虚拟机2的IP"

  peer1.org1.example.com:
    container_name: peer1.org1.example.com
    image: hyperledger/fabric-peer
    environment:
      - CORE_VM_ENDPOINT=unix:///host/var/run/docker.sock
      - CORE_PEER_ID=peer1.org1.example.com
      - CORE_PEER_ADDRESS=peer1.org1.example.com:8051
      - CORE_PEER_LISTENADDRESS=0.0.0.0:8051
      - CORE_PEER_CHAINCODEADDRESS=peer1.org1.example.com:8052
      - CORE_PEER_CHAINCODELISTENADDRESS=0.0.0.0:8052
      - CORE_PEER_GOSSIP_BOOTSTRAP=peer1.org1.example.com:8051
      - CORE_PEER_GOSSIP_EXTERNALENDPOINT=peer1.org1.example.com:8051
      - CORE_PEER_LOCALMSPID=Org1MSP
      - FABRIC_LOGGING_SPEC=INFO
      - CORE_PEER_TLS_ENABLED=true
      - CORE_PEER_GOSSIP_USELEADERELECTION=true
      - CORE_PEER_GOSSIP_ORGLEADER=false
      - CORE_PEER_PROFILE_ENABLED=true
      - CORE_PEER_TLS_CERT_FILE=/etc/hyperledger/fabric/tls/server.crt
      - CORE_PEER_TLS_KEY_FILE=/etc/hyperledger/fabric/tls/server.key
      - CORE_PEER_TLS_ROOTCERT_FILE=/etc/hyperledger/fabric/tls/ca.crt
      # Allow more time for chaincode container to build on install.
      - CORE_CHAINCODE_EXECUTETIMEOUT=300s
    working_dir: /opt/gopath/src/github.com/hyperledger/fabric/peer
    command: peer node start
    volumes:
       - /var/run/:/host/var/run/
       - ./crypto-config/peerOrganizations/org1.example.com/peers/peer1.org1.example.com/msp:/etc/hyperledger/fabric/msp
       - ./crypto-config/peerOrganizations/org1.example.com/peers/peer1.org1.example.com/tls:/etc/hyperledger/fabric/tls
    ports:
      - 8051:8051
      - 8052:8052
      - 8053:8053
    extra_hosts:
      - "orderer0.example.com:虚拟机1的IP"
      - "orderer1.example.com:虚拟机1的IP"
      - "orderer2.example.com:虚拟机2的IP"

  cli1:
    container_name: cli1
    image: hyperledger/fabric-tools
    tty: true
    stdin_open: true
    environment:
      - GOPATH=/opt/gopath
      - CORE_VM_ENDPOINT=unix:///host/var/run/docker.sock
      #- FABRIC_LOGGING_SPEC=DEBUG
      - FABRIC_LOGGING_SPEC=INFO
      - CORE_PEER_ID=cli1
      - CORE_PEER_ADDRESS=peer0.org1.example.com:7051
      - CORE_PEER_LOCALMSPID=Org1MSP
      - CORE_PEER_TLS_ENABLED=true
      - CORE_PEER_TLS_CERT_FILE=/opt/gopath/src/github.com/hyperledger/fabric/peer/crypto/peerOrganizations/org1.example.com/peers/peer0.org1.example.com/tls/server.crt
      - CORE_PEER_TLS_KEY_FILE=/opt/gopath/src/github.com/hyperledger/fabric/peer/crypto/peerOrganizations/org1.example.com/peers/peer0.org1.example.com/tls/server.key
      - CORE_PEER_TLS_ROOTCERT_FILE=/opt/gopath/src/github.com/hyperledger/fabric/peer/crypto/peerOrganizations/org1.example.com/peers/peer0.org1.example.com/tls/ca.crt
      - CORE_PEER_MSPCONFIGPATH=/opt/gopath/src/github.com/hyperledger/fabric/peer/crypto/peerOrganizations/org1.example.com/users/[email protected]/msp
    working_dir: /opt/gopath/src/github.com/hyperledger/fabric/peer
    command: /bin/bash
    volumes:
        - /var/run/:/host/var/run/
        - ./chaincode/go/:/opt/gopath/src/github.com/hyperledger/multiple-deployment/chaincode/go
        - ./crypto-config:/opt/gopath/src/github.com/hyperledger/fabric/peer/crypto/
        - ./channel-artifacts:/opt/gopath/src/github.com/hyperledger/fabric/peer/channel-artifacts
    extra_hosts:
      - "orderer0.example.com:虚拟机1的IP"
      - "orderer1.example.com:虚拟机1的IP"
      - "orderer2.example.com:虚拟机2的IP"
      - "peer0.org1.example.com:虚拟机1的IP"
      - "peer1.org1.example.com:虚拟机1的IP"
      - "peer0.org2.example.com:虚拟机2的IP"
      - "peer1.org2.example.com:虚拟机2的IP"

  cli2:
    container_name: cli2
    image: hyperledger/fabric-tools
    tty: true
    stdin_open: true
    environment:
      - GOPATH=/opt/gopath
      - CORE_VM_ENDPOINT=unix:///host/var/run/docker.sock
      #- FABRIC_LOGGING_SPEC=DEBUG
      - FABRIC_LOGGING_SPEC=INFO
      - CORE_PEER_ID=cli2
      - CORE_PEER_ADDRESS=peer1.org1.example.com:8051
      - CORE_PEER_LOCALMSPID=Org1MSP
      - CORE_PEER_TLS_ENABLED=true
      - CORE_PEER_TLS_CERT_FILE=/opt/gopath/src/github.com/hyperledger/fabric/peer/crypto/peerOrganizations/org1.example.com/peers/peer1.org1.example.com/tls/server.crt
      - CORE_PEER_TLS_KEY_FILE=/opt/gopath/src/github.com/hyperledger/fabric/peer/crypto/peerOrganizations/org1.example.com/peers/peer1.org1.example.com/tls/server.key
      - CORE_PEER_TLS_ROOTCERT_FILE=/opt/gopath/src/github.com/hyperledger/fabric/peer/crypto/peerOrganizations/org1.example.com/peers/peer1.org1.example.com/tls/ca.crt
      - CORE_PEER_MSPCONFIGPATH=/opt/gopath/src/github.com/hyperledger/fabric/peer/crypto/peerOrganizations/org1.example.com/users/[email protected]/msp
    working_dir: /opt/gopath/src/github.com/hyperledger/fabric/peer
    command: /bin/bash
    volumes:
        - /var/run/:/host/var/run/
        - ./chaincode/go/:/opt/gopath/src/github.com/hyperledger/multiple-deployment/chaincode/go
        - ./crypto-config:/opt/gopath/src/github.com/hyperledger/fabric/peer/crypto/
        - ./channel-artifacts:/opt/gopath/src/github.com/hyperledger/fabric/peer/channel-artifacts
    extra_hosts:
      - "orderer0.example.com:虚拟机1的IP"
      - "orderer1.example.com:虚拟机1的IP"
      - "orderer2.example.com:虚拟机2的IP"
      - "peer0.org1.example.com:虚拟机1的IP"
      - "peer1.org1.example.com:虚拟机1的IP"
      - "peer0.org2.example.com:虚拟机2的IP"
      - "peer1.org2.example.com:虚拟机2的IP"
虚拟机2的操作:
touch docker-compose-up.yaml
将以下内容写入docker-compose-up.yaml中,yaml文件中的虚拟机的IP记得修改成你的虚拟机IP
version: '2'

services:
  orderer2.example.com:
    container_name: orderer2.example.com
    image: hyperledger/fabric-orderer
    environment:
      - FABRIC_LOGGING_SPEC=INFO
      - ORDERER_GENERAL_LISTENADDRESS=0.0.0.0
      - ORDERER_GENERAL_BOOTSTRAPMETHOD=file
      - ORDERER_GENERAL_BOOTSTRAPFILE=/var/hyperledger/orderer/orderer.genesis.block
      - ORDERER_GENERAL_LOCALMSPID=OrdererMSP
      - ORDERER_GENERAL_LOCALMSPDIR=/var/hyperledger/orderer/msp
      # enabled TLS
      - ORDERER_GENERAL_TLS_ENABLED=true
      - ORDERER_GENERAL_TLS_PRIVATEKEY=/var/hyperledger/orderer/tls/server.key
      - ORDERER_GENERAL_TLS_CERTIFICATE=/var/hyperledger/orderer/tls/server.crt
      - ORDERER_GENERAL_TLS_ROOTCAS=[/var/hyperledger/orderer/tls/ca.crt]
      - ORDERER_GENERAL_CLUSTER_CLIENTCERTIFICATE=/var/hyperledger/orderer/tls/server.crt
      - ORDERER_GENERAL_CLUSTER_CLIENTPRIVATEKEY=/var/hyperledger/orderer/tls/server.key
      - ORDERER_GENERAL_CLUSTER_ROOTCAS=[/var/hyperledger/orderer/tls/ca.crt]
    working_dir: /opt/gopath/src/github.com/hyperledger/fabric
    command: orderer
    volumes:
        - ./channel-artifacts/genesis.block:/var/hyperledger/orderer/orderer.genesis.block
        - ./crypto-config/ordererOrganizations/example.com/orderers/orderer2.example.com/msp:/var/hyperledger/orderer/msp
        - ./crypto-config/ordererOrganizations/example.com/orderers/orderer2.example.com/tls/:/var/hyperledger/orderer/tls
    ports:
      - 7050:7050
    extra_hosts:
      - "orderer0.example.com:虚拟机1的IP"
      - "orderer1.example.com:虚拟机1的IP"
      - "orderer2.example.com:虚拟机2的IP"

  peer0.org2.example.com:
    container_name: peer0.org2.example.com
    image: hyperledger/fabric-peer
    environment:
      - CORE_VM_ENDPOINT=unix:///host/var/run/docker.sock
      - CORE_PEER_ID=peer0.org2.example.com
      - CORE_PEER_ADDRESS=peer0.org2.example.com:7051
      - CORE_PEER_LISTENADDRESS=0.0.0.0:7051
      - CORE_PEER_CHAINCODEADDRESS=peer0.org2.example.com:7052
      - CORE_PEER_CHAINCODELISTENADDRESS=0.0.0.0:7052
      - CORE_PEER_GOSSIP_EXTERNALENDPOINT=peer0.org2.example.com:7051
      - CORE_PEER_GOSSIP_BOOTSTRAP=peer0.org2.example.com:7051
      - CORE_PEER_LOCALMSPID=Org2MSP
      - FABRIC_LOGGING_SPEC=INFO
      - CORE_PEER_TLS_ENABLED=true
      - CORE_PEER_GOSSIP_USELEADERELECTION=true
      - CORE_PEER_GOSSIP_ORGLEADER=false
      - CORE_PEER_PROFILE_ENABLED=true
      - CORE_PEER_TLS_CERT_FILE=/etc/hyperledger/fabric/tls/server.crt
      - CORE_PEER_TLS_KEY_FILE=/etc/hyperledger/fabric/tls/server.key
      - CORE_PEER_TLS_ROOTCERT_FILE=/etc/hyperledger/fabric/tls/ca.crt
      # Allow more time for chaincode container to build on install.
      - CORE_CHAINCODE_EXECUTETIMEOUT=300s
    working_dir: /opt/gopath/src/github.com/hyperledger/fabric/peer
    command: peer node start
    volumes:
       - /var/run/:/host/var/run/
       - ./crypto-config/peerOrganizations/org2.example.com/peers/peer0.org2.example.com/msp:/etc/hyperledger/fabric/msp
       - ./crypto-config/peerOrganizations/org2.example.com/peers/peer0.org2.example.com/tls:/etc/hyperledger/fabric/tls
    ports:
      - 7051:7051
      - 7052:7052
      - 7053:7053
    extra_hosts:
      - "orderer0.example.com:虚拟机1的IP"
      - "orderer1.example.com:虚拟机1的IP"
      - "orderer2.example.com:虚拟机2的IP"

  peer1.org2.example.com:
    container_name: peer1.org2.example.com
    image: hyperledger/fabric-peer
    environment:
      - CORE_VM_ENDPOINT=unix:///host/var/run/docker.sock
      - CORE_PEER_ID=peer1.org2.example.com
      - CORE_PEER_ADDRESS=peer1.org2.example.com:8051
      - CORE_PEER_LISTENADDRESS=0.0.0.0:8051
      - CORE_PEER_CHAINCODEADDRESS=peer1.org2.example.com:8052
      - CORE_PEER_CHAINCODELISTENADDRESS=0.0.0.0:8052
      - CORE_PEER_GOSSIP_EXTERNALENDPOINT=peer1.org2.example.com:8051
      - CORE_PEER_GOSSIP_BOOTSTRAP=peer1.org2.example.com:8051
      - CORE_PEER_LOCALMSPID=Org2MSP
      - FABRIC_LOGGING_SPEC=INFO
      - CORE_PEER_TLS_ENABLED=true
      - CORE_PEER_GOSSIP_USELEADERELECTION=true
      - CORE_PEER_GOSSIP_ORGLEADER=false
      - CORE_PEER_PROFILE_ENABLED=true
      - CORE_PEER_TLS_CERT_FILE=/etc/hyperledger/fabric/tls/server.crt
      - CORE_PEER_TLS_KEY_FILE=/etc/hyperledger/fabric/tls/server.key
      - CORE_PEER_TLS_ROOTCERT_FILE=/etc/hyperledger/fabric/tls/ca.crt
      # Allow more time for chaincode container to build on install.
      - CORE_CHAINCODE_EXECUTETIMEOUT=300s
    working_dir: /opt/gopath/src/github.com/hyperledger/fabric/peer
    command: peer node start
    volumes:
       - /var/run/:/host/var/run/
       - ./crypto-config/peerOrganizations/org2.example.com/peers/peer1.org2.example.com/msp:/etc/hyperledger/fabric/msp
       - ./crypto-config/peerOrganizations/org2.example.com/peers/peer1.org2.example.com/tls:/etc/hyperledger/fabric/tls
    ports:
      - 8051:8051
      - 8052:8052
      - 8053:8053
    extra_hosts:
      - "orderer0.example.com:虚拟机1的IP"
      - "orderer1.example.com:虚拟机1的IP"
      - "orderer2.example.com:虚拟机2的IP"

  cli1:
    container_name: cli1
    image: hyperledger/fabric-tools
    tty: true
    stdin_open: true
    environment:
      - GOPATH=/opt/gopath
      - CORE_VM_ENDPOINT=unix:///host/var/run/docker.sock
      #- FABRIC_LOGGING_SPEC=DEBUG
      - FABRIC_LOGGING_SPEC=INFO
      - CORE_PEER_ID=cli1
      - CORE_PEER_ADDRESS=peer0.org2.example.com:7051
      - CORE_PEER_LOCALMSPID=Org2MSP
      - CORE_PEER_TLS_ENABLED=true
      - CORE_PEER_TLS_CERT_FILE=/opt/gopath/src/github.com/hyperledger/fabric/peer/crypto/peerOrganizations/org2.example.com/peers/peer0.org2.example.com/tls/server.crt
      - CORE_PEER_TLS_KEY_FILE=/opt/gopath/src/github.com/hyperledger/fabric/peer/crypto/peerOrganizations/org2.example.com/peers/peer0.org2.example.com/tls/server.key
      - CORE_PEER_TLS_ROOTCERT_FILE=/opt/gopath/src/github.com/hyperledger/fabric/peer/crypto/peerOrganizations/org2.example.com/peers/peer0.org2.example.com/tls/ca.crt
      - CORE_PEER_MSPCONFIGPATH=/opt/gopath/src/github.com/hyperledger/fabric/peer/crypto/peerOrganizations/org2.example.com/users/[email protected]/msp
    working_dir: /opt/gopath/src/github.com/hyperledger/fabric/peer
    command: /bin/bash
    volumes:
        - /var/run/:/host/var/run/
        - ./chaincode/go/:/opt/gopath/src/github.com/hyperledger/multiple-deployment/chaincode/go
        - ./crypto-config:/opt/gopath/src/github.com/hyperledger/fabric/peer/crypto/
        - ./channel-artifacts:/opt/gopath/src/github.com/hyperledger/fabric/peer/channel-artifacts
    extra_hosts:
      - "orderer0.example.com:虚拟机1的IP"
      - "orderer1.example.com:虚拟机1的IP"
      - "orderer2.example.com:虚拟机2的IP"
      - "peer0.org1.example.com:虚拟机1的IP"
      - "peer1.org1.example.com:虚拟机1的IP"
      - "peer0.org2.example.com:虚拟机2的IP"
      - "peer1.org2.example.com:虚拟机2的IP"

  cli2:
    container_name: cli2
    image: hyperledger/fabric-tools
    tty: true
    stdin_open: true
    environment:
      - GOPATH=/opt/gopath
      - CORE_VM_ENDPOINT=unix:///host/var/run/docker.sock
      #- FABRIC_LOGGING_SPEC=DEBUG
      - FABRIC_LOGGING_SPEC=INFO
      - CORE_PEER_ID=cli2
      - CORE_PEER_ADDRESS=peer1.org2.example.com:8051
      - CORE_PEER_LOCALMSPID=Org2MSP
      - CORE_PEER_TLS_ENABLED=true
      - CORE_PEER_TLS_CERT_FILE=/opt/gopath/src/github.com/hyperledger/fabric/peer/crypto/peerOrganizations/org2.example.com/peers/peer1.org2.example.com/tls/server.crt
      - CORE_PEER_TLS_KEY_FILE=/opt/gopath/src/github.com/hyperledger/fabric/peer/crypto/peerOrganizations/org2.example.com/peers/peer1.org2.example.com/tls/server.key
      - CORE_PEER_TLS_ROOTCERT_FILE=/opt/gopath/src/github.com/hyperledger/fabric/peer/crypto/peerOrganizations/org2.example.com/peers/peer1.org2.example.com/tls/ca.crt
      - CORE_PEER_MSPCONFIGPATH=/opt/gopath/src/github.com/hyperledger/fabric/peer/crypto/peerOrganizations/org2.example.com/users/[email protected]/msp
    working_dir: /opt/gopath/src/github.com/hyperledger/fabric/peer
    command: /bin/bash
    volumes:
        - /var/run/:/host/var/run/
        - ./chaincode/go/:/opt/gopath/src/github.com/hyperledger/multiple-deployment/chaincode/go
        - ./crypto-config:/opt/gopath/src/github.com/hyperledger/fabric/peer/crypto/
        - ./channel-artifacts:/opt/gopath/src/github.com/hyperledger/fabric/peer/channel-artifacts
    extra_hosts:
      - "orderer0.example.com:虚拟机1的IP"
      - "orderer1.example.com:虚拟机1的IP"
      - "orderer2.example.com:虚拟机2的IP"
      - "peer0.org1.example.com:虚拟机1的IP"
      - "peer1.org1.example.com:虚拟机1的IP"
      - "peer0.org2.example.com:虚拟机2的IP"
      - "peer1.org2.example.com:虚拟机2的IP"
接下来在两台虚拟机上启动网络
虚拟机1和虚拟机2的操作:
docker-compose -f docker-compose-up.yaml up -d


注意图中docker分别开启的是否是org1和org2
虚拟机1的操作:
进入cli1容器,也就是以peer0.org1的角色与网络交互
docker exec -it cli1 bash
创建通道,这一步最好等网络跑起来15秒之后再操作,因为orderer之间要握手和选举raft领导节点,需要点时间。操作太快会报no Raft leader的错误(如遇到就重启docker吧)
peer channel create -o orderer0.example.com:7050 -c mychannel -f ./channel-artifacts/channel.tx --tls --cafile /opt/gopath/src/github.com/hyperledger/fabric/peer/crypto/ordererOrganizations/example.com/orderers/orderer0.example.com/msp/tlscacerts/tlsca.example.com-cert.pem
组织1的peer0节点加入通道mychannel
peer channel join -b mychannel.block
 更新组织1的锚节点
peer channel update -o orderer0.example.com:7050 -c mychannel -f ./channel-artifacts/Org1MSPanchors.tx --tls --cafile /opt/gopath/src/github.com/hyperledger/fabric/peer/crypto/ordererOrganizations/example.com/orderers/orderer0.example.com/msp/tlscacerts/tlsca.example.com-cert.pem

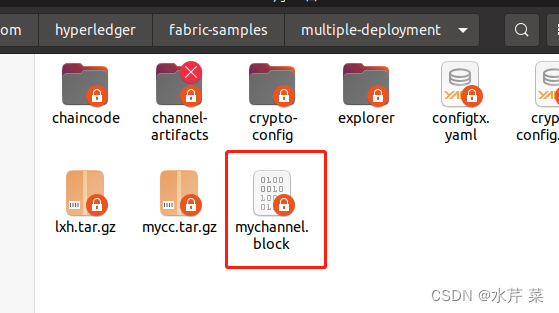
退出cli1容器,从cli1容器中拷贝出mychannel.block文件到multiple-deployment文件夹下,并复制到虚拟机2中
exit
docker cp cli1:/opt/gopath/src/github.com/hyperledger/fabric/peer/mychannel.block ./
接下来到虚拟机2的操作
将mychannel.block拷贝到虚拟机2的cli1(组织2的peer0角色)容器中
docker cp mychannel.block cli1:/opt/gopath/src/github.com/hyperledger/fabric/peer/
 进入cli1容器
docker exec -it cli1 bash
加入通道
peer channel join -b mychannel.block

更新组织2的锚节点(主节点)
peer channel update -o orderer0.example.com:7050 -c mychannel -f ./channel-artifacts/Org2MSPanchors.tx --tls --cafile /opt/gopath/src/github.com/hyperledger/fabric/peer/crypto/ordererOrganizations/example.com/orderers/orderer0.example.com/msp/tlscacerts/tlsca.example.com-cert.pem

六、安装与调用链码(智能合约)
虚拟机1的操作:
进入cli1容器中
docker exec -it cli1 bash
peer lifecycle chaincode package mycc.tar.gz --path github.com/hyperledger/multiple-deployment/chaincode/go --lang golang --label mycc_1
注:此时“可能”会报错:Error: error getting chaincode bytes: ‘go list’ failed with: no required module provides package github.com/hyperledger/multiple-deployment/chaincode/go: go.mod file not found in current directory or any parent directory; see ‘go help modules’: exit status 1
输入以下代码后,在重新执行上一句即可
go env -w GO111MODULE=auto
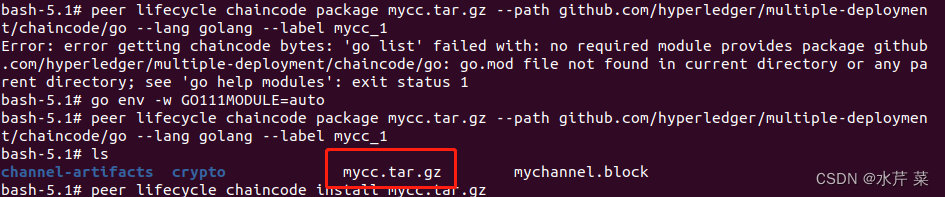
安装链码:
peer lifecycle chaincode install mycc.tar.gz
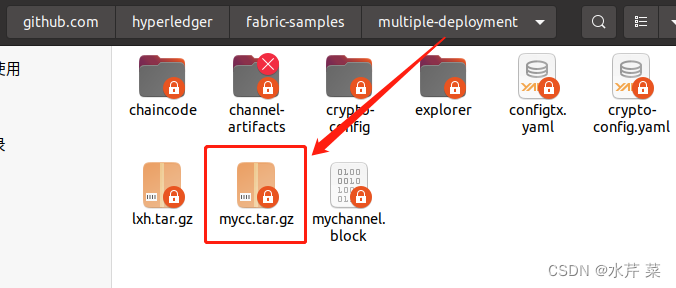
 退出cli1容器,将打包的链码mycc.tar.gz从cli1容器中提取出来,并拷贝到虚拟机2的multiple-deployment目录下
exit
docker cp cli1:/opt/gopath/src/github.com/hyperledger/fabric/peer/mycc.tar.gz ./
接下来进行虚拟机2的操作:
退出cli1容器,将multiple-deployment目录下的链码压缩包mycc.tar.gz复制到cli1(组织2的peer0)容器
exit
docker cp mycc.tar.gz cli1:/opt/gopath/src/github.com/hyperledger/fabric/peer/

再次进入cli1容器,安装链码
docker exec -it cli1 bash
peer lifecycle chaincode install mycc.tar.gz

将下面这个代码中的相应位置改成上面划横线的链码id
组织2同意提交链码,下面指令中的链码id记得替换成上一条指令生成的链码id
peer lifecycle chaincode approveformyorg --channelID mychannel --name mycc --version 1.0 --init-required --package-id mycc_1:242b275209a0cacb00772667b69b4ed1d6efe91dab266042b0b7047ded06adb3 --sequence 1 --tls true --cafile /opt/gopath/src/github.com/hyperledger/fabric/peer/crypto/ordererOrganizations/example.com/orderers/orderer0.example.com/msp/tlscacerts/tlsca.example.com-cert.pem

接下来到虚拟机1的操作:
再次进入cli1容器,同意提交链码
docker exec -it cli1 bash
peer lifecycle chaincode approveformyorg --channelID mychannel --name mycc --version 1.0 --init-required --package-id mycc_1:242b275209a0cacb00772667b69b4ed1d6efe91dab266042b0b7047ded06adb3 --sequence 1 --tls true --cafile /opt/gopath/src/github.com/hyperledger/fabric/peer/crypto/ordererOrganizations/example.com/orderers/orderer0.example.com/msp/tlscacerts/tlsca.example.com-cert.pem
 查看链码的状态是否就绪
peer lifecycle chaincode checkcommitreadiness --channelID mychannel --name mycc --version 1.0 --init-required --sequence 1 --tls true --cafile /opt/gopath/src/github.com/hyperledger/fabric/peer/crypto/ordererOrganizations/example.com/orderers/orderer0.example.com/msp/tlscacerts/tlsca.example.com-cert.pem --output json

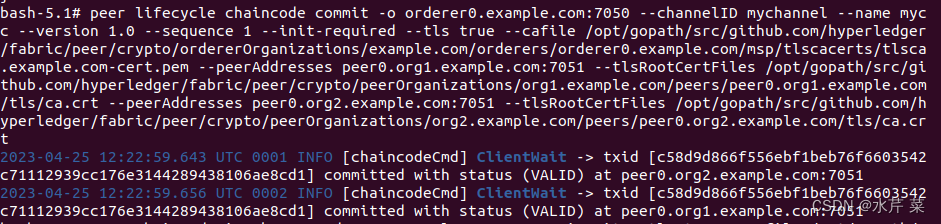
提交链码
peer lifecycle chaincode commit -o orderer0.example.com:7050 --channelID mychannel --name mycc --version 1.0 --sequence 1 --init-required --tls true --cafile /opt/gopath/src/github.com/hyperledger/fabric/peer/crypto/ordererOrganizations/example.com/orderers/orderer0.example.com/msp/tlscacerts/tlsca.example.com-cert.pem --peerAddresses peer0.org1.example.com:7051 --tlsRootCertFiles /opt/gopath/src/github.com/hyperledger/fabric/peer/crypto/peerOrganizations/org1.example.com/peers/peer0.org1.example.com/tls/ca.crt --peerAddresses peer0.org2.example.com:7051 --tlsRootCertFiles /opt/gopath/src/github.com/hyperledger/fabric/peer/crypto/peerOrganizations/org2.example.com/peers/peer0.org2.example.com/tls/ca.crt
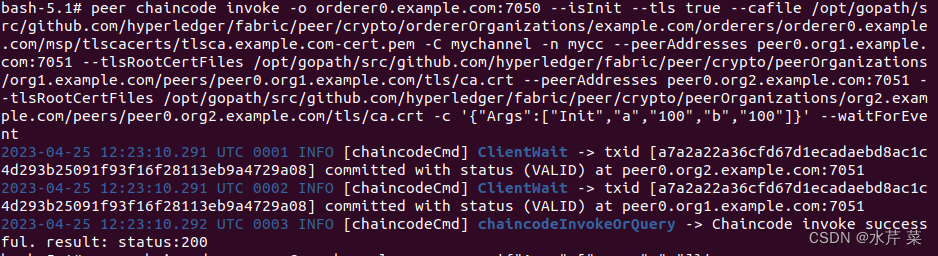
初始化链码
peer chaincode invoke -o orderer0.example.com:7050 --isInit --tls true --cafile /opt/gopath/src/github.com/hyperledger/fabric/peer/crypto/ordererOrganizations/example.com/orderers/orderer0.example.com/msp/tlscacerts/tlsca.example.com-cert.pem -C mychannel -n mycc --peerAddresses peer0.org1.example.com:7051 --tlsRootCertFiles /opt/gopath/src/github.com/hyperledger/fabric/peer/crypto/peerOrganizations/org1.example.com/peers/peer0.org1.example.com/tls/ca.crt --peerAddresses peer0.org2.example.com:7051 --tlsRootCertFiles /opt/gopath/src/github.com/hyperledger/fabric/peer/crypto/peerOrganizations/org2.example.com/peers/peer0.org2.example.com/tls/ca.crt -c '{"Args":["Init","a","100","b","100"]}' --waitForEvent
 虚拟机1查询a的余额
peer chaincode query -C mychannel -n mycc -c '{"Args":["query","a"]}'

虚拟机2查询a的余额

双方均可查询到a的余额
在虚拟机2上操作a转账10给b
peer chaincode invoke -o orderer0.example.com:7050 --tls true --cafile /opt/gopath/src/github.com/hyperledger/fabric/peer/crypto/ordererOrganizations/example.com/orderers/orderer0.example.com/msp/tlscacerts/tlsca.example.com-cert.pem -C mychannel -n mycc --peerAddresses peer0.org1.example.com:7051 --tlsRootCertFiles /opt/gopath/src/github.com/hyperledger/fabric/peer/crypto/peerOrganizations/org1.example.com/peers/peer0.org1.example.com/tls/ca.crt --peerAddresses peer0.org2.example.com:7051 --tlsRootCertFiles /opt/gopath/src/github.com/hyperledger/fabric/peer/crypto/peerOrganizations/org2.example.com/peers/peer0.org2.example.com/tls/ca.crt -c '{"Args":["invoke","a","b","10"]}' --waitForEvent
转账完成后查询a的余额
peer chaincode query -C mychannel -n mycc -c '{"Args":["query","a"]}'
 在虚拟机2的操作已经fabric网络的各节点中同步
Hyperledger Fabric 2.x 多机部署/分布式集群部署成功
如果要结束网络,可以在退出cli1容器后使用以下指令退出
docker-compose -f docker-compose-up.yaml down
docker-compose-up.yaml文件中还有各组织1、2的peer1节点,容器名为cli2,可以进入容器中使他们加入网络,同步消息,操作与peer0一样