在尝试过 mnist 数据集进行测试后,想要对任意一张图片进行识别测试,所以将目光瞄准了GoogleNet。在Caffe安装好后就会有GoogleNet的example,在model种就可以找到。
—————————————————————————————————————————————————————
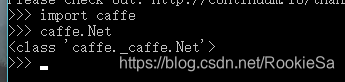
因为要使用Python,所以又重新编译了一遍Caffe,加了Python的兼容,重新编译了pycaffe,需要安装python2.7,配置好路径,pipi安装numpy,boost库,然后应该就可以编译通过了,之后python2.7调用的时候,会报一些错,只需要添加相应的包就可以了。
成功好测试一下。
—————————————————————————————————————————————————————
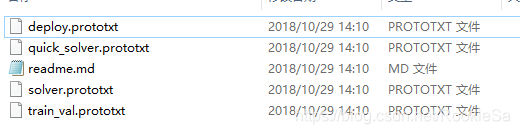
打开 readme.md,然后复制里面的链接,下载已经训练好的CaffeMdel。


有点慢,文末附加上传地址吧。
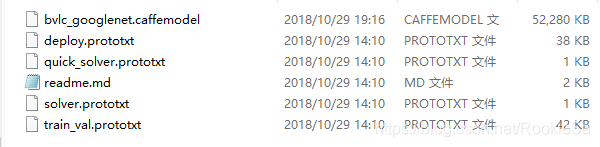
将下载好的caffemodel放入model里面,或者自己新建的工程目录中都可以。
接下来新建一个文本,是训练的模型里面的所有分类信息。
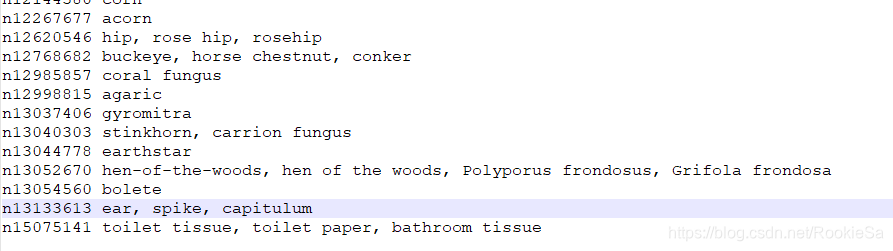
大致是这样子的,一共有1000类。到此,所有的准备材料都OK了。
现在开始准备Python的代码。
首先,导入包:
import caffe
import numpy as np
import matplotlib.pyplot as plt
import os
import PIL
from PIL import Image
import sys
import time
之后,配置一些默认的目录:
#定义Caffe根目录
caffe_root = 'F:/caffe/caffe/'
#网络结构描述文件
deploy_file = caffe_root+'models/bvlc_googlenet/deploy.prototxt'
#训练好的模型
model_file = caffe_root+'models/bvlc_googlenet/bvlc_googlenet.caffemodel'
设置CPU模式:
#cpu模式
caffe.set_mode_cpu()
新建一个网络结构:
#定义网络模型
net = caffe.Classifier(deploy_file, #调用deploy文件
                       model_file,  #调用模型文件
                       mean=np.load(caffe_root +'python/caffe/imagenet/ilsvrc_2012_mean.npy').mean(1).mean(1), #调用均值文件
                       channel_swap=(2,1,0),  #caffe中图片是BGR格式,而原始格式是RGB,所以要转化
                       raw_scale=255,         #python中将图片存储为[0, 1],而caffe中将图片存储为[0, 255],所以需要一个转换
其中mean那一条是在caffe编译好了之后就会有的。

加载写好的Labels:
#分类标签文件
imagenet_labels_filename = caffe_root +'models/bvlc_googlenet/synset_words.txt'
#载入分类标签文件
labels = np.loadtxt(imagenet_labels_filename, str, delimiter='\t')
最后开始预测:
#对目标路径中的图像,遍历并分类
for root,dirs,files in os.walk(caffe_root+'models/bvlc_googlenet/image/'):
for file in files:
#加载要分类的图片
image_file = os.path.join(root,file)
input_image = caffe.io.load_image(image_file)
# print(type(input_image))
#打印图片路径及名称
image_path = os.path.join(root,file)
print(image_path)
#显示图片
img=Image.open(image_path)
plt.imshow(img)
plt.axis('off')
plt.show()
#预测图片类别
time_start = time.time()
prediction = net.predict([input_image])
time_end = time.time() - time_start
print 'Use time',time_end
print 'predicted class:',prediction[0].argmax()
# 输出概率最大的前5个预测结果
top_k = prediction[0].argsort()[-5:][::-1]
for node_id in top_k:
#获取分类名称
human_string = labels[node_id]
#获取该分类的置信度
score = prediction[0][node_id]
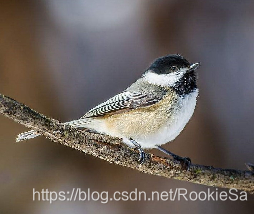
print('%s (score = %.5f)' % (human_string, score))在工程目录下新建一个image文件夹,在该文件夹下放入想要预测的图片:
预测结果: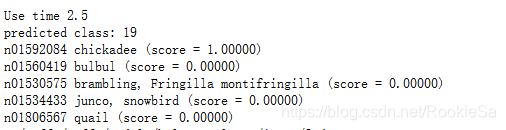
可以看到用了2.5秒进行预测,但是效果还是比较好的。
代码来自覃老师的课堂。