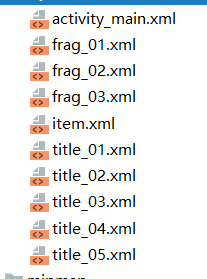
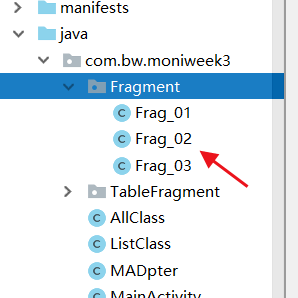
第一步、添加相对应的Fragment类及XML
第二步、进行布局------代码如下:
 <FrameLayout
     android:id="@+id/mfrag"
     android:layout_width="match_parent"
     android:layout_height="0dp"
     android:layout_weight="1"
></FrameLayout>
<RadioGroup
    android:id="@+id/mRg"
    android:layout_gravity="center_vertical"
    android:layout_width="match_parent"
    android:layout_height="wrap_content"
    android:orientation="horizontal">

    <RadioButton
        android:id="@+id/mB1"
        android:layout_width="0dp"
        android:layout_height="wrap_content"
        android:gravity="center"
        android:button="@null"
        android:layout_weight="1"
        android:text="我的" />

    <RadioButton
        android:id="@+id/mB2"
        android:layout_width="0dp"
        android:gravity="center"
        android:button="@null"
        android:layout_height="wrap_content"
        android:layout_weight="1"
        android:text="联系人" />

    <RadioButton
        android:id="@+id/mB3"
        android:layout_width="0dp"
        android:button="@null"
        android:gravity="center"
        android:layout_height="wrap_content"
        android:layout_weight="1"
        android:text="动态" />
</RadioGroup>
**第三步、**在MainActivity实现点击切换不同的Fragment页面切换
package com.bw.moniweek3;
import android.support.v4.app.FragmentManager;
import android.support.v4.app.FragmentTransaction;
import android.support.v7.app.AppCompatActivity;
import android.os.Bundle;
import android.view.View;
import android.widget.FrameLayout;
import android.widget.RadioGroup;
import com.bw.moniweek3.Fragment.Frag_01;
import com.bw.moniweek3.Fragment.Frag_02;
import com.bw.moniweek3.Fragment.Frag_03;
public class MainActivity extends AppCompatActivity {
private Frag_01 frag_01;
private Frag_02 frag_02;
private Frag_03 frag_03;
@Override
protected void onCreate(Bundle savedInstanceState) {
super.onCreate(savedInstanceState);
setContentView(R.layout.activity_main);
    FragmentManager supportFragmentManager = getSupportFragmentManager();
    FragmentTransaction transaction = supportFragmentManager.beginTransaction();

    frag_01 = new Frag_01();    //  创建类对象
    frag_02 = new Frag_02();
    frag_03 = new Frag_03();

    transaction.add(R.id.mfrag,frag_01);      // 添加
    transaction.add(R.id.mfrag,frag_02);    //  R.id.mfrag 是指  在布局文件里寻找Fraglayout 的id
    transaction.add(R.id.mfrag,frag_03);

    transaction.show(frag_01);      //  默认选中的一页
    transaction.hide(frag_02);
    transaction.hide(frag_03);

    transaction.commit();  // 提交事务  -----必不可少的一步

    //初始化单选按钮组
    RadioGroup mRadioGroup = findViewById(R.id.mRg);

    mRadioGroup.setOnCheckedChangeListener(new RadioGroup.OnCheckedChangeListener() {
        @Override
        public void onCheckedChanged(RadioGroup group, int checkedId) {
        //  再一次提交事务
            FragmentManager supportFragmentManager = getSupportFragmentManager();
            FragmentTransaction transaction1 = supportFragmentManager.beginTransaction();
            switch (checkedId){
                case R.id.mB1:    // 每个Button的idi
                    transaction1.show(frag_01);
                    transaction1.hide(frag_02);
                    transaction1.hide(frag_03);
                    break;
                case  R.id.mB2:
                    transaction1.show(frag_02);
                    transaction1.hide(frag_01);
                    transaction1.hide(frag_03);
                    break;
                case  R.id.mB3:
                    transaction1.show(frag_03);
                    transaction1.hide(frag_02);
                    transaction1.hide(frag_01);
                    break;
            }
            transaction1.commit();
        }
    });
}
}
这样的话就可以实现Fragment点击隐藏,不同的页面了。需要注意的是创建新类 一定要继承的是Fragment 否则会报一个没有此方法的错误!!!