版权声明:本文为博主原创文章,未经博主允许不得转载。 https://blog.csdn.net/yang450712123/article/details/80881387
微信小程序同声传译 Face2FaceTranslator 开发
腾讯开源了微信小程序的同声传译插件 Face2FaceTranslator ;开发者可以在小程序使用同声传译的功能,以下是本人在项目中做的 demo;我们的小程序是用美团的 mpvue 做的。
Face2FaceTranslator github链接(官方demo)
Face2FaceTranslator 官方开发文档
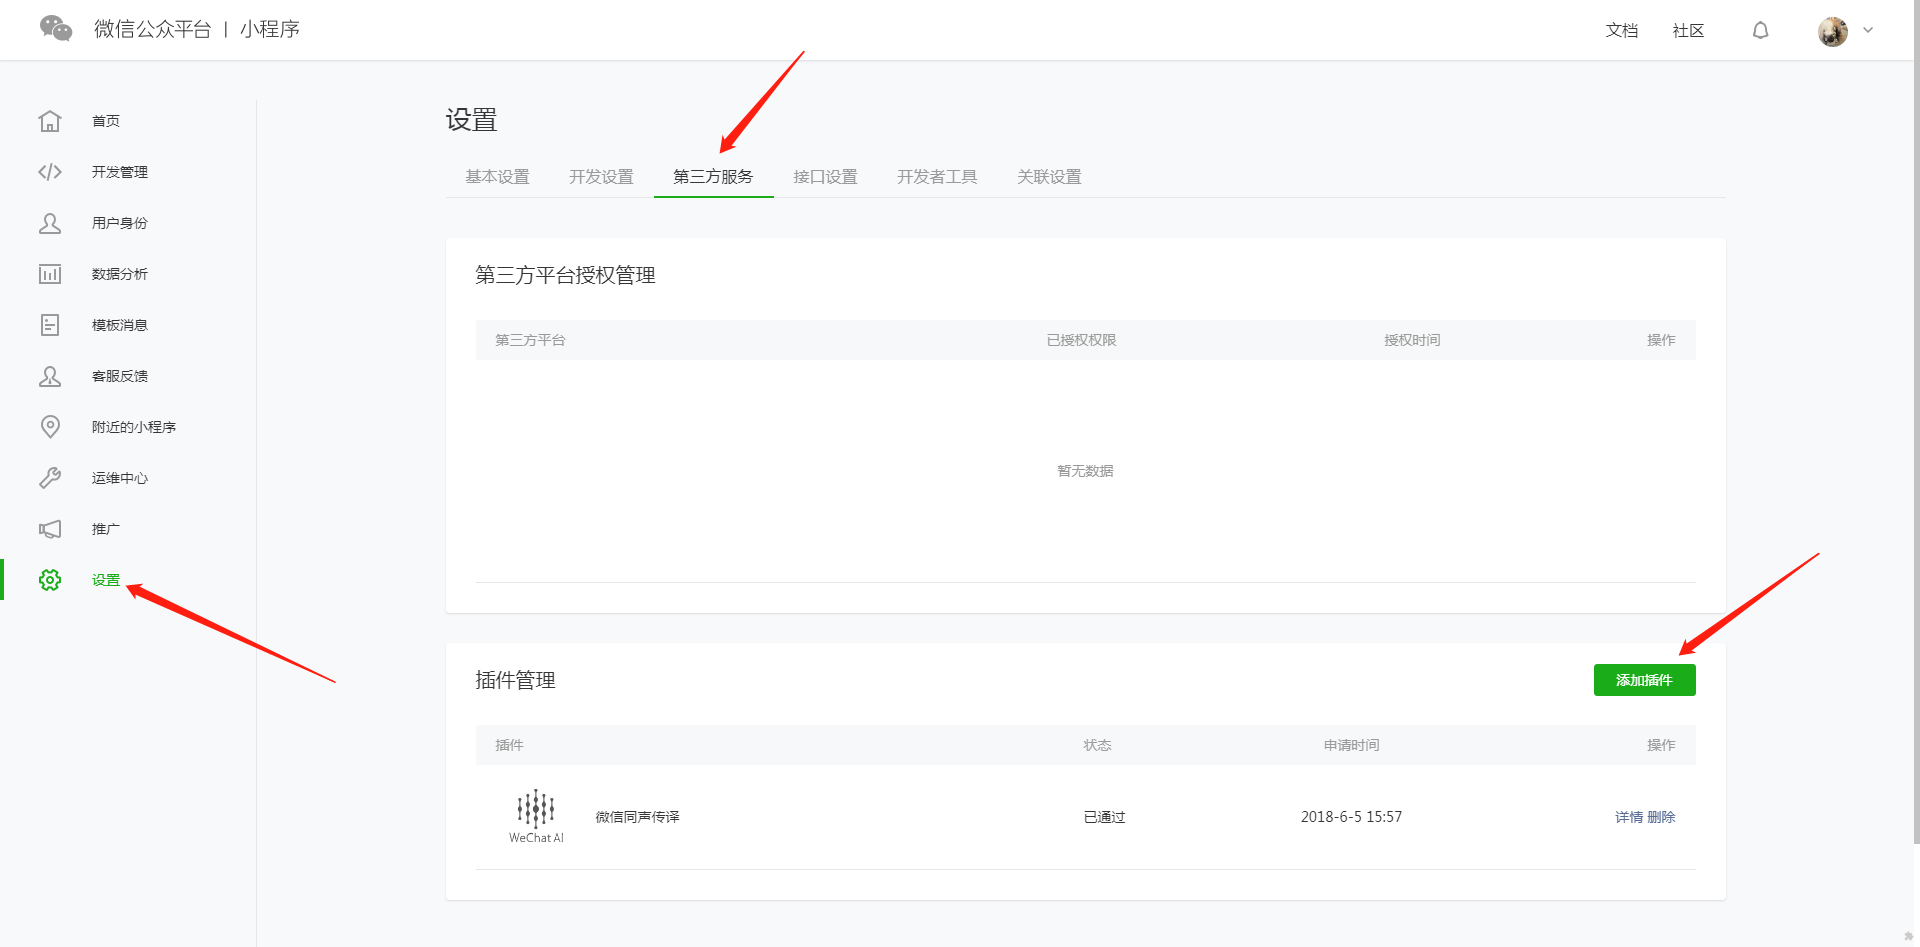
第一步:配置微信公众平
首先,需要在微信公众平台配置,以下是配置步骤:
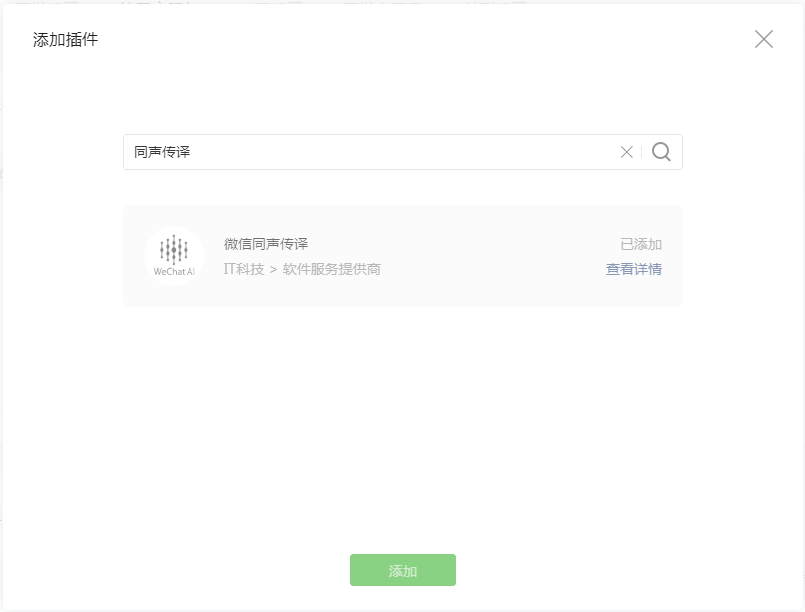
打开微信公众平台,点击设置 => 第三方服务 => 添加插件
搜索同声传译,点击添加:
第二步:在代码里添加功能:
以下代码为关键部分代码,因为用 mpvue 开发,所以为 vue 编程风格,开发者可以根据自己情况进行修改。
首先要在 main.js 中配置
// main.js 需要在配置文件中配置插件

export default {
  config: {
    pages: [
      '^pages/imSceneDoctor/imSceneDoctor',
    ],
    window: {
      backgroundTextStyle: 'light',
      backgroundColor: "#000",
      navigationBarBackgroundColor: '#ffffff',
      navigationBarTitleText: '同声传译 demo',
      navigationBarTextStyle: 'black'
    },
    plugins: {
      "WechatSI": {
        "version": "0.0.6",
        "provider": "wx069ba97219f66d99"
      }
    }
  }
}
然后在开发的文件使用 (imSceneDoctor.vue 中关键的代码)。
// imSceneDoctor.vue

<template>
  <ul class="footer-box-bottom">
    <li class="bottom-item" @touchstart='streamRecord(0)' @touchend='streamRecordEnd()'>
      <figure class="bottom-item-content">
        <img class="bottom-item-image" src="https://m.allinmed.cn/static/image/imScene/[email protected]" width="350"
             height="234"/>
        <figcaption class="bottom-item-description">智能语音</figcaption>
      </figure>
    </li>
    <li class="bottom-item" @touchstart='streamRecord(1)' @touchend='streamRecordEnd()'>
      <figure class="bottom-item-content">
        <img class="bottom-item-image" src="https://m.allinmed.cn/static/image/imScene/[email protected]"
             width="350"
             height="234"/>
        <figcaption class="bottom-item-description">中=>英</figcaption>
      </figure>
    </li>
    <li class="bottom-item" @touchstart='streamRecord(2)' @touchend='streamRecordEnd()'>
      <figure class="bottom-item-content">
        <img class="bottom-item-image" src="https://m.allinmed.cn/static/image/imScene/[email protected]"
             width="350"
             height="234"/>
        <figcaption class="bottom-item-description">英=>中</figcaption>
      </figure>
    </li>
  </ul>
</template>

<script type="text/ecmascript-6">
  // 获取**全局唯一**的语音识别管理器**recordRecoManager**
  const plugin = requirePlugin("WechatSI");
  const manager = plugin.getRecordRecognitionManager();

  export default {
    data() {
      return {
        currentTranslateVoice: '', // 当前播放语音路径
        sendTextContent:'', // 展示的语音内容
        connectNum: 0,
        recordType:0, // 录音类型:0,中文录音;1,中文翻译英文;2,英文翻译中文
      }
    },
    onLoad() {
      this.getRecordAuth();
    },
    mounted() {
      this.initRecord();
    },
    methods: {
      // 权限询问
      getRecordAuth () {
        wx.getSetting({
          success(res) {
            console.log("succ")
            console.log(res)
            if (!res.authSetting['scope.record']) {
              wx.authorize({
                scope: 'scope.record',
                success() {
                    // 用户已经同意小程序使用录音功能,后续调用 wx.startRecord 接口不会弹窗询问
                    console.log("succ auth")
                }, fail() {
                    console.log("fail auth")
                }
              })
            } else {
              console.log("record has been authed")
            }
          }, fail(res) {
              console.log("fail")
              console.log(res)
          }
        })
      },
      /**
       * 初始化语音识别回调
       * 绑定语音播放开始事件
       */
      initRecord: function() {
        //有新的识别内容返回,则会调用此事件
        manager.onRecognize = (res) => {
          let currentData = Object.assign({}, this.sendTextContent, {
                            text: res.result,
                          })
          this.sendTextContent = res.result;
        }

        // 识别结束事件
        manager.onStop = (res) => {

          let text = res.result
          console.log('识别结束');
          console.log(res);
          this.sendTextContent = res.result;
          if (this.recordType) {
            this.translateText(res.result)
          }
        }

        // 识别错误事件
        manager.onError = (res) => {
          console.log(res);
        }

        // 语音播放开始事件
        wx.onBackgroundAudioPlay(res=>{

          const backgroundAudioManager = wx.getBackgroundAudioManager()
          let src = backgroundAudioManager.src
          this.currentTranslateVoice = src;
        })
      },
      /**
       * 按住按钮开始语音识别
       */
      streamRecord: function(type) {
        // 先清空背景音
        let param;
        wx.stopBackgroundAudio();
        this.recordType = type;
        if (type == 2) {
          param = 'en_US';
        } else {
          param = "zh_CN";
        }
        manager.start({
          lang: param,
        })


      },
      /**
       * 松开按钮结束语音识别
       */
      streamRecordEnd: function(e) {

        manager.stop()

      },
      /**
       * 翻译
       */
      translateText: function(text) {
        let lfrom =  this.recordType === 1 ? 'zh_CN' : 'en_US';
        let lto = this.recordType === 1 ? 'en_US':'zh_CN';


        plugin.translate({
          lfrom: lfrom,
          lto: lto,
          content: text,
          tts: true,
          success: (resTrans)=>{
            console.log(resTrans);
            let passRetcode = [
              0, // 翻译合成成功
              -10006, // 翻译成功,合成失败
              -10007, // 翻译成功,传入了不支持的语音合成语言
              -10008, // 翻译成功,语音合成达到频率限制
            ]

            if(passRetcode.indexOf(resTrans.retcode) >= 0 ) {
              this.sendTextContent = resTrans.result;
            } else {
              console.warn("翻译失败", resTrans, item)
            }

          },
          fail: function(resTrans) {
            console.error("调用失败",resTrans, item)
          },
          complete: resTrans => {
            wx.hideLoading()
          }
        })

      },

    }
  }
</script>
备注:
以上只是个小 demo,并且正常运行,然而并没有考虑多种边界情况,如果开发者需要在项目正常使用,也请参考官方demo(上方有 github 地址)。