作用域public,private。protected。以及不写时的差别
这四个作用域的可见范围例如以下表所看到的。
说明:假设在修饰的元素上面没有写不论什么訪问修饰符,则表示friendly。不使用keyword默觉得包内使用。
作用域 当前类 同一package 子孙类 其它package
public √ √ √ √
protected √ √ √ ×
friendly √ √ × ×
private √ × × ×
备注:仅仅要记住了有4种訪问权限,4个訪问范围。然后将全选和范围在水平和垂直方向上分别按排从小到大或从大到小的顺序排列,就非常easy画出上面的图了。
样例:应用场景
1、public:public表明该数据成员、成员函数是对全部用户开放的。全部用户都能够直接进行调用,在程序的不论什么其他地方訪问。
2、private:private表示私有。私有的意思就是除了class自己之外。不论什么人都不能够直接使用,私有財产神圣不可侵犯嘛。即便是子女。朋友,都不能够使用。
和public相反,加上这个修饰的属性和方法,仅仅同意在自己本身这个类里訪问。程序的不论什么其他地方都不能訪问
3、protected:protected对于子女、朋友来说。就是public的,能够自由使用,没有不论什么限制。而对于其它的外部class,protected就变成private。受保护的,位于public和private中间,加上这个修饰的属性和方法,仅仅能在子类(extends)和同包下的程序訪问,别的的地方不能訪问。
4.default(默认):同一包中的类能够訪问。声明时没有加修饰符,觉得是friendly。
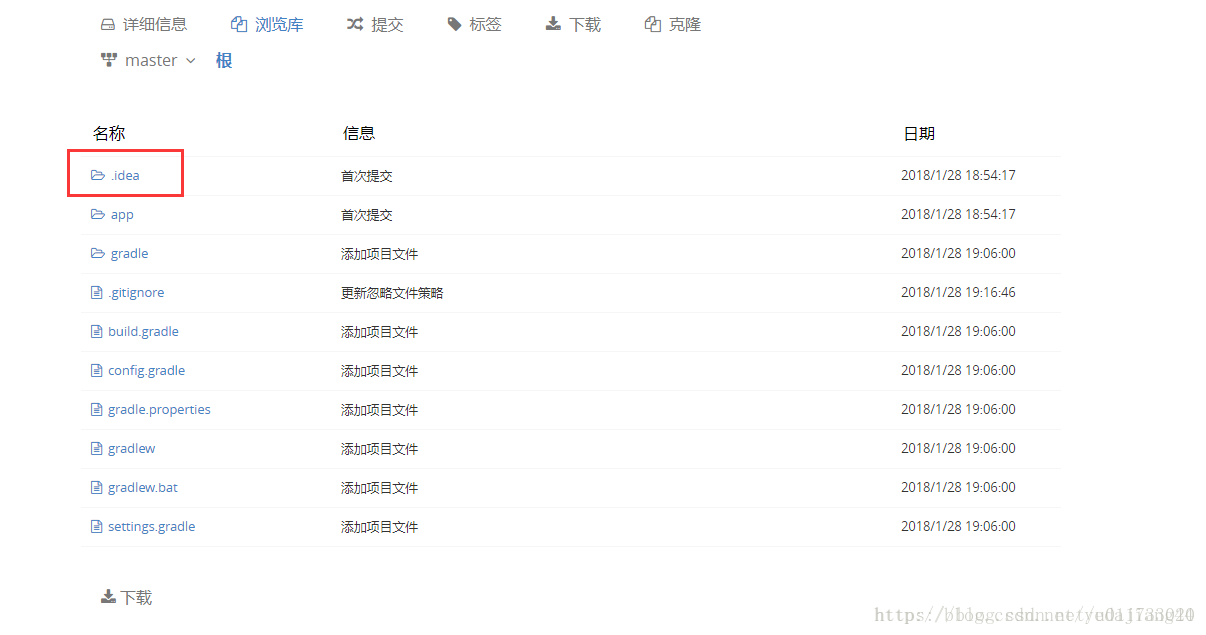
android studio git 删除已在远程仓库的文件或文件夹
有时候我们会不经意的吧不必要的文件传到git的远程仓库上like this。。。
如果你也碰到这情况,请别急,点根烟然后继续往下看
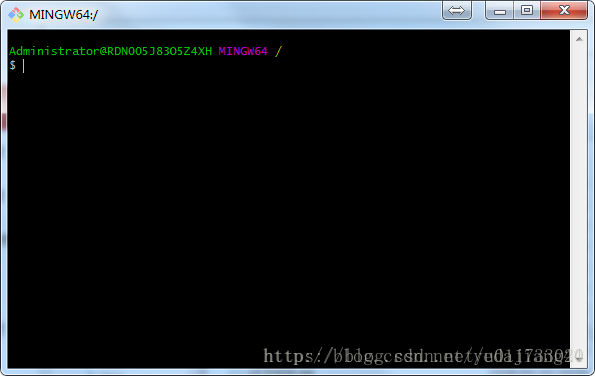
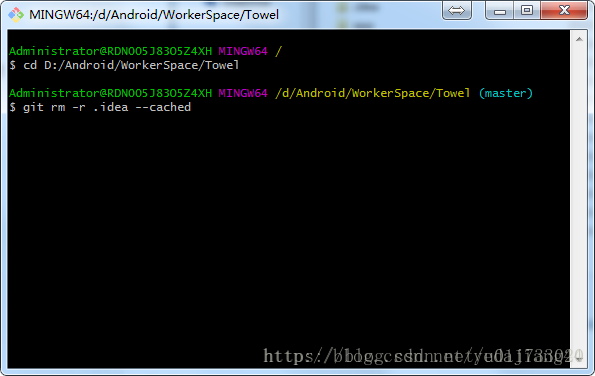
先进git的安装目录运行git-bash.exe
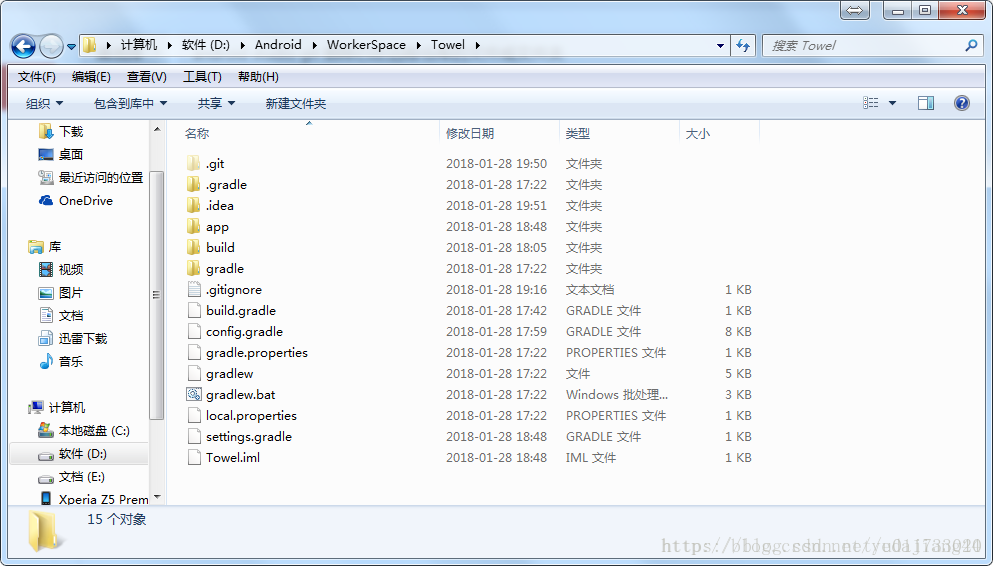
然后用cd命令切换到项目的根目录如下如

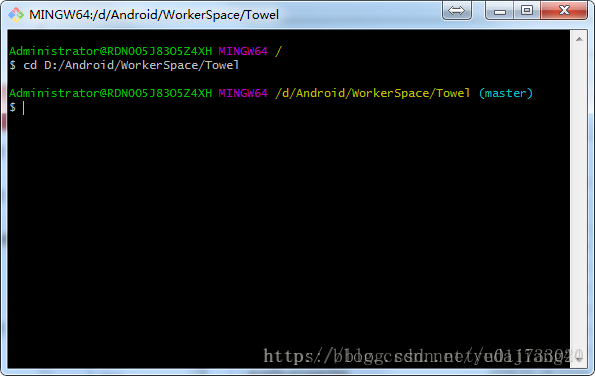
然后再执行命令
git rm -r .idea --cached
其中.idea是我想删除的文件夹,所以用了rm -r命令,如果你想删除的是文件,则用rm就行,慎用rm -r!!!!
然后执行提交命令
git commit -m ‘删除不必要的文件’
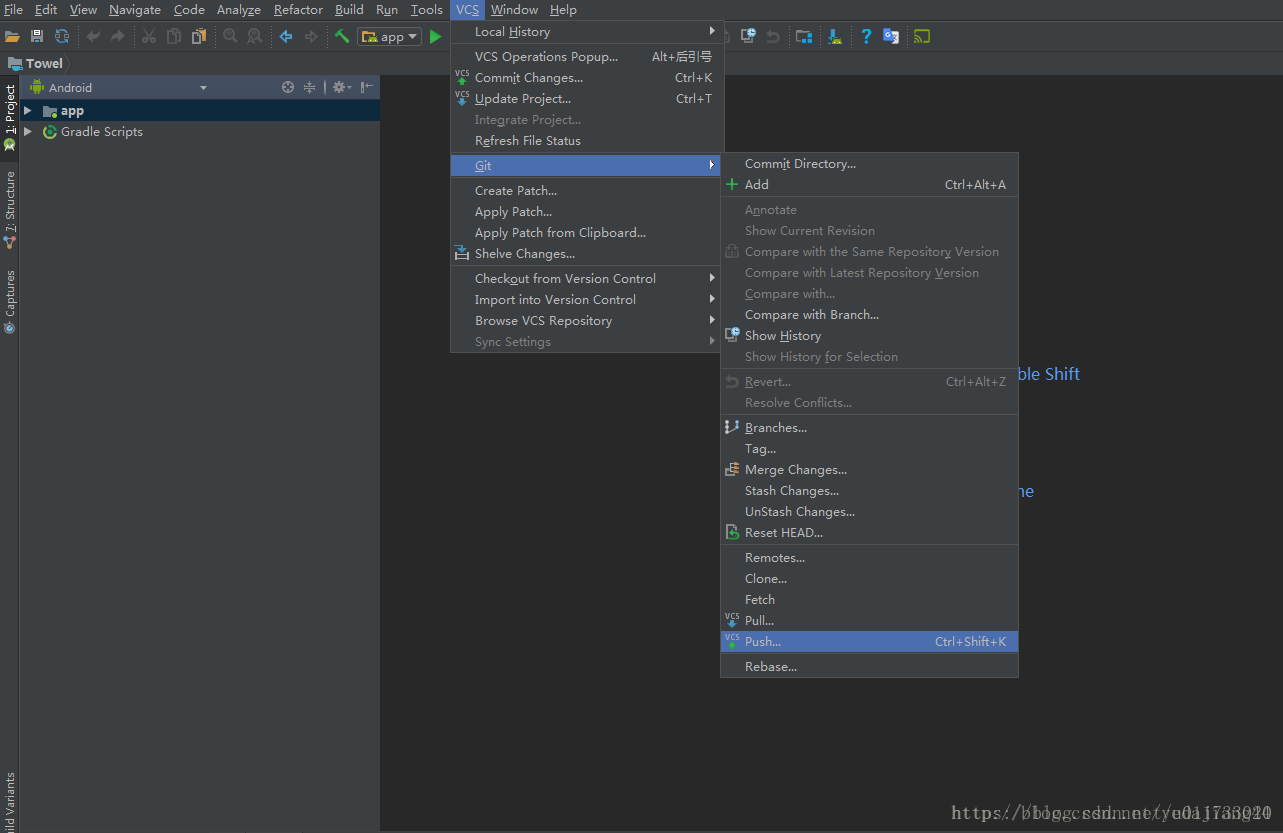
最后进android studio 推送
你可能会问为啥不直接在命令行里推送,多数情况家可能你项目还有其他的提交,如果盲目推送可能会被上级ko一顿(逃。。。)
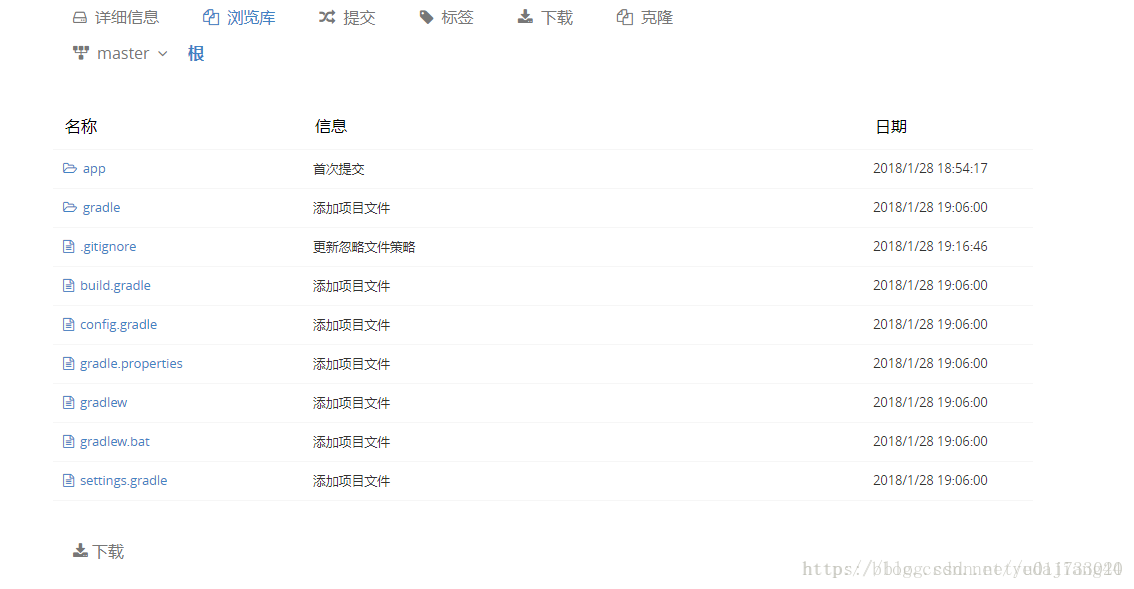
现在再倒远程仓库中看下,是不是神奇的被删除了
emmmmmmmmmmm
我觉得你烟也抽的差不多了
Android实用代码七段(一)
1、 精确获取屏幕尺寸(例如:3.5、4.0、5.0寸屏幕)
    public static double getScreenPhysicalSize(Activity ctx) {
        DisplayMetrics dm = new DisplayMetrics();
        ctx.getWindowManager().getDefaultDisplay().getMetrics(dm);
        double diagonalPixels = Math.sqrt(Math.pow(dm.widthPixels, 2) + Math.pow(dm.heightPixels, 2));
        return diagonalPixels / (160 * dm.density);
    }
一般是7寸以上是平板
2、 判断是否是平板(官方用法)
    public static boolean isTablet(Context context) {
        return (context.getResources().getConfiguration().screenLayout & Configuration.SCREENLAYOUT_SIZE_MASK) >= Configuration.SCREENLAYOUT_SIZE_LARGE;
    }
3、 文字根据状态更改颜色 android:textColor
<selector xmlns:android="http://schemas.android.com/apk/res/android">
    <item android:color="#53c1bd" android:state_selected="true"/>
    <item android:color="#53c1bd" android:state_focused="true"/>
    <item android:color="#53c1bd" android:state_pressed="true"/>
    <item android:color="#777777"/>
</selector>
放在res/color/目录下
4、背景色根据状态更改颜色 android:backgroup
<selector xmlns:android="http://schemas.android.com/apk/res/android">

    <item android:state_selected="true"><shape>
            <gradient android:angle="0" android:centerColor="#00a59f" android:endColor="#00a59f" android:startColor="#00a59f" />
        </shape></item>
    <item android:state_focused="true"><shape>
            <gradient android:angle="0" android:centerColor="#00a59f" android:endColor="#00a59f" android:startColor="#00a59f" />
        </shape></item>
    <item android:state_pressed="true"><shape>
            <gradient android:angle="0" android:centerColor="#00a59f" android:endColor="#00a59f" android:startColor="#00a59f" />
        </shape></item>
    <item><shape>
            <gradient android:angle="0" android:centerColor="#00ff00" android:endColor="00ff00" android:startColor="00ff00" />
        </shape></item>

</selector>
如果直接给背景色color会报错。
5、 启动APK的默认Activity
    public static void startApkActivity(final Context ctx, String packageName) {
        PackageManager pm = ctx.getPackageManager();
        PackageInfo pi;
        try {
            pi = pm.getPackageInfo(packageName, 0);
            Intent intent = new Intent(Intent.ACTION_MAIN, null);
            intent.addCategory(Intent.CATEGORY_LAUNCHER);
            intent.setPackage(pi.packageName);

            List<ResolveInfo> apps = pm.queryIntentActivities(intent, 0);

            ResolveInfo ri = apps.iterator().next();
            if (ri != null) {
                String className = ri.activityInfo.name;
                intent.setComponent(new ComponentName(packageName, className));
                ctx.startActivity(intent);
            }
        } catch (NameNotFoundException e) {
            Log.e("startActivity", e);
        }
    }
7、计算字宽
    public static float GetTextWidth(String text, float Size) {
        TextPaint FontPaint = new TextPaint();
        FontPaint.setTextSize(Size);
        return FontPaint.measureText(text);
    }
注意如果设置了textStyle,还需要进一步设置TextPaint。
Android实用代码七段(二)
一、获取应用程序下所有Activity
  public static ArrayList<String> getActivities(Context ctx) {
      ArrayList<String> result = new ArrayList<String>();
      Intent intent = new Intent(Intent.ACTION_MAIN, null);
      intent.setPackage(ctx.getPackageName());
      for (ResolveInfo info : ctx.getPackageManager().queryIntentActivities(intent, 0)) {
          result.add(info.activityInfo.name);
      }
      return result;
  }
二、检测字符串中是否包含汉字
    public static boolean checkChinese(String sequence) {
        final String format = "[\\u4E00-\\u9FA5\\uF900-\\uFA2D]";
        boolean result = false;
        Pattern pattern = Pattern.compile(format);
        Matcher matcher = pattern.matcher(sequence);
        result = matcher.find();
        return result;
    }
三、检测字符串中只能包含:中文、数字、下划线(_)、横线(-)
  public static boolean checkNickname(String sequence) {
        final String format = "[^\\u4E00-\\u9FA5\\uF900-\\uFA2D\\w-_]";
        Pattern pattern = Pattern.compile(format);
        Matcher matcher = pattern.matcher(sequence);
        return !matcher.find();
    }
四、检查有没有应用程序来接受处理你发出的intent
public static boolean isIntentAvailable(Context context, String action) {
        final PackageManager packageManager = context.getPackageManager();
        final Intent intent = new Intent(action);
        List<ResolveInfo> list = packageManager.queryIntentActivities(intent, PackageManager.MATCH_DEFAULT_ONLY);
        return list.size() > 0;
  }
五、使用TransitionDrawable实现渐变效果
private void setImageBitmap(ImageView imageView, Bitmap bitmap) {
    // Use TransitionDrawable to fade in.
    final TransitionDrawable td = new TransitionDrawable(new Drawable[] { new ColorDrawable(android.R.color.transparent), new BitmapDrawable(mContext.getResources(), bitmap) });
    //noinspection deprecation
        imageView.setBackgroundDrawable(imageView.getDrawable());
    imageView.setImageDrawable(td);
    td.startTransition(200);
}
比使用AlphaAnimation效果要好,可避免出现闪烁问题。
六、 扫描指定的文件
sendBroadcast(new Intent(Intent.ACTION_MEDIA_SCANNER_SCAN_FILE, uri));
	用途:从本软件新增、修改、删除图片、文件某一个文件(音频、视频)需要更新系统媒体库时使用,不必扫描整个SD卡。
七、Dip转px
public static int dipToPX(final Context ctx, float dip) {
    return (int)TypedValue.applyDimension(TypedValue.COMPLEX_UNIT_DIP, dip, ctx.getResources().getDisplayMetrics());
}
用途:难免在Activity代码中设置位置、大小等,本方法就很有用了!
Android实用代码七段(三)
一、获取已经安装APK的路径
PackageManager pm = getPackageManager();
for (ApplicationInfo app : pm.getInstalledApplications(0)) {
     Log.d("PackageList", "package: " + app.packageName + ", sourceDir: " + app.sourceDir);
}
输出如下:
package: com.tmobile.thememanager, sourceDir: /system/app/ThemeManager.apk
package: com.touchtype.swiftkey, sourceDir: /data/app/com.touchtype.swiftkey-1.apk
二、 多进程Preferences数据共享
public static void putStringProcess(Context ctx, String key, String value) {
    SharedPreferences sharedPreferences = ctx.getSharedPreferences("preference_mu", Context.MODE_MULTI_PROCESS);
    Editor editor = sharedPreferences.edit();
    editor.putString(key, value);
    editor.commit();
}

public static String getStringProcess(Context ctx, String key, String defValue) {
    SharedPreferences sharedPreferences = ctx.getSharedPreferences("preference_mu", Context.MODE_MULTI_PROCESS);
    return sharedPreferences.getString(key, defValue);
}
相关文章:
http://zengrong.net/post/1687.htm
三、泛型ArrayList转数组
@SuppressWarnings("unchecked")
public static <T> T[] toArray(Class<?> cls, ArrayList<T> items) {
    if (items == null || items.size() == 0) {
        return (T[]) Array.newInstance(cls, 0);
    }
    return items.toArray((T[]) Array.newInstance(cls, items.size()));
}
四、 保存恢复ListView当前位置
private void saveCurrentPosition() {
    if (mListView != null) {
        int position = mListView.getFirstVisiblePosition();
        View v = mListView.getChildAt(0);
        int top = (v == null) ? 0 : v.getTop();
        //保存position和top
    }
}

private void restorePosition() {
    if (mFolder != null && mListView != null) {
        int position = 0;//取出保存的数据
        int top = 0;//取出保存的数据
        mListView.setSelectionFromTop(position, top);
    }
}
可以保存在Preference中或者是数据库中,数据加载完后再设置。
五、调用 便携式热点和数据共享 设置
public static Intent getHotspotSetting() {
    Intent intent = new Intent();
    intent.setAction(Intent.ACTION_MAIN);
    ComponentName com = new ComponentName("com.android.settings", "com.android.settings.TetherSettings");
    intent.setComponent(com);
    return intent;
}
六、 格式化输出IP地址
public static String getIp(Context ctx) {
    return Formatter.formatIpAddress((WifiManager) ctx.getSystemService(Context.WIFI_SERVICE).getConnectionInfo().getIpAddress());
}
七、 文件夹排序(先文件夹排序,后文件排序)
public static void sortFiles(File[] files) {
    Arrays.sort(files, new Comparator<File>() {

        @Override
        public int compare(File lhs, File rhs) {
            //返回负数表示o1 小于o2,返回0 表示o1和o2相等,返回正数表示o1大于o2。
            boolean l1 = lhs.isDirectory();
            boolean l2 = rhs.isDirectory();
            if (l1 && !l2)
                return -1;
            else if (!l1 && l2)
                return 1;
            else {
                return lhs.getName().compareTo(rhs.getName());
            }
        }
    });
}
Android实用代码七段(四)
1、发送不重复的通知(Notification)
public static void sendNotification(Context context, String title,
        String message, Bundle extras) {
    Intent mIntent = new Intent(context, FragmentTabsActivity.class);
    mIntent.setFlags(Intent.FLAG_ACTIVITY_CLEAR_TOP);
    mIntent.putExtras(extras);

    int requestCode = (int) System.currentTimeMillis();

    PendingIntent mContentIntent = PendingIntent.getActivity(context,
            requestCode, mIntent, 0);

    Notification mNotification = new NotificationCompat.Builder(context)
            .setContentTitle(title).setSmallIcon(R.drawable.app_icon)
            .setContentIntent(mContentIntent).setContentText(message)
            .build();
    mNotification.flags |= Notification.FLAG_AUTO_CANCEL;
    mNotification.defaults = Notification.DEFAULT_ALL;

    NotificationManager mNotificationManager = (NotificationManager) context
            .getSystemService(Context.NOTIFICATION_SERVICE);

    mNotificationManager.notify(requestCode, mNotification);
}
代码说明:
关键点在这个requestCode,这里使用的是当前系统时间,巧妙的保证了每次都是一个新的Notification产生。
2、代码设置TextView的样式
使用过自定义Dialog可能马上会想到用如下代码:
new TextView(this,null,R.style.text_style);
但你运行这代码你会发现毫无作用!正确用法:
new TextView(new ContextThemeWrapper(this, R.style.text_style))
3、 ip地址转成8位十六进制串
/** ip转16进制 */
public static String ipToHex(String ips) {
    StringBuffer result = new StringBuffer();
    if (ips != null) {
        StringTokenizer st = new StringTokenizer(ips, ".");
        while (st.hasMoreTokens()) {
            String token = Integer.toHexString(Integer.parseInt(st.nextToken()));
            if (token.length() == 1)
                token = "0" + token;
            result.append(token);
        }
    }
    return result.toString();
}

/** 16进制转ip */
public static String texToIp(String ips) {
    try {
        StringBuffer result = new StringBuffer();
        if (ips != null && ips.length() == 8) {
            for (int i = 0; i < 8; i += 2) {
                if (i != 0)
                    result.append('.');
                result.append(Integer.parseInt(ips.substring(i, i + 2), 16));
            }
        }
        return result.toString();
    } catch (NumberFormatException ex) {
        Logger.e(ex);
    }
    return "";
}
ip:192.168.68.128 16 =>hex :c0a84480
4、WebView保留缩放功能但隐藏缩放控件
    mWebView.getSettings().setSupportZoom(true);
    mWebView.getSettings().setBuiltInZoomControls(true);
    if (DeviceUtils.hasHoneycomb())
          mWebView.getSettings().setDisplayZoomControls(false);
注意:setDisplayZoomControls是在API Level 11中新增。
5、获取网络类型名称
public static String getNetworkTypeName(Context context) {
    if (context != null) {
        ConnectivityManager connectMgr = (ConnectivityManager) context.getSystemService(Context.CONNECTIVITY_SERVICE);
        if (connectMgr != null) {
            NetworkInfo info = connectMgr.getActiveNetworkInfo();
            if (info != null) {
                switch (info.getType()) {
                case ConnectivityManager.TYPE_WIFI:
                    return "WIFI";
                case ConnectivityManager.TYPE_MOBILE:
                    return getNetworkTypeName(info.getSubtype());
                }
            }
        }
    }
    return getNetworkTypeName(TelephonyManager.NETWORK_TYPE_UNKNOWN);
}

public static String getNetworkTypeName(int type) {
    switch (type) {
    case TelephonyManager.NETWORK_TYPE_GPRS:
        return "GPRS";
    case TelephonyManager.NETWORK_TYPE_EDGE:
        return "EDGE";
    case TelephonyManager.NETWORK_TYPE_UMTS:
        return "UMTS";
    case TelephonyManager.NETWORK_TYPE_HSDPA:
        return "HSDPA";
    case TelephonyManager.NETWORK_TYPE_HSUPA:
        return "HSUPA";
    case TelephonyManager.NETWORK_TYPE_HSPA:
        return "HSPA";
    case TelephonyManager.NETWORK_TYPE_CDMA:
        return "CDMA";
    case TelephonyManager.NETWORK_TYPE_EVDO_0:
        return "CDMA - EvDo rev. 0";
    case TelephonyManager.NETWORK_TYPE_EVDO_A:
        return "CDMA - EvDo rev. A";
    case TelephonyManager.NETWORK_TYPE_EVDO_B:
        return "CDMA - EvDo rev. B";
    case TelephonyManager.NETWORK_TYPE_1xRTT:
        return "CDMA - 1xRTT";
    case TelephonyManager.NETWORK_TYPE_LTE:
        return "LTE";
    case TelephonyManager.NETWORK_TYPE_EHRPD:
        return "CDMA - eHRPD";
    case TelephonyManager.NETWORK_TYPE_IDEN:
        return "iDEN";
    case TelephonyManager.NETWORK_TYPE_HSPAP:
        return "HSPA+";
    default:
        return "UNKNOWN";
    }
}
6、Android解压Zip包
/**
 * 解压一个压缩文档 到指定位置
 *
 * @param zipFileString 压缩包的名字
 * @param outPathString 指定的路径
 * @throws Exception
 */
public static void UnZipFolder(String zipFileString, String outPathString) throws Exception {
    java.util.zip.ZipInputStream inZip = new java.util.zip.ZipInputStream(new java.io.FileInputStream(zipFileString));
    java.util.zip.ZipEntry zipEntry;
    String szName = "";

    while ((zipEntry = inZip.getNextEntry()) != null) {
        szName = zipEntry.getName();

        if (zipEntry.isDirectory()) {

            // get the folder name of the widget
            szName = szName.substring(0, szName.length() - 1);
            java.io.File folder = new java.io.File(outPathString + java.io.File.separator + szName);
            folder.mkdirs();

        } else {

            java.io.File file = new java.io.File(outPathString + java.io.File.separator + szName);
            file.createNewFile();
            // get the output stream of the file
            java.io.FileOutputStream out = new java.io.FileOutputStream(file);
            int len;
            byte[] buffer = new byte[1024];
            // read (len) bytes into buffer
            while ((len = inZip.read(buffer)) != -1) {
                // write (len) byte from buffer at the position 0
                out.write(buffer, 0, len);
                out.flush();
            }
            out.close();
        }
    }//end of while

    inZip.close();

}//end of func
7、 从assets中读取文本和图片资源
/** 从assets 文件夹中读取文本数据 */
public static String getTextFromAssets(final Context context, String fileName) {
    String result = "";
    try {
        InputStream in = context.getResources().getAssets().open(fileName);
        // 获取文件的字节数
        int lenght = in.available();
        // 创建byte数组
        byte[] buffer = new byte[lenght];
        // 将文件中的数据读到byte数组中
        in.read(buffer);
        result = EncodingUtils.getString(buffer, "UTF-8");
        in.close();
    } catch (Exception e) {
        e.printStackTrace();
    }
    return result;
}

/** 从assets 文件夹中读取图片 */
public static Drawable loadImageFromAsserts(final Context ctx, String fileName) {
    try {
        InputStream is = ctx.getResources().getAssets().open(fileName);
        return Drawable.createFromStream(is, null);
    } catch (IOException e) {
        if (e != null) {
            e.printStackTrace();
        }
    } catch (OutOfMemoryError e) {
        if (e != null) {
            e.printStackTrace();
        }
    } catch (Exception e) {
        if (e != null) {
            e.printStackTrace();
        }
    }
    return null;
}
Android实用代码七段(五)
1、展开、收起状态栏
public static final void collapseStatusBar(Context ctx) {
        Object sbservice = ctx.getSystemService("statusbar");
        try {
            Class<?> statusBarManager = Class.forName("android.app.StatusBarManager");
            Method collapse;
            if (Build.VERSION.SDK_INT >= Build.VERSION_CODES.JELLY_BEAN_MR1) {
                collapse = statusBarManager.getMethod("collapsePanels");
            } else {
                collapse = statusBarManager.getMethod("collapse");
            }
            collapse.invoke(sbservice);
        } catch (Exception e) {
            e.printStackTrace();
        }
    }

    public static final void expandStatusBar(Context ctx) {
        Object sbservice = ctx.getSystemService("statusbar");
        try {
            Class<?> statusBarManager = Class.forName("android.app.StatusBarManager");
            Method expand;
            if (Build.VERSION.SDK_INT >= 17) {
                expand = statusBarManager.getMethod("expandNotificationsPanel");
            } else {
                expand = statusBarManager.getMethod("expand");
            }
            expand.invoke(sbservice);
        } catch (Exception e) {
            e.printStackTrace();
        }
    }
用途:可用于点击Notifacation之后收起状态栏
2、 获取状态栏高度
    public static int getStatusBarHeight(Context context){
        Class<?> c = null;
        Object obj = null;
        Field field = null;
        int x = 0, statusBarHeight = 0;
        try {
            c = Class.forName("com.android.internal.R$dimen");
            obj = c.newInstance();
            field = c.getField("status_bar_height");
            x = Integer.parseInt(field.get(obj).toString());
            statusBarHeight = context.getResources().getDimensionPixelSize(x);
        } catch (Exception e1) {
            e1.printStackTrace();
        }
        return statusBarHeight;
    }
3、ListView使用ViewHolder极简写法
 public static <T extends View> T getAdapterView(View convertView, int id) {
        SparseArray<View> viewHolder = (SparseArray<View>) convertView.getTag();
        if (viewHolder == null) {
            viewHolder = new SparseArray<View>();
            convertView.setTag(viewHolder);
        }
        View childView = viewHolder.get(id);
        if (childView == null) {
            childView = convertView.findViewById(id);
            viewHolder.put(id, childView);
        }
        return (T) childView;
    }
用法:
    @Override
    public View getView(int position, View convertView, ViewGroup parent) {
        if (convertView == null) {
            convertView = LayoutInflater.from(getActivity()).inflate(R.layout.fragment_feed_item, parent, false);
        }

        ImageView thumnailView = getAdapterView(convertView, R.id.video_thumbnail);
        ImageView avatarView =  getAdapterView(convertView, R.id.user_avatar);
        ImageView appIconView = getAdapterView(convertView, R.id.app_icon);
用起来非常简练,将ViewHolder隐于无形。
4、 设置Activity透明
    <style name="TransparentActivity" parent="AppBaseTheme">
        <item name="android:windowBackground">@android:color/transparent</item>
        <item name="android:colorBackgroundCacheHint">@null</item>
        <item name="android:windowIsTranslucent">true</item>
        <item name="android:windowNoTitle">true</item>
        <item name="android:windowContentOverlay">@null</item>
    </style>
说明:AppBaseTheme一般是你application指定的android:theme是啥这里就是啥,否则Activity内部的空间风格可能不一致。
用途:用于模拟Dialog效果,比如再Service中没法用Dialog,就可以用Activity来模拟
5、 代码切换全屏
	//切换到全屏
	getWindow().clearFlags(WindowManager.LayoutParams.FLAG_FORCE_NOT_FULLSCREEN);
	getActivity().getWindow().addFlags(WindowManager.LayoutParams.FLAG_FULLSCREEN);

	//切换到非全屏
	getWindow().clearFlags(WindowManager.LayoutParams.FLAG_FULLSCREEN);
	getWindow().addFlags(WindowManager.LayoutParams.FLAG_FORCE_NOT_FULLSCREEN);
注意:切换到全屏时,底部的虚拟按键仍然是显示的。次方法可多次调用用于切换
用途:播放器界面经常会用到
6、调用开发者选项中显示触摸位置功能
android.provider.Settings.System.putInt(getContentResolver(), "show_touches", 1);
设置1显示,设置0不显示。
7、获取设备上已安装并且可启动的应用列表
            Intent intent = new Intent(Intent.ACTION_MAIN);
            intent.addCategory(Intent.CATEGORY_LAUNCHER);
            List<ResolveInfo> activities = getPackageManager().queryIntentActivities(intent, 0)
注意:使用getInstalledApplications会返回很多无法启动甚至没有图标的系统应用。ResolveInfo.activityInfo.applicationInfo也能取到你想要的数据。
SVN 用户名切换
方法1:主要针对Window下安装了客户端设置
右键桌面–>settings–>Saved Data -->Authentication data -->clear
方法2:主要针对MyEclipse安装的插件
如果你没装客户端,是通过Eclipse插件的,这种情况下,你进入Eclipse的工作区里面,如:C:\workspace\csdbDemo
在该工程里面点右键,TortoiseSVN–>settings–>Saved Data -->Authentication data -->clear即可搞定!
方法3:
如果在本机用svn的一个帐户update和commite代码,并且选择了保存用户名和密码。
上面是一个假设,如果这个假设成立,当你准备换另一个svn的用户来update和commite的时候就遇到麻烦了,至少我是这样的,我逐次用一下办法解决
1.删除隐藏文件夹 .svn,重新取code,无效
2. 卸载svn,重新取code,无效
最后网上搜了一番。发现如下可以顺利解决;
删除掉Documents and Settings\user\Application Data\Subversion\auth\svn.simple文件夹下的文件即可。
再次访问时,会弹出要求输入用户名和密码.
更改SVN服务连接IP:
选中项目左键–>TortoiseSVN–>Relocate…
把原有的:“https://192.168.1.17:8443/svn/16crm/hr”
更为:https://新IP:8443/svn/16crm/hr
Activity和Fragment生命周期变化
情形一:启动应用加载Activity和Fragment
Activity::onCreate
Fragment::onAttach
Fragment::onCreate
Fragment::onCreateView
Fragment::onActivityCreate
Activity::onStart
Fragment::onSatrt
Activity::onResume
Fragment::onResume
情形二:fragA->fragB->fragA(Fragment不加入回退栈)
销毁FragmentA:
启动FragmentB:
销毁FragmentB:
启动FragmentA:
启动过程如下
onAttach
onCreate
onCreateView
onActivityCreate
onSatrt
onResume
销毁过程如下:
onPause
onStop
onDestroyView
onDestroy
onDetach
在不加入回退栈的情况下,无论多少Fragment之间的切换,都遵循启动下一个,销毁上一个的原则,在屏幕不旋转的情况下Activity是不会发生任何变化的
情形三:旋转Fragment(与加不加入回退栈没关系,过程都一样)
Activity和Fragment都会被销毁,其中销毁过程Fragment会保存状态
Fragment::onPause
Activity::onPause
Fragment::onSaveInstanceState(保存销毁前的状态)
Fragment::onStop
Activity onStop
Fragment::onDestroyView
Fragment::onDestroy
Fragment::onDetach
Activity::onDestroy
创建Activity和Fragment(与一开始启动应用过程相同)
Activity::onCreate
Fragment::onAttach
Fragment::onCreate
Fragment::onCreateView
Fragment::onActivityCreated
Fragment::onAttach
Fragment::onCreate
Fragment::onCreateView
Fragment::onActivityCreated
Activity onStart
Fragment::onStart
Fragment::onStart
Activity::onResume
Fragment::onResume
Fragment::onResume
情形四:FragmentA->FragmentB->FragmentA(两者都加入回退栈)
停止FragmentA,但是不销毁,与不加入回退栈相比唯一的不同就是不会被销毁
FragmentA::onPause
FragmentA::onStop
FragmentA::onDestroyView
启动FragmentB
"恢复"FragmentA,这种恢复会从Fragment的onCreateView开始,重新绘制页面,所以之前的所有数据都已经不在了,这就涉及到Fragment的状态保存(下节待续)
onCreateView
onActivityCreated
onStart
onResume
Fragment强烈不推荐使用自定义带参的构造函数
Fragment 源码中有这样一段话
Default constructor. Every fragment must have an empty constructor, so it can be instantiated when restoring its activity’s state. It is strongly recommended that subclasses do not have other constructors with parameters, since these constructors will not be called when the fragment is re-instantiated; instead, arguments can be supplied by the caller with setArguments(android.os.Bundle) and later retrieved by the Fragment with getArguments().
Applications should generally not implement a constructor. The first place application code an run where the fragment is ready to be used is in onAttach(android.app.Activity), the point where the fragment is actually associated with its activity. Some applications may also want to implement onInflate(android.app.Activity,android.util.AttributeSet,android.os.Bundle) to retrieve attributes from a layout resource, though should take care here because this happens for the fragment is attached to its activity.
错误1
This fragment should provide a default constructor (a public constructor wit
代码不规范,这个错误是在提示你需要添加一个空的构造函数
错误2 Avoid non-default constructors in fragments: use a default constructor plus Fragment#setArguments(Bundle) instead(Error when building APK in android studio打包时报错)
这个错误说要使用默认构造函数外加setArguments(Bundle)来代替,去android的官网上查看Fragment的例子都是下面这个样子的
/**
* Create a new instance of MyFragment that will be initialized
* with the given arguments.
*/

static MyFragment newInstance(CharSequence label) {
MyFragment f = new MyFragment();
Bundle b = new Bundle();
b.putCharSequence("label", label);
f.setArguments(b);
return f;
既然人家这么写例子肯定还是有道理的,我们只需要依葫芦画瓢就可以了,去掉带参的构造函数,创建一个newInstance.
public class TestFragment extends Fragment
{
private String name;
private String passwd;
public static TestFragment newInstance(String name, string passwd) {
TestFragment newFragment = new TestFragment();
Bundle bundle = new Bundle();
bundle.putString("name", name);
bundle.putString("passwd", passwd);
newFragment.setArguments(bundle);
return newFragment;
}

@Override
public View onCreateView(LayoutInflater inflater, ViewGroup container,
Bundle savedInstanceState) { // TODO Auto-generated method stub
View view = inflater.inflate(R.layout.main, null);
return view;
}
}
这个错误就消失了,在Fragment所依赖的Activity中,用以下语句创建Fragment实例即可
Fragment testFragment=TestFragment.newInstance(“name”,”passwd”);
对于从Activity传递到Fragment中的参数我们只需要在Fragment的onCreate中获取就可以了
public void onCreate(Bundle savedInstanceState) {
super.onCreate(savedInstanceState);
Bundle args = getArguments();
if (args != null) {
name = args.getString("name");
passwd = args.getstring("passwd");
}
通过浏览器 h5 启动 android 应用程序
背景:访问一个http A界面链接,webview在加载完这个界面在特定时候 判断。
如果手机安装了我们的客户端:要求启动apk客户端,
否则:跳转一个html5 B页面,这个界面是前端同学写的一个特殊页面,有一些提示下载客户端的样式。
所以B界面的连接其实就是一个有提示下载客户端的连接,而客户端配合要做的就是拦截这个B界面的连接,说到底A界面的连接,客户端并不关心。
核心代码:
在manifest。xml 里面把你想加入拦截机制里的activity加入对应的intent filter,
<activity android:name=".ui.UploadActivity" android:screenOrientation="portrait">
            <intent-filter>
                <data android:scheme="http" android:host="192.168.167.33" android:port="8088" android:path="/mi-tracker-web/download.html"/>
                <action android:name="android.intent.action.VIEW" />
                <category android:name="android.intent.category.DEFAULT" />
                <category android:name="android.intent.category.BROWSABLE" />
            </intent-filter>
        </activity>
当手机在任何时候,在webview里面跳转 http://192.168.167.33:8088;/mi-tracker-web/download.html 时,就会弹出对话框,一般来说因为我们设置了category android:name=“android.intent.category.BROWSABLE” 属性,他会把系统的所以浏览器(比如手机装了UC,或者TT浏览器)和那个我们注册拦截了的App都显示在一个dialog里。
Manifest merger failed with multiple errors, see logs
在android开发的时候,有时候会遇到这样的问题
Error:Execution failed for task ‘:test:processDebugManifest’.> Manifest merger failed with multiple errors, see logs
但是要命的是,除了这个log,没有什么其他的有用信息了,怎么办?
处理方式是这样的:
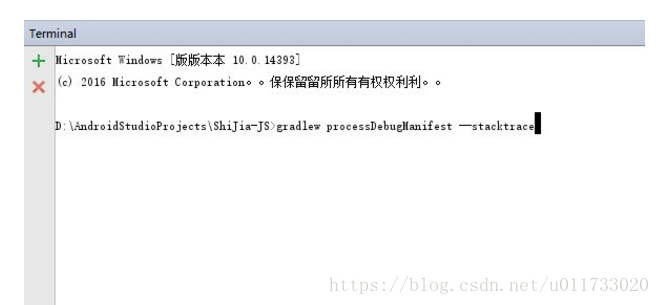
首先进入命令行,输入命令
gradlew processDebugManifest --stacktrace
其中,processDebugManifest是log里面提到的,这个命令是会了获取更多的log信息。
Manifest merger failed with multiple errors, see logs问题处理
等待一会,结果就出来了,我截取了一部分:
Manifest merger failed with multiple errors, see logs问题处理
可见,是由于我们自己的项目最小sdk的版本是14,而使用的库中的最小版本是15,冲突了,所以只要将二者改成同一个就没有问题了。
我一个同事也遇到了这个问题,我用这个方法帮他看了下log,
Manifest merger failed with multiple errors, see logs问题处理
发现是我们的项目里面将allowBackup设置成了false,但是库里面是true,所以将二者改成同一个就行了。
Android应用打破65K方法数限制
1.修改Gradle配置文件,启用MultiDex并包含MultiDex支持:
android { compileSdkVersion 21 buildToolsVersion "21.1.0"

defaultConfig {
    ...
    minSdkVersion 14
    targetSdkVersion 21
    ...

    // Enabling multidex support.
    multiDexEnabled true
}
...
}

dependencies { compile 'com.android.support:multidex:1.0.0' }
2.让应用支持多DEX文件。在MultiDexApplication JavaDoc中描述了三种可选方法:
在AndroidManifest.xml的application中声明android.support.multidex.MultiDexApplication;
如果你已经有自己的Application类,让其继承MultiDexApplication;
如果你的Application类已经继承自其它类,你不想/能修改它,那么可以重写attachBaseContext()方法:
@Override
protected void attachBaseContext(Context base) {
    super.attachBaseContext(base); MultiDex.install(this);
}
经过以上步骤,你的应用已经可以实现多个DEX文件了。当应用构建时,构建工具会分析哪些类必须放在第一个DEX文件,哪些类可以放在附加的DEX文件中。当它创建了第一个DEX文件(classes.dex)后,如果有必要会继续创建附加的DEX文件,如classes2.dex, classes3.dex。Multidex的支持类库将被包含在应用的第一个DEX文件中,帮助实现对其它DEX文件的访问。
把String字符串转化为drawable设置成TextView的drawableRight
设置TextView的drawable:
Drawable drawableleft = getResources().getDrawable(
        R.drawable.icon_qq_gray);
drawableleft.setBounds(0, 0, drawableleft.getMinimumWidth(),
        drawableleft.getMinimumHeight());

txt_bind_qq.setCompoundDrawables(drawableleft, null,
        TextToDrawable(R.string.bound), null);

把字符串转化为drawable:
[java] view plain copy
public Drawable TextToDrawable(int id) {
    Bitmap bitmap = Bitmap.createBitmap(200, 250, Config.ARGB_8888);
    Canvas canvas = new Canvas(bitmap);
    Paint paint = new Paint();
    paint.setTextSize(65);
    paint.setTextAlign(Align.LEFT);
    paint.setColor(Color.GRAY);
    String s = getResources().getString(id);
    FontMetrics fm = paint.getFontMetrics();
    canvas.drawText(s, 0, 145 + fm.top - fm.ascent, paint);
    canvas.save();
    Drawable drawableright = new BitmapDrawable(bitmap);
    drawableright.setBounds(0, 0, drawableright.getMinimumWidth(),
            drawableright.getMinimumHeight());
    return drawableright;
}
让listview在scrollview中自由滑动
http://blog.csdn.net/wanghao200906/article/details/51084975
mipmap和drawable文件夹的区别
定位不同
mipmap文件夹下的图标会通过Mipmap纹理技术进行优化。关于Mipmap纹理技术的介绍,请参考:Mipmap纹理技术简介
经过查询官方和第三方资料,得出结论:
mipmap文件夹下,仅仅建议放启动图标/app launcher icons,也就是应用安装后,会显示在桌面的那个图标。而其他的图片资源等,还是按照以前方式,放在drawable文件夹下。
下面再详细阐述下,得出以上结论的依据:
1.google官方关于mipmap和drawable的定位
drawable/
For bitmap files (PNG, JPEG, or GIF), 9-Patch image files, and XML files that describe Drawable shapes or Drawable objects that contain multiple states (normal, pressed, or focused). See the Drawable resource type.
mipmap/
For app launcher icons. The Android system retains the resources in this folder (and density-specific folders such as mipmap-xxxhdpi) regardless of the screen resolution of the device where your app is installed. This behavior allows launcher apps to pick the best resolution icon for your app to display on the home screen. For more information about using the mipmap folders, see Managing Launcher Icons as mipmap Resources.
2.stackoverflow上关于mipmap和drawable的区别
The mipmap folders are for placing your app icons in only. Any other drawable assets you use should be placed in the relevant drawable folders as before.
用法不同
以ic_launcher为例。
1.放在mipmap文件夹下时,引用方式如下:
android:icon="@mipmap/ic_launcher"
R.mipmap.ic_launcher
2.放在drawable文件夹下时,引用方式如下:
android:icon="@drawable/ic_launcher"
R.drawable.ic_launcher
参考
Mipmap纹理技术简介
mipmap vs drawable folders
google官方关于mipmap和drawable的定位
关于Android app首次安装完成后在安装界面直接“打开”应用再按home键返回桌面,重新进入app重复实例化launcher activity的问题的解决
http://blog.csdn.net/love100628/article/details/43238135
动化快速实现Parcelable接口序列化
http://blog.csdn.net/kroclin/article/details/40902721
二、效果展示
首先建好一个测试用的person实体类:
在线安装
然后打开File -> Settings -> Pugins -> Browse Repositories 如下,输入android parcelable code generator:
然后就可以安装了,安装好了之后重启下就可以用啦~~
使用方法:
新建好一个实体类后写好属性:
按下Alt+Insert,选择Palcelable,选择需要的属性,按下OK,搞定.
Android studio - SVN 使用教程
https://www.zhihu.com/question/32298079
http://ask.android-studio.org/?/article/97
http://ask.android-studio.org/?/question/10
https://my.oschina.net/fyyy/blog/519353
单例模式的一种写法
public class SingletonTest {

    private static final Singleton<SingletonTest> gDefault = new Singleton<SingletonTest>(){

        @Override
        protected SingletonTest create() {
            return new SingletonTest();
        }
    };

    private SingletonTest(){}
    public static SingletonTest getInstance(){
        return gDefault.get();
    }
}
虚拟键盘分辨率高度的获取
	/**
	 * 因虚拟键盘影响分辨率高度的正确
	 * @param cxt
	 * @return
	 */
	public static  int getRealDeviceHeight(Context cxt) {
		DisplayMetrics dm = new DisplayMetrics();
		WindowManager wm = (WindowManager) cxt.getSystemService(Context.WINDOW_SERVICE);

		if (Build.VERSION.SDK_INT >= Build.VERSION_CODES.JELLY_BEAN_MR1) {
			wm.getDefaultDisplay().getRealMetrics(dm);
			// 获取高度
			return dm.heightPixels;
		}else {
			return	wm.getDefaultDisplay().getHeight();
		}
	}
Gson实现 对象与Json的互相转换
以下均利用Gson来处理:
1.将bean转换成Json字符串:
public static String beanToJSONString(Object bean) {
		return new Gson().toJson(bean);
	}
2.将Json字符串转换成对象:
public static Object JSONToObject(String json,Class beanClass) {
		Gson gson = new Gson();
		Object res = gson.fromJson(json, beanClass);
		return res;
	}
注:转换后的对象使用前进行强转:例如bean bean1 = (bean)FormatUtil.JSONToObject(json, bean.class);
3.将Json字符串转换成JsonObject对象:
JsonObject returnData = new JsonParser().parse(jsonstr).getAsJsonObject();
4.将JsonArray类型的Json字符串解析成对象方法
    Gson gson = new Gson();
    JsonParser parser = new JsonParser();
    JsonArray Jarray = parser.parse(jstring).getAsJsonArray();

    ArrayList<channelSearchEnum> lcs = new ArrayList<channelSearchEnum>();

    for(JsonElement obj : Jarray ){
        channelSearchEnum cse = gson.fromJson( obj , channelSearchEnum.class);
        lcs.add(cse);
    }
或者
String json = "[{\"username\":\"test\"},{\"username\":\"test2\"}]";
System.out.println(new JsonParser().parse(json).getAsJsonArray().get(0).getAsJsonObject().get("username").getAsString());
5.获取JsonObject中指定key值对应的JsonArray对象:
String json= "{\"pids\":[\"1\",\"2\",\"3\"]}";
System.out.println(new JsonParser().parse(json).getAsJsonObject().getAsJsonArray("pids").get(0).getAsString());