版权声明:本文为博主原创文章,未经博主允许不得转载。 https://blog.csdn.net/Ghost_leader/article/details/53128583
1、DNS的基础知识
上网时本输入IP就可以了,但人们方便记忆的是字符串。所以,DNS就诞生了,DNS负责域名(字符串)到IP的转换
正向查询:最基本的通过主机名查IP
反向查询:用IP来查主机名
迭代查询:去查询dns时。服务器不直接告诉你答案。而是让你去找另一台主机去问答案
递归查询:去查询dns时,问的谁。谁就直接告诉你答案。
常常听别人说什么智能DNS。其实大概意思就是将同一个主机名解析到不同的服务器上以达到负载均衡的效果。
2.客户端的dns查询时的配置文件
/etc/hosts 默认优先查询这个
/etc/resolv.conf DNS写在这里面
/etc/nsswitch.conf 查询优先级的设在这里
3.BIND--伯克利因特网名字域名系统
这就是配置dns服务所需要的软件。可以直接使用yum安装
4.最专业的dns查询命令dig
[root@ns ~]# dig www.xupt.edu.cn

; <<>> DiG 9.9.4-RedHat-9.9.4-18.el7 <<>> www.xupt.edu.cn
;; global options: +cmd
;; Got answer:
;; ->>HEADER<<- opcode: QUERY, status: NOERROR, id: 33124
;; flags: qr rd ra; QUERY: 1, ANSWER: 1, AUTHORITY: 4, ADDITIONAL: 5

;; OPT PSEUDOSECTION:
; EDNS: version: 0, flags:; udp: 4096
;; QUESTION SECTION:
;www.xupt.edu.cn.		IN	A

;; ANSWER SECTION:
www.xupt.edu.cn.	86400	IN	A	222.24.19.47

;; AUTHORITY SECTION:
xupt.edu.cn.		172799	IN	NS	XYU04.xupt.edu.cn.
xupt.edu.cn.		172799	IN	NS	XYU03.xupt.edu.cn.
xupt.edu.cn.		172799	IN	NS	XYU02.xupt.edu.cn.
xupt.edu.cn.		172799	IN	NS	XYU01.xupt.edu.cn.

;; ADDITIONAL SECTION:
XYU04.xupt.edu.cn.	172799	IN	A	221.11.22.35
XYU02.xupt.edu.cn.	172799	IN	A	202.117.128.3
XYU01.xupt.edu.cn.	172799	IN	A	202.117.128.2
XYU03.xupt.edu.cn.	172799	IN	A	222.24.19.2

;; Query time: 1093 msec
;; SERVER: 192.168.1.234#53(192.168.1.234)
;; WHEN: Fri Nov 11 14:44:06 CST 2016
;; MSG SIZE  rcvd: 204
输出信息有这几个部分
1.QUESTION (问题)
2.ANSWER (回答)
3.AUTHORITY (验证)
一点一点来看。
;; ANSWER SECTION:
www.xupt.edu.cn.	86400	IN	A	222.24.19.47
;; AUTHORITY SECTION:
xupt.edu.cn.		172799	IN	NS	XYU04.xupt.edu.cn.
xupt.edu.cn.		172799	IN	NS	XYU03.xupt.edu.cn.
xupt.edu.cn.		172799	IN	NS	XYU02.xupt.edu.cn.
xupt.edu.cn.		172799	IN	NS	XYU01.xupt.edu.cn.
下个部分
;; ADDITIONAL SECTION:
XYU04.xupt.edu.cn.	172799	IN	A	221.11.22.35
XYU02.xupt.edu.cn.	172799	IN	A	202.117.128.3
XYU01.xupt.edu.cn.	172799	IN	A	202.117.128.2
XYU03.xupt.edu.cn.	172799	IN	A	222.24.19.2
这个部分就是说这次查询服务是那个DNS服务器提供的。(这个是我搭建的dns)
;; Query time: 1093 msec
;; SERVER: 192.168.1.234#53(192.168.1.234)
;; WHEN: Fri Nov 11 14:44:06 CST 2016
;; MSG SIZE  rcvd: 204
在开始dns服务器的配置前需要知道一些基本的概念。
www.xupt.edu.cn.
分为几个部分。
1 ."." 根域。就是个点. 。平时可以省略
2.cn 中国的国家域
3.edu这个域。
4.自己申请的域名 xupt。
5前面的www是主机名。也可以由news、ftp、mail多了去了。。 比如百度新闻的网站叫news.baidu.com.所以千万不要以为网站都是www开头的。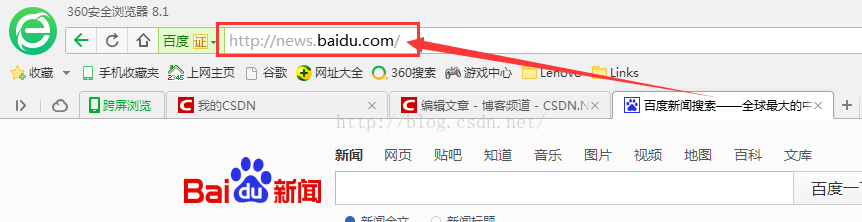
说了这么多。就是要引出一个概念zone。对。就是域。那上面的网站的域是什么呢。当然是 xupt.edu.cn.
那想要让别人访问www.xupt.edu.cn当然就需要在自己将要搭建DNS配置上xupt.edu.cn这个zone了。这样
才能向互联网上的朋友解析www.xupt.edu.cn。
一会的配置还有几个概念。那就hint (根域)。当你的DNS服务器为自己的客户提供查询服务时。就需要
查自己的缓存。但缓存当然是有限的。所以不知道的域名就需要问最顶级的根域。根域会告诉你。想要解
析这个域名你需要找谁。
还有个本地域
2.DNS服务器的搭建
1.相关软件的安装(提前搭建好yum源)
[root@www ~]# yum -y install bind-libs bind-utils bind bind-chroot
Loaded plugins: fastestmirror, langpacks
Loading mirror speeds from cached hostfile
 * base: mirrors.nwsuaf.edu.cn
 * extras: mirrors.nwsuaf.edu.cn
 * updates: mirrors.nwsuaf.edu.cn
Resolving Dependencies   ##后面的安装过程是自动的。所以我就省略了
来看看这几个包
[root@www ~]# rpm -qa |grep '^bind'
bind-9.9.4-29.el7_2.4.x86_64        ##bind主程序所需软件
bind-license-9.9.4-29.el7_2.4.noarch    ##认证相关的
bind-utils-9.9.4-29.el7_2.4.x86_64      ##客户端查找主机名的相关工具
bind-chroot-9.9.4-29.el7_2.4.x86_64     ##给named进程根切换,为了安全
bind-libs-9.9.4-29.el7_2.4.x86_64       ##bind所需的库文件
/etc/named.conf: 配置文件
/etc/sysconfig/named:由该文件控制是否启用chroot及额外参数
/var/named: 数据库默认放置位置
/var/run/named:named程序执行时默认将pid-file放置在此目录
/var/named/chroot/etc/named.conf
/var/named/chroot/var/named/ZONE_file
/var/named/chroot/var/run/named/PID_file
先打开/etc/named.conf看看。这里面是配置样板(只是样板,不能直接用。需要改!!)
options {
        listen-on port 53 { 127.0.0.1; };     ##监听那个主机53端口
        listen-on-v6 port 53 { ::1; };        ##ipv6版本的啦
        directory       "/var/named";         ##数据库默认放的位置
        dump-file       "/var/named/data/cache_dump.db";      ##一些统计信息
        statistics-file "/var/named/data/named_stats.txt";    ##
        memstatistics-file "/var/named/data/named_mem_stats.txt";
        allow-query     { localhost; };    ##允许谁查询,设置时当然需要将这句删掉。允许谁都可以查询
        recursion yes;    ##允许谁递归。只为内网用户递归就好了。要是给谁都递归会累死服务器的


        dnssec-enable yes;    ##
        dnssec-validation yes;


        /* Path to ISC DLV key */
        bindkeys-file "/etc/named.iscdlv.key";


        managed-keys-directory "/var/named/dynamic";

        pid-file "/run/named/named.pid";
        session-keyfile "/run/named/session.key";
};


logging {
        channel default_debug {
                file "data/named.run";
                severity dynamic;
        };
};


zone "." IN {      ##根域的zone
        type hint;
        file "named.ca";         ##文件放的位置
};


include "/etc/named.rfc1912.zones";      ##还有内容在这两个文件中
include "/etc/named.root.key";
2.开始修改配置文件
options {
        listen-on port 53 { 192.168.1.192; };
        directory       "/var/named";
        dump-file       "/var/named/data/cache_dump.db";
        statistics-file "/var/named/data/named_stats.txt";
        memstatistics-file "/var/named/data/named_mem_stats.txt";
        allow-query     { any; };
        allow-recursion { 192.168.1.0/24; };
        blackhole { 192.168.1.234};
};


zone "." IN {
        type hint;
        file "named.ca";
};

zone "localhost" IN {
        type master;
        file "named.localhost";
        allow-transfer { none; };
};

zone "0.0.127.in-addr.arpa" IN {
        type master;
        file "named.loopback";
        allow-transfer { none; };
};
zone "double2.com" IN {
type master;
file "double2.com.zone";
allow-transfer { 192.168.1.192; };
};
zone "1.168.192.in-addr.arpa" IN {
type master;
file "192.168.1.zone";
allow-transfer { 192.168.1.192; };
};
可以用 named-checkconf 检查配置文件是否出错。
[root@www ~]# named-checkconf
/etc/named.conf:9: missing ';' before '}'
好了。再配置数据库文件(在/var/named下)
创建一个文件。权限都改成和named.ca一样。看看权限
[root@www named]# ll -Z named.ca
-rw-r-----. root named system_u:object_r:named_conf_t:s0 named.ca
$TTL 600
double2.com.    IN      SOA     ns.double2.com. admin.double2.com. (
                                2016110101
                                1H
                                5M
                                2D
                                6H )

                      NS      ns1
ns1                   A       192.168.1.192
                      MX   5  mail
mail                  A       192.168.1.239
www                   A       192.168.1.222
www                   A       192.168.1.192
ftp                   CNAME   www
[root@www named]# chmod 640 double2.com.zone
[root@www named]# chgrp named double2.com.zone
使用命令named-checkzone "double2.com." /var/named/double2.com.zone检查是否有语法错误
[root@www named]# named-checkzone "double2.com." /var/named/double2.com.zone
zone double2.com/IN: loaded serial 2016110101
OK
再写反解的zone数据库文件
[root@www named]# vim 192.168.1.zone
[root@www named]# chmod 640 192.168.1.zone
[root@www named]# chgrp named 192.168.1.zone
内容:
$TTL 600
@               IN      SOA     ns.double2.com. admin.double2.com. (
                                2016110101
                                1H
                                5M
                                2D
                                6H )

@               IN      NS      ns1.double2.com.
@               IN      MX   5  mail.double2.com.
234             IN      PTR     ns1.double2.com.
239             IN      PTR     mail.double2.com.
222             IN      PTR     www.double2.com.
192             IN      PTR     www.double2.com.
[root@www named]# named-checkzone "192.168.1.zone" /var/named/192.168.1.zone
zone 192.168.1.zone/IN: 192.168.1.zone/MX 'mail.double2.com' (out of zone) has no addresses records (A or AAAA)
zone 192.168.1.zone/IN: loaded serial 2016110101
OK
3.开启dns服务
[root@www named]# systemctl start named
[root@www named]# systemctl status named
● named.service - Berkeley Internet Name Domain (DNS)
   Loaded: loaded (/usr/lib/systemd/system/named.service; disabled; vendor preset: disabled)
   Active: active (running) since Fri 2016-11-11 16:43:50 CST; 5s ago
  Process: 21291 ExecStart=/usr/sbin/named -u named $OPTIONS (code=exited, status=0/SUCCESS)
  Process: 21288 ExecStartPre=/bin/bash -c if [ ! "$DISABLE_ZONE_CHECKING" == "yes" ]; then /usr/sbin/named-checkconf -z /etc/named.conf; else echo "Checking of zone files is disabled"; fi (code=exited, status=0/SUCCESS)
 Main PID: 21294 (named)
   CGroup: /system.slice/named.service
           └─21294 /usr/sbin/named -u named

Nov 11 16:43:50 www named[21294]: managed-keys-zone: loaded serial 0
Nov 11 16:43:50 www named[21294]: zone 0.0.127.in-addr.arpa/IN: loaded serial 0
Nov 11 16:43:50 www named[21294]: zone 1.168.192.in-addr.arpa/IN: loaded serial 2016110101
Nov 11 16:43:50 www named[21294]: zone localhost/IN: loaded serial 0
Nov 11 16:43:50 www named[21294]: zone double2.com/IN: loaded serial 2016110101
Nov 11 16:43:50 www named[21294]: all zones loaded
Nov 11 16:43:50 www named[21294]: running
Nov 11 16:43:50 www named[21294]: zone double2.com/IN: sending notifies (serial 2016110101)
Nov 11 16:43:50 www named[21294]: zone 1.168.192.in-addr.arpa/IN: sending notifies (serial 2016110101)
Nov 11 16:43:50 www systemd[1]: Started Berkeley Internet Name Domain (DNS).
用自己配置的dns服务器查询一下。依旧使用强大的dig
[root@www named]# dig www.double2.com @192.168.1.192

; <<>> DiG 9.9.4-RedHat-9.9.4-29.el7_2.4 <<>> www.double2.com @192.168.1.192
;; global options: +cmd
;; Got answer:
;; ->>HEADER<<- opcode: QUERY, status: NOERROR, id: 65459
;; flags: qr aa rd ra; QUERY: 1, ANSWER: 2, AUTHORITY: 2, ADDITIONAL: 3

;; OPT PSEUDOSECTION:
; EDNS: version: 0, flags:; udp: 4096
;; QUESTION SECTION:
;www.double2.com.		IN	A

;; ANSWER SECTION:
www.double2.com.	600	IN	A	192.168.1.192
www.double2.com.	600	IN	A	192.168.1.222

;; AUTHORITY SECTION:
double2.com.		600	IN	NS	ns1.double2.com.
double2.com.		600	IN	NS	ns2.double2.com.

;; ADDITIONAL SECTION:
ns1.double2.com.	600	IN	A	192.168.1.234
ns2.double2.com.	600	IN	A	192.168.1.192

;; Query time: 1 msec
;; SERVER: 192.168.1.192#53(192.168.1.192)
;; WHEN: Fri Nov 11 16:45:22 CST 2016
;; MSG SIZE  rcvd: 144
查出来了
下来再说一下主从dns
从dns服务器会一直去从主dns同步数据。
只要在主dns服务器那里写上这句
allow-transfer { 192.168.1.192; };
192这台主机现在是从。234这台主机是主
将192这台主机的/etc/named.conf中的这段改成这样。其他的和234的配置文件内容一样
zone "double2.com" IN {
        type slave;
        file "slaves/double2.com.zone";
        masters { 192.168.1.234; };
        allow-transfer { none; };
};


zone "1.168.192.in-addr.arpa" IN {
        type slave;
        file "slaves/192.168.1.zone";
        masters { 192.168.1.234; };
        allow-transfer { none; };
};
注意。两边都关闭一下防火墙。
之后会在slaves 下发现同步过来的数据
[root@www slaves]# ls
192.168.1.zone  double2.com.zone
4.允许其他主机管理dns服务(rndc)
[root@www slaves]# rndc-confgen |tee /etc/rndc.conf
# Start of rndc.conf
key "rndc-key" {
	algorithm hmac-md5;
	secret "QAoyGs28T9V++cROXrO9xQ==";
};

options {
	default-key "rndc-key";
	default-server 127.0.0.1;
	default-port 953;
};
# End of rndc.conf

# Use with the following in named.conf, adjusting the allow list as needed:
# key "rndc-key" {
# 	algorithm hmac-md5;
# 	secret "QAoyGs28T9V++cROXrO9xQ==";
# };
#
# controls {
# 	inet 127.0.0.1 port 953
# 		allow { 127.0.0.1; } keys { "rndc-key"; };
# };
# End of named.conf
输入如下命令。将下面的文件写入主dns服务器的配置文件
key "rndc-key" {
        algorithm hmac-md5;
        secret "/S2bPHkqXDX12ttgwTlN1A==";
};
controls {
        inet 192.168.1.234 port 953
        allow { 192.168.1.192; } keys { "rndc-key"; };
};
192主机的/etc/rndc配置文件写入如下
key "rndc-key" {
        algorithm hmac-md5;
        secret "/S2bPHkqXDX12ttgwTlN1A==";
};

options {
        default-key "rndc-key";
        default-server 192.168.1.234;
        default-port 953;
};
好了。可以远程控制234那台主机的dns了。使用rndc命令
[root@www slaves]# rndc -c /etc/rndc.conf status
version: 9.9.4-RedHat-9.9.4-18.el7 <id:8f9657aa>
CPUs found: 2
worker threads: 2
UDP listeners per interface: 2
number of zones: 102
debug level: 0
xfers running: 0
xfers deferred: 0
soa queries in progress: 0
query logging is OFF
recursive clients: 0/0/1000
tcp clients: 0/100
server is up and running
rndc命令很强大的
ww slaves]# rndc -h
Usage: rndc [-b address] [-c config] [-s server] [-p port]
	[-k key-file ] [-y key] [-V] command

command is one of the following:

  reload	Reload configuration file and zones.
  reload zone [class [view]]
		Reload a single zone.
  refresh zone [class [view]]
		Schedule immediate maintenance for a zone.
  retransfer zone [class [view]]
		Retransfer a single zone without checking serial number.
  freeze	Suspend updates to all dynamic zones.
  freeze zone [class [view]]
		Suspend updates to a dynamic zone.
  thaw		Enable updates to all dynamic zones and reload them.
  thaw zone [class [view]]
		Enable updates to a frozen dynamic zone and reload it.
  sync [-clean]	Dump changes to all dynamic zones to disk, and optionally
		remove their journal files.
  sync [-clean] zone [class [view]]
		Dump a single zone's changes to disk, and optionally
		remove its journal file.
  notify zone [class [view]]
		Resend NOTIFY messages for the zone.
  reconfig	Reload configuration file and new zones only.
  sign zone [class [view]]
		Update zone keys, and sign as needed.
  loadkeys zone [class [view]]
		Update keys without signing immediately.
  stats		Write server statistics to the statistics file.
  querylog newstate
		Enable / disable query logging.
  dumpdb [-all|-cache|-zones] [view ...]
		Dump cache(s) to the dump file (named_dump.db).
  secroots [view ...]
		Write security roots to the secroots file.
  stop		Save pending updates to master files and stop the server.
  stop -p	Save pending updates to master files and stop the server
		reporting process id.
  halt		Stop the server without saving pending updates.
  halt -p	Stop the server without saving pending updates reporting
		process id.
  trace		Increment debugging level by one.
  trace level	Change the debugging level.
  notrace	Set debugging level to 0.
  flush 	Flushes all of the server's caches.
  flush [view]	Flushes the server's cache for a view.
  flushname name [view]
		Flush the given name from the server's cache(s)
  flushtree name [view]
		Flush all names under the given name from the server's cache(s)
  status	Display status of the server.
  recursing	Dump the queries that are currently recursing (named.recursing)
  tsig-list	List all currently active TSIG keys, including both statically
		configured and TKEY-negotiated keys.
  tsig-delete keyname [view]
		Delete a TKEY-negotiated TSIG key.
  validation newstate [view]
		Enable / disable DNSSEC validation.
  addzone ["file"] zone [class [view]] { zone-options }
		Add zone to given view. Requires new-zone-file option.
  delzone ["file"] zone [class [view]]
		Removes zone from given view. Requires new-zone-file option.
  signing -list zone [class [view]]
		List the private records showing the state of DNSSEC
		signing in the given zone.
  signing -clear <keyid>/<algorithm> zone [class [view]]
		Remove the private record that indicating the given key
		has finished signing the given zone.
  signing -clear all zone [class [view]]
		Remove the private records for all keys that have
		finished signing the given zone.
  signing -nsec3param none zone [class [view]]
		Remove NSEC3 chains from zone.
  signing -nsec3param hash flags iterations salt zone [class [view]]
		Add NSEC3 chain to zone if already signed.
		Prime zone with NSEC3 chain if not yet signed.
  *restart	Restart the server.

* == not yet implemented
Version: 9.9.4-RedHat-9.9.4-29.el7_2.4