RabbitMQ
总来来说,RabbitMQ的安装还是有一些难度的。不同的方式,安装的方法也是完全不一样,还要解决蛮多依赖。加上现在有些网站,极其不负责,很多博文都没有经过测试检验就直接发出来的。楼主来亲测一下,希望能对大家有好的帮助。
一、安装前的准备
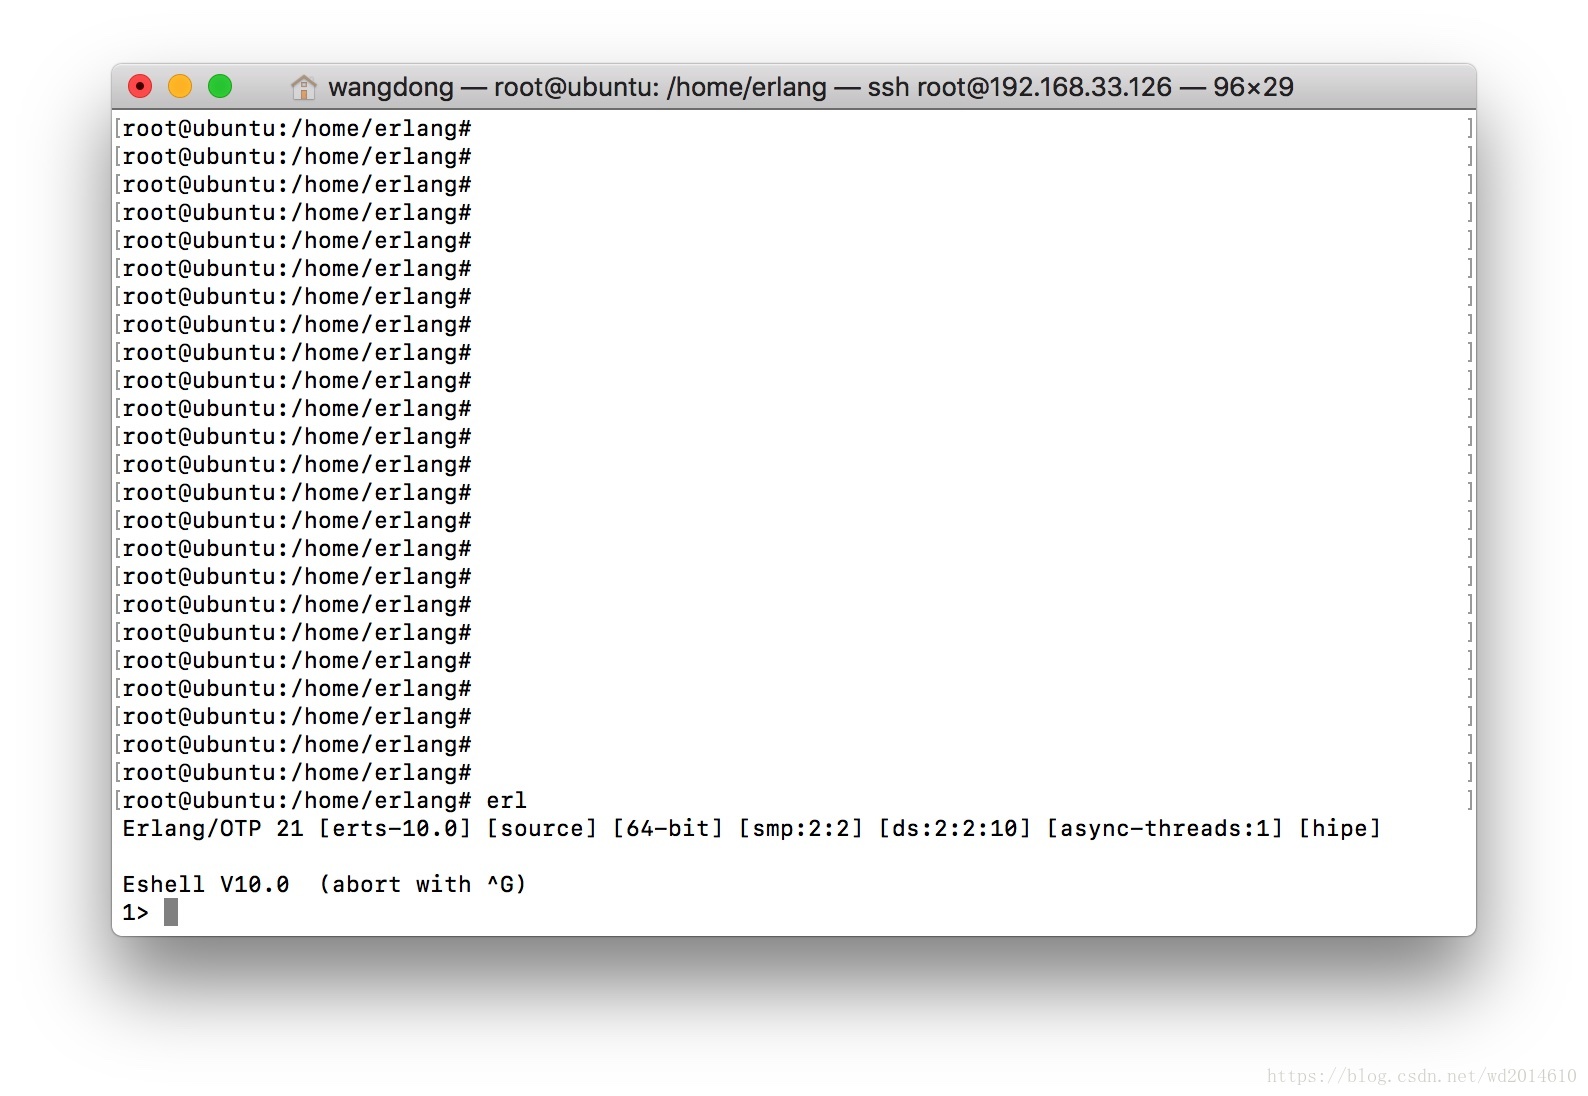
要确保,你有Erlang的环境。
楼主亲测安装Erlang
二、安装RabbitMQ
1、添加 apt repository仓库
推荐通过apt repository的方式安装。不然你需要自己去解决蛮多依赖的问题
To add the apt repository to the source list directory (/etc/apt/sources.list.d), use:
So, on Ubuntu 18.04 the above command becomes:
echo "deb https://dl.bintray.com/rabbitmq/debian bionic main" | sudo tee /etc/apt/sources.list.d/bintray.rabbitmq.listand on Ubuntu 16.04 it would be:
echo "deb https://dl.bintray.com/rabbitmq/debian xenial main" | sudo tee /etc/apt/sources.list.d/bintray.rabbitmq.list2、添加Signing Key
In order to use the repository, add a key used to sign RabbitMQ releases to apt-key:
wget -O - 'https://dl.bintray.com/rabbitmq/Keys/rabbitmq-release-signing-key.asc' | sudo apt-key add -3、更新下系统库
Run the following command to update the package list:
sudo apt-get update4、安装rabbitmq-server
sudo apt-get install rabbitmq-server过程会让你输入y同意就好。
不报错就OK了
三、启动RabbitMQ
1、启动命令:
service rabbitmq-server start2、查看RabbitMQ的状态
service rabbitmq-server status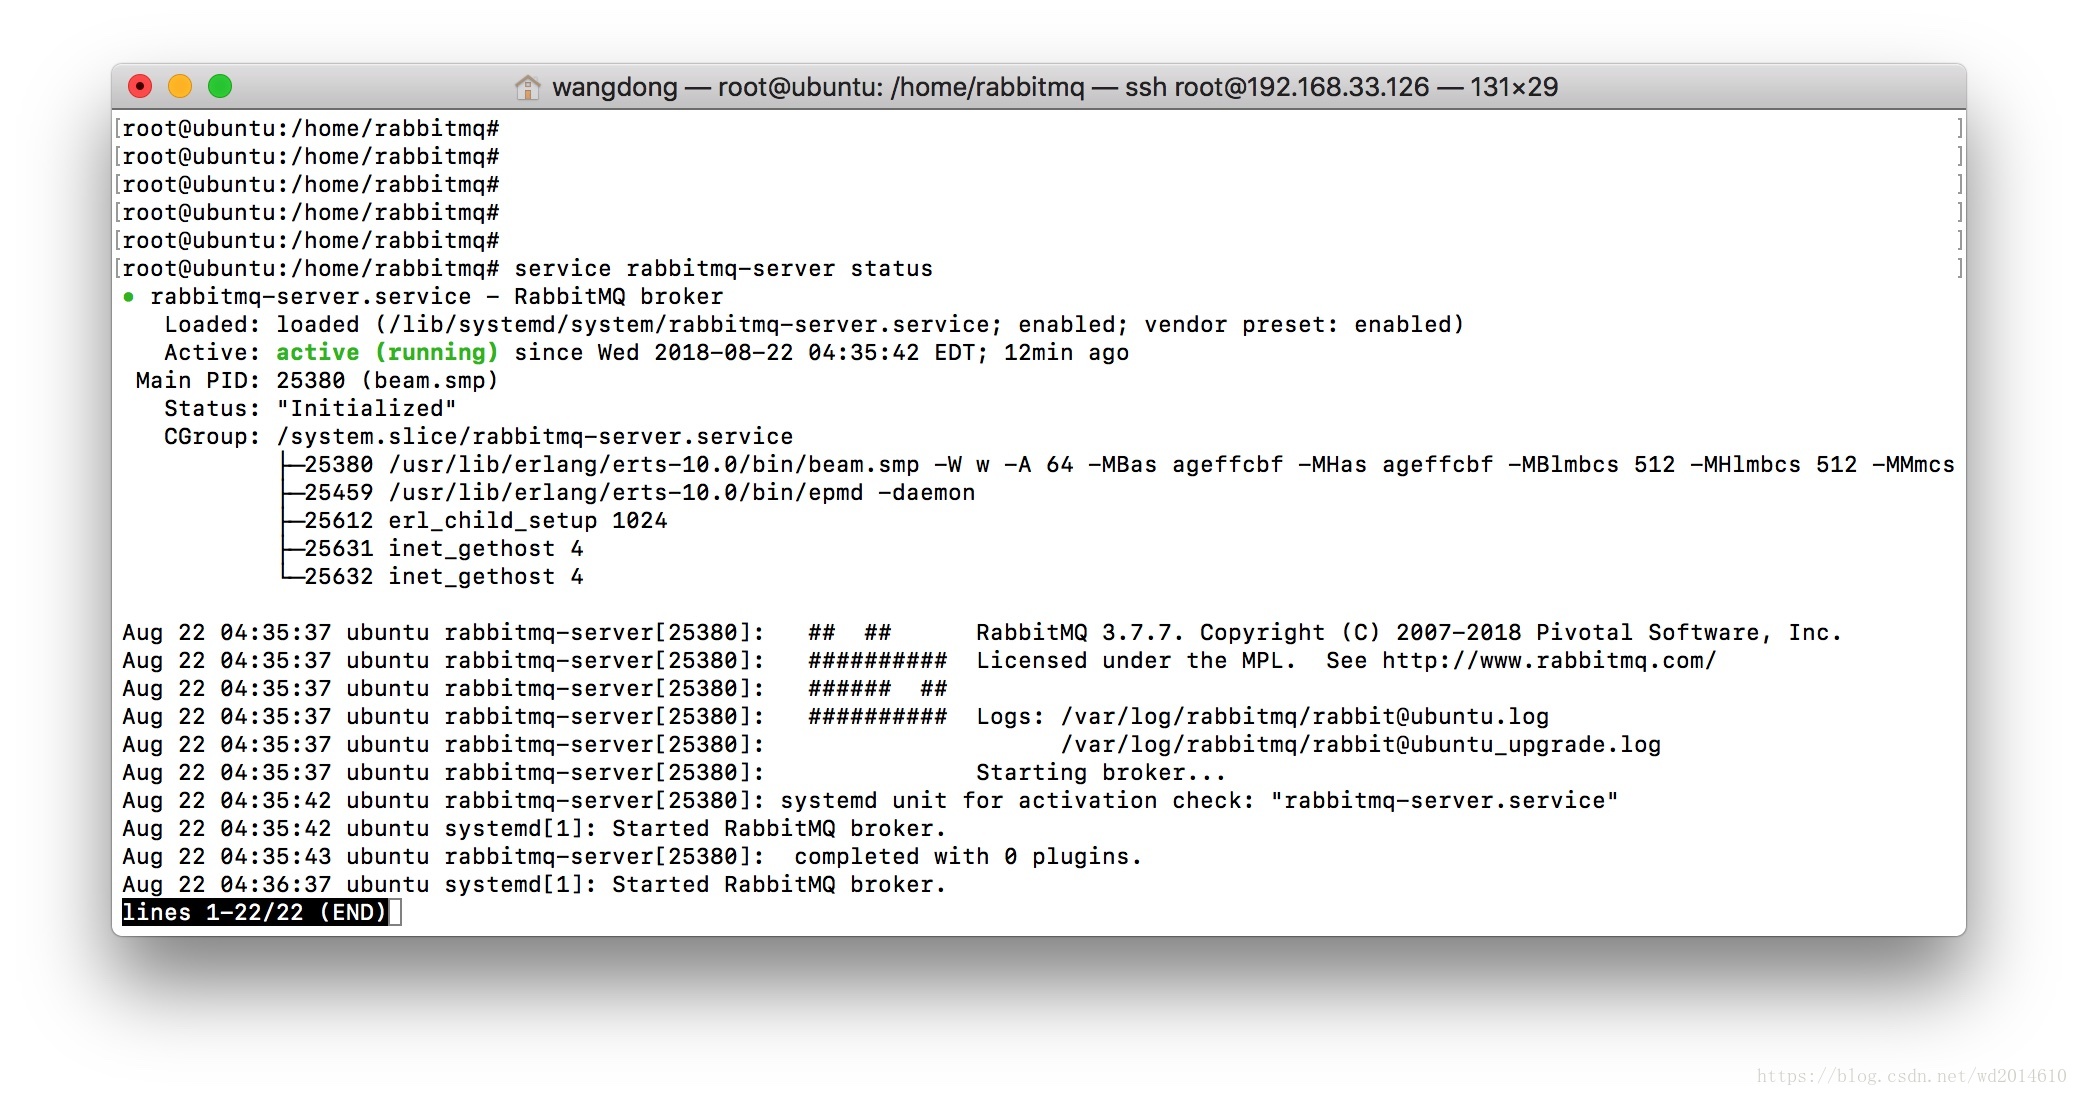
四、Web页面管理RabbitMQ
1、开启页面管理
rabbitmq既可以命令行操作,也可以用rabbitmq自带的web管理界面,只需要启动插件便可以使用。
rabbitmq-plugins enable rabbitmq_management结果如下
root@ubuntu:/home/rabbitmq# rabbitmq-plugins enable rabbitmq_management
warning: the VM is running with native name encoding of latin1 which may cause Elixir to malfunction as it expects utf8. Please ensure your locale is set to UTF-8 (which can be verified by running "locale" in your shell)
The following plugins have been configured:
  rabbitmq_management
  rabbitmq_management_agent
  rabbitmq_web_dispatch
Applying plugin configuration to rabbit@ubuntu...
The following plugins have been enabled:
  rabbitmq_management
  rabbitmq_management_agent
  rabbitmq_web_dispatch

started 3 plugins.
root@ubuntu:/home/rabbitmq#
2、登陆页面
然后通过浏览器访问,如果是本机则可以输入http://127.0.0.1:15672打开登录界面,输入用户名和密码访问web管理界面了。默认用户名guest密码guest。
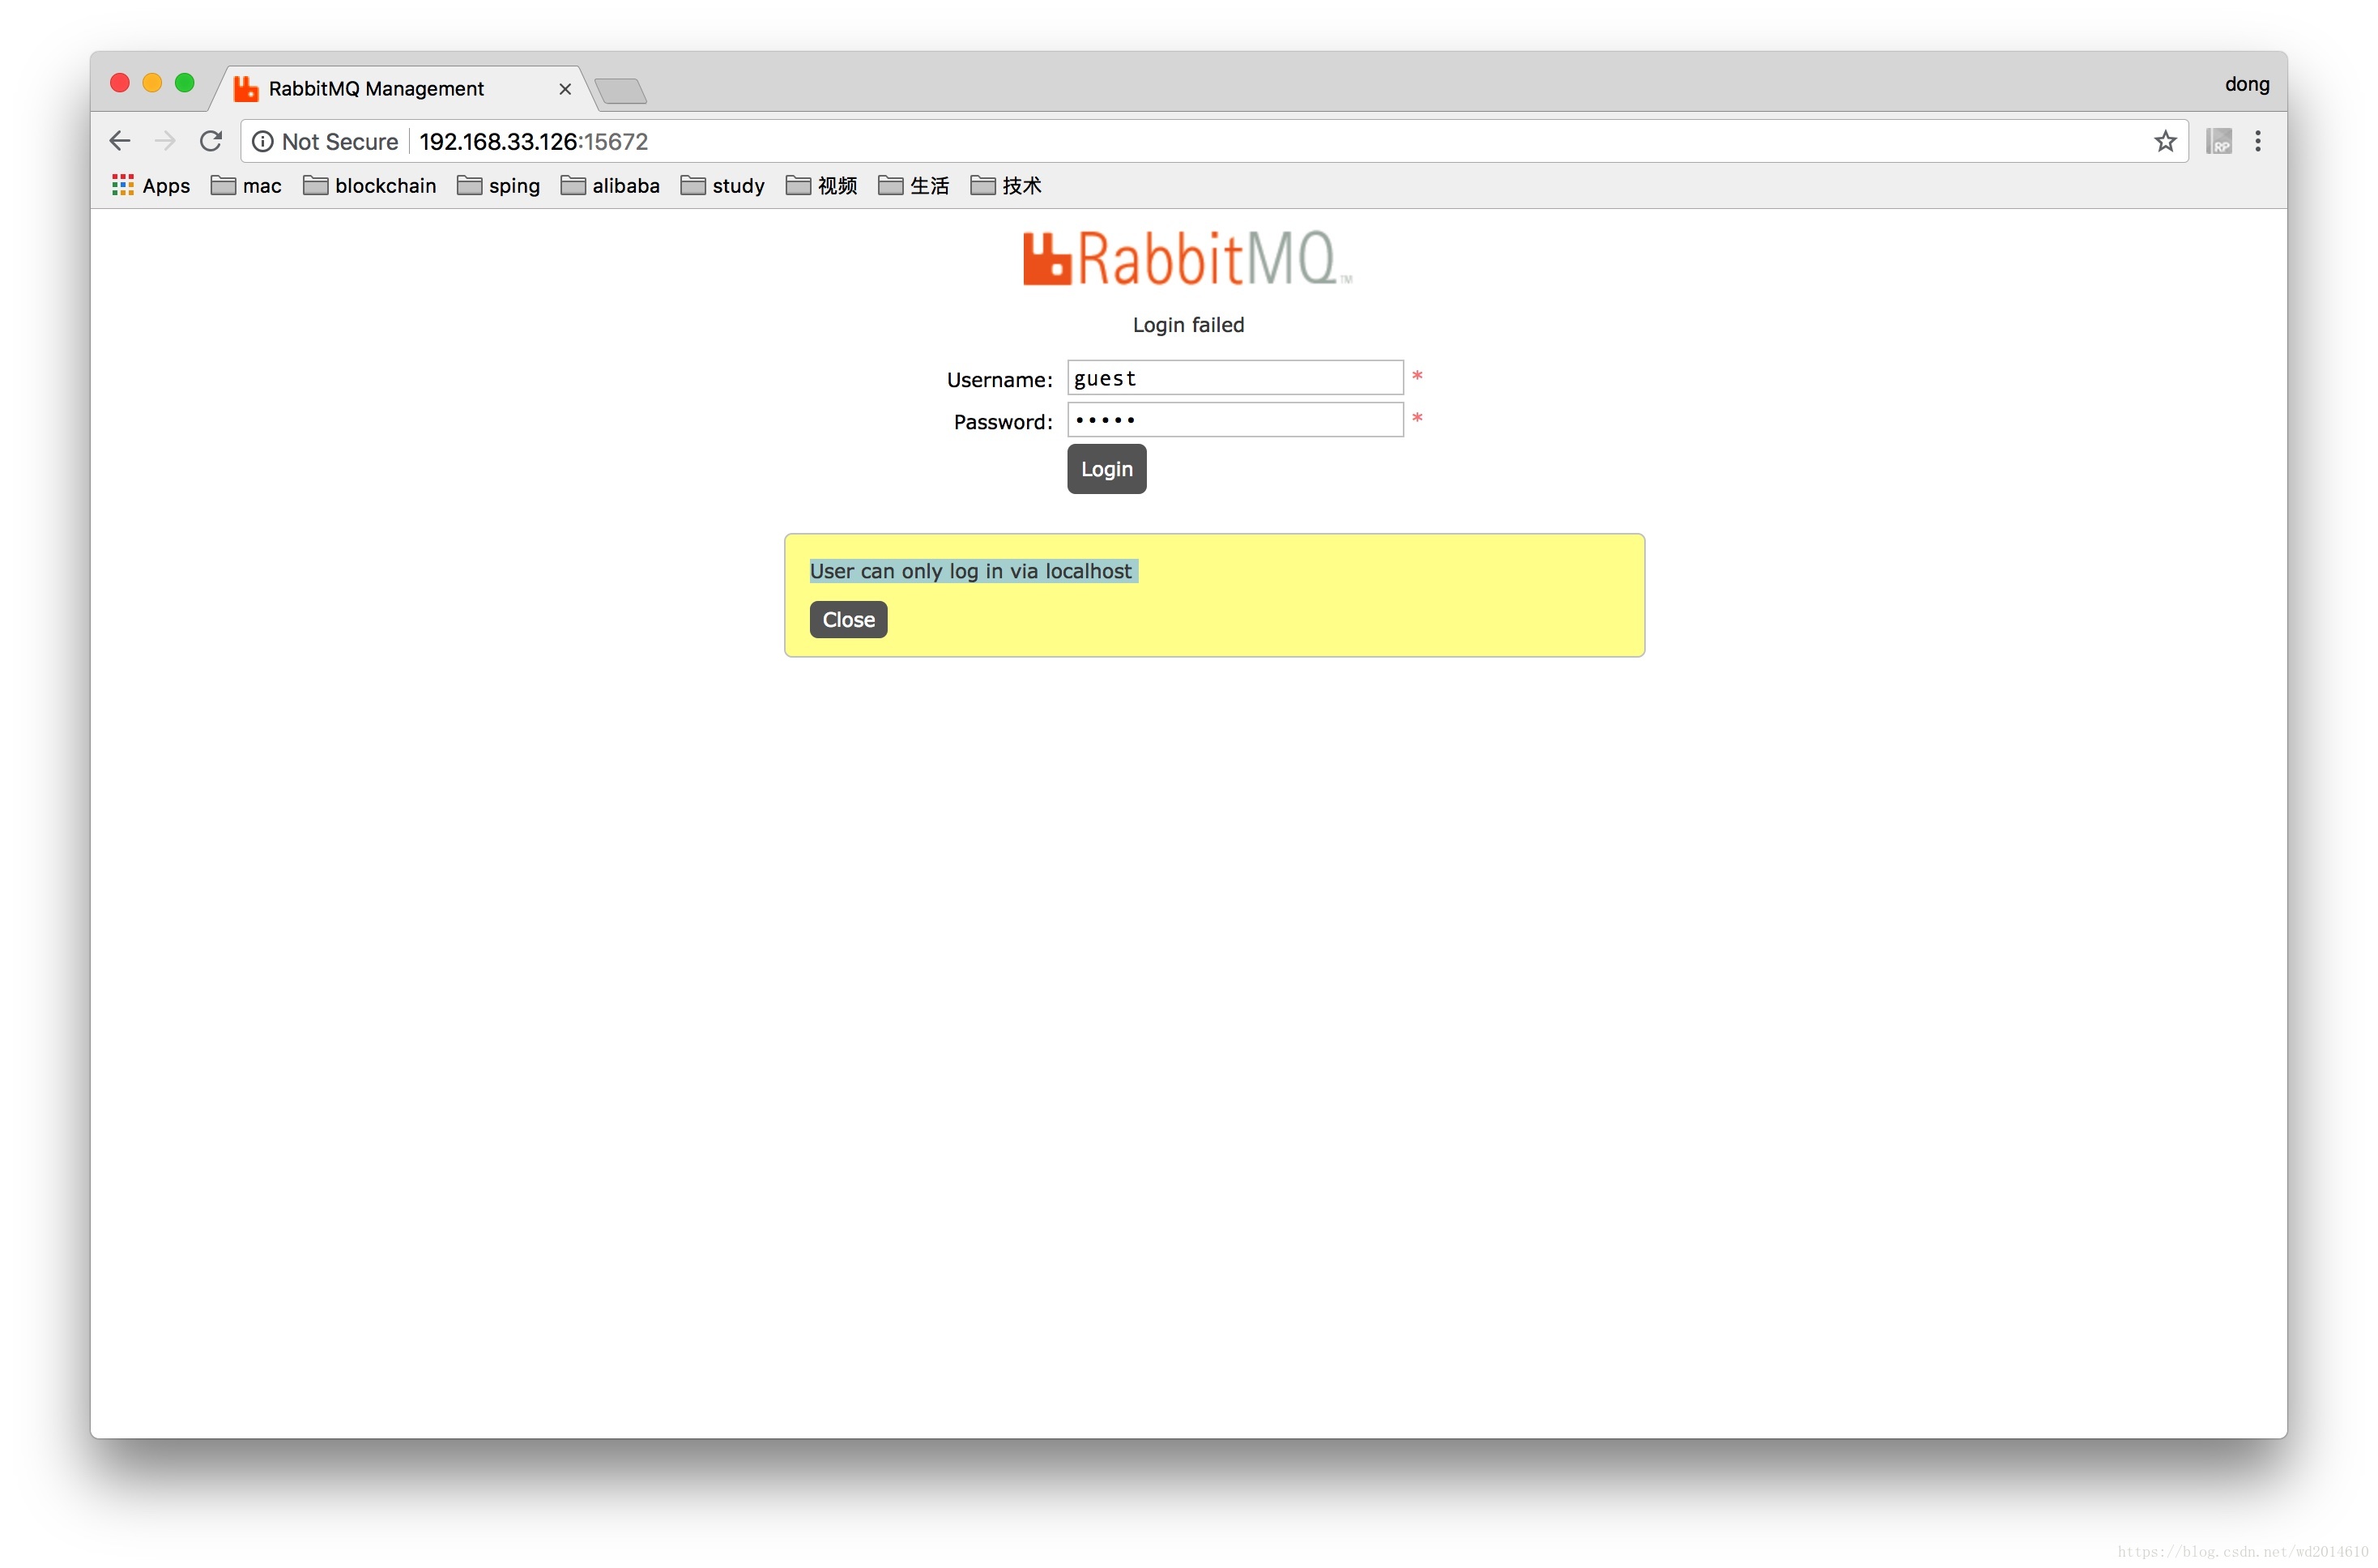
我这是远程的,就登陆不了。会报:User can only log in via localhost
3、解决User can only log in via localhost
- 你需要先停止
rabbitmq
service rabbitmq-server stop- 这个时候,需要编辑
/etc/rabbitmq/rabbitmq.config文件
本来是没有这个文件的。
你在执行下面的vi编辑命令的时候
vi /etc/rabbitmq/rabbitmq.config会自动创建,你将下面的这个配置复制进去。
[
{rabbit, [{tcp_listeners, [5672]}, {loopback_users, ["admin"]}]}
].- 启动RabbitMQ,开启web访问
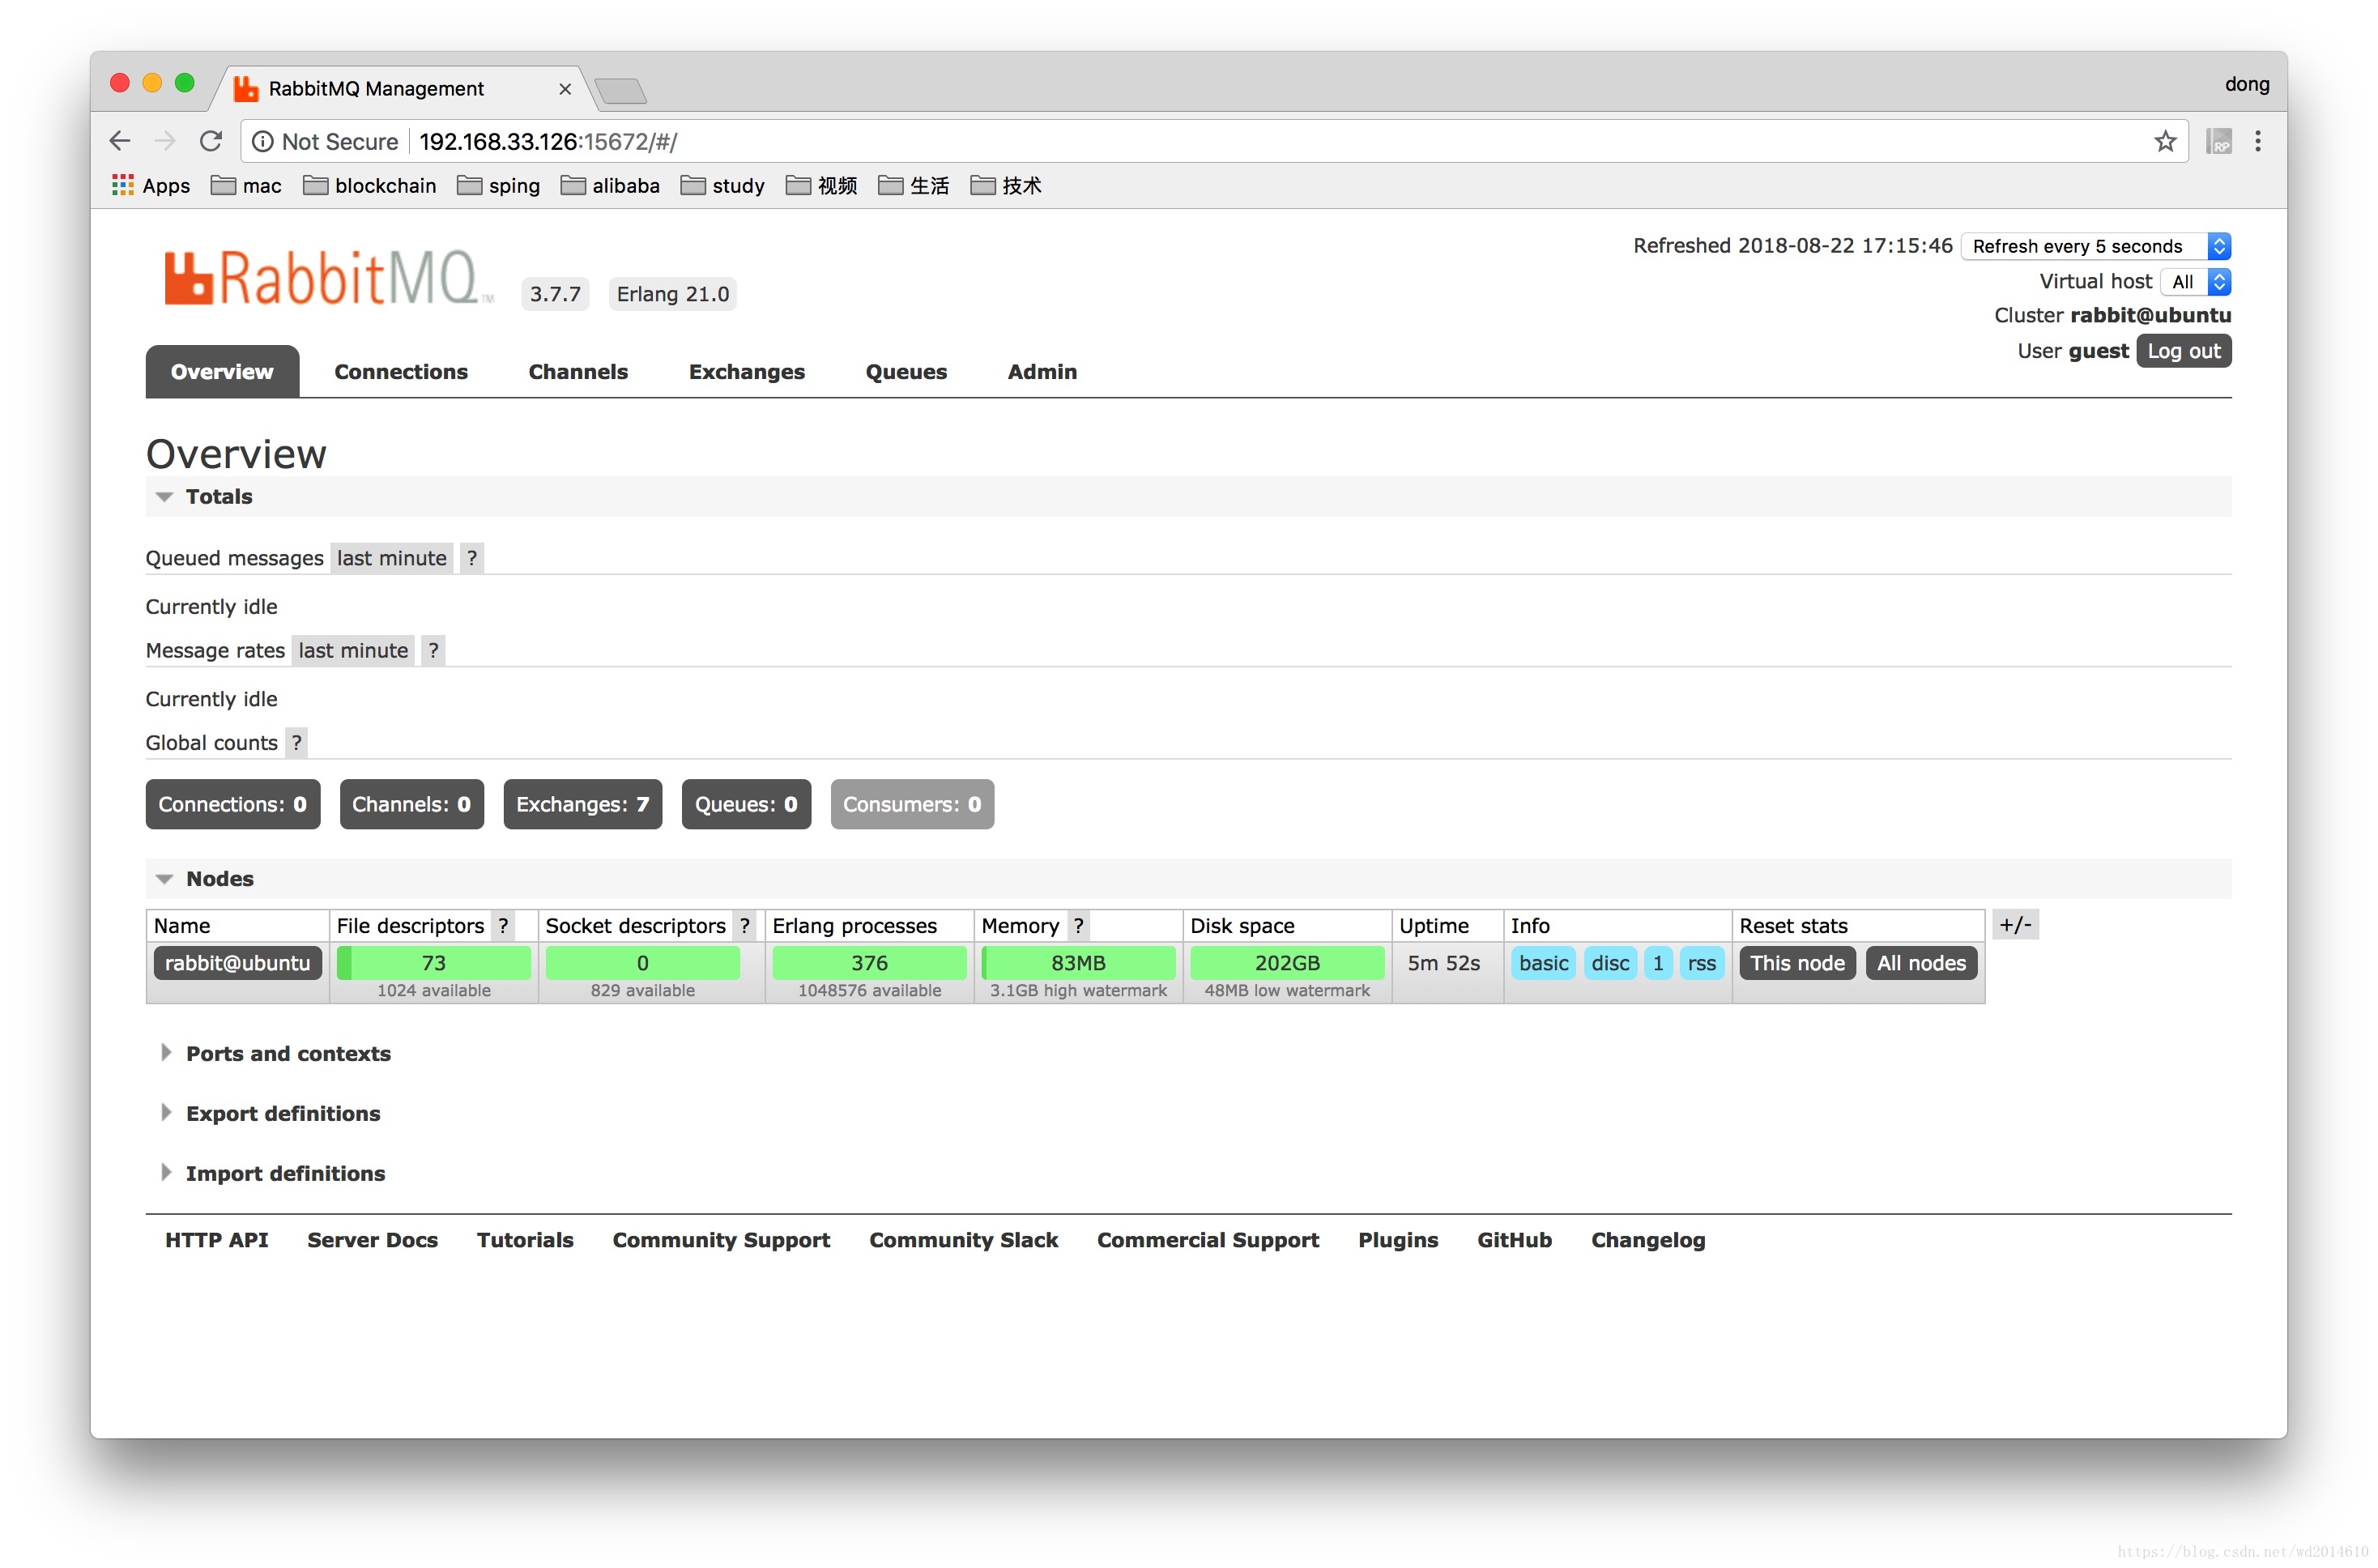
service rabbitmq-server startrabbitmq-plugins enable rabbitmq_management- 你再登陆,就可以远程登陆啦。
五、关于RabbitMQ的配置和端口问题
1、配置
一般使用默认配置就好了,具体配置可参考官方配置说明。
Rabbit官方配置说明
2、端口
默认的一些重要端口:
4369 – erlang发现口
5672 –client端通信口
15672 – 管理界面ui端口
25672 – server间内部通信口
其他端口请参考官方文档:端口说明
以下为rabbitmq的默认端口,如果这些端口被其他程序占用,rabbitmq就会出错。
4369: epmd, a peer discovery service used by RabbitMQ nodes and CLI tools
5672, 5671: used by AMQP 0-9-1 and 1.0 clients without and with TLS
25672: used for inter-node and CLI tools communication (Erlang distribution server port) and is allocated from a dynamic range (limited to a single port by default, computed as AMQP port + 20000). See networking guide for details.
35672-35682: used by CLI tools (Erlang distribution client ports) for communication with nodes and is allocated from a dynamic range (computed as Erlang dist port + 10000 through dist port + 10010). See networking guide for details.
15672: HTTP API clients and rabbitmqadmin (only if the management plugin is enabled)
61613, 61614: STOMP clients without and with TLS (only if the STOMP plugin is enabled)
1883, 8883: (MQTT clients without and with TLS, if the MQTT plugin is enabled
15674: STOMP-over-WebSockets clients (only if the Web STOMP plugin is enabled)
15675: MQTT-over-WebSockets clients (only if the Web MQTT plugin is enabled)
运行sudo netstat -tlnpe命令可以看到rabbitmq默认的监听端口。
root@ubuntu:~# netstat -tlnpe
Active Internet connections (only servers)
Proto Recv-Q Send-Q Local Address           Foreign Address         State       User       Inode       PID/Program name
tcp        0      0 0.0.0.0:22              0.0.0.0:*               LISTEN      0          16278       1007/sshd
tcp        0      0 0.0.0.0:15672           0.0.0.0:*               LISTEN      112        184136      27132/beam.smp
tcp        0      0 0.0.0.0:25672           0.0.0.0:*               LISTEN      112        184091      27132/beam.smp
tcp        0      0 0.0.0.0:4369            0.0.0.0:*               LISTEN      112        184041      27223/epmd
tcp6       0      0 :::22                   :::*                    LISTEN      0          16280       1007/sshd
tcp6       0      0 :::5672                 :::*                    LISTEN      112        184123      27132/beam.smp
tcp6       0      0 :::4369                 :::*                    LISTEN      112        184042      27223/epmd
root@ubuntu:~#
因为上面运行了sudo rabbitmq-plugins enable rabbitmq_management,所以这里可以看到15672这个端口。
如果相冲突的话,可以参考官网文档端口修改文档修改或者杀掉占用端口配置的文件。
六、RabbitMQ常用的一些命令
sudo chkconfig rabbitmq-server on #添加开机启动(chkconfig一般只有redhat系统有)RabbitMQ服务
sudo service rabbitmq-server start # 启动服务
sudo service rabbitmq-server status # 查看服务状态
sudo service rabbitmq-server stop # 停止服务
sudo rabbitmqctl stop # 停止服务
sudo rabbitmqctl status # 查看服务状态
sudo rabbitmqctl list_users # 查看当前所有用户
sudo rabbitmqctl list_user_permissions guest # 查看默认guest用户的权限
sudo rabbitmqctl delete_user guest# 删掉默认用户(由于RabbitMQ默认的账号用户名和密码都是guest。为了安全起见, 可以删掉默认用户)
sudo rabbitmqctl add_user username password # 添加新用户
sudo rabbitmqctl set_user_tags username administrator# 设置用户tag
sudo rabbitmqctl set_permissions -p / username “.” “.” “.*” # 赋予用户默认vhost的全部操作权限
sudo rabbitmqctl list_user_permissions username # 查看用户的权限
好啦,接下来就祝大家都能够工作和学习顺利啦。