转自https://www.cnblogs.com/lovelinux199075/p/9062345.html
正向代理:代理服务器帮助客户端(浏览器)实现互联网的访问
(1)代理服务器配置
1.安装squid
yum install squid -y 2.编辑squid配置文件
#vim /etc/squid/squid.conf
acl local src 192.9.191.0/24 //允许192.9.191.0/24网段内所有客户机访问代理服务器
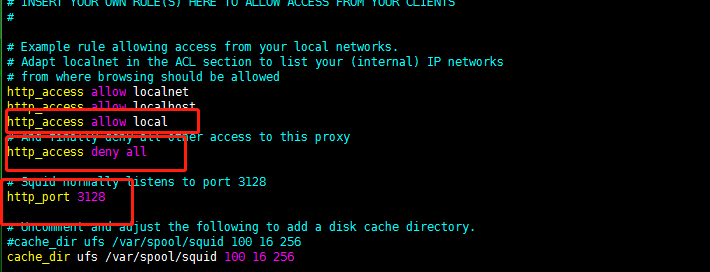
http_access allow localnet //该记录一定要添在deny all之前
http_port 3128 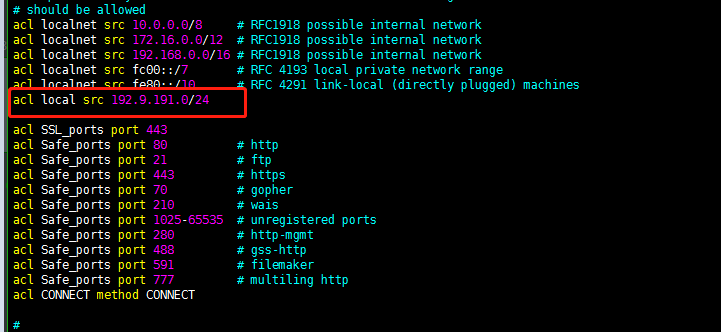
3.防火墙配置
systemctl stop firewald.service
systemctl disable firewald.service
yum install iptables-services iptables-devel -y
systemctl enable iptables.service
systemctl start iptables.service
iptables -I INPUT 1 -s 192.9.191.0/24 -p tcp --dport 3128 -j ACCEPT
iptables -I INPUT  2 -p tcp --dport 3128 -j DROP
4.启动squid服务
systemctl start squid
systemctl enable squid
(2)linux客户端配置
1.linux客户端配置正向代理
export http_proxy=http://192.9.191.30:3128          \\192.9.191.30是代理服务器ip
export https_proxy=http://192.9.191.30:3128
echo "export http_proxy=http://192.9.191.30:3128" >>/etc/profile
echo "export https_proxy=http://192.9.191.30:3128" >>/etc/profile
2.测试http
wget http://www.cmake.org/files/v3.3/cmake-3.3.1.tar.gz3.代理服务器上查看日志/var/log/squid/access.log
4.测试https
wget https://codeload.github.com/gflags/gflags/tar.gz/v2.1.25.在代理服务器上查看日志/var/log/squid/access.log
(3)windows客户端设置,以搜狗浏览器演示
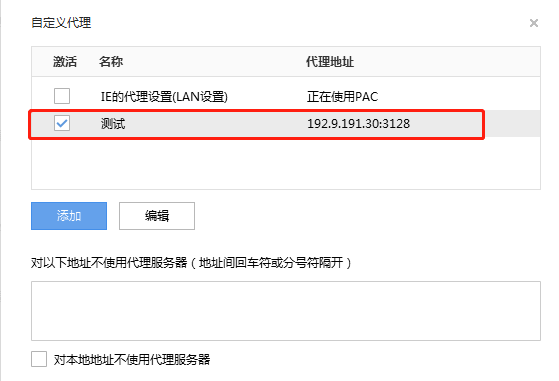
测试http和https查看日志
