Flask介绍
Flask 是一个轻量级的 web 开发框架, 使用 Python 开发, 上手简单。
安装 Flask
pip install Flask
第一个 Flask 程序
1、编写 app.py 文件内容如下:
#encoding: utf-8

# 导入Flask类
from flask import Flask

# 创建Flask实例
app = Flask(__name__)

# 定义路由, 由index函数处理url为/的GET请求
@app.route('/')
def index():
   # 返回响应内容
   return 'Hello, Silence'

# 脚本运行执行代码
if __name__ == '__main__':
   # 启动Flask实例, 设置监听0.0.0.0:9001, 开启调试模式
   app.run(host='0.0.0.0', port=9001, debug=True)
2、启动程序
python app.py
3、浏览器访问 http://localhost:9001/ 查看显示内容

4、程序说明
-
Line 4: 导入 Flask 类
-
Line 7: 创建 Flask 实例, 第一个参数为模块或者包的名称, 模块名称会根据是否单独应用而变化因此可以选择使用 name 变量动态指定, 该参数与 Flask 查找static 和 template 文件位置有关
-
Line 10: 定义路由 endpoint=/, 表示有 index 函数处理请求 url 为/的 GET 请求
-
Line 18: 启动 app, 执行监听的 host:port, 在测试环境开启调试模
-
注意: debug 模式是不安全的, 在生产环境应该关闭
路由
1、路由用于将 python 函数绑定到 url 上, 一个函数可以绑定多个路由规则, 也可以构建动态的 url
@app.route('/users/')
@app.route('/users/<uid>/')
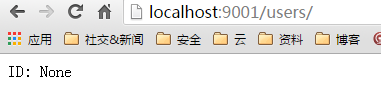
def users(uid=None):
return 'ID: %s' % uid2、访问浏览器 http://localhost:9001/users/
3、访问浏览器 http://localhost:9001/users/12/

4、在动态 url 中通过添加变量<varname>将参数传递到函数中, 在添加变量可以使用 <converter:varname> 指定 varname 的类型
@app.route('/users/<int:uid>/')
def user_uid(uid):
   return 'UID: %s' % uid
converter 支持 int, float, path 三种类型
5、路由中的 endpoint 有两种模式, 以/结尾和不以/结尾
对于以/结尾的 route, 在浏览器中访问 url 时若不以/结尾, 会被 flask 重定向到与以/结尾的 endpoint 上
对于不以/结尾的 route, 在浏览器中访问 url 时若以/结尾, 则会返回 404 错误
个人建议: 在定义 route 和使用 url 访问时结尾都加上/
6、路由中可以通过 methods 指定函数处理的 HTTP 方法, 默认只处理 GET 方法
@app.route('/users/', methods=["GET", "POST"])
@app.route('/users/<uid>/', methods=["GET", "PUT", "DELETE"])
def users(uid=None):
   print type(uid)
   return 'ID: %s' % uid
HTTP 方法:
-
GET: 获取内容
-
POST: 提交新数据
-
HEAD: 检查数据是否存在
-
PUT: 覆盖数据
-
DELETE: 删除数据
-
OPTIONS: 检查服务器支持哪些方法
模板
1、项目目录结构:
.
├─ app.py
├─ static
└─ templates
    └─ users.html
2、模板存放目录为 /templates/
3、渲染模板
# 导入render_template
from flask import render_template

@app.route('/users/')
def users():
   user_list = [{'name' : 'silence', 'sex' : 1, 'email' : '[email protected]'}]
   # 渲染模板
   return render_template('users.html', title=u"用户管理", users=user_list)
说明:
-
Line 2: 导入 render_template 函数
-
Line 8: 使用 render_template 函数渲染模板 users.html, 并将变量 title 和users 传递给模板
4、模板定义
<!DOCTYPE html>
<html>
   <head>
       <meta charset="utf-8"/>
       <title>{{title}}</title>
   </head>
   <body>
       <table style="border: 1px solid black;">
           <thead>
               <tr>
                   <th>用户名</th>
                   <th>性别</th>
                   <th>邮件</th>
               </tr>
           </thead>
           <tbody>
           {% for user in users %}
               <tr>
                   <td>{{user.name}}</td>
                   <td>
                   {% if user.sex == 1 %}
                   男
                   {% else %}
                   女
                   {% endif %}
                   </td>
                   <td>{{user['email']}}</td>
               </tr>
           {% else %}
               <tr><td colspan="3">暂无数据</td></tr>
           {% endfor %}
           </tbody>
       </table>
   </body>
</html>
说明:
-
Line 5: 将 title 变量渲染到模板中, 需要使用两个大括号包含变量
-
Line 17: 遍历 users, for 语句需要被包含在大括号百分号之中,结束需要用 endfor
-
Line 21: 条件判断, if 语句需要被包含在大括号百分号之中,结束需要用 endfif
5、访问浏览器 http://localhost:9001/users/

静态文件
可以在模板中引入本地的 js, css, 图片等资源文件
说明:
-
静态资源文件需要放置在 static 目录
-
在模板中使用 /static/filename.suffix 的格式引入文件
-
可以使用 url_for('static', filename=filename.suffix) 函数自动生成 url 引入文件
请求参数
from flask import request
@app.route('/users/', methods=["GET", "POST"])
def users():
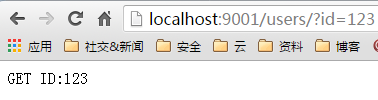
if request.method == 'GET':
return 'GET ID:%s' % request.args.get('id')
else:
return 'GET ID:%s' % request.form.get('id')说明:
-
Line 1: 导入 reqeust 对象
-
Line 5: 通过 reqeust.method 获取请求方法
-
Line 6: 通过 reqeust.args 获取 GET 请求提交的参数
访问浏览器 http://localhost:9001/users/?id=123
- Line 8: 通过 reqeust.form 获取 POST 请求提交的参数
通过 curl 访问 http://localhost:9001/users/

-
若需要上传文件则需要使用 request.files 获取提交的参数并通过 save 函数保存到服务器上
from werkzeug import secure_filename

@app.route('/users/', methods=["POST"])
def image():
   img = request.files.get('img')
   if img is not None:
       img.save('e:/tmp/%s' % secure_filename(img.filename))
需要注意在保存用户上传的文件时注意对文件名进行安全处理, 或者使用自己的命名规则,切忌不要直接使用文件名存储到服务器中
cookie
from flask import make_response
@app.route('/users/')
def users():
   response = make_response('Hello, Silence')
   response.set_cookie('locale', 'zh_CN')
   print request.cookies.get('locale')
   return response
说明:
-
Line 1: 导入 make_response 函数
-
Line 4: 通过 make_response 创建 response 对象
-
Line 5: 设置 cookie 信息 locale=zh_CN
-
Line 6: 获取 cookie 中信息
会话
from flask import session
from flask import redirect

app.secret_key = 'ABCDEFGHIGKLMNOPQRST'

@app.route('/login/', methods=["POST"])
def login():
   if validate_login(request.form.get('username'), request.form.get('password')):
       session['user'] = {'username' : request.form.get('username')}
       return redirect('/users/')
   else:
       return render_template('login.html')

@app.route('/users/')
def users():
   return session.get('user', {}).get('username')

@app.route('/logout/')
def logout():
   session.pop('user')
   session.clear()
   return render_template('login.html')
说明:
-
Line 1: 导入 session 对象
-
Line 9: 在 session 中存储信息
-
Line 2: 导入重定向函数 redirect
-
Line 10: 重定向到 /users/
-
Line 16: 获取 session 中存储的信息
-
Line 20: 删除 session 中的信息
-
Line 21: 销毁 session 中的所有信息
-
Line 4: 设置 session 签名所使用的密钥, 可以使用 os.urandom(32) 来生成强壮的密钥