上一篇简单的创建了详情页和首页,这篇稍微优化一下,添加发布日期,分类,标签以及根据标签筛选该标签的内容。
1、优化首页和详情页


<!DOCTYPE html>
<html lang="en">
<head>
    <meta charset="UTF-8">
    <title>{{ blog.title }}</title>
</head>
<body>

<a href="{% url 'home' %}">
    <div>
        <h3>felix Blog</h3>
    </div>
</a>
<h3>{{ blog.title }}</h3>
<p>作者:{{ blog.author }}</p>
{# 时间过滤器让时间按照自己需要的格式过滤 #}
<p>发布日期:{{ blog.created_time|date:"Y-m-d H:n:s" }}</p>
<p>分类:
    <a href="{% url 'blogs_with_type' blog.blog_type.pk %}">
        {{ blog.blog_type }}
    </a>
</p>
<p>{{ blog.content }}</p>
</body>
</html>
<!DOCTYPE html>
<html lang="en">
<head>
    <meta charset="UTF-8">
    <title>felix Blog</title>
</head>
<body>
<div>
    <h3>felix Blog</h3>
</div>
<br/>

{% for blog in blogs %}
    <a href="{% url 'blog_detail' blog.pk %}"><h3>{{ blog.title }}</h3></a>
    {#    添加过滤器 文章太长时只显示前30个字符  #}
    <p>{{ blog.content|truncatechars:30 }}</p>
{% empty %}
    <p>--暂无博客,敬请期待--</p>
{% endfor %}
{# 过滤器统计博客数量 #}
<p>一共有{{ blogs|length }}篇博客</p>
</body>
</html>
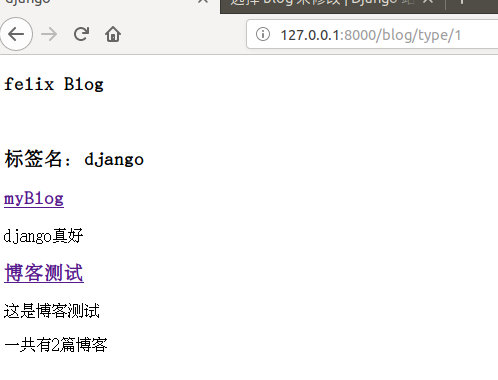
2、添加通过标签筛选文章
在templates下新建blog_with_type.html文件
<!DOCTYPE html>
<html lang="en">
<head>
    <meta charset="UTF-8">
    <title>{{ blog_type.type_name }}</title>
</head>
<body>
<div>
    <h3>felix Blog</h3>
</div>
<br/>
<h3>标签名:{{ blog_type.type_name }}</h3>
{% for blog in blogs %}
    <a href="{% url 'blog_detail' blog.pk %}"><h3>{{ blog.title }}</h3></a>
    {#    添加过滤器 文章太长时只显示前30个字符  #}
    <p>{{ blog.content|truncatechars:30 }}</p>
{% empty %}
    <p>--暂无博客,敬请期待--</p>
{% endfor %}
{# 过滤器统计博客数量 #}
<p>一共有{{ blogs|length }}篇博客</p>
</body>
</html>
3、新建视图和路径
def blogs_with_type(requests, blog_type_pk):
    blog_type = get_object_or_404(BlogType, pk=blog_type_pk)
    context = {
        'blogs': Blog.objects.filter(blog_type=blog_type),
        'blog_type':blog_type,
    }
    return render_to_response('blog_with_type.html', context)
from django.shortcuts import render_to_response, get_object_or_404
from .models import Blog, BlogType


# Create your views here.

# 博客列表
def blog_list(requests):
    context = {
        'blogs': Blog.objects.all()
    }
    return render_to_response('blog_list.html', context)


# 博客详情
def blog_detail(requests, blog_pk):
    context = {
        'blog': get_object_or_404(Blog, pk=blog_pk)
    }

    return render_to_response('blog_detail.html', context)


def blogs_with_type(requests, blog_type_pk):
    blog_type = get_object_or_404(BlogType, pk=blog_type_pk)
    context = {
        'blogs': Blog.objects.filter(blog_type=blog_type),
        'blog_type':blog_type,
    }
    return render_to_response('blog_with_type.html', context)
# -*- coding: utf-8 -*-
# @Time    : 18-11-4 下午5:22
# @Author  : Felix Wang

from django.urls import path
from . import views
urlpatterns = [
    # name 表示别名
    path('<int:blog_pk>',views.blog_detail,name='blog_detail'),
    # 链接非常容易混掉,所以要区分
    path('type/<int:blog_type_pk>',views.blogs_with_type,name='blogs_with_type'),
]
4、我的项目目录
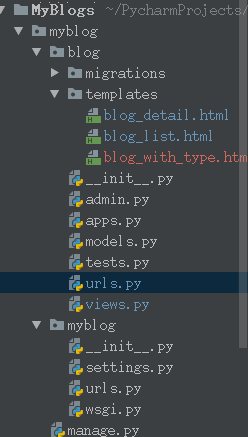
最近发现得添加自己的项目目录,以分别出和上一篇博客相比,那些文件产生了变化。
其中:
红色表示新建的文件
蓝色表示修改过得文件
5、启动服务测试
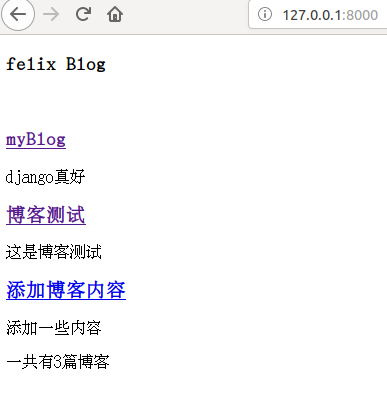

如果博客数据不够多,可以进入admin后台管理中创建,比如多创建一些标签和一些博客,看效果。
6、其他只是补充
(1)、模板的常用过滤器
日期:date
字数截取:truncatechars、truncatechars_html、truncatewords、truncatewords_html
是否信任html:safe
长度:length

参考链接:https://docs.djangoproject.com/en/2.1/ref/templates/builtins/
(2)、常用的模板标签
循环:for
条件:if、ifequal、ifnotequal
链接:url
模板嵌套:block、extends、include
注释:{#  #}