前言
笔者近期在慕课网上学习了《Springboot框架开发技术整合》一系列课程,收益颇丰,于是结合笔记写下此文以作总结归纳。如有不当之处,敬请评论指出,笔者虚心接受。
第一章 构建简单WEB项目
有两种方法可以快速构建SpringBoot项目。
一. 通过SpringBoot官网的QuickStart构建一个项目。快速构建SpringBoot项目
二. 使用Spring官方的Spring Tool Suite搭建SpringBoot项目。因为大多数开发者用的是idea和eclipse,这里就不作阐述,有兴趣的可以自行了解。
第二章 SpringBoot接口返回Json
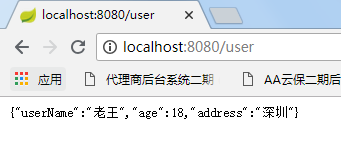
一. SpringBoot构造并返回一个json对象
@RestController
public class UserController {

    @RequestMapping("user")
    public User getUser() {
        User user = new User();
        user.setAddress("深圳");
        user.setAge(18);
        user.setUserName("老王");
        return user;
    }
}
二. Jackson的基本演绎法
类注解:
- @JsonIgnoreProperties({“id”, “created”, “steps”, “copy”, “stepList”})
指定序列化时忽略这些属性,可用于覆盖父类的属性
属性注解:
- @JsonInclude(Include.NON_EMPTY)
当该属性为空时,不序列化 - @JsonIgnore
忽略该属性 - @JsonFormat(pattern = “yyyy-MM-dd HH:mm:ss”, timezone = “GMT+8”)
格式化时间戳,其中GMT+8指东八区
第三章 SpringBoot热部署
只需要要引入一个starter就可以实现热部署。
<!-- 热部署 -->
        <!-- devtools可以实现页面热部署(即页面修改后会立即生效,
            这个可以直接在application.properties文件中配置spring.thymeleaf.cache=false来实现) -->
        <!-- 实现类文件热部署(类文件修改后不会立即生效),实现对属性文件的热部署。 -->
        <!-- 即devtools会监听classpath下的文件变动,并且会立即重启应用(发生在保存时机),
            注意:因为其采用的虚拟机机制,该项重启是很快的 -->
        <!-- (1)base classloader (Base类加载器):加载不改变的Class,例如:第三方提供的jar包。 -->
        <!-- (2)restart classloader(Restart类加载器):加载正在开发的Class。 -->
        <!-- 为什么重启很快,因为重启的时候只是加载了在开发的Class,没有重新加载第三方的jar包。 -->
        <dependency>
            <groupId>org.springframework.boot</groupId>
            <artifactId>spring-boot-devtools</artifactId>
            <!-- optional=true, 依赖不会传递, 该项目依赖devtools;
                之后依赖boot项目的项目如果想要使用devtools, 需要重新引入 -->
            <optional>true</optional>
        </dependency>
需要注意的是,IDEA中改完代码需要Build Project(CTRL+F9)后才会进行热部署。
笔者认为,相对于IDEA的DEBUG模式,这种热部署方式显得有些笨拙。大多数场景是修改业务代码,使用DEBUG模式重构完项目就可以立即生效,而devtools会重启整个项目,用时更多。如果在项目构建初期,需要频繁地修改配置、注解、依赖的时候(DEBUG模式对这些的修改不能即时生效),可以使用devtools进行热部署,缩短项目重启时间。
第四章 SpringBoot资源文件属性
一. 资源文件中的属性配置与映射到实体类
1. 引入依赖
        <!--<dependency>
            <groupId>org.springframework.boot</groupId>
            <artifactId>spring-boot-configuration-processor</artifactId>
            <optional>true</optional>
        </dependency>-->
SpringBoot默认使用yml中的配置,但有时候要用传统的xml或properties配置,就需要使用spring-boot-configuration-processor。如果已经依赖了spring-boot-starter,可以不用再次引用spring-boot-configuration-processor,因为前者已经包含了后者。
2. 创建配置文件并配置属性
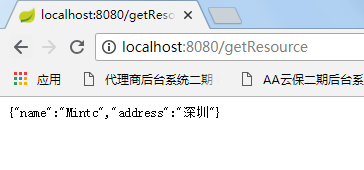
resource.properties:
com.mintc.opensourece.name = Mintc
com.mintc.opensourece.address = 深圳
3. 创建需要映射的实体类
package com.mintc.springBootDemo.entity;

import org.springframework.boot.context.properties.ConfigurationProperties;
import org.springframework.context.annotation.Configuration;
import org.springframework.context.annotation.PropertySource;

@Configuration
@ConfigurationProperties(prefix = "com.mintc.opensourece")
@PropertySource(value = "classpath:resource.properties")
public class Resource {
    /**
     * 名称
     */
    private String name;

    /**
     * 地址
     */
    private String address;

    public String getName() {
        return name;
    }

    public void setName(String name) {
        this.name = name;
    }

    public String getAddress() {
        return address;
    }

    public void setAddress(String address) {
        this.address = address;
    }
}
@Configuration用于定义配置类,可替换xml配置文件,被注解的类内部包含有一个或多个被@Bean注解的方法,这些方法将会被AnnotationConfigApplicationContext或AnnotationConfigWebApplicationContext类进行扫描,并用于构建bean定义,初始化Spring容器。
@ConfigurationProperties(prefix = “com.mintc.opensourece”)用于注入配置文件,其中prefix作用是定义配置文件中属性的前缀,结合第二步能够更好地理解。
@PropertySource(value = “classpath:resource.properties”)用于指定配置文件的位置,其中classpath指的是resource目录。
4. 测试Controller
package com.mintc.springBootDemo.Controller;

import com.mintc.springBootDemo.entity.Resource;
import org.springframework.beans.BeanUtils;
import org.springframework.beans.factory.annotation.Autowired;
import org.springframework.web.bind.annotation.RequestMapping;
import org.springframework.web.bind.annotation.RestController;

@RestController
public class UserController {

    @Autowired
    private Resource resource;

    @RequestMapping("getResource")
    public Resource getResource() {
        Resource a = new Resource();
        BeanUtils.copyProperties(resource, a);
        return a;
    }
}
5. 运行效果
二. SpringBoot资源文件配置Server
############################################################
#
# Server 服务端相关配置
#
############################################################
# 配置api端口号
#server.port=8088
# 配置context-path, 一般来说这个配置在正式发布的时候不配置
#server.servlet.context-path=/IMooc
# 错误页,指定发生错误时,跳转的URL --> BasicErrorController
#server.error.path=/error
# session最大超时时间(分钟),默认为30分钟
server.session-timeout=60
# 该服务绑定IP地址,启动服务器时如本机不是该IP地址则抛出异常启动失败,
# 只有特殊需求的情况下才配置, 具体根据各自的业务来设置
#server.address=192.168.1.2

############################################################
# Server - tomcat 相关常用配置
############################################################
# tomcat最大线程数, 默认为200
#server.tomcat.max-threads=250
# tomcat的URI编码
server.tomcat.uri-encoding=UTF-8
# 存放Tomcat的日志、Dump等文件的临时文件夹,默认为系统的tmp文件夹
#(如:C:\Users\Shanhy\AppData\Local\Temp)
#server.tomcat.basedir=H:/springboot-tomcat-tmp
# 打开Tomcat的Access日志,并可以设置日志格式的方法:
#server.tomcat.access-log-enabled=true
#server.tomcat.access-log-pattern=
# accesslog目录,默认在basedir/logs
#server.tomcat.accesslog.directory=
# 日志文件目录
#logging.path=H:/springboot-tomcat-tmp
# 日志文件名称,默认为spring.log
#logging.file=myapp.log