版权声明:本文为博主原创文章,未经博主允许不得转载。 https://blog.csdn.net/oXinYangonly/article/details/83545230
maven继承spring-boot
<parent>
	<groupId>org.springframework.boot</groupId>
	<artifactId>spring-boot-starter-parent</artifactId>
	<version>2.0.6.RELEASE</version>
	<relativePath/> <!-- lookup parent from repository -->
</parent>
- 指定
jdk版本和字符集
<properties>
	<project.build.sourceEncoding>UTF-8</project.build.sourceEncoding>
	<project.reporting.outputEncoding>UTF-8</project.reporting.outputEncoding>
	<java.version>1.8</java.version>
</properties>
- 添加依赖
<dependencies>
	<dependency>
		<groupId>org.springframework.boot</groupId>
		<artifactId>spring-boot-starter-web</artifactId>
	</dependency>
	<dependency>
		<groupId>org.springframework.boot</groupId>
		<artifactId>spring-boot-starter-test</artifactId>
		<scope>test</scope>
	</dependency>
	<dependency>
		<groupId>org.springframework.boot</groupId>
		<artifactId>spring-boot-starter-data-jpa</artifactId>
	</dependency>
	<dependency>
		<groupId>mysql</groupId>
		<artifactId>mysql-connector-java</artifactId>
	</dependency>
       <dependency>
           <groupId>com.alibaba</groupId>
           <artifactId>druid</artifactId>
           <version>1.1.10</version>
       </dependency>
       <dependency>
           <groupId>org.projectlombok</groupId>
           <artifactId>lombok</artifactId>
       </dependency>
	<dependency>
		<groupId>org.apache.commons</groupId>
		<artifactId>commons-text</artifactId>
		<version>1.2</version>
	</dependency>
</dependencies>
- 添加插件
<plugin>
	<groupId>org.springframework.boot</groupId>
	<artifactId>spring-boot-maven-plugin</artifactId>
</plugin>
- 配置
src/main/resources/application.yml
spring:
  datasource:
    driver-class-name: com.mysql.jdbc.Driver
    url: jdbc:mysql://localhost:3306/react
    username: root
    password: 123456
    type: com.alibaba.druid.pool.DruidDataSource
  jpa:
    show-sql: true
    hibernate:
      ddl-auto: update
    database: mysql
    database-platform: org.hibernate.dialect.MySQL5InnoDBDialect
- 编写启动类
package com.example.react;

import org.springframework.boot.SpringApplication;
import org.springframework.boot.autoconfigure.SpringBootApplication;

@SpringBootApplication
public class ReactApplication {

	public static void main(String[] args) {
		SpringApplication.run(ReactApplication.class, args);
	}
}
- 持久化对象类
package com.example.react.model;

import lombok.*;
import lombok.experimental.Accessors;

import javax.persistence.*;

/**
 * 用户类
 */
@Table(name = "t_user")
@Entity
@Setter
@Getter
@NoArgsConstructor
@AllArgsConstructor
@ToString
@Accessors(chain = true)
public class User {
    /**
     * 用户ID
     */
    @Id
    @GeneratedValue(strategy = GenerationType.IDENTITY)
    private Long id;
    /**
     * 用户名
     */
    private String name;
}
- 持久化操作接口
package com.example.react.dao;

import com.example.react.model.User;
import org.springframework.data.jpa.repository.JpaRepository;
import org.springframework.stereotype.Repository;

@Repository
public interface UserDao extends JpaRepository<User,Long> {


}
- 控制层
package com.example.react.controller;

import com.example.react.model.User;
import com.example.react.dao.UserDao;
import org.springframework.beans.factory.annotation.Autowired;
import org.springframework.web.bind.annotation.*;

import java.util.List;

@RestController
@RequestMapping("/user")
public class UserController {

    @Autowired
    private UserDao userDao;

    /**
     * 查询所有用户
     * @return
     */
    @GetMapping
    public List<User> all(){
        return this.userDao.findAll();
    }

    /**
     * 保存用户
     * 新增或更新
     * @param user
     * @return
     */
    @PostMapping
    public Object save(@RequestBody User user){
        this.userDao.save(user);
        return true;
    }

    /**
     * 根据ID删除用户
     * @param id
     * @return
     */
    @DeleteMapping("/{id}")
    public Object delete(@PathVariable Long id){
        this.userDao.deleteById(id);
        return true;
    }
}
- 启动后台项目
- 在项目根路径创建前端项目,使用
create-react-app
npx create-react-app web
给命令会在当前目录下使用create-react-app创建一个react单页项目
- 进入
web目录,添加依赖库
npm install axios [email protected] --save
- 在
package.json中增加前后端交互代理
"proxy": "http://localhost:8080"
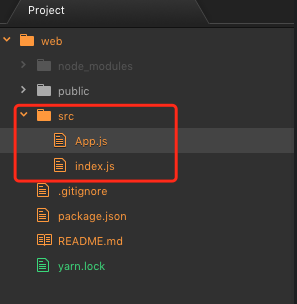
- 删除前端项目
src目录下无用的文件,只保留index.js和App.js,并修改文件使其能够运行
-
目录结构
-
index.js
import React from 'react';
import ReactDOM from 'react-dom';
import App from './App';

ReactDOM.render(<App />, document.getElementById('root'));
App.js
import React, { Component } from 'react';

class App extends Component {
  render() {
    return (
      <div>

      </div>
    );
  }
}

export default App;
- 在
index.js中引入bootstrap样式文件
注意:这里只需要引入css文件即可
import React from 'react';
import ReactDOM from 'react-dom';
import 'bootstrap/dist/css/bootstrap.min.css';
import App from './App';

ReactDOM.render(<App />, document.getElementById('root'));
-
接下来进行页面布局,这是一个简单的增删改查功能,所以只需要在一个页面编写全部功能即可,左侧为一个表格,右侧为一个表单,如下图

-
首先利用
bootstrap中提供的栅格模式,将页面分为左右两栏,两栏中分别有一个panel
render() {
   return (
        <div className="container-fluid" style={{marginTop: '20px'}}>
            <div className="row">
                <div className="col-xs-4 col-xs-offset-1">
                    <div className="panel panel-default">
                        <div className="panel-body">
                            表格区域
                        </div>
                    </div>
                </div>
                <div className="col-xs-3 col-xs-offset-1">
                    <div className="panel panel-default">
                        <div className="panel-body">
                            表单区域
                        </div>
                    </div>
                </div>
            </div>
        </div>
    );
}
- 添加表格
<table className="table table-bordered">
  <thead>
   <tr>
       <th>ID</th>
       <th>用户名</th>
       <th>操作</th>
   </tr>
   </thead>
   <tbody>

   </tbody>
</table>
- 添加表单
<form className="form-horizontal">
    <div className="form-group">
        <label htmlFor="name" className="col-xs-3">用户名</label>
        <div className="col-xs-8">
            <input type="text" id="name" className="form-control"/>
        </div>
    </div>
    <div className="form-group">
        <div className="col-sm-offset-2 col-sm-10">
            <button className="btn btn-default">提交</button>
        </div>
    </div>
</form>
- 初始化
state
constructor(props) {
    super(props);
    this.state = {
        id:'',
        name:'',
        list:[]
    }
}
- 实现查询函数,并在
App组件挂载渲染完成后执行查询函数
- 引入
axios
import axios from 'axios';
- 声明查询函数
query = () =>{
	axios.get('/user').then(({data})=>{
		this.setState({
			list:data
		});
	});
}
- 组件挂载完成后执行查询函数
componentDidMount(){
	this.query();
}
- 向表格中填充数据
<tbody>
{
    this.state.list.map(item=>{
        return (
            <tr key={item.id}>
                <td>{item.id}</td>
                <td>{item.name}</td>
                <td>
                    <button className="btn btn-primary">修改</button>
                    <button className="btn btn-danger" style={{marginLeft:'5px'}}>删除</button>
                </td>
            </tr>
        )
    })
}
</tbody>
- 对表单中的文本框和提交按钮进行控制
- 文本框
<input type="text" id="name" className="form-control" value={this.state.name} onChange={
    (e)=>{
        this.setState({
            name:e.target.value
        })
    }
}/>
- 提交按钮点击事件
<button className="btn btn-default" onClick={this.handleFormSubmit}>提交</button>
- 点击事件函数
handleFormSubmit = (e) => {
    e.preventDefault();
    if (this.state.name != '') {
        axios.post('/user', {
            id: !this.state.id ? '' : this.state.id,
            name: this.state.name
        }).then(({data}) => {
            this.setState({
                id: '',
                name: ''
            });
            this.query();
        })
    }
}
- 对表格中每一行的修改和删除按钮进行事件处理
<button className="btn btn-primary" onClick={() => {
     this.setState({id: item.id, name: item.name})
 }}>修改
 </button>
 <button className="btn btn-danger" style={{marginLeft: '5px'}}
         onClick={() => {
             this.deleteItem(item)
         }}>删除
 </button>
- 删除操作函数
deleteItem = (item) => {
    axios.delete(`/user/${item.id}`).then(({data}) => {
        this.query();
    })
}
- 执行
npm start启动前端
26.表单数据居中显示
- 添加
App.css
.table th, .table td {
    text-align: center;
    vertical-align: middle!important;
}
App.js中引入App.css
import './App.css'