ActiveMQ简介
ActiveMQ 是Apache出品,最流行的,能力强劲的开源消息总线。ActiveMQ 是一个完全支持JMS1.1和J2EE 1.4规范的 JMS Provider实现
JMS:Java Message Service java消息服务
ActiveMQ:实现JMS规范
JMS只给出接口,具体的实现由中间件完成,AcitveMQ为其中的一种
其它的消息队列产品:ActiveMQ、RabbitMQ、Kafka、MetaMQ等
消息队列中间件是分布式系统中的重要组件,主要解决应用耦合,异步消息,流量削锋等问题, 实现高性能,高可用,可伸缩和最终一致性的架构
ActiveMQ下载
官网:http://activemq.apache.org/

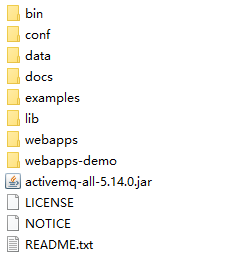
目录结构
启动ActiveMQ
进入bin目录启动服务。
http://localhost:8161/admin/queues.jsp
http端口8161:web页面访问端口
Tcp端口连接服务端口:61616
默认登陆用户名,密码:admin
ActiveMQ操作界面

常用术语


    Provider/MessageProvider:生产者
    Consumer/MessageConsumer:消费者
    PTP:Point To Point,点对点通信消息模型
    Pub/Sub:Publish/Subscribe,发布订阅消息模型
    Queue:队列,目标类型之一,和PTP结合
    Topic:主题,目标类型之一,和Pub/Sub结合
    ConnectionFactory:连接工厂,JMS用它创建连接
    Connnection:JMS Client到JMS Provider的连接
    Destination:消息目的地,由Session创建
    Session:会话,由Connection创建,实质上就是发送、接受消息的一个线程,因此生产者、消费者都是Session创建的
spring整合activeMQ应用
配置生产者
第一步:创建maven,导入spring和activeMQ的坐标或web工程,导入相应activeMQjar包和与spring整合的jar包
<dependencies>
      <dependency>
          <groupId>org.apache.activemq</groupId>
          <artifactId>activemq-all</artifactId>
          <version>5.2.0</version>
      </dependency>
      <dependency>
          <groupId>org.springframework</groupId>
          <artifactId>spring-jms</artifactId>
          <version>4.2.4.RELEASE</version>
      </dependency>
      <dependency>
          <groupId>junit</groupId>
          <artifactId>junit</artifactId>
          <version>4.9</version>
      </dependency>
      <dependency>
          <groupId>org.springframework</groupId>
          <artifactId>spring-test</artifactId>
          <version>4.2.4.RELEASE</version>
      </dependency>
  <dependency>
        <groupId>org.apache.xbean</groupId>
        <artifactId>xbean-spring</artifactId>
        <version>4.2</version>
    </dependency>
  </dependencies>
第二步:提供spring配置文件(配置生产者相关)引入amq,jms名称空间
第三步:配置连接工厂(缓存session工厂),配置模板对象
<?xml version="1.0" encoding="UTF-8"?>
<beans xmlns="http://www.springframework.org/schema/beans"
    xmlns:xsi="http://www.w3.org/2001/XMLSchema-instance"
    xmlns:aop="http://www.springframework.org/schema/aop"
    xmlns:context="http://www.springframework.org/schema/context"
    xmlns:jdbc="http://www.springframework.org/schema/jdbc"
    xmlns:tx="http://www.springframework.org/schema/tx"
    xmlns:jpa="http://www.springframework.org/schema/data/jpa"
    xmlns:task="http://www.springframework.org/schema/task"
    xmlns:amq="http://activemq.apache.org/schema/core"
    xsi:schemaLocation="
                        http://www.springframework.org/schema/beans http://www.springframework.org/schema/beans/spring-beans.xsd
                        http://www.springframework.org/schema/aop http://www.springframework.org/schema/aop/spring-aop.xsd
                        http://www.springframework.org/schema/context http://www.springframework.org/schema/context/spring-context.xsd
                        http://www.springframework.org/schema/jdbc http://www.springframework.org/schema/jdbc/spring-jdbc.xsd
                        http://www.springframework.org/schema/tx http://www.springframework.org/schema/tx/spring-tx.xsd
                        http://www.springframework.org/schema/data/jpa
                        http://www.springframework.org/schema/data/jpa/spring-jpa.xsd
                        http://activemq.apache.org/schema/core
                        http://activemq.apache.org/schema/core/activemq-core-5.8.0.xsd">
   <!-- 配置连接工厂对象:产生Connection  方式一:通过amq名称空间创建连接工厂  方式二:可以通过bean标签创建对象-->
    <!-- <amq:connectionFactory
        id="connectionFactory"
        userName="admin" password="admin"
        brokerURL="tcp://localhost:61616">
    </amq:connectionFactory> -->

    <bean id="connectionFactory" class="org.apache.activemq.ActiveMQConnectionFactory">
        <constructor-arg index="0" value="admin"></constructor-arg>
        <constructor-arg index="1" value="admin"></constructor-arg>
        <constructor-arg index="2" value="tcp://localhost:61616"></constructor-arg>
    </bean>


    <!-- spring提供优化缓存session对象 -->
    <bean id="cachingConnectionFactory" class="org.springframework.jms.connection.CachingConnectionFactory">
        <property name="targetConnectionFactory" ref="connectionFactory"></property>
        <property name="sessionCacheSize" value="10"></property>
    </bean>


    <!-- spring提供模板对象jmsTemplate:向mq服务器写入消息(p2p,pub/sub) -->

    <!-- 发送点对点消息 -->
    <bean id="jmsQueueTemplate" class="org.springframework.jms.core.JmsTemplate">
        <property name="connectionFactory" ref="cachingConnectionFactory"></property>
        <!-- 通过属性pubSubDomain指定消息模式:默认值false  -->
        <property name="pubSubDomain" value="false"></property>
    </bean>

    <!-- 发送主题模式消息 -->
    <bean id="jmsTopicTemplate" class="org.springframework.jms.core.JmsTemplate">
        <property name="connectionFactory" ref="cachingConnectionFactory"></property>
        <property name="pubSubDomain" value="true"></property>
    </bean>
</beans>
第四步:编写单元测试方法,在类中注入模板对象JmsTemplate。通过此对象发送消息到队列
@RunWith(SpringJUnit4ClassRunner.class)
@ContextConfiguration("classpath:applicationContext.xml")
public class ProduceTest {

//    @Resource("")
    @Autowired
    @Qualifier("jmsQueueTemplate")
    private JmsTemplate jmsTemplate;

    @Test
    public void test() {
        jmsTemplate.send("test_spring", new MessageCreator() {

            // 创建对象
            public Message createMessage(Session session) throws JMSException {
                MapMessage mapMessage = session.createMapMessage();
                mapMessage.setString("tel", "1311111111");
                mapMessage.setString("code", "MSXX88sdfsdf");
                return mapMessage;
            }
        });
    }

    /*public static void main(String[] args) {
        ClassPathXmlApplicationContext classPathXmlApplicationContext = new ClassPathXmlApplicationContext("classpath:applicationContext.xml");
        JmsTemplate jmsTemplate = (JmsTemplate) classPathXmlApplicationContext.getBean("jmsQueueTemplate");
        //发送消息
        jmsTemplate.send("test_spring", new MessageCreator() {

            //创建对象
            public Message createMessage(Session session) throws JMSException {
                MapMessage mapMessage = session.createMapMessage();
                mapMessage.setString("tel", "1311111111");
                mapMessage.setString("code", "MSXX88sdfsdf");
                return mapMessage;
            }
        });
    }*/
}
配置消费者
第一步:开发一个类,监听消息队列
@Component("consumerListener")
public class ConsumerListener implements MessageListener{

    //果注册了消息监听器,一旦消息到达,将自动调用监听器的onMessage方法
    public void onMessage(Message message) {
        try {
            MapMessage mapMessage = (MapMessage) message;
            String tel = mapMessage.getString("tel");
            String code = mapMessage.getString("code");
            System.out.println(tel+"**********"+code);
        } catch (JMSException e) {
            e.printStackTrace();
        }
    }

}
第二步:配置spring 配置文件,注册监听器
<?xml version="1.0" encoding="UTF-8"?>
<beans xmlns="http://www.springframework.org/schema/beans"
    xmlns:xsi="http://www.w3.org/2001/XMLSchema-instance"
    xmlns:aop="http://www.springframework.org/schema/aop"
    xmlns:context="http://www.springframework.org/schema/context"
    xmlns:jdbc="http://www.springframework.org/schema/jdbc"
    xmlns:tx="http://www.springframework.org/schema/tx"
    xmlns:jpa="http://www.springframework.org/schema/data/jpa"
    xmlns:task="http://www.springframework.org/schema/task"
    xmlns:amq="http://activemq.apache.org/schema/core"
    xmlns:jms="http://www.springframework.org/schema/jms"
    xsi:schemaLocation="
                        http://www.springframework.org/schema/beans http://www.springframework.org/schema/beans/spring-beans.xsd
                        http://www.springframework.org/schema/aop http://www.springframework.org/schema/aop/spring-aop.xsd
                        http://www.springframework.org/schema/context http://www.springframework.org/schema/context/spring-context.xsd
                        http://www.springframework.org/schema/jdbc http://www.springframework.org/schema/jdbc/spring-jdbc.xsd
                        http://www.springframework.org/schema/tx http://www.springframework.org/schema/tx/spring-tx.xsd
                        http://www.springframework.org/schema/data/jpa
                        http://www.springframework.org/schema/data/jpa/spring-jpa.xsd
                        http://activemq.apache.org/schema/core
                        http://activemq.apache.org/schema/core/activemq-core-5.8.0.xsd
                        http://www.springframework.org/schema/jms
                        http://www.springframework.org/schema/jms/spring-jms.xsd">

    <!-- 配置连接工厂对象:产生Connection  方式一:通过amq名称空间创建连接工厂  方式二:可以通过bean标签创建对象-->
    <!-- <amq:connectionFactory
        id="connectionFactory"
        userName="admin" password="admin"
        brokerURL="tcp://localhost:61616">
    </amq:connectionFactory> -->

    <bean id="connectionFactory" class="org.apache.activemq.ActiveMQConnectionFactory">
        <constructor-arg index="0" value="admin"></constructor-arg>
        <constructor-arg index="1" value="admin"></constructor-arg>
        <constructor-arg index="2" value="tcp://localhost:61616"></constructor-arg>
    </bean>


    <!-- spring提供优化缓存session对象 -->
    <bean id="cachingConnectionFactory" class="org.springframework.jms.connection.CachingConnectionFactory">
        <property name="targetConnectionFactory" ref="connectionFactory"></property>
        <property name="sessionCacheSize" value="10"></property>
    </bean>

    <context:component-scan base-package="cn.itcast"></context:component-scan>

    <!-- 在监听器容器中注册监听器对象
        acknowledge:设置应答模式  auto自动应答
        destination-type:队列类型(queue,topic)
        connection-factory:注入连接工厂

        jms:listener:节点注入监听器对象
     -->
    <jms:listener-container
            acknowledge="auto"  destination-type="queue"  connection-factory="cachingConnectionFactory">
            <!-- destination:监听哪个队列 -->
            <jms:listener destination="test_spring" ref="consumerListener"/>
    </jms:listener-container>

</beans>
测试代码
@RunWith(SpringJUnit4ClassRunner.class)
@ContextConfiguration("classpath:applicationContext.xml")
public class ConsumerTest {


    @Test
    public void test() {
        while(true){

        }
    }

}