1.ArduPilot下载
windows下:
Building ArduPilot for Pixhawk/PX4 on Windows with Make
git clone https://github.com/ArduPilot/ardupilot
cd ardupilot
git submodule update --init --recursive
Linux下:
Building ArduPilot for Pixhawk/2/PX4 on Linux with Make
Install git:
sudo apt-get -qq -y install gitClone the source:
git clone https://github.com/ArduPilot/ardupilot.git
cd ardupilot
git submodule update --init --recursive
Run the install-prereqs-ubuntu.sh script:
Tools/scripts/install-prereqs-ubuntu.sh -yReload the path (log-out and log-in to make permanent):
. ~/.profile2.Qt安装
下载:
http://download.qt.io/official_releases/qt/
windows下安装,直接运行exe。
linux下安装:
ubuntu下安装QT5.7.1
3.QtCreator导入工程
Building ArduPilot for Pixhawk/PX4 on Windows or Linux with QtCreator
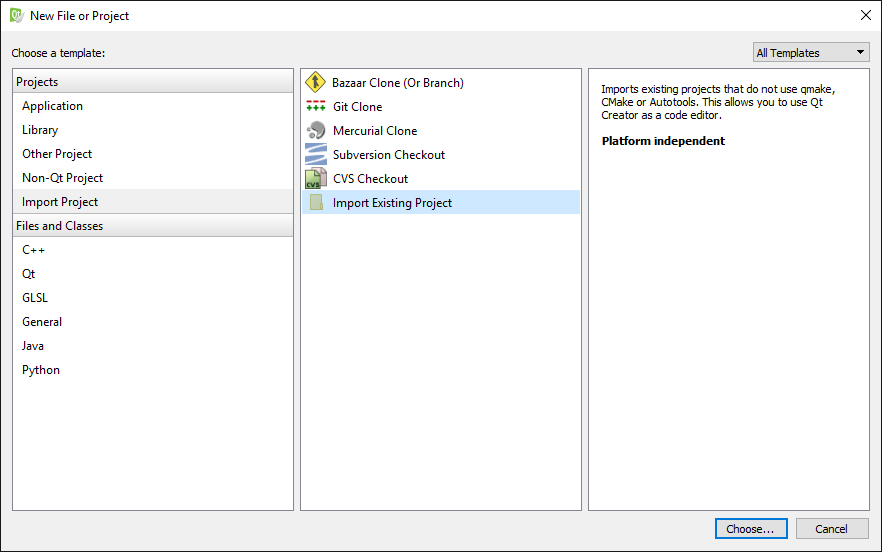
1)Select File -> New File or Project.
2)Choose the Import Project template and from these templates Import Existing Project. Then press Next.
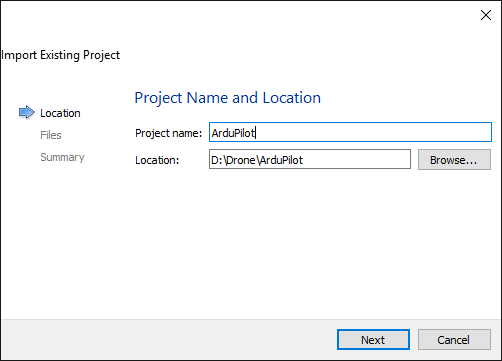
3)Enter a project name and choose the location of the ArduPilot Git repository. Then press Next.
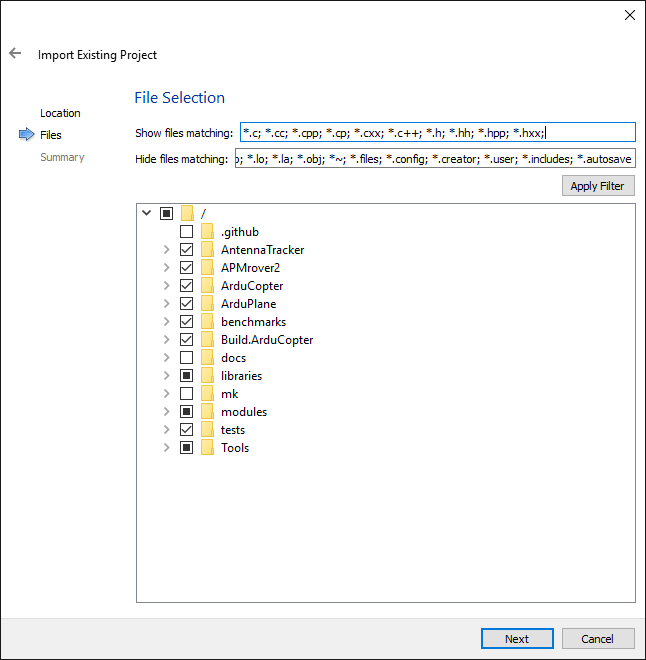
4)Qt Creator shows you the files that will be imported into the project. Just press Next (we will worry about this a bit later).
5)click finish.
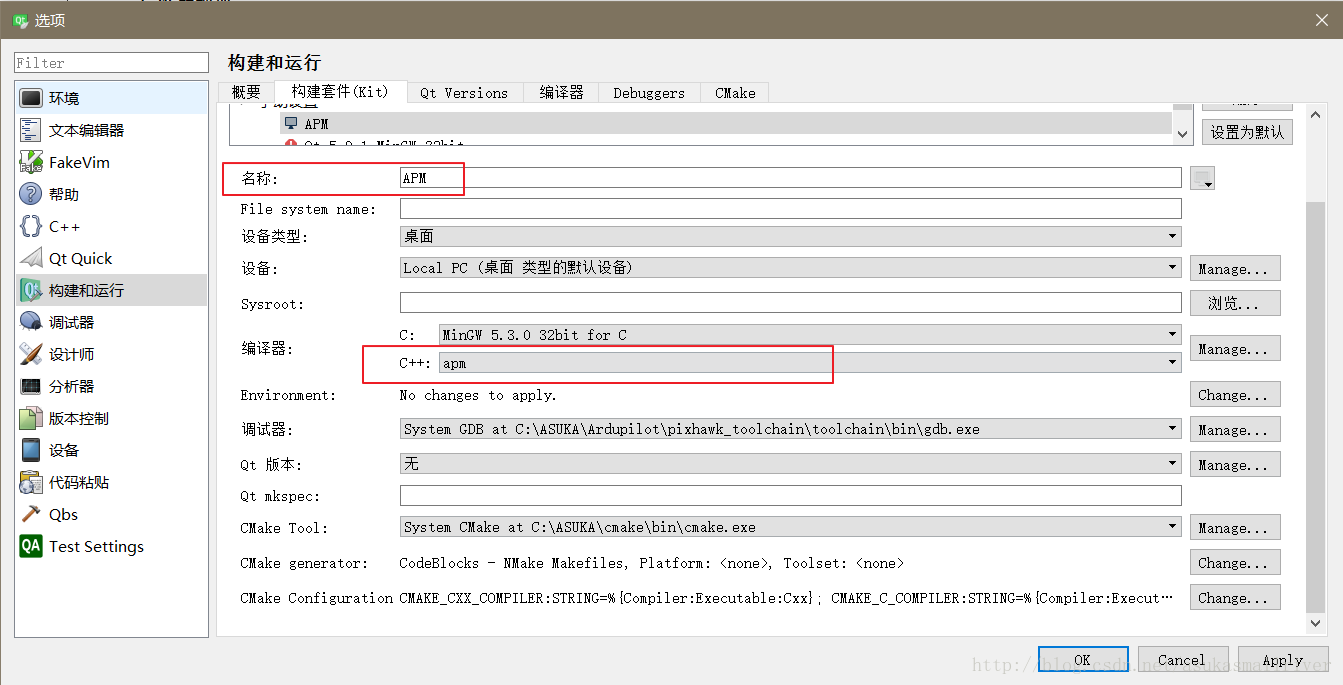
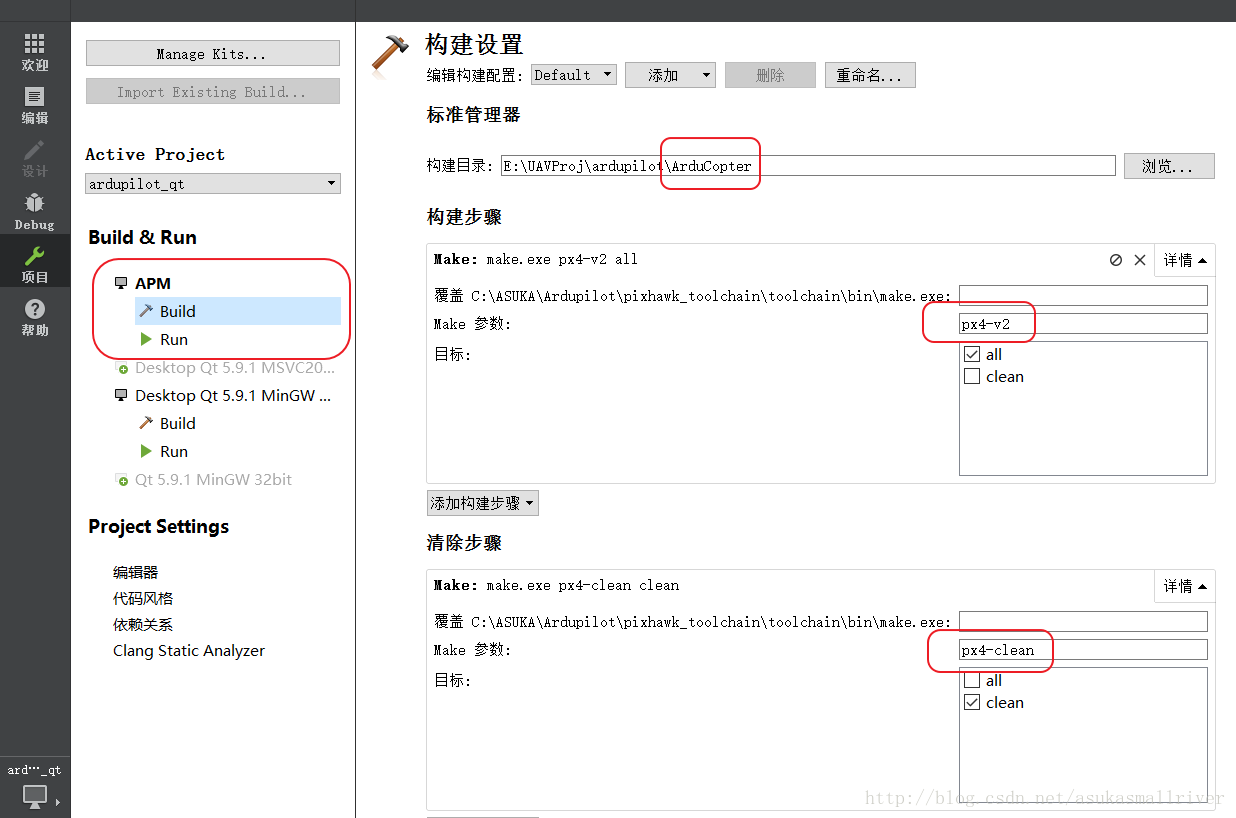
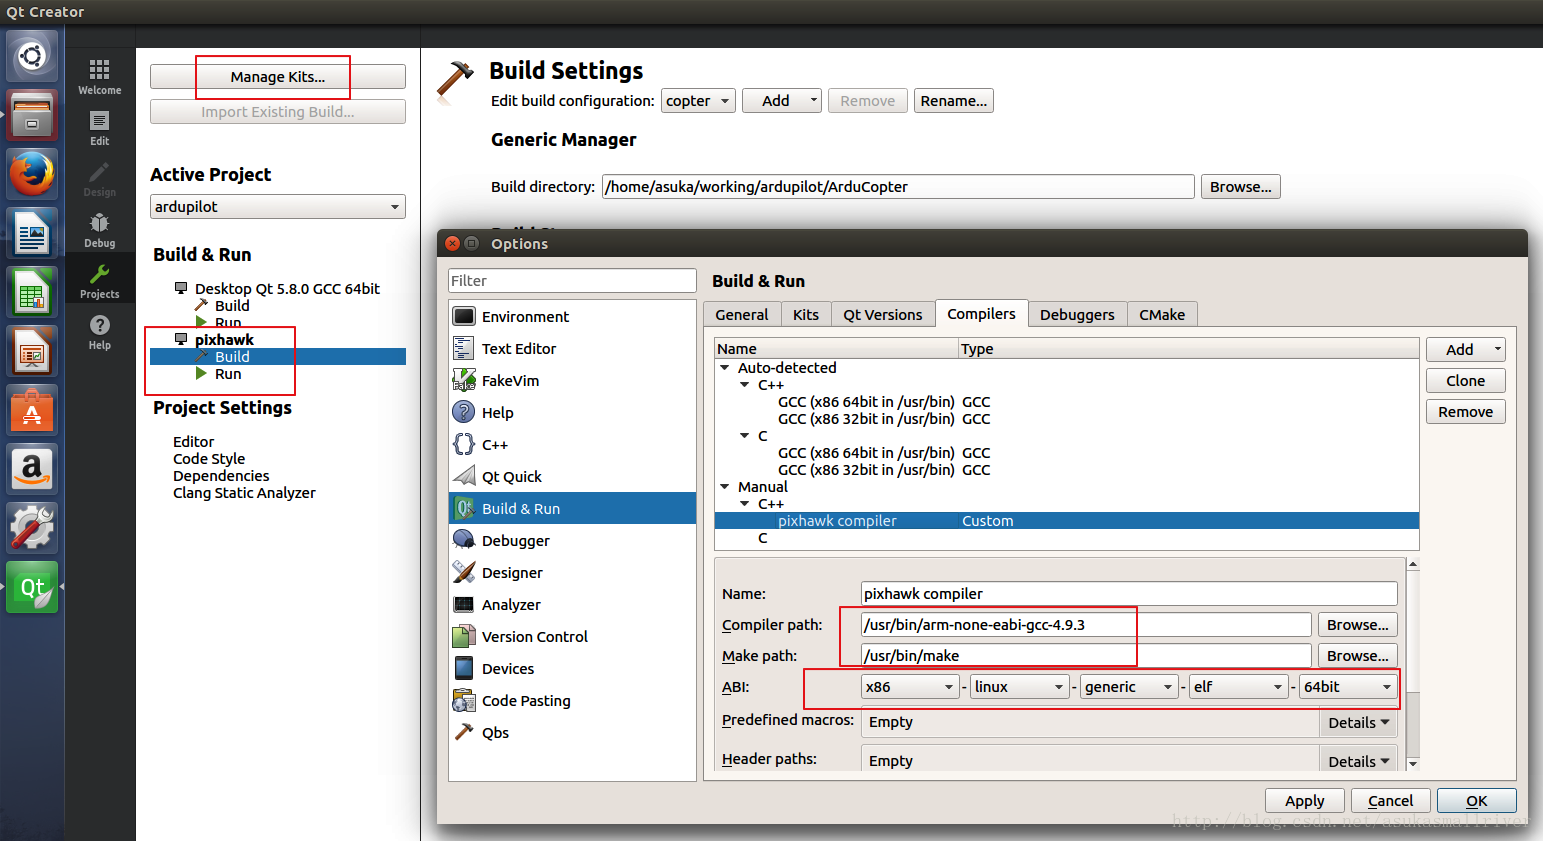
4.编译环境设置
1)编译器设置
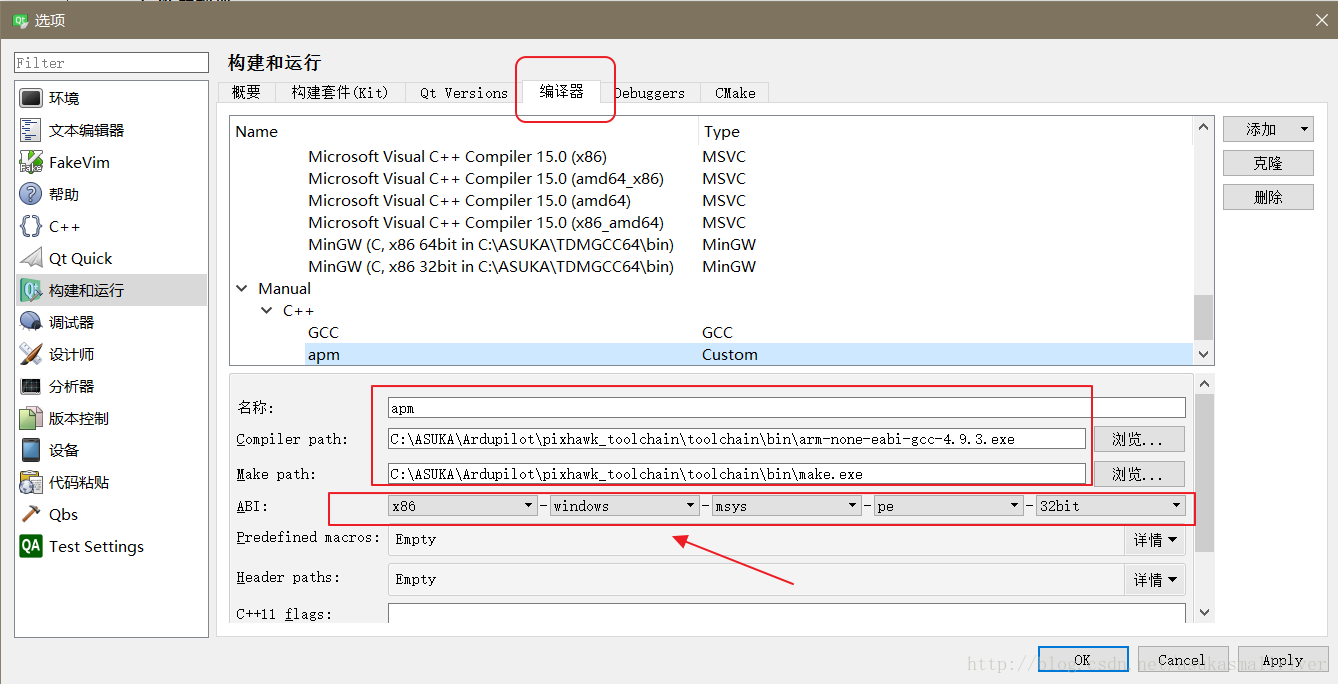
注意:箭头所指位置设置一定要与Qt默认ABI一致,否则无法通过,如下图

2)kit设置
3)工程Build设置
4)编译
5)补充
Linux下设置基本相同,唯一在编译器选择时有差别,如下
参考文献: