1、在官网下载mysql压缩包:
下载地址:http://dev.mysql.com/downloads/mysql/5.6.html#downloads
下载版本:我这里选择的5.6.33,通用版,linux下64位
也可以直接通过命令下载:
wget http://dev.mysql.com/get/Downloads/MySQL-5.6/mysql-5.6.33-linux-glibc2.5-x86_64.tar.gz
2、将mysql进行解压:
#解压
tar -zxvf mysql-5.6.33-linux-glibc2.5-x86_64.tar.gz
#复制解压后的mysql目录
cp -r mysql-5.6.33-linux-glibc2.5-x86_64 /usr/local/mysql

3、添加用户组和用户
#添加用户组
groupadd mysql
#添加用户mysql 到用户组mysql
useradd -g mysql mysql
4、安装mysql
因为我们是编译安装需要生成configure文件
需要下载编译工具yum install autoconf -y
cd /usr/local/mysql/ 转到该目录下
mkdir -p data/mysql 创建目录
chown -R mysql:mysql ./ 将./的属主属组改为mysql
cd /scripts
./mysql_install_db --user=mysql --datadir=/usr/local/mysql/data/mysql
执行此处会报错
安装时的一些错误
-bash: ./scripts/mysql_install_db: /usr/bin/perl: bad interpreter: 没有那个文件或目录
解决: yum -y install perl perl-devel
Installing MySQL system tables…/bin/mysqld: error while loading shared libraries: libaio.so.1: cannot open shared object file: No such file or directory
解决:yum -y install libaio-devel
cp support-files/mysql.server /etc/init.d/mysqld 复制
chmod 755 /etc/init.d/mysqld 更改权限
cp support-files/my-default.cnf /etc/my.cnf复制文件
5、修改启动脚本
vi /etc/init.d/mysqld
找到
basedir=
datadir=
加上路径
basedir=/usr/local/mysql/
datadir=/usr/local/mysql/data/mysql
6、启动mysql服务
service mysqld start
7、测试连接
./mysql/bin/mysql -uroot
8、加入环境变量,编辑 /etc/profile,这样可以在任何地方用mysql命令了
最后一行加入export PATH=$PATH:/usr/local/mysql/bin
让变量生效source /etc/profile
#启动mysql
service mysqld start
#关闭mysql
service mysqld stop
#查看运行状态
service mysqld status 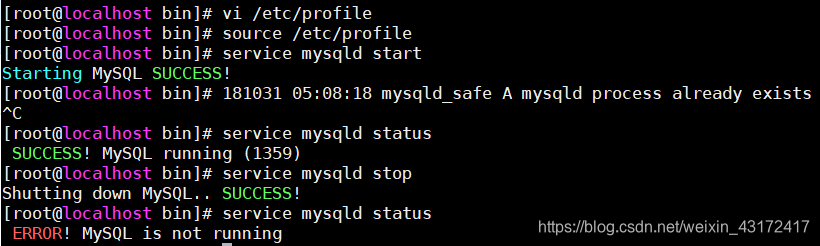
9、可能出现的错误
sqlyog连接时,报1130错误,是由于没有给远程连接的用户权限问题
解决1:更改 ‘mysql’数据库‘user’表‘host’项,从‘localhost’改成‘%’。
use mysql;
select ‘host’ from user where user=‘root’;
update user set host = ‘%’ where user =‘root’;
flush privileges;
解决2:直接授权
GRANT ALL PRIVILEGES ON . TO ‘root’@’%’ IDENTIFIED BY ‘youpassword’ WITH GRANT OPTION;
初次尝试安装:参考的博客:https://www.cnblogs.com/caiyunyun/p/7492373.html
在Linux下编译安装mysql
猜你喜欢
转载自blog.csdn.net/weixin_43172417/article/details/83549449
今日推荐
周排行