Windows版redis服务器设置
Windows版redis的下载通常有msi版和解压缩版,我们这里使用解压缩版
打开解压缩版压缩包,将redis目录拷贝到C盘根目录下,修改里面配置文件redis.windows.conf
找到maxmemory项-最大内存,修改值为 1024000000 大约1G内存

找到requirepass项-登录密码,修改值为123456

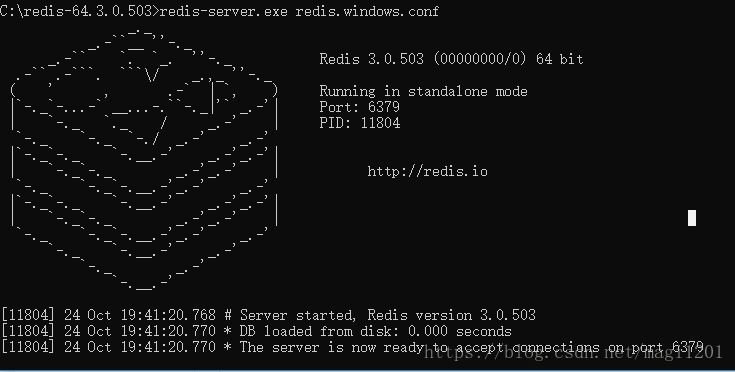
然后 打开命令窗口,切换到redis所在目录,使用命令 C:\redis-64.3.0.503>redis-server.exe redis.windows.conf 来启动redis服务
使用客户端来查看
打开另一个命令窗口,依然切换到redis目录下,使用命令C:\redis-64.3.0.503>redis-cli.exe -h 127.0.0.1 -p 6379 -a 123456来查看服务器情况,命令中 -h 表示主机位置,-p 表示端口号,-a 表示登录密码。如果前面不设置密码,则这边就无需输入密码了。

Java连接
创建一个springboot项目,pom.xml中添加对redis依赖,pom.xml主要内容如下
	<parent>
		<groupId>org.springframework.boot</groupId>
		<artifactId>spring-boot-starter-parent</artifactId>
		<version>2.0.6.RELEASE</version>
		<relativePath/> <!-- lookup parent from repository -->
	</parent>

	<properties>
		<project.build.sourceEncoding>UTF-8</project.build.sourceEncoding>
		<project.reporting.outputEncoding>UTF-8</project.reporting.outputEncoding>
		<java.version>1.8</java.version>
	</properties>

	<dependencies>
		<dependency>
			<groupId>org.springframework.boot</groupId>
			<artifactId>spring-boot-starter-data-redis</artifactId>
		</dependency>
		<dependency>
			<groupId>org.springframework.boot</groupId>
			<artifactId>spring-boot-starter-web</artifactId>
		</dependency>

		<dependency>
			<groupId>org.springframework.boot</groupId>
			<artifactId>spring-boot-starter-test</artifactId>
			<scope>test</scope>
		</dependency>
	</dependencies>
Java代码部分,一个dao层实现类RedisDao.java,一个controller实现类HelloRedis.java
RedisDao.java
package com.example.redis.dao;

import java.util.concurrent.TimeUnit;
import org.springframework.beans.factory.annotation.Autowired;
import org.springframework.data.redis.core.StringRedisTemplate;
import org.springframework.data.redis.core.ValueOperations;
import org.springframework.stereotype.Repository;

@Repository
public class RedisDao {

	@Autowired
	private StringRedisTemplate template;

	/**
	 * 向redis中写入键值对
	 * @param key
	 * @param value
	 */
	public void setKey(String key, String value) {
		ValueOperations<String, String> ops = template.opsForValue();
		ops.set(key, value, 10, TimeUnit.MINUTES);
	}

	/**
	 * 从redis中根据键取值
	 * @param key
	 * @return
	 */
	public String getValue(String key) {
		ValueOperations<String, String> ops = template.opsForValue();
		return ops.get(key);
	}
}
HelloRedis.java
package com.example.redis.controller;

import org.springframework.beans.factory.annotation.Autowired;
import org.springframework.web.bind.annotation.RequestMapping;
import org.springframework.web.bind.annotation.ResponseBody;
import org.springframework.web.bind.annotation.RestController;
import com.example.redis.dao.RedisDao;

@RestController
public class HelloRedis {

	@Autowired
	RedisDao redisDao;

	@RequestMapping("/helloredis")
	@ResponseBody
	public String hello(String name, String age) {
		redisDao.setKey("name", name);
		redisDao.setKey("age", age);

		System.out.println("name=" + name + " * " + "age=" + age);

		String retName = redisDao.getValue("name");
		String retAge = redisDao.getValue("age");
		return retName + " * " + retAge;
	}
}
application.properties
spring.redis.host=127.0.0.1
spring.redis.port=6379
spring.redis.password=123456
spring.redis.database=0
启动springboot后,我们在查看服务器状态的命令窗口看下连接到服务器的客户端数量

客户端数量由之前的一个变为了两个,表示Java部分已经连接到了redis服务器
在url中输入 http://localhost:8080/helloredis?name=王五&age=23 进行测试,页面正常跳转

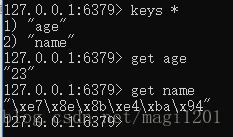
此时,我们到查看服务器状态的命令窗口,通过keys * 命令,可以看到通过程序写入的两个key值,通过get命令可以获取到key对应的value值
以上,本人学习整理,如有错误或语法不当之处,欢迎批评斧正。谢谢。