我们继续翻译GeoTools官网上上的知识,这一篇来翻译GeoTools在Eclipse上的部署并和快速搭建一个项目。
Eclipse Quictstart
Welcome Eclipse Developers
Welcome to Geospatial for Java.This workbook is aimed at Java developers who are new to geospatial and would like to get started.
We are going to start out carefully with the steps needed to set up your Eclipse IDE.
This workbook is also available for NetBeans or Maven command line use.
If you are comfortable with the build tool Maven, it is our preferred option for downloading and managing jars but we will also document how to set up things by hand.
These are visual tutorials that allows you to see what you are working with while you learn.
These examples make use of Swing;
be assured that this is only to make the examples easy and fun to use.
These sessions are applicable to both server side and client side development.
Eclipse 快速入门
欢迎Eclipse开发人员
欢迎来到针对Java的地理空间。本工作手册适用于对于地理空间并不熟悉但愿意开始学习的新手使用。
我们将从设置您的Eclipse IDE环境开始仔细地着手。
这本工作手册同样适用于 NetBeans 和 Maven 中的命令行来使用。
如果您习惯于使用项目管理工具Marven, 我们则更建议您使用Marven来下载和管理jar包。当然了,我们同样会介绍如何手动进行这些设置。
本教程都是可视化的教程(配有图片和详细步骤),旨在让您在学习过程中看到自己每步操作的是什么。
这些例子使用到了Java的开发工具包Swing;
(使用这些Swing)是为了让这些例子使用起来更加简单易用。
这些会话(内容)对于服务端和客户端的开发都有用。
Java Install
We are going to be making use of Java, so if you don't have a Java Development Kit installed now is the time to do so.Even if you have Java installed already check out the
optional Java Advanced Imaging and Java Image IO section.
2.At the time of writing the latest was JDK 8. Choose a download for your platform, for example:
jdk-8u66-windows-i586.exe
For Windows 32bit platforms.
3.Click through the installer. You will need to accept a license agreement, choose a directory and so forth. By default this will install to:
C:\Program Files\Java\jdk1.8.0\
4.Optional: Java Advanced Imaging is used by GeoTools for raster support. If you install JAI 1.1.3 performance will be imporved:
Both a JDK and JRE installer are available:
- jai-1_1_3-lib-windows-i586-jdk.exe
- jai-1_1_3-lib-windows-i586-jre.exe
5.Optional: ImaeIO is used to read and write raster files. GeoTools uses version 1-1 of ImageIO library:
Both a JDK and JRE installer are available:
- jai_imageio-1_1-lib-windows-i586-jdk.exe
- jai_imageio-1_1-lib-windows-i586-jre.exe
For more details of how to install these packages see this page
Java 安装
我们即将使用Java,如果您的机器上还没有安装Java 开发工具包 JDK的话,现在就先安装一下。即使已经安装了JDK,不妨查看一下可选项JAI和java image IO图形接口部分的内容。
2、截止到本文编辑的时刻,JDK最新发行版本是JDK 8,针对您的平台,选择一个合适的版本来下载,比如:针对32位的Windows操作系统,请选择如下版本的JDK:
jdk-8u66-windows-i586.exe
3、点击安装器进行安装,您需要一个许可,选择一个安装目录然后进行第四步的操作,如果没有自定义安装位置,则JDK的默认安装路径是:
C:\Program Files\Java\jdk1.8.0\
4、可选:GeoTools提供了Java Advanced Imaging(JAI)用于栅格支持。如果您安装了JAI 1.1.3,GeoTools的性能会有所改善,可到下面的链接进行下载:
JDK 和 JRE 的安装程序可分别使用下面对应版本的JAI:
- jai-1_1_3-lib-windows-i586-jdk.exe
- jai-1_1_3-lib-windows-i586-jre.exe
5、可选:ImageIO 用于读写光栅文件。GeoTools使用的ImageIO库的版本是1_1:可到下面的链接下载java Image IO:
JDK 和 JRE的安装程序可分别使用下面版本的JAI_ImageIO:
- jai_imageio-1_1-lib-windows-i586-jdk.exe
- jai_imageio-1_1-lib-windows-i586-jre.exe
关于如何安装这些包的详细阐述,请参考本页链接:
http://docs.geoserver.org/latest/en/user/production/java.html#install-native-jai-and-imageio-extensions
Eclipse
Eclipse is a popular integrated development environment most often used for all kinds of Java development. For this tutorial we are doing straight up Java programming using the smallest download available - if you already have an Eclipse download please go ahead and use it and switch to the "Java Perspective".
At the time of writing the latest release was Eclipse Neon:
- eclipse-jee-neon-R-win32.zip
2.Eclipse now provides an installer; however this tutorial targets the binary packages that you simply extract and run,
3.To start out with create the folder C:\java to keep all our java development in one spot.
4.Unzip the downloaded
eclipse-java-mars-R-win32.zip
file to your C:\java directory - the folder C:\java\eclipse will be created.
5.Navigate to C:\java\eclipse and right-click on the eclipse.exe file and select Send To -> Desktop(create shortcut).
6.Open up the eclipse.ini file.
- Use our JDK directly by providing a -vm argument
- Optional: If you have lots of memory for development consider -Xmx756m
-startup
plugins/org.eclipse.equinox.launcher_1.1.0.v20100507.jar
--launcher.library
plugins/org.eclipse.equinox.launcher.win32.win32.x86_1.1.0.v20100503
-product
org.eclipse.epp.package.java.product
--launcher.defaultAction
openFile
-showsplash
org.eclipse.platform
--launcher.defaultAction
openFile
-vm
C:\Program Files\Java\jdk1.6.0_20\bin
-vmargs
-Dosgi.requiredJavaVersion=1.8
-Xms40m
-Xmx756m
7.Double click on your desktop shortcut to start up eclipse.
8.When you start up eclipse for the first time it will prompt you for a workspace. To keep our java work in one spot you can type in:C:\java\workspace
9.On the Welcome view press Workbench along the right hand side and we can get started
Eclipse
Eclipse 是一个很受欢迎的经常被用来进行各种Java开发的集成开发环境。在本教程中,我们使用最小的版本来进行最简单直接的Java开发——如果您已经下载好了一款Eclipse,请直接使用它并切换到Java透视图(Java Perspective)
截止到本网页编辑的时刻,Eclipse 的最新发型版本是 Eclipse Neon:
- eclipse-jee-neon-R-win32.zip
2、目前,Eclipse 提供了一个安装程序;但本教程仅针对能够让您进行提取和运行的二进制包来介绍。
3、我们先创建目录 C:\java 以便于把所有的和 java 开发相关的东西放到一起。
4、解压下载的安装包
eclipse-java-mars-R-win32.zip并放到
C:\java 目录 下,将会创建
C:\java\eclipse 文件夹。
5、导航到目录
C:\java\eclipse下并右击 eclipse.exe 文件并选择 发送到 -> 桌面快捷方式。
6、打开 Eclipse的配置文件 eclipse.ini
- 通过提供一个-vm参数直接使用我们的JDK
- 可选:如果您有大量内存用于开发,请考虑 -Xmx756m
-startup
plugins/org.eclipse.equinox.launcher_1.1.0.v20100507.jar
--launcher.library
plugins/org.eclipse.equinox.launcher.win32.win32.x86_1.1.0.v20100503
-product
org.eclipse.epp.package.java.product
--launcher.defaultAction
openFile
-showsplash
org.eclipse.platform
--launcher.defaultAction
openFile
-vm
C:\Program Files\Java\jdk1.6.0_20\bin
-vmargs
-Dosgi.requiredJavaVersion=1.8
-Xms40m
-Xmx756m
7、双击您桌面上的快捷方式来启动 Eclipse
8、当您第一次启动Eclipse时,它会提示您输入工作空间。为了让我们的java工作在一个地方,可以输入:
C:\java\workspace
9、在欢迎界面中右击工作台,我们可以开始。
M2E
Maven is a build system for Java which is very good at managing dependencies.The GeoTools library is plugin based and you get to pick and choose what features you need for your application. While this is useful when determining just what is needed for delivery - it can be a pain to manage by hand so we encourage the use of a tool such as maven.
In previous years we used the command line(gasp!) when working with maven. This year we are going to be using the M2E plugin from Sonyatype.
The M2E plugin is included by default since Eclipse 3.7.
M2E
Maven 是 Java 的构建系统,他非常适合管理依赖关系。GeoTools 库是基于插件的,您可以选取自己的应用程序所需的功能。虽然这在确定需要交付什么的时候很有用——但是手工管理可能会很痛苦,所以我们鼓励使用诸如 Maven 的工具。
几年前,我们使用Maven的时候还在用命令行(gasp!)。今年我们将使用Sonyatype 的 M2E插件。
Eclipse 3.7 版本开始默认包含 M2E 插件。
Quickstart
For this Quickstart we are going to produce a simple maven project, hook it up to GeoTools, and then display a shapefile.
This tutorial is really focused on your development environment and making sure you have GeoTools ready to go. We will cover what a shapefile is and how the map is displayed shortly.
快速开始
在这个快速开始种,我们将生成一个简单的 Maven 项目,将其连接到 Geotools, 然后显示一个shapefile 。
本教程将真正专注于您的开发环境,请确保您已经准备好了Geotools. 我们将介绍什么是shapefile 以及如何快速显示地图。
Creating a Simple Maven project
Maven works by asking you to describe your project, the name, the version number, where the source code is, how you want it packaged, and what libraries it makes use of. Based on the description it can figure out most things: how to compile your code, creating javadocs, or even downloading the library jars for you.
To use M2E plugin to create a new maven project:
1. File > New > Other from the menu bar
2. Select the wizard Maven > Maven Project and press Next to open theNew Maven Project wizard
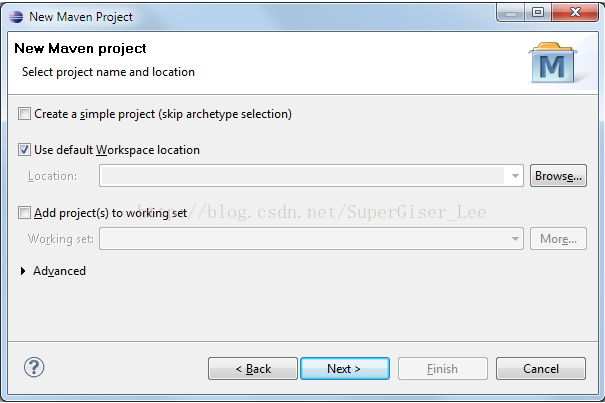
3.The new Maven project page defaults are fine,press Next
4.The default of maven-archtype-quickstart is fine, pressNext
5.The archtype acts a template using the parameters we supply to create the project.
- Group Id: org.geotools
- Artifact Id: tutorial
- Version: 0.0.1-SNAPSHOT (default)
- Package: org.geotools.tutorial

6. Press Finish to create the new project.
7. You can see that an application has been created; complete withApp.java and a JUnint test case
8.Open up src/main/java and select org.geotools.tutorial.App and press theRun butrton in the toolbar:
Hello World!
9.You may also open up src/main/test and run org.geotools.tutorial.ApppTestas aJUnit Test
创建一个简单的Maven项目
Maven的工作原理是要求您来描述自己的项目,名称,版本号,源码位置,打包方式和使用的库,根据描述,他可以解决大多数事情:如何编译代码,创建javadoc,甚至为您下载jar库。
使用M2E来创建一个新的maven项目:
1、文件 》新建 》其他(菜单栏中)
2、选择向导
Maven 》Maven 项目 》然后点击
下一步 打开
新建 Maven 项目 向导
3、新建 Maven 项目页面选择默认设置就好,点击
下一步
4、选择默认的
maven-archtype-quickstart 就好,点击
下一步
5、archtype充当了一个模板,它使用我们提供的参数来创建项目(参数按如下填写)。
-
- Group Id: org.geotools
- Artifact Id: tutorial
- Version: 0.0.1-SNAPSHOT (default)
- Package: org.geotools.tutorial

6、点击 完成 按钮来完成新项目的创建
7、您可以看到已经创建好了一个应用程序,同时完成了一个
App.java 和一个 JUnit 测试用例
8、打开 src / main / java 并选择
org.geotools.tutorial.App ,然后点击工具栏中的 运行 按钮
Hello World!
9、您也可以打开src / main / test 并运行
org.geotools.tutorial.AppTest 作为
JUnit 测试。