SpringBoot 入门系列:
搭建 SpringBoot 2.0 项目 (一) 开发环境的搭建(安装开发工具STS)
搭建 SpringBoot 2.0 项目 (二) 简单项目的搭建
搭建 SpringBoot 2.0 项目 (三) 使用 JPA 访问MySQL数据库
搭建 SpringBoot 2.0 项目 (四) 使用 Mybatis 访问MySQL数据库
搭建 SpringBoot 2.0 项目 (五) 搭建一个集成ssm的web项目
本博文主要讲述使用 JPA 访问 MySQL 数据库,参考了官网的入门指南,链接如下:
官网入门指南:https://spring.io/guides/gs/accessing-data-mysql/
运行环境:
-
MySQL 5.6或更高版本。
1、首先登录Mysql,然后新建一个数据库
推荐使用软件navicat ,操作数据库非常便捷。参考我的博文:https://blog.csdn.net/Henry_Lin_Wind/article/details/80927803
mysql> create database db_example否则运行时,会报错,如下:
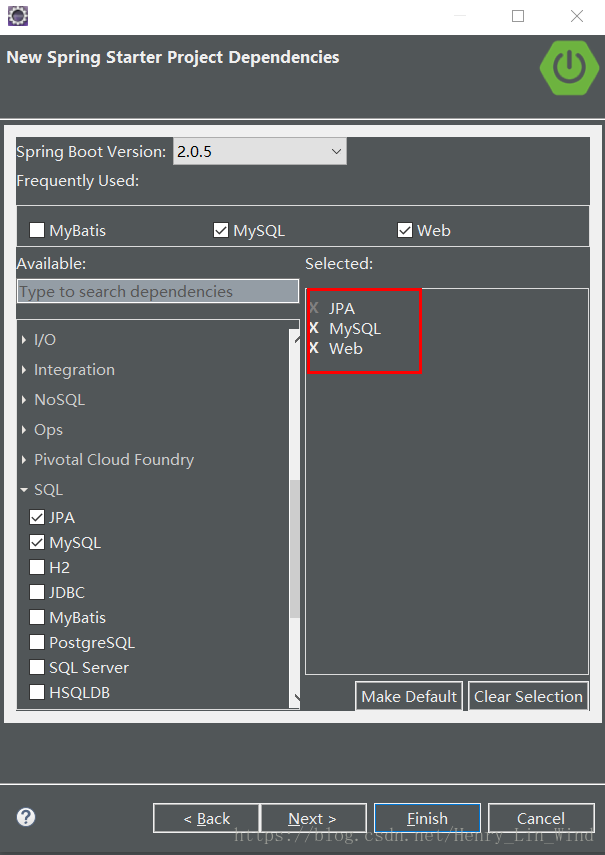
com.mysql.jdbc.exceptions.jdbc4.MySQLSyntaxErrorException: Unknown database 'db_example'2、使用 STS 新建一个名为demo-jpa的项目,选择JPA,MySQL以及Web
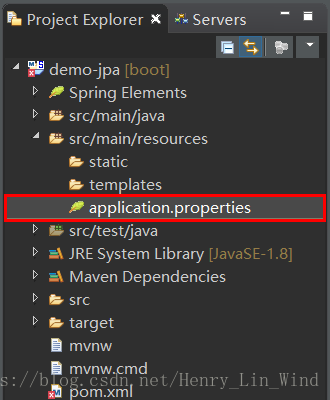
创建完成后,打开 application.properties
设置数据库相关属性
spring.jpa.hibernate.ddl-auto=create //第一次访问数据库要设置为create,成功后改为none
spring.datasource.url=jdbc:mysql://localhost:3306/db_example //你的数据库连接路径
spring.datasource.username= //你的数据库用户名
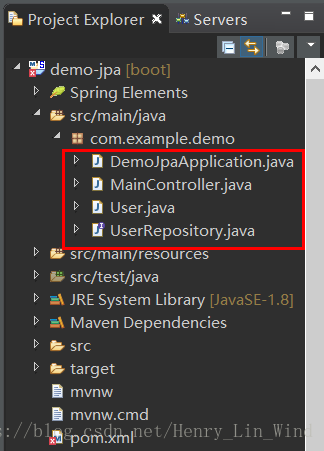
spring.datasource.password= //你的数据库密码 3、创建 User.java 、UserRepository.java 、MainController.java。如下:
package com.example.demo;

import javax.persistence.Entity;
import javax.persistence.GeneratedValue;
import javax.persistence.GenerationType;
import javax.persistence.Id;

@Entity
public class User {
    @Id
    @GeneratedValue(strategy=GenerationType.AUTO)
    private Integer id;

    private String name;

    private String email;

	public Integer getId() {
		return id;
	}

	public void setId(Integer id) {
		this.id = id;
	}

	public String getName() {
		return name;
	}

	public void setName(String name) {
		this.name = name;
	}

	public String getEmail() {
		return email;
	}

	public void setEmail(String email) {
		this.email = email;
	}


}
package com.example.demo;
import org.springframework.data.repository.CrudRepository;
// This will be AUTO IMPLEMENTED by Spring into a Bean called userRepository
// CRUD refers Create, Read, Update, Delete
public interface UserRepository extends CrudRepository<User, Integer> {
}package com.example.demo;
import org.springframework.beans.factory.annotation.Autowired;
import org.springframework.stereotype.Controller;
import org.springframework.web.bind.annotation.RequestMapping;
import org.springframework.web.bind.annotation.GetMapping;
import org.springframework.web.bind.annotation.RequestParam;
import org.springframework.web.bind.annotation.ResponseBody;
@Controller
@RequestMapping(path="/demo")
public class MainController {
@Autowired
private UserRepository userRepository;
@GetMapping(path="/add") // Map ONLY GET Requests
public @ResponseBody String addNewUser (@RequestParam String name
, @RequestParam String email) {
User n = new User();
n.setName(name);
n.setEmail(email);
userRepository.save(n);
return "Saved";
}
@GetMapping(path="/all")
public @ResponseBody Iterable<User> getAllUsers() {
return userRepository.findAll();
}
}4、启动项目,插入数据
http://localhost:8080/demo/add?name=First&[email protected]

新增数据,成功返回 saved

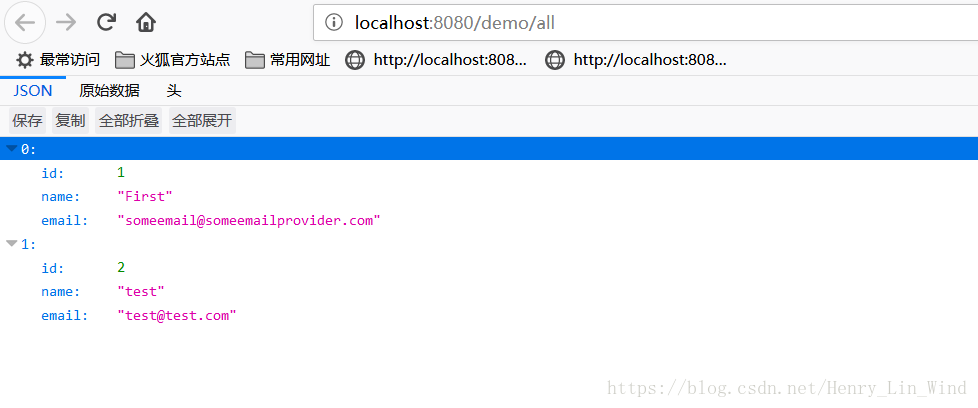
查询数据库数据,返回所有数据


5、新增数据以及查询成功后,将application.properties 的 spring.jpa.hibernate.ddl-auto 设置为 nono 或者 update
spring.jpa.hibernate.ddl-auto=none设置完成后重启,就可以在不改变数据结构的情况下插入新数据,例如
http://localhost:8080/demo/add?name=test&[email protected]
重新查询,结果如下:
以上,springboot项目通过JPA访问MySQL的案例就成功了。