版权声明:本文为博主原创文章,未经博主允许不得转载。 https://blog.csdn.net/u013037201/article/details/76998999
我们用的还是之前博客中介绍到的例子,将用户微服务和电影微服务注册到Eureka Server中,大部分代码在前面都已经展示过。这里只说明修改的部分。
项目源码包下载地址:http://pan.baidu.com/s/1geWJU3x
整体目录:
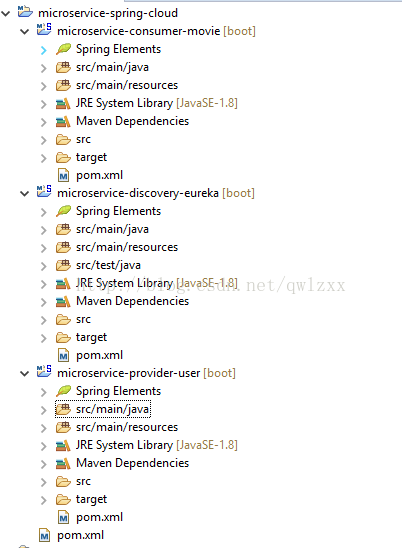
从上面目录结构可以看出,用户微服务、电影微服务和eueka有一个公共目录spring cloud。就是将之前各个微服务的依赖和插件全都抽取到了一个公共的pom文件中。便于统一管理版本和打包部署,而且目录结构也非常清晰。
上篇博客已经展示了Eureka Server的配置,这里只对用户微服务和电影微服务注册到Eureka Server进行说明。
用户微服务
1、在pom文件中添加eureka和actuator的jar包的依赖。
<?xml version="1.0" encoding="UTF-8"?>
<project xmlns="http://maven.apache.org/POM/4.0.0" xmlns:xsi="http://www.w3.org/2001/XMLSchema-instance"
	xsi:schemaLocation="http://maven.apache.org/POM/4.0.0 http://maven.apache.org/xsd/maven-4.0.0.xsd">
	<modelVersion>4.0.0</modelVersion>

	<artifactId>microservice-provider-user</artifactId>
	<packaging>jar</packaging>

	<parent>
		<groupId>com.itmuch.cloud</groupId>
		<artifactId>microservice-spring-cloud</artifactId>
		<version>0.0.1-SNAPSHOT</version>
		<relativePath/> <!-- lookup parent from repository -->
	</parent>

	<properties>
		<project.build.sourceEncoding>UTF-8</project.build.sourceEncoding>
		<project.reporting.outputEncoding>UTF-8</project.reporting.outputEncoding>
		<java.version>1.8</java.version>
	</properties>

	<dependencies>
		<dependency>
			<groupId>org.springframework.boot</groupId>
			<artifactId>spring-boot-starter-data-jpa</artifactId>
		</dependency>
		<dependency>
			<groupId>org.springframework.boot</groupId>
			<artifactId>spring-boot-starter-web</artifactId>
		</dependency>

		<dependency>
			<groupId>com.h2database</groupId>
			<artifactId>h2</artifactId>
			<scope>runtime</scope>
		</dependency>

		<dependency>
			<groupId>org.springframework.cloud</groupId>
			<artifactId>spring-cloud-starter-eureka</artifactId>
		</dependency>
		<dependency>
			<groupId>org.springframework.boot</groupId>
			<artifactId>spring-boot-starter-actuator</artifactId>
		</dependency>
	</dependencies>


</project>
2、在启动类加上@EnableEurekaClient的注解。
package com.itmuch.cloud;


import org.springframework.boot.SpringApplication;
import org.springframework.boot.autoconfigure.SpringBootApplication;
import org.springframework.cloud.netflix.eureka.EnableEurekaClient;

@SpringBootApplication
@EnableEurekaClient
public class MicroserviceSimpleProviderUserApplication {

	public static void main(String[] args) {
		SpringApplication.run(MicroserviceSimpleProviderUserApplication.class, args);
	}
}
3、配置application.yml,添加如下内容
server:
  port: 7900
spring:
  jpa:
    generate-ddl: false
    show-sql: true
    hibernate:
      ddl-auto: none
  datasource:
    platform: h2
    schema: classpath:schema.sql
    data: classpath:data.sql
  application:
    name: microservice-provider-user
logging:
  level:
    root: INFO
    org.hibernate: INFO
    org.hibernate.type.descriptor.sql.BasicBinder: TRACE
    ort.hibernate.type.descriptor.sql.BasicExtractor: TRACE
    com.itmuch: DEBUG
eureka:
  client:
    healthcheck:
      enabled: true
    serviceUrl:
      defaultZone: http://user:password123@localhost:8761/eureka
  instance:
      prefer-ip-address: true
      instance-id: ${spring.application.name}:${spring.application.instance_id:${server.port}}
4、使用Eureka Client的测试,在Controller中编写
package com.itmuch.cloud.controller;

import org.springframework.beans.factory.annotation.Autowired;
import org.springframework.cloud.client.ServiceInstance;
import org.springframework.cloud.client.discovery.DiscoveryClient;
import org.springframework.web.bind.annotation.GetMapping;
import org.springframework.web.bind.annotation.PathVariable;
import org.springframework.web.bind.annotation.RestController;
import com.itmuch.cloud.entity.User;
import com.itmuch.cloud.repository.UserRepository;
import com.netflix.appinfo.InstanceInfo;
import com.netflix.discovery.EurekaClient;


@RestController
public class UserController {
	@Autowired
	private UserRepository userRepository;

	@Autowired
	private EurekaClient eurekaClient;

	@Autowired
	private DiscoveryClient discoveryClient;

	@GetMapping("/simple/{id}")
//	@RequestMapping(value="/simple/{id}")
	public User findById(@PathVariable Long id)
	{
		return this.userRepository.findOne(id);
	}

	@GetMapping("/eureka-instance")
	public String serviceUrl() {
	    InstanceInfo instance = eurekaClient.getNextServerFromEureka("MICROSERVICE-PROVIDER-USER", false);
	    return instance.getHomePageUrl();
	}

	@GetMapping("/instance-info")
	public ServiceInstance showInfo() {
	    ServiceInstance instance = discoveryClient.getLocalServiceInstance();
	    return instance;
	}
}
电影微服务也同理
1、pom文件中添加:
<dependency>
			<groupId>org.springframework.cloud</groupId>
			<artifactId>spring-cloud-starter-eureka</artifactId>
		</dependency>
		<dependency>
			<groupId>org.springframework.boot</groupId>
			<artifactId>spring-boot-starter-actuator</artifactId>
		</dependency>
2、application.xml中添加
服务名称:
spring:
  application:
    name: microservice-consumer-movie
eureka:
  client:
    healthcheck:
      enabled: true
    serviceUrl:
      defaultZone: http://user:password123@localhost:8761/eureka
  instance:
      prefer-ip-address: true
3、在启动类中添加注解@EnableEurekaClient
到这里全部配置完成,我们先启动Eureka Server,再启动用户微服务,最后启动电影微服务。然后登陆Eureka页面,我们可以看到如下现象:
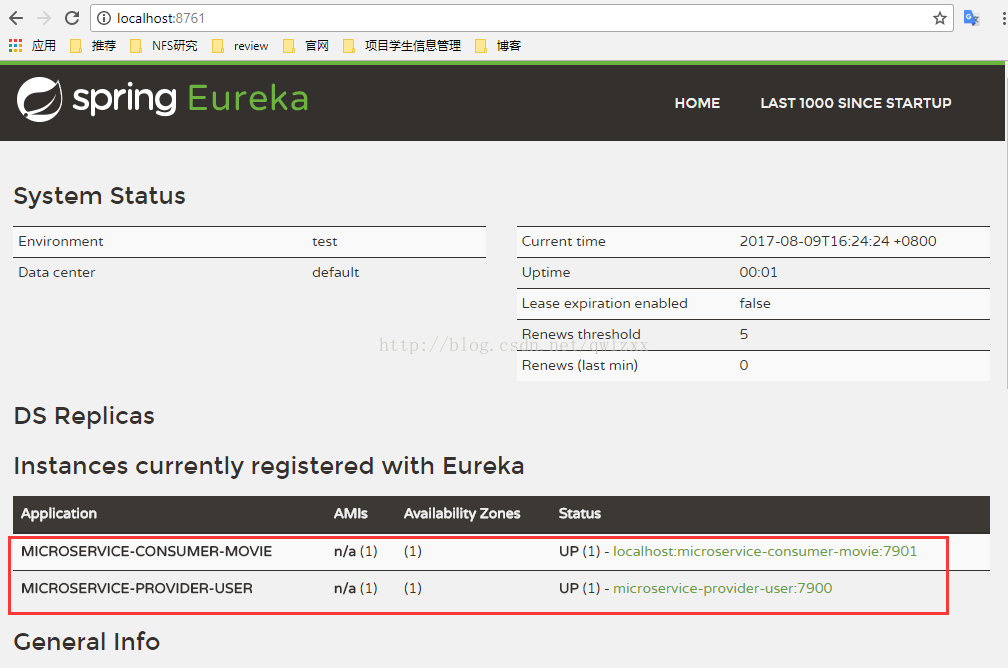
从上图可以看到,我们已经将微服务全都注册到了Eureka Server上。
总结和拓展:
1、How to include Eureka Client
在微服务中添加依赖
<dependency>
			<groupId>org.springframework.cloud</groupId>
			<artifactId>spring-cloud-starter-eureka</artifactId>
</dependency>在application.yml中添加如下内容:
eureka:
  client:
    serviceUrl:
      defaultZone: http://user:password123@localhost:8761/eureka
  instance:
      prefer-ip-address: true
2、配置应用名称,如果不进行配置,那么就会在页面显示为UNKNOWN
spring:
  application:
    name: microservice-consumer-movie
3、更改Eureca实例ID
默认为:
${spring.cloud.client.hostname}:${spring.application.name}:${spring.application.instance_id:${server.port}}}.
可以在application.yml中进行更改
eureka:
  instance:
      instance-id: ${spring.application.name}:${spring.application.instance_id:${server.port}}
4、当注册在Eureca Server上的微服务宕掉后,会显示DOWN字样
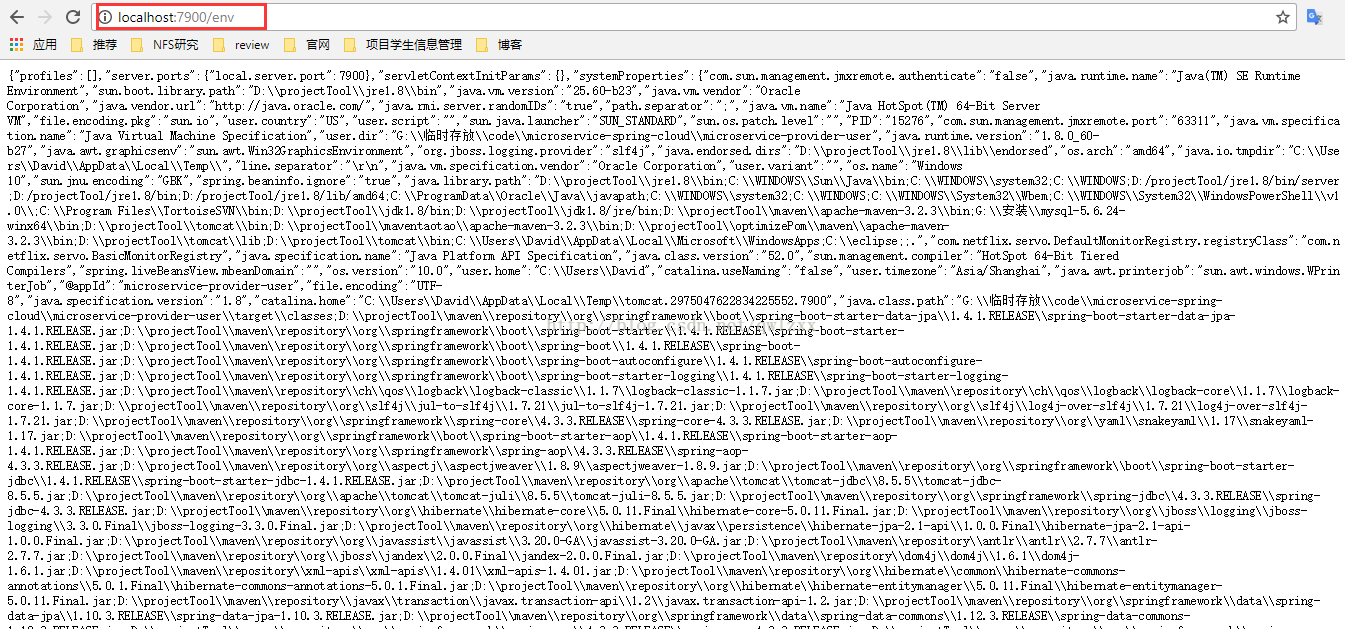
5、Status Page and Health Indicator
添加依赖:
<dependency>
			<groupId>org.springframework.boot</groupId>
			<artifactId>spring-boot-starter-actuator</artifactId>
		</dependency>
spring boot actuator专门监控和管理生产环境
启动看看:

6、Eureka's Health Checks
在application.yml中配置
eureka:
client:
healthcheck:
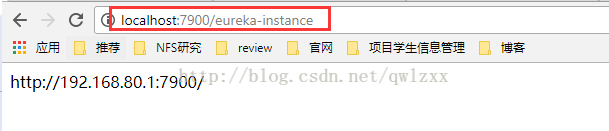
enabled: true7、Using the EurekaClient
在controller中添加:
@Autowired
	private EurekaClient eurekaClient;

	@Autowired
	private DiscoveryClient discoveryClient;

	@GetMapping("/eureka-instance")
	public String serviceUrl() {
	    InstanceInfo instance = eurekaClient.getNextServerFromEureka("MICROSERVICE-PROVIDER-USER", false);
	    return instance.getHomePageUrl();
	}

	@GetMapping("/instance-info")
	public ServiceInstance showInfo() {
	    ServiceInstance instance = discoveryClient.getLocalServiceInstance();
	    return instance;
	}

这里总结的实践参考与官方资料:http://cloud.spring.io/spring-cloud-static/Camden.SR1/
有精力建议一定要好好看看,很全面!