环境说明
hostnamectl set-hostname 主机名
以下操作需要在所有节点执行。
停止防火墙
systemctl disable firewalld
systemctl stop firewalld
禁止selinux.
vim /etc/selinux/config
配置为disabled
配置/etc/hosts
10.0.0.230 admin
10.0.0.231 node231
10.0.0.232 node232
10.0.0.233 node233
10.0.0.234 client
更换yum源为国内阿里云
http://blog.csdn.net/chenhaifeng2016/article/details/78864541
添加ceph安装源
vim /etc/yum.repos.d/ceph.repo
[Ceph]
name=Ceph packages for $basearch
baseurl=http://mirrors.aliyun.com/ceph/rpm-luminous/el7/$basearch
enabled=1
gpgcheck=1
type=rpm-md
gpgkey=https://download.ceph.com/keys/release.asc

[Ceph-noarch]
name=Ceph noarch packages
baseurl=http://mirrors.aliyun.com/ceph/rpm-luminous/el7/noarch
enabled=1
gpgcheck=1
type=rpm-md
gpgkey=https://download.ceph.com/keys/release.asc

[ceph-source]
name=Ceph source packages
baseurl=http://mirrors.aliyun.com/ceph/rpm-luminous/el7/SRPMS
enabled=1
gpgcheck=1
type=rpm-md
gpgkey=https://download.ceph.com/keys/release.asc
安装ntp
yum install ntp
systemctl enable ntpd
systemctl start ntpd
查看ntp状态
ntpq -p
重启所有节点
shutdown -r now 或者reboot
以下操作只需在admin节点运行
配置ssh免密登录
ssh-keygen
ssh-copy-id admin
ssh-copy-id node231
ssh-copy-id node232
ssh-copy-id node233
ssh-copy-id client
安装ceph-deploy
yum install ceph-deploy
创建配置文件目录
mkdir -p /etc/ceph
cd /etc/ceph
创建一个ceph集群
cepy-deploy new node231
在所有节点上安装ceph二进制软件包
ceph-deploy admin node231 node232 node233 client
ceph -v或ceph version

创建一个Ceph MON
ceph-deploy mon create-initial
创建Ceph OSD
ceph-deploy disk list node231
ceph-deploy disk zap node231:vdb
ceph-deploy disk zap node232:vdb
ceph-deploy disk zap node233:vdb


由于内核不支持,需要禁止一些特性,只保留layering
rbd --pool test feature disable disk01 exclusive-lock, object-map, fast-diff, deep-flatten
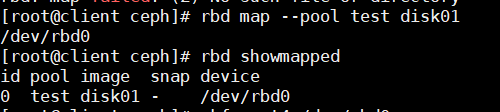
映射块disk01到本地
rbd map --pool test disk01
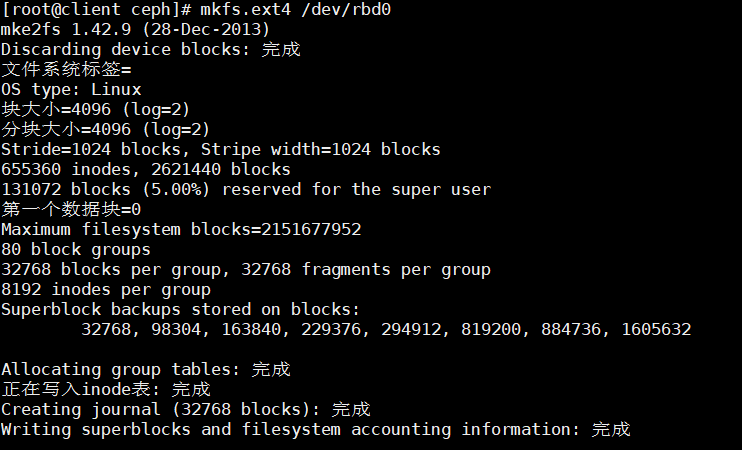
格式化块设备
mkfs.ext4 /dev/rbd0
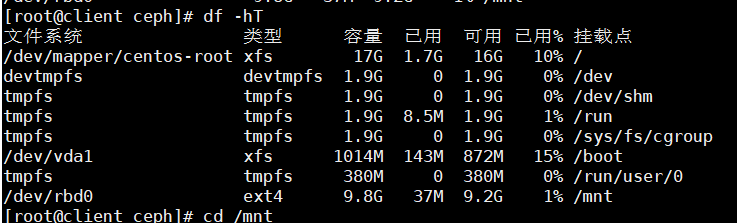
把rbd0挂载到本地目录
mount /dev/rbd0 /mnt
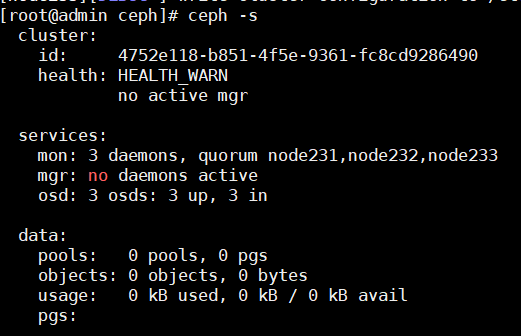
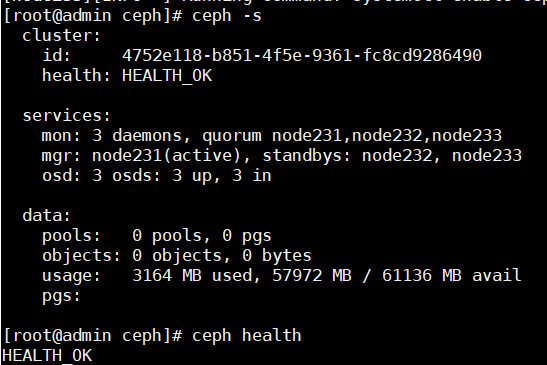
这个时候查看集群状态, 集群的状态是HEALTH_WARN
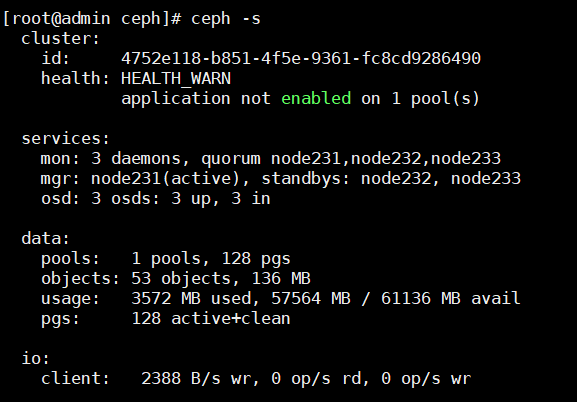
执行ceph health detail

根据提示信息执行ceph osd pool application enable test rbd
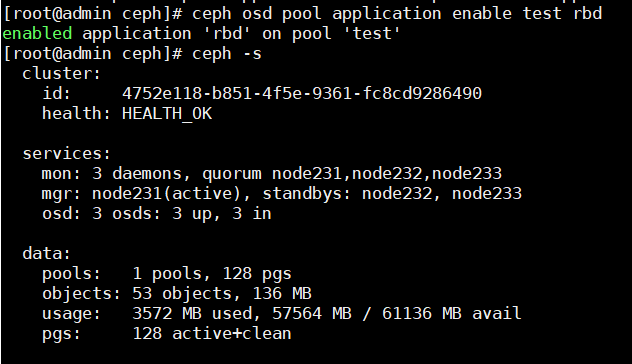
集群状态正常了。