前面我们已经了解了可以通过localStorage在客户端(浏览器)保存数据。
回顾token
框架中的RESTful api快速领悟(中):token认证
框架中的RESTful api快速领悟(下):token的设置
我们后端有这样一个接口:
http://localhost/yiiserver/web/index.php/token?client_appid=aaa&client_appkey=bbb - 1
- 1
其实就向clients(理解为用户表即可)里面去生成一个token


这里的client_appid 就相当于用户名,client_appkey 就相当于密码。
这样后端认证之后会生成一个access-token,我们需要把这个access-token 保存在客户端。
注意:我们前端一般部署在另外的服务器上,会跨域,后端要处理跨域的问题,在PHP中可以写上如下代码:
//指定允许其他域名访问
header("Access-Control-Allow-Origin: *");
header("Access-Control-Allow-Methods: GET,POST");
header('Access-Control-Allow-Headers: X-Requested-With,content-type,if-modified-since');- 1
- 2
- 3
- 4
- 1
- 2
- 3
- 4
前端的套路
注意,我们项目既然早已用上了VueX,那么我肯定就要在Store(vuex里的概念)里面来创建一个module。
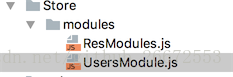
我们新建了一个UsersModule.js 来处理用户登录的业务,注意不要忘记在入口文件users-index.js 中引入。如果我们的『会员后台』也需要用户相关数据,也要引入。
在users-index.js 里修改:
//引入模块
import ResModule from './../Store/modules/ResModules';
import UsersModule from "./../Store/modules/UsersModule";
const vuex_config = new Vuex.Store({
    modules: {
        res:ResModule,
        users:UsersModule
    }
});- 1
- 2
- 3
- 4
- 5
- 6
- 7
- 8
- 9
- 1
- 2
- 3
- 4
- 5
- 6
- 7
- 8
- 9
1、UsersModule.js
import Vue from "vue";

export default {
    state:{
        currentUser:{
            get UserName(){
                return localStorage.getItem("currentUser_name");
            },
            get UserToken(){
                return localStorage.getItem("currentUser_token");
            }
        }
    },
    mutations:{
        setUser(state,{user_name,user_token}){
            // 在这里把用户名和token保存起来
            localStorage.setItem("currentUser_name",user_name);
            localStorage.setItem("currentUser_token",user_token);
        }
    },
    actions:{
        userLogin(context,{user_name,user_pass}){
            // 发送get请求做权限认证(真实开发建议用post的方式)
            let url = "http://localhost/yiiserver/web/index.php/token?client_appid="+user_name+"&client_appkey="+user_pass;
            console.log(url);

            Vue.http.get(url)
                .then((res)=>{
                    if (res!=null && res.body!=undefined && "access-token" in res.body){
                        var token = res.body["access-token"];
                        if (token != ""){
                            // 后端API验证通过
                            // 调用上面mutations里定义的方法
                            context.commit("setUser",{"user_name":user_name,"user_token":token});
                        }
                    }else{
                        alert("用户名密码错误");
                    }
                },(res)=>{
                    alert("请求失败进入这里")
                });
        }
    }
}- 1
- 2
- 3
- 4
- 5
- 6
- 7
- 8
- 9
- 10
- 11
- 12
- 13
- 14
- 15
- 16
- 17
- 18
- 19
- 20
- 21
- 22
- 23
- 24
- 25
- 26
- 27
- 28
- 29
- 30
- 31
- 32
- 33
- 34
- 35
- 36
- 37
- 38
- 39
- 40
- 41
- 42
- 43
- 44
- 1
- 2
- 3
- 4
- 5
- 6
- 7
- 8
- 9
- 10
- 11
- 12
- 13
- 14
- 15
- 16
- 17
- 18
- 19
- 20
- 21
- 22
- 23
- 24
- 25
- 26
- 27
- 28
- 29
- 30
- 31
- 32
- 33
- 34
- 35
- 36
- 37
- 38
- 39
- 40
- 41
- 42
- 43
- 44
actions部分:我们写了一个userLogin()方法,来发送http请求后端服务器,请求成功返回的数据调用在mutations部分定义的setUser()方法保存到客户端。
注意:actions里的userLogin()方法,是供在用户登录页调用的,也就是userslogin.vue里。
所以来到userlogin.vue,修改如下代码:
        methods:{
            login(){

                // 这个验证是element-ui框架提供的方法
                this.$refs["users"].validate(function (flag) {
                    if(flag){
                        /*localStorage.setItem("currentUser",this.UserModel.user_name);
                        alert("用户登录成功");*/

                        this.$store.dispatch("userLogin",{"user_name":this.UserModel.user_name,"user_pass":this.UserModel.user_pass})
                    }else{
                        alert("用户名密码必填");
                    }
                }.bind(this));
            }
}- 1
- 2
- 3
- 4
- 5
- 6
- 7
- 8
- 9
- 10
- 11
- 12
- 13
- 14
- 15
- 16
- 1
- 2
- 3
- 4
- 5
- 6
- 7
- 8
- 9
- 10
- 11
- 12
- 13
- 14
- 15
- 16
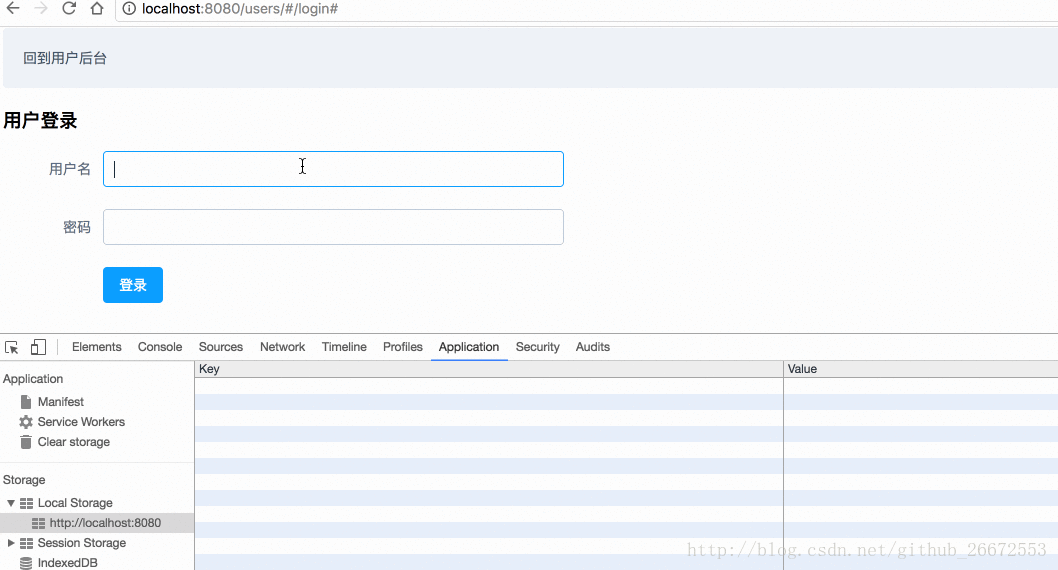
我们来测试一下,有没有成功保存到客户端的localStorage 中:
2、如果我们的会员后台
http://localhost:8080/member
也需要获取用户的登录信息,比如用户名。来显示到导航栏上。
首先是应该在会员后台模块的入口文件member-index.js中:
//引入Module
import ResModule from './../Store/modules/ResModules';
import UsersMoule from "./../Store/modules/UsersModule";
const vuex_config = new Vuex.Store({
    modules: {
        res:ResModule,
        users:UsersMoule
    }
});- 1
- 2
- 3
- 4
- 5
- 6
- 7
- 8
- 9
- 1
- 2
- 3
- 4
- 5
- 6
- 7
- 8
- 9
然后我们就可以在,比如导航栏组件navbar.vue中:
<a href="##">{{this.$store.state.users.currentUser.UserName}}</a>- 1
- 1
通过这样的方式,访问users里的属性。
