1. 方案选择
最近发现好久不看算法了,自己的能力有些松懈和退步了,便捡起 LeetCode 刷刷题,在选择IDE时发现:Vim 太简陋,Eclipse 操作太繁杂,VS Code 正合适。我把 VS Code 用于编写小小型C++项目的配置方式记录下来。
VS Code 提供 C/C++ for VS Code 插件,提供下面 C++ 语言方面的支持(Language service):
- Code Formatting (clang-format) 代码格式化
- Auto-Completion (experimental) 自动完成
- Symbol Searching 符号搜索
- Go to Definition/Declaration 定义跳转
- Peek Definition/Declaration 定义预览
- Class/Method Navigation 类/方法 导航
- Signature Help 帮助提示
- Quick Info (Hover) 鼠标浮动提示
- Error Squiggles 错误曲线标识
下面开始配置,仅记录 Linux 环境下的配置:
2. 编译配置
在 VS Code 中打开工具窗口 (Ctrl+Shift+P) ,输入 C/CPP: Edit Configurations 来生成配置文件 c_cpp_properties.json 可以添加一些自定义 include 路径,如果不使用外部的第三方库,默认配置可以直接使用。
C++ 是需要编译的,VS Code 把代码的 linting, building, packaging, testing , deploying 都归结为 Tasks 我们需要配置一个或者多个 Tasks 来完成编译任务
打开工具窗口 (Ctrl+Shift+P) → 输入 Tasks: Configure Task Runner,弹出窗口中选择 Others 在新打开的tasks.json中配置如下:
{
    // See https://go.microsoft.com/fwlink/?LinkId=733558
    // for the documentation about the tasks.json format
    "version": "2.0.0",
    "tasks": [
        {
            "label": "build-release",
            "type": "shell",
            "command": "g++",
            "args": [
                "*.cpp",
                "-o${workspaceRootFolderName}"
            ],
            "group": {
                "kind": "build",
                "isDefault": true
            },
            "problemMatcher": [
                "$gcc"
            ]
        },
        {
            "label": "build-debug",
            "type": "shell",
            "command": "g++",
            "args": [
                "-g",
                "*.cpp",
                "-o${workspaceRootFolderName}"
            ],
            "group": {
                "kind": "build",
                "isDefault": true
            },
            "problemMatcher": [
                "$gcc"
            ]
        },
        {
            "label": "make default",
            "type": "shell",
            "command": "make",
            "args": [
                "default"
            ],
            "group": {
                "kind": "build",
                "isDefault": true
            }
        },
        {
            "label": "make all",
            "type": "shell",
            "command": "make",
            "args": [
                "all"
            ],
            "group": {
                "kind": "build",
                "isDefault": true
            },
            "problemMatcher": [
                "$gcc"
            ]
        },
        {
            "label": "make clean",
            "type": "shell",
            "command": "make",
            "args": [
                "clean"
            ],
            "group": {
                "kind": "build",
                "isDefault": true
            },
            "problemMatcher": [
                "$gcc"
            ]
        }
    ]
}
3. 调试配置
配置完成后可以使用 Ctrl+Shift+B 快捷键来执行编译,编译成功后就是调试运行(debug) ,VS Code 的调试有专用的模块,进入调试模块,选择 C++(GDB/LLDB) 此时会生成调试配置文件 launch.json,输入下面的配置信息:
{
    // Use IntelliSense to learn about possible attributes.
    // Hover to view descriptions of existing attributes.
    // For more information, visit: https://go.microsoft.com/fwlink/?linkid=830387
    "version": "0.2.0",
    "configurations": [
        {
            "name": "(gdb) Launch direct",
            "type": "cppdbg",
            "request": "launch",
            "program": "${workspaceFolder}/${workspaceRootFolderName}",
            "args": [],
            "stopAtEntry": false,
            "cwd": "${workspaceFolder}",
            "environment": [],
            "externalConsole": true,
            "MIMode": "gdb",
            "setupCommands": [
                {
                    "description": "Enable pretty-printing for gdb",
                    "text": "-enable-pretty-printing",
                    "ignoreFailures": true
                }
            ]
        },
        {
            "name": "(gdb) Launch makefile",
            "type": "cppdbg",
            "request": "launch",
            "program": "${workspaceFolder}/debug/${workspaceRootFolderName}",
            "args": [],
            "stopAtEntry": false,
            "cwd": "${workspaceFolder}",
            "environment": [],
            "externalConsole": true,
            "MIMode": "gdb",
            "setupCommands": [
                {
                    "description": "Enable pretty-printing for gdb",
                    "text": "-enable-pretty-printing",
                    "ignoreFailures": true
                }
            ]
        }
    ]
}
然后就可以使用快捷键 F5 进行调试了。
4. Makefile 模板
下面列出了一个简易的 Makefile 模板:
# Fork from https://github.com/TheNetAdmin/Makefile-Templates
# tool marcros
CC := g++
CCFLAG := -std=c++14
DBGFLAG := -g
CCOBJFLAG := $(CCFLAG) -c

# path marcros
BIN_PATH := bin
OBJ_PATH := obj
LIB_PATH := lib
SRC_PATH := src
DBG_PATH := debug

# compile marcros
TARGET_NAME := $(shell pwd | awk -F '/' '{printf $$(NF)}')
ifeq ($(OS),Windows_NT)
    TARGET_NAME := $(addsuffix .exe,$(TARGET_NAME))
endif
TARGET := $(BIN_PATH)/$(TARGET_NAME)
TARGET_DEBUG := $(DBG_PATH)/$(TARGET_NAME)

# src files & obj files
SRC := $(foreach x, $(SRC_PATH), $(wildcard $(addprefix $(x)/*,.c*)))
OBJ := $(addprefix $(OBJ_PATH)/, $(addsuffix .o, $(notdir $(basename $(SRC)))))
OBJ_DEBUG := $(addprefix $(DBG_PATH)/, $(addsuffix .o, $(notdir $(basename $(SRC)))))

# clean files list
DISTCLEAN_LIST := $(OBJ) \
                  $(OBJ_DEBUG)
CLEAN_LIST := $(TARGET) \
              $(TARGET_DEBUG) \
              $(DISTCLEAN_LIST)

# default rule
default: arch

# non-phony targets
$(TARGET): $(OBJ)
	$(CC) $(CCFLAG) -o $@ $?

$(TARGET_DEBUG): $(OBJ_DEBUG)
	$(CC) $(CCFLAG) $(DBGFLAG) $? -o $@

$(OBJ_PATH)/%.o: $(SRC_PATH)/%.c*
	$(CC) $(CCOBJFLAG) -o $@ $<

$(DBG_PATH)/%.o: $(SRC_PATH)/%.c*
	$(CC) $(CCOBJFLAG) $(DBGFLAG) -o $@ $<

# phony rules
.PHONY: arch
arch:
	@mkdir -p src obj lib bin debug

.PHONY: all
all: $(TARGET) $(TARGET_DEBUG)

.PHONY: debug
debug: $(TARGET_DEBUG)

.PHONY: clean
clean:
	@echo CLEAN $(CLEAN_LIST)
	@rm -f $(CLEAN_LIST)

.PHONY: distclean
distclean:
	@echo CLEAN $(CLEAN_LIST)
	@rm -f $(DISTCLEAN_LIST)
5. 参考示例
下面是一个简易的链表逆序的算法实现,可以作为运行调试的例子:
#include <iostream>

using namespace std;

struct ListNode
{
    int value;
    ListNode *next;
};

void ReversePrint(ListNode *pHead) //递归实现逆序打印(不改变链表结构)
{
    if (pHead != NULL)
    {
        if (pHead->next != NULL)
            ReversePrint(pHead->next);
        cout << pHead->value << " ";
    }
}

ListNode *ReverseList1(ListNode *pHead) //头插法(改变链表结构)
{
    if (pHead == NULL)
        return NULL;
    ListNode *p = pHead->next;
    ListNode *newHead = pHead;
    while (p != NULL)
    {                          //将p结点移到链表最前方
        pHead->next = p->next; //头结点指向p的下一个结点
        p->next = newHead;     //p插入链表最前方
        newHead = p;           //链表新头结点更新为p
        p = pHead->next;       //处理下一个结点,该结点位于头结点后
    }
    return newHead;
}

ListNode *ReverseList2(ListNode *pHead) //依次改变指针方向(改变链表结构)
{
    ListNode *prev = NULL;
    ListNode *next = NULL;
    while (pHead != NULL)
    {
        next = pHead->next; //保存剩余链表
        pHead->next = prev; //断开剩余链表头结点pHead,指向pre
        prev = pHead;       //pre更新
        pHead = next;       //head更新
    }
    return prev;
}

int main() //主函数
{
    int n;
    cout << endl
         << "请输入链表元素个数: " << endl;
    cin >> n; //输入元素个数
    ListNode *head = NULL;
    ListNode *p = NULL;
    ListNode *q = NULL;
    cout << endl
         << "请依次输入链表元素: " << endl;
    for (int i = 0; i < n; i++) //分配内存,依次输入元素
    {
        q = new ListNode;
        cin >> q->value;
        if (head == NULL)
        {
            head = q;
            p = head;
        }
        else
        {
            p->next = q;
            p = p->next;
        }
    }
    if (head == NULL)
        return 0;
    p->next = NULL;
    //验证
    cout << "递归逆序打印: " << endl;
    ReversePrint(head);
    cout << endl
         << "头插法反转链表: " << endl;
    ListNode *reverseHead;
    reverseHead = ReverseList1(head);
    p = reverseHead;
    while (p != NULL)
    {
        cout << p->value << " ";
        p = p->next;
    }
    cout << endl
         << "改变指针方向反转链表(将链表再次反转): " << endl;
    p = ReverseList2(reverseHead); //改变指针方向反转链表
    while (p != NULL)
    {
        cout << p->value << " ";
        q = p;
        p = p->next;
        delete q; //释放内存
    }
    cout << endl;
    return 0;
}
6. Windows 环境配置
Windows环境下是非常不方便进行 GNU/C++ 编译的,但是极端情况下也是可以用的,记录一下 Mingw-w64 (GCC for Windows 64 & 32 bits) 环境的搭建和 VS Code 的相关配置,使用 Mingw-builds 进行安装,如果需要配套的命令行工具可以使用 Msys2 , Cygwin是运行于Windows平台的POSIX子系统编译出来的程序需要dll依赖,这里并不推荐使用。
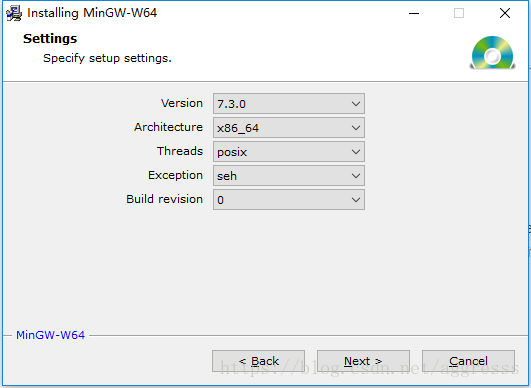
Mingw-w64安装:
安装完成后使用 sysdm.cpl 修改环境变量
然后将 %MINGW_HOME%\bin 附加到 Path 变量后面,这样就可以在系统环境下直接调用 GNU/GCC 工具。

在 VS Code 中打开工具窗口 (Ctrl+Shift+P) ,输入 C/CPP: Edit Configurations 来生成配置文件 c_cpp_properties.json 添加 MinGW-w64 的 include 路径:
        {
            "name": "Win32",
            "includePath": [
                "${workspaceFolder}",
                "${env:MINGW_HOME}/x86_64-w64-mingw32/include",
                "${env:MINGW_HOME}/x86_64-w64-mingw32/include/c++",
                "${env:MINGW_HOME}/x86_64-w64-mingw32/include/c++/tr1",
                "${env:MINGW_HOME}/x86_64-w64-mingw32/include/c++/backward",
                "${env:MINGW_HOME}/x86_64-w64-mingw32/include/c++/x86_64-w64-mingw32",
                "${env:MINGW_HOME}/include"
            ],
            "defines": [
                "_DEBUG",
                "UNICODE",
                "_UNICODE",
                "__GNUC__=5",
                "__cdecl=__attribute__((__cdecl__))"
            ],
            "intelliSenseMode": "msvc-x64",
            "browse": {
                "path": [
                    "${workspaceFolder}",
                    "${env:MINGW_HOME}/x86_64-w64-mingw32/include",
                    "${env:MINGW_HOME}/x86_64-w64-mingw32/include/c++",
                    "${env:MINGW_HOME}/x86_64-w64-mingw32/include/c++/tr1",
                    "${env:MINGW_HOME}/x86_64-w64-mingw32/include/c++/backward",
                    "${env:MINGW_HOME}/x86_64-w64-mingw32/include/c++/x86_64-w64-mingw32",
                    "${env:MINGW_HOME}/include"
                ],
                "limitSymbolsToIncludedHeaders": true,
                "databaseFilename": ""
            },
            "cStandard": "c11",
            "cppStandard": "c++17"
        }
其他的使用就和Linux一样了,如果MinGW64体验不够好可以使用 MSVC, 这里就不介绍了。
7. 备注
下面是 VS Code 中的 预定义变量(Predefined variables) :
${workspaceRoot}当前打开的文件夹的绝对路径+文件夹的名字${workspaceRootFolderName}当前打开的文件夹的名字${file}当前打开正在编辑的文件名,包括绝对路径,文件名,文件后缀名${relativeFile}从当前打开的文件夹到当前打开的文件的路径${fileBasename}当前打开的文件名+后缀名,不包括路径${fileBasenameNoExtension}当前打开的文件的文件名,不包括路径和后缀名${fileDirname}当前打开的文件所在的绝对路径,不包括文件名${fileExtname}当前打开的文件的后缀名${cwd}同 pwd , 当前绝对路径${lineNumber}当前打开的文件,光标所在的行数